HBM ML77B User manual

Operating Manual
English
ML77B
Profibus Interface

Hottinger Baldwin Messtechnik GmbH
Im Tiefen See 45
D-64239 Darmstadt
Tel. +49 6151 803-0
Fax +49 6151 803-9100
www.hbm.com
Mat.: 7-2002.0577
DVS: A00760_09_E00_00 HBM: public
06.2018
EHottinger Baldwin Messtechnik GmbH.
Subject to modifications.
All product descriptions are for general information only.
They are not to be understood as a guarantee of quality or
durability.

ML77B A00760_09_E00_00 HBM: public 3
1 Savety instructions 7.......................................
2 Markings used 10............................................
2.1 The markings used in this document 10..........................
2.2 Symbols on the product 11.....................................
3 Introduction 12..............................................
4 Guideline 13................................................
5 Connection 15...............................................
5.1 Pin assignment 15............................................
5.2 Bus termination 16............................................
6 Configuration and parameterization 17........................
7 Front panel 19...............................................
8 Menu structure in Setup mode 20.............................
8.1 Parameters menu 20..........................................
8.1.1 Setup window DP settings 20...................................
8.1.2 Setup window Scaling (P2.00 or later) 21........................
8.1.3 Setting the Profibus address 21.................................
8.2 Options menu 22.............................................
8.2.1 Output data dialogue window 22................................
8.2.2 Input data dialogue window 23..................................
8.2.3 Diagnostic data dialogue window 23.............................
8.2.4 Parameterisation data dialogue window 23.......................
8.2.5 Configuration data dialogue window 24..........................
8.2.6 Bus parameters dialogue window 24............................
9 Profibus 26..................................................
9.1 Input data 26.................................................
9.1.1 Device status 26..............................................
9.1.2 Measured values 27...........................................
9.1.3 Channel status for 1-channel device 27..........................

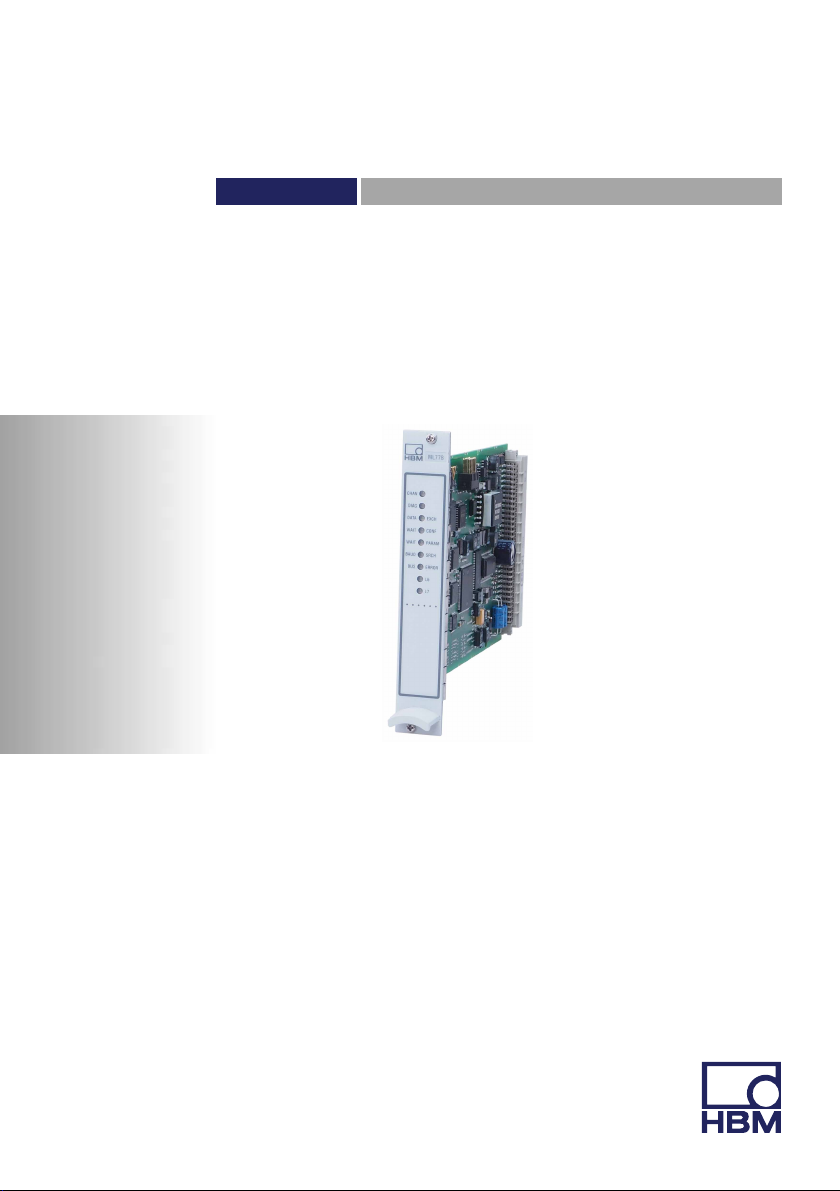
4A00760_09_E00_00 HBM: public ML77B
9.1.4 Channel status for 8-channel device 28..........................
9.1.5 Control word status 29.........................................
9.1.6 Time stamp 30...............................................
9.1.7 Input data of 1-channel device 30...............................
9.1.8 Input data of 8-channel device 30...............................
9.1.9 Input data of 32-channel device 31..............................
9.2 Output data 32...............................................
9.2.1 Device control word 32........................................
9.2.2 Limit values, tare value for 1-channel device 33...................
9.2.3 Channel control word for 1-channel device 34.....................
9.2.4 Channel control word for 8‐channel device 34.....................
9.2.5 Channel control word for 32‐channel device 35...................
9.2.6 Output data for 1-channel device 35.............................
9.2.7 Output data for 8-channel device 35.............................
9.2.8 Output data for 32‐channel device 36............................
9.2.9 ML77B output data (if ML77B has one subchannel) 36.............
9.2.10 ML77B output data (if ML77B has several subchannels, available
as from firmware‐version P2.00) 37.............................
9.3 Diagnosis 40.................................................
10 Output of measured values 42................................
10.1 Measured values as output data for the ML77B 42................
11 Manual parameterization and configuration 46.................
11.1 Parameterisation 46...........................................
11.1.1 Device parameterisation entry 47...............................
11.1.2 Parameterisation entry for 1-channel device 47...................
11.1.3 Parameterisation entry for 8-channel device 48...................
11.1.4 Parametrisation entry for 32-channel device 49...................
11.1.5 Parameterization entry ML77B 50...............................
11.2 Configuration 50..............................................
11.2.1 Configuring amplifier channels 51...............................
11.2.2 Subsequent configuration bytes for 1-channel device 53...........
11.2.3 Subsequent configuration bytes for 8-channel device 53...........

ML77B A00760_09_E00_00 HBM: public 5
11.2.4 Subsequent configuration bytes for 32‐channel device 54..........
11.2.5 Subsequent configuration bytes for the ML77B 56.................
12 Setup parameters in the AB22A Setup mode 58................
12.1 Parameter list 58.............................................

6A00760_09_E00_00 HBM: public ML77B

Savety instructions
ML77B A00760_09_E00_00 HBM: public 7
1 Savety instructions
Approbiate use
The K3607 calibration instrument is to be used exclusively for measurement
tasks and directly related control tasks. Use for any purpose other than the
above shall be deemed to be not in accordance with the regulations.
In the interests of safety, the instrument should only be operated as described
in the Operating Manual. It is also essential to comply with the legal and safety
requirements for the application concerned during use. The same applies to the
use of accessories.
Conditions on site
SProtect the device from direct contact with water.
SProtect the device from moisture and humidity or weather conditions such
as rain, snow.
SDo not expose the device to direct sunlight.
SPlease observe the permissible maximum ambient temperatures and
humidity stated in the specifications.
SThe device must not be modified from the design or safety engineering point
of view except with our express agreement. Any modification shall exclude
all liability on our part for any damage resulting therefrom.
In particular, any repair or soldering work on motherboards is prohibited.
When exchanging complete modules, use only original parts from HBM.
SInstall the device so that it can be disconnected from the supply voltage at
any time without difficulty.
SThe device is maintenance-free.
SBefore cleaning, disconnect all connections.
SClean the housing with a soft, slightly damp (not wet!) cloth. You should
never use solvents, since these could damage the labeling.
SWhen cleaning, ensure that no liquid gets into the module or connections.
SIn accordance with national and local environmental protection and material
recovery and recycling regulations, old equipment that can no longer be

Savety instructions
8A00760_09_E00_00 HBM: public ML77B
used must be disposed of separately and not with normal household
garbage.
Qualified personnel
Qualified personnel means persons entrusted with the installation, assembly,
commissioning and operation of the product, who possess the appropriate
qualifications for their function.
This includes people who meet at least one of the three following requirements:
SKnowledge of the safety concepts of automation technology is a require
ment and, as project personnel, you must be familiar with these concepts.
SAs automation plant operating personnel, you have been instructed how to
handle the machinery. You are familiar with the operation of the equipment
and technologies described in this documentation.
SAs commissioning engineers or service engineers, you have successfully
completed the training to qualify you to repair the automation systems. You
are also authorized to activate, ground and label circuits and equipment in
accordance with safety engineering standards.
It is also essential to comply with the legal and safety requirements for the
application concerned during use. The same applies to the use of accessories.
The device must only be installed by qualified personnel, strictly in accordance
with the specifications and with the safety requirements and regulations listed
below.
Maintenance and repair work on an open device with the power on may only be
carried out by trained personnel who are aware of the dangers involved.
Working safety
SMaintenance and repair work on an open device with the power on may only
be carried out by trained personnel who are aware of the dangers involved.
SAutomation equipment and devices must be installed in such a way that
adequate protection or locking against unintentional actuation is provided
(e.g. access checks, password protection, etc.).

Savety instructions
ML77B A00760_09_E00_00 HBM: public 9
Additional safety precautions
Additional safety precautions must be taken in plants where malfunctions could
cause major damage, loss of data or even personal injury. In the event of a
fault, these precautions establish safe operating conditions.
The scope of supply and performance of the device only covers a small area of
measurement technology. In addition, equipment planners, installers and
operators should plan, implement and respond to the safety engineering
considerations of measurement technology in such a way as to minimize
remaining dangers. On-site regulations must be complied with at all times.
There must be reference to the remaining dangers connected with
measurement technology.
General dangers of failing to follow the safety instructions
The device is a state of the art unit and as such is reliable. The module may
give rise to dangers if it is inappropriately installed and operated by untrained
personnel.

Markings used
10 A00760_09_E00_00 HBM: public ML77B
2 Markings used
2.1 The markings used in this document
Important instructions for your safety are specifically identified. It is essential to
follow these instructions in order to prevent accidents and damage to property.
Symbol Significance
DANGER Warns of an imminently dangerous situation in which
failure to comply with safety requirements will result
in death or serious physical injury.
WARNING This marking warns of a potentially dangerous
situation in which failure to comply with safety
requirements can result in death or serious physical
injury.
CAUTION This marking warns of a potentially dangerous
situation in which failure to comply with safety
requirements can result in slight or moderate physical
injury.
Notice This marking draws your attention to a situation in
which failure to comply with safety requirements can
lead to damage to property.
Important
This marking draws your attention to important
information about the product or about handling the
product.
Tip
This marking indicates application tips or other
information that is useful to you.
Information
This marking draws your attention to information
about the product or about handling the product.
Emphasis
See….
Italics are used to emphasize and highlight text and
references to other chapters and external docu
ments.

Markings used
ML77B A00760_09_E00_00 HBM: public 11
SignificanceSymbol
Gerät -> Neu Fette Schrift kennzeichnet Menüpunkte sowie Dialog‐
und Fenstertitel in Programmoberflächen. Pfeile zwi
schen Menüpunkten kennzeichnen die Reihenfolge,
in der Menüs und Untermenüs aufgerufen werden
Messrate Fett‐kursive Schrift kennzeichnet Eingaben und Ein
gabefelder in Programmoberflächen.
2.2 Symbols on the product
CE mark
The CE mark enables the manufacturer to guarantee that
the product complies with the requirements of the rele
vant EC directives (the declaration of conformity is avail
able at http://www.hbm.com/HBMdoc).
Statutory marking requirements for waste disposal
National and local regulations regarding the protection of
the environment and recycling of raw materials require
old equipment to be separated from regular domestic
waste for disposal.
For more detailed information on disposal, please contact
the local authorities or the dealer from whom you pur
chased the product.

Introduction
12 A00760_09_E00_00 HBM: public ML77B
3 Introduction
The ML77B module uses the internal bus (link) to access measured values
from other system modules and “hand them over” to the Profibus. The Profibus
output (e.g. taring, zeroing, clearing peak value stores, predefining limit value
levels) is transmitted to the respective amplifiers via the internal serial interface
in the form of single commands.
The data contents for the Profibus is selected via the Profibus communication
telegram. The DP protocol is used on the Profibus.
The Profibus enables a maximum of 244 bytes of input and 244 bytes of output
data to be transmitted.
Transmission of:
- measured values (gross, net, peak, sample time)
- limit switch status
- control bits for taring, zeroing, peak value control, parameter set switch
ing, and
- optionally, the limit value levels
- press-fit results
In general, only instantaneous values are available on the Profibus.
The update rates on the Profibus vary according to the Profibus master and the
Profibus baud rate (max. 12 Mbaud), data is read in at a rate of 2,400 Hz per
second via the link. If with large numbers of channels the CPU capacity is not
sufficient, it might prove necessary to reduce this rate. With 15 channels with
one signal each, an update rate of 1,200 Hz is achieved.
Notice
Please note that MGCplus measurement cycles are asynchronous to the Profi
bus cycle. Hence, it is possible that not all values will reach the receiver at the
same time.

Guideline
ML77B A00760_09_E00_00 HBM: public 13
4 Guideline
Steps for successfully connecting to Profibus:
1. Mechanical connection of the device to Profibus (see chapter 5).
2. Setting the parameters on the device, see chapter 8.1 (can also be done
using the HBM software ”MGCplus Assistant”).
3. Configuring and parameterizing the Profibus message by means of a config
uration tool (e.g. Step7) and device database files (GSD files) or manually in
accordance with Chapter 11.
A GSD file describes the properties of a Profibus node in a standardized form.
It is used by the configuration tool to specify which data content of the individ
ual bus nodes is exchanged at the Profibus.
A standard GSD (hbmxxx.gsd=german; hbmxxx.gse=english) for MGCplus
modules is included on the MGCplus system CD (GSD directory). Use the pro
gram ”GSDEdit” to edit the standard GSD.

Guideline
14 A00760_09_E00_00 HBM: public ML77B
PROFIBUS−DP
System configuration
Profibus configurator
SPS GSD
Electronic device datasheets (GSD files)
Fig. 4.1 Configuration with GSD files

Connection
ML77B A00760_09_E00_00 HBM: public 15
5 Connection
WARNING
Before starting the device, do in any case read the safety instructions.
5.1 Pin assignment
A 9-pin Sub-D connector (complying with standard) on the AP77 connection
board is used for connecting the Profibus.
Profibus
male connector
1
5
6
9
GND
RS485‐A
Vcc (5V)
GND
AP77
Profibus
RS485‐B
RS485‐RTS
Fig. 5.1 Profibus connection complying with standard

Connection
16 A00760_09_E00_00 HBM: public ML77B
5.2 Bus termination
Correct termination of the first and last device on a Profibus segment is essen
tial to correct signal transmission. Bus termination involves three resistors (see
Fig. 5.2), integrated in the Profibus connector.
390
390
220
+5 V
Line B
Line A
Data ground
Profibus
male connector
3
5
6
8
6
8
3
5
Profibus
Fig. 5.2 Terminating resistors
SConnect the Profibus line to the AP77 connection board. Ensure that the
Profibus connector slide switches of the first and last Profibus device are set
to “ON” position.
Example:
SPS
First device on
the bus line
Last device on
the bus line
Profibus connector slide switch to „ON“
Profibus connector slide
switch to „ON“
Profibus connector Profibus connector
Fig. 5.3 Profibus mode

Configuration and parameterization
ML77B A00760_09_E00_00 HBM: public 17
6 Configuration and parameterization
SStart your configuration program (e.g. Step7).
SLoad the HBM GSD file (MGCplus CD).
SAdd an HBM device (Profibus‐DP/additional field devices/general).
SSimulate the layout of your device, with the device itself (MGCplus)being
given as in slot 0. All the device modules must be mapped (counting from
left to right), even if they do not send data (”empty slot”).
Fig. 6.1 Hardware configuration
SNote: The ML77B module must be configured.
SConfigure the modules from the hardware catalog using Drag and Drop.

Configuration and parameterization
18 A00760_09_E00_00 HBM: public ML77B
SOpen the Properties window by double‐clicking the configured entries and
select the required parameters.
Fig. 6.2 Setting the parameters
Instructions for users of the Simatic S7 PLC:
STo ensure consistent transfer of data of 3 bytes or 4 bytes, you must use the
SFC14 special function block for reading and the SFC15 for writing.
SThe maximum amount of data that can be transferred consistently with the
S7 3xx is 32 bytes.

ML77B
Front panel
ML77B A00760_09_E00_00 HBM: public 19
7 Front panel
LED designation Colour Meaning
CHAN. yellow Channel selected
DIAG red Diagnostic message
DATA EXCH yellow Bus status: Data Exchange
WAIT CONF red Bus status: Wait Configuration
WAIT PARAM red Bus status:Wait Param
BAUD SRCH red Bus status: Baud Search
BUS ERROR red Bus error
(L6, L7 no function, at present)

Menu structure in Setup mode
20 A00760_09_E00_00 HBM: public ML77B
8 Menu structure in Setup mode
The MGCplus device setup is structured in functional groups. Press the
key to access the setup dialogue. The setup menu will be displayed.
System-specific setup
which normally must
only be made for the
first putting into opera
tion or for a new mea
surement task.
User-oriented display
setup such as e.g. the
desired representation
of measured values, F-
key assignment, as
signment of channel
names.
DP setup Param. data
Configuration data
Input data
Output data
Diagnostic data
Bus parameters
Display in setup mode
Parameter for channel 3.2
Setup menü
Display
For more information on operation using the AB22A Display and control panel,
refer to the operating manual MGCplus.
8.1 Parameters menu
8.1.1 Setup window DP settings
The Profibus address is set in this menu.
If there are system errors, you can choose between two modes of operation:
Table of contents
Other HBM Recording Equipment manuals
Popular Recording Equipment manuals by other brands

USB-Nachruesten
USB-Nachruesten MMI 2G Installation guide and user's manual

Behringer
Behringer B-Control Fader BCF2000 quick start guide

Lutron Electronics
Lutron Electronics Grafik Eye GBO-RS232 Installation and operation instructions

DOEPFER
DOEPFER MCV24 owner's manual

Gordius
Gordius TinyBox user manual

RDL
RDL FLAT-PAK Series quick guide