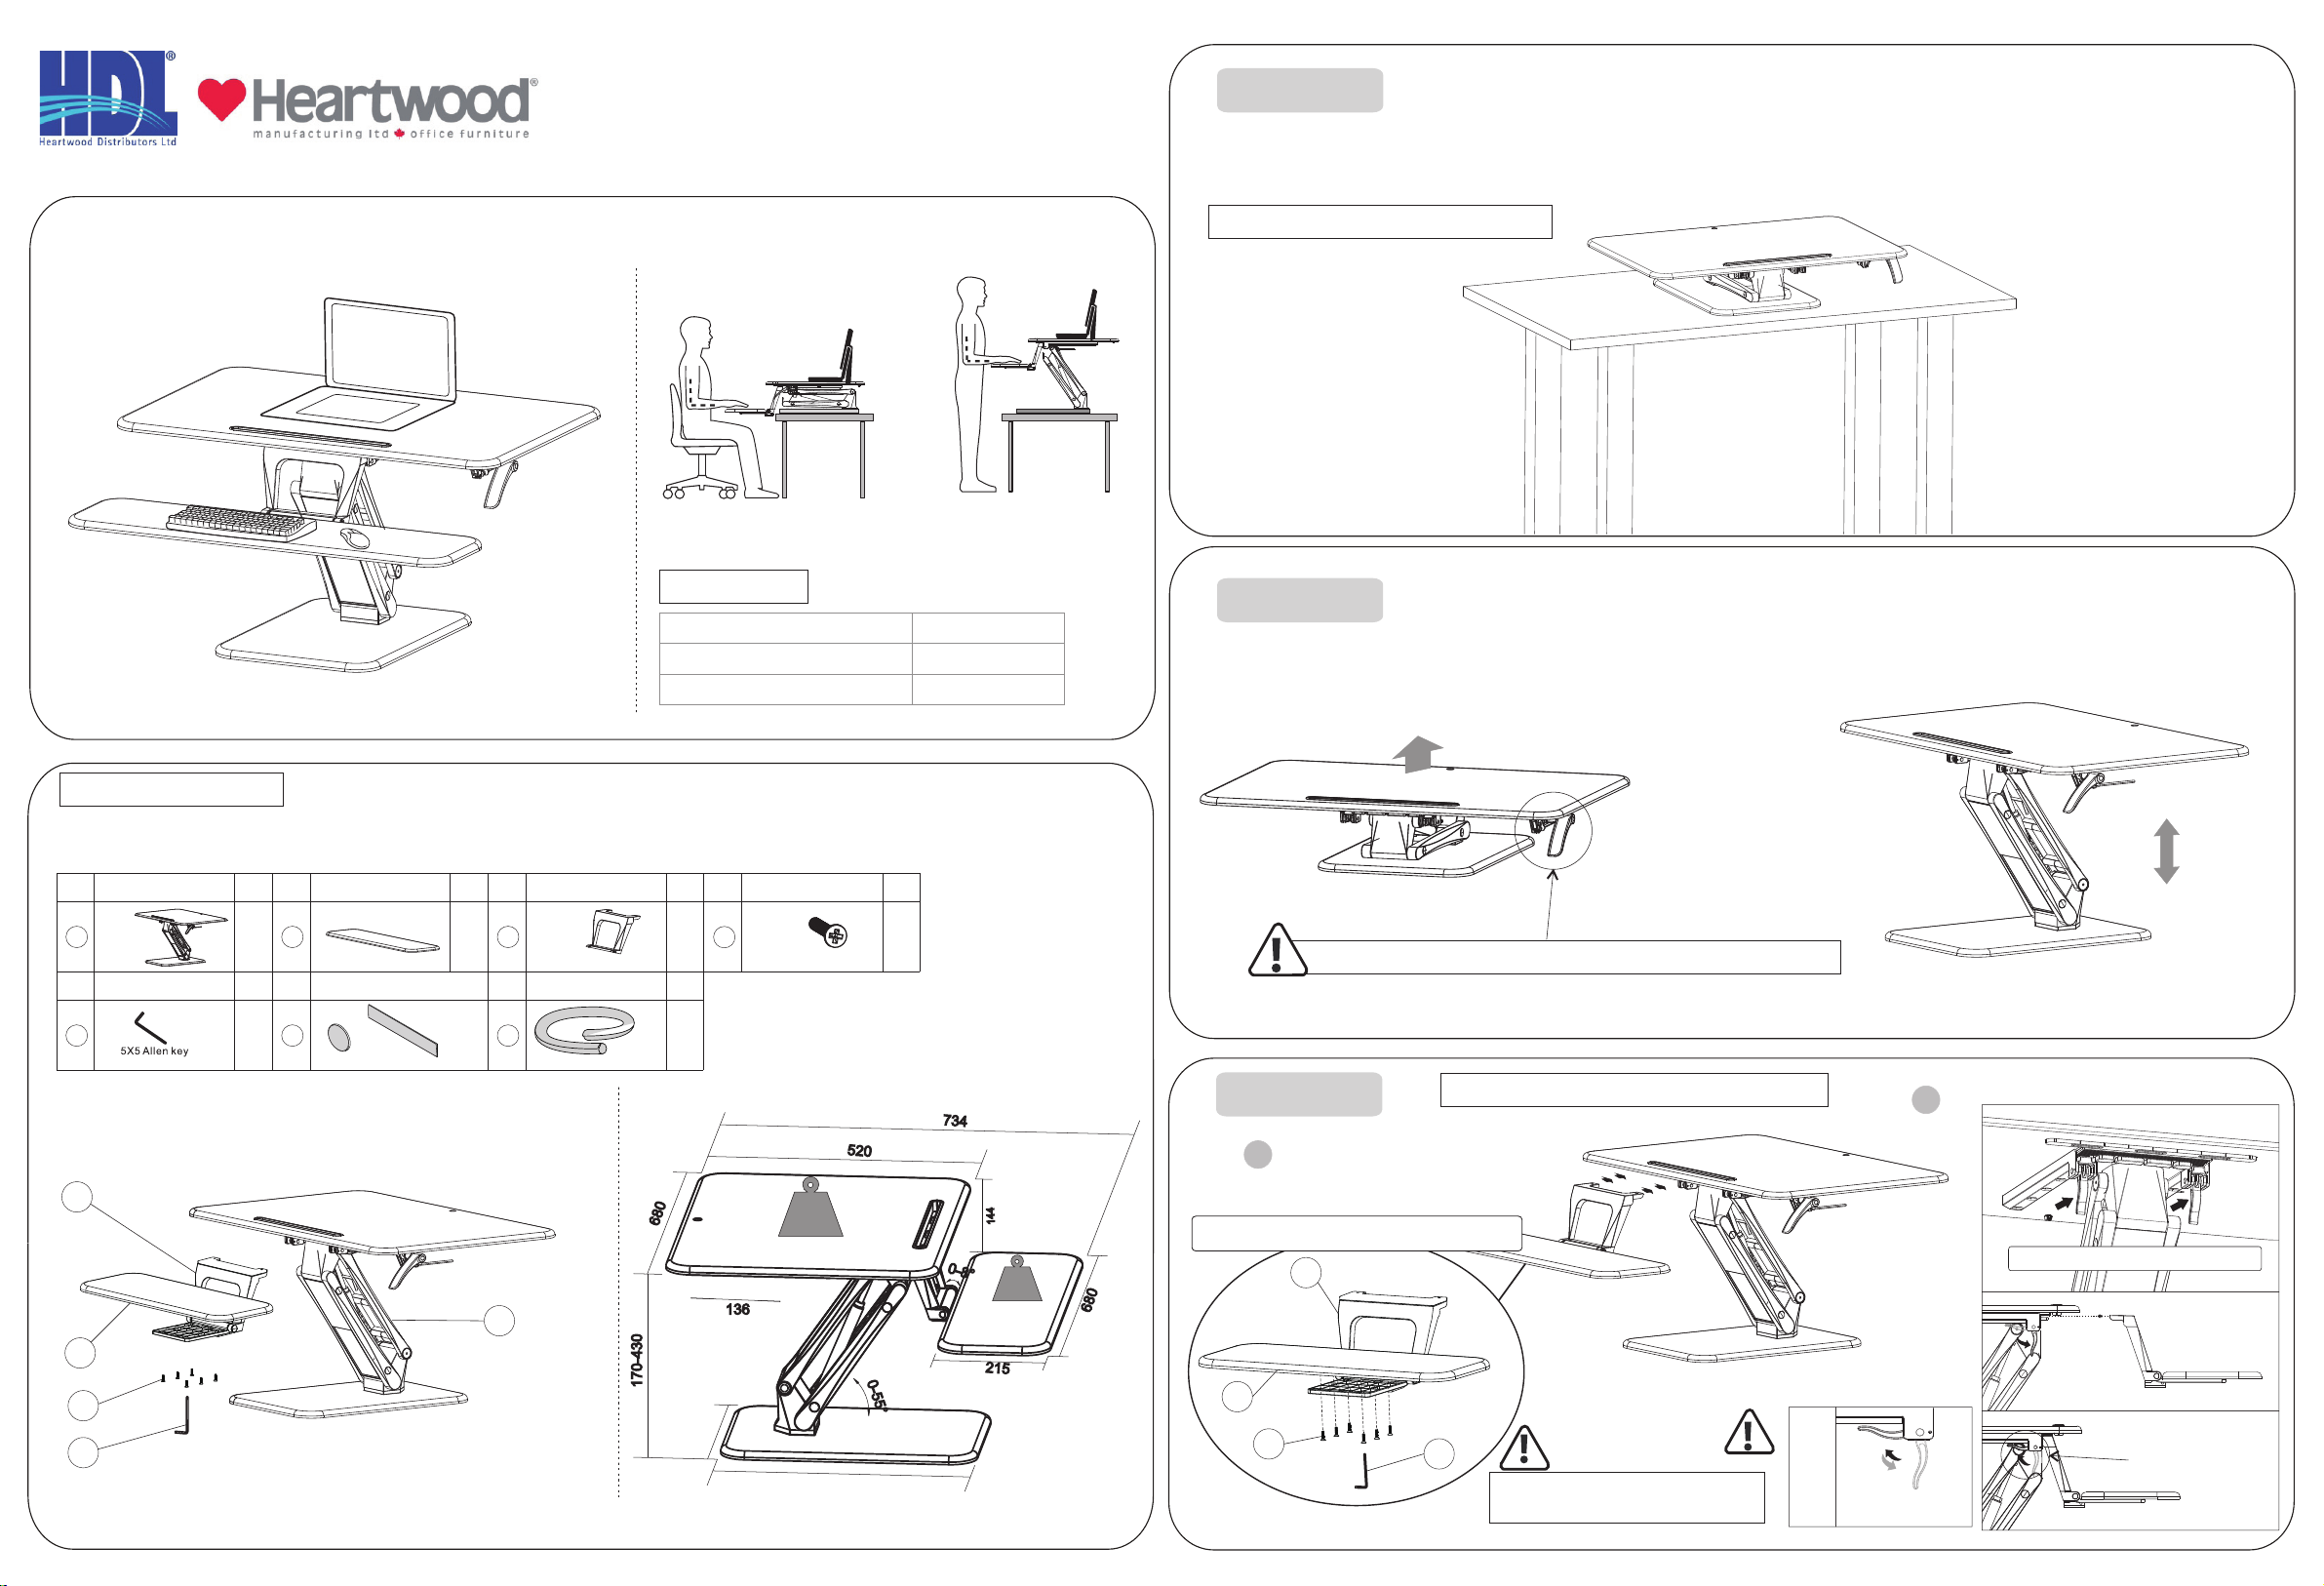
A
B
Déposer l’équipement sur
la surface de travail
Assurez-vous de placer convenablement tout
équipement en ligne avec le rebord de la
surface pour éviter toute blessure ou bris
d’équipement.
ATTENTION!
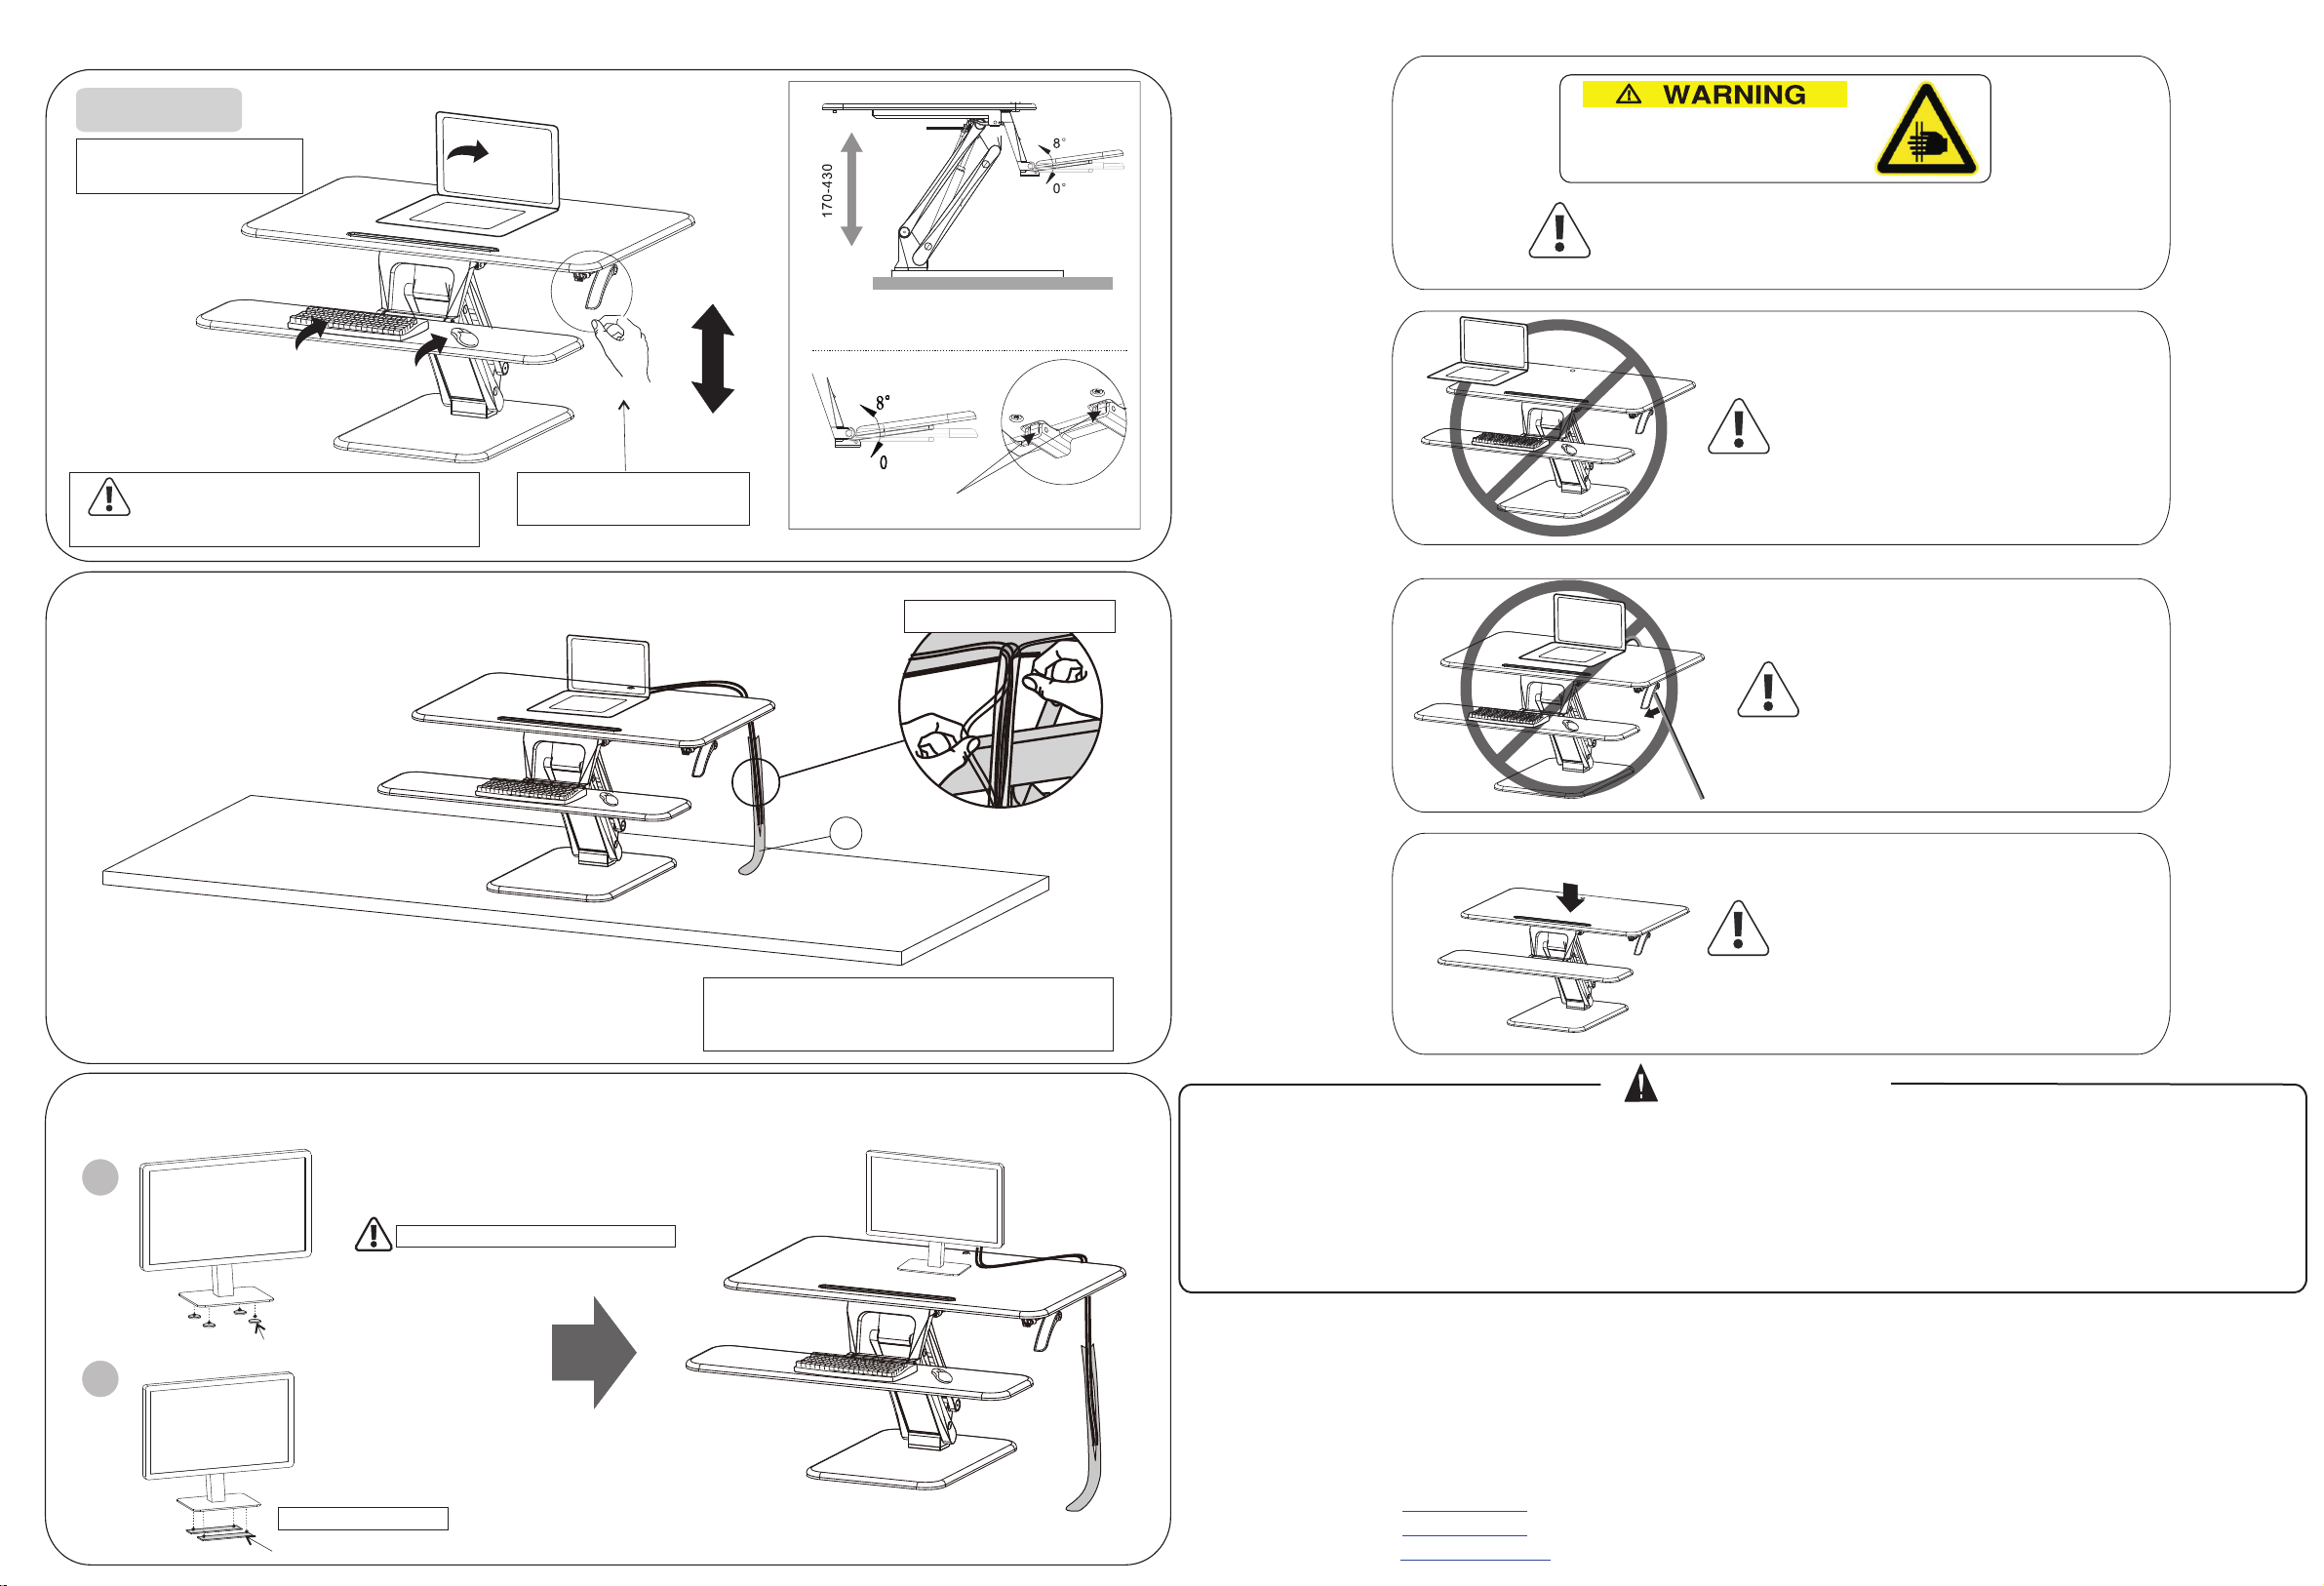
Pour activer le poste de travail, il suffit
de presser la poignée qui lève ou
baisse la surface à la hauteur désirée. Déplacez le bloc d’ajustement pour
régler l'angle du plateau du clavier.
À noter: La surface de travail doit être plus grande que la
base de ce produit afin d'éviter toute blessure ou
dommage lorsqu’on règle la hauteur du produit.
ATTENTION!
NOTE!
L’autoadhésif peut être enlevé avec de l’eau.
Placer l’autoadhésif sous
l’écran.
Autoadhésif B
Autoahésif A
L’autoadhésif B peut être coupé à votre convenance.
ATTENTION!
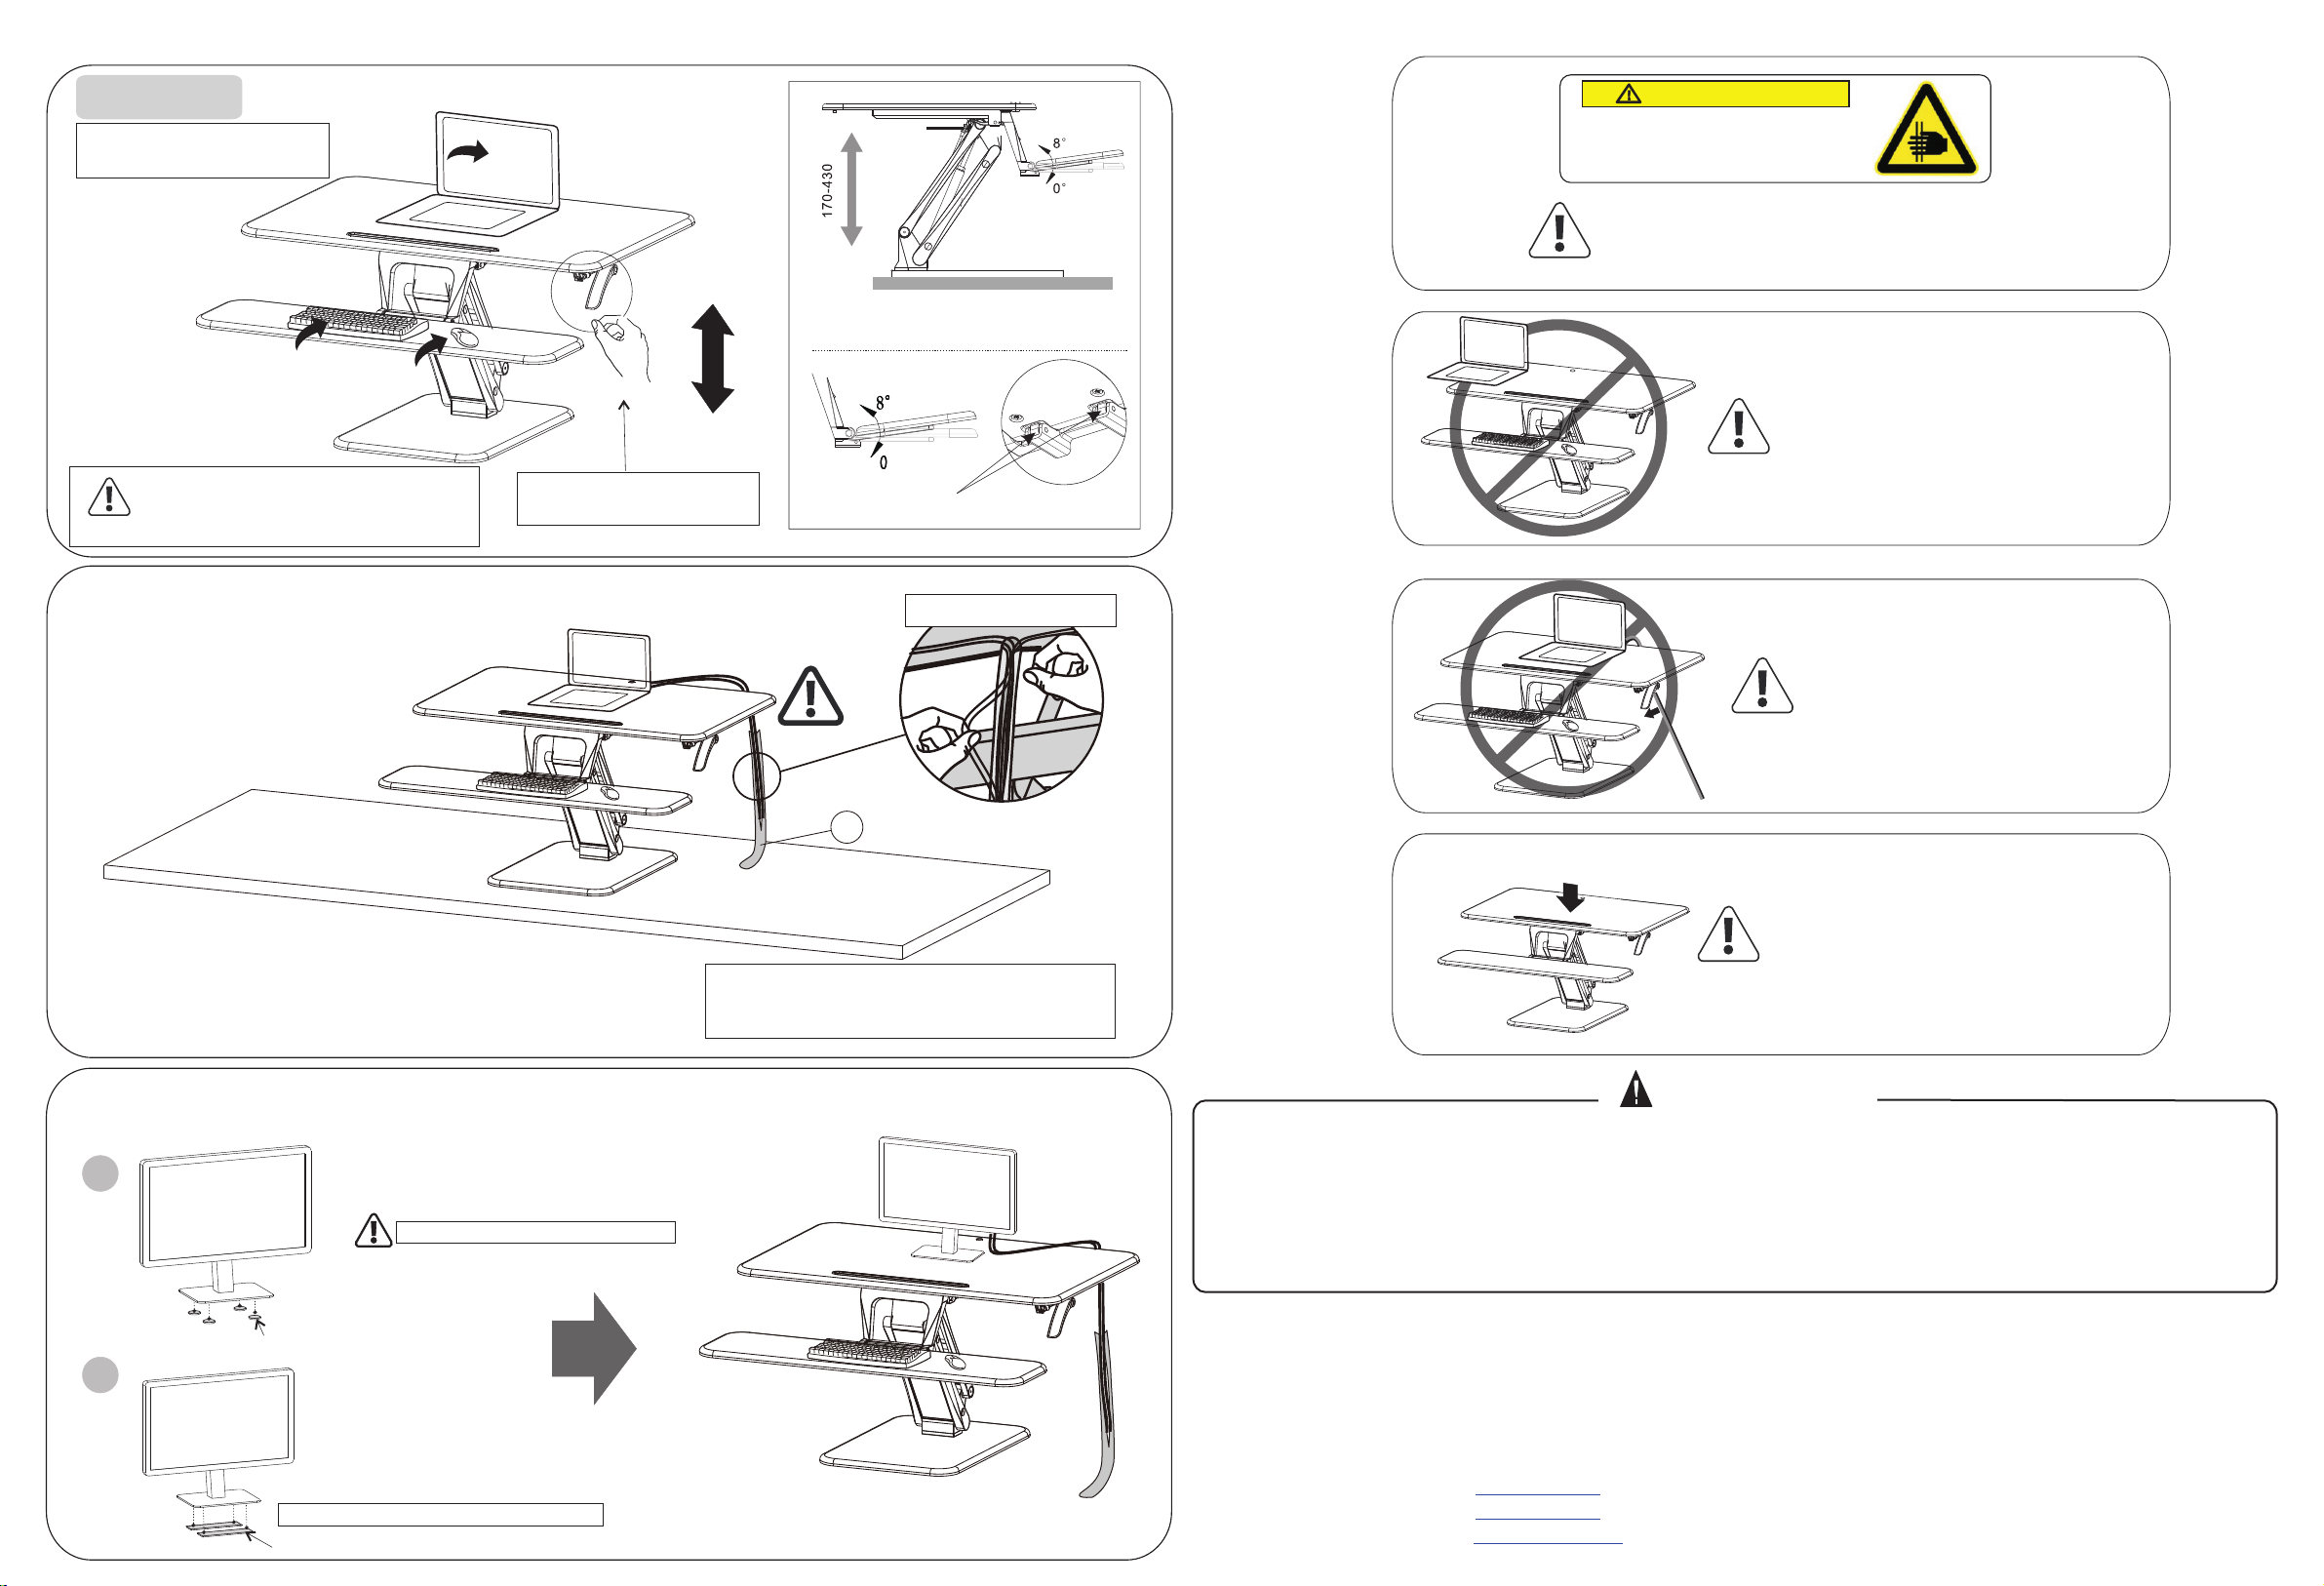
Danger de pincement
ATTENTION
Ne placez pas vos mains près du
support métallique.
L’angle du support change lors de l’ajustement de
hauteur et pourrait causer une blessure.
ATTENTION!
Assurez-vous de placer convenablement tout
équipement en ligne avec le rebord de la surface
pour éviter toute blessure ou bris d’équipement.
ATTENTION!
Câbles
Assurez-vous que le câble est assez long lors du
réglage en hauteur afin d'éviter des dommages
inattendus dus à la chute de l’équipement
Presser
ATTENTION!
Presser sur la poignée tout en appuyant douce-
ment sur le poste de travail pour régler la hauteur.
Réglez la hauteur seulement lorsque l'élément sur
le poste de travail pèse moins de 3 kg afin d’éviter
les rebondissements qui pourraient causer des
dommages matériels ou corporels.
2 de 2 le 3 octobre 2017 REV C
ÉTAPE 4
IMPORTANT!
Ce produit contient de petites pièces qui peuvent présenter un risque d'étouffement si avalées. Conserver hors de la portée de jeunes enfants.
● S'assurer que ces instructions sont lues et complètement comprises avant l'installation. Si vous êtes incertain, s.v.p. contacter un professionnel pour vous aider.
● La surface de montage ou le bureau doit pouvoir soutenir le poids combiné du support et de l'écran, sinon la structure devra être renforcée.
●
● De l'équipement sécuritaire et des outils appropriés doivent être utilisés. Un minimum de deux personnes est requis pour cette installation. Ne pas utiliser des méthodes sécuritaires peut
entraîner des dommages matériels, des blessures graves, ou la mort..
● S.V.P. vérifier les joints tous les deux mois pour s'assurer que les vis sont bien serrées.
Ce produit a été conçu pour une installation sur un bureau. Avant l'installation, soyez assuré que le support soutiendra le poids combiné de l'équipement et des différentes pièces. Ne jamais
dépasser la capacité maximale de charge de 9kg car cela pourrait entraîner une défaillance du produit ou des blessures corporelles..
Notez : ce produit est conçu pour être utilisé à l'intérieur seulement. L'utilisation de ce produit à l'extérieur pourrait entraîner une défaillance du produit ou des blessures corporelles..
Pour s'assurer de la performance d'étanchéité du ressort à gaz, il est suggéré de serrer le bras (avec le ressort) une ou deux fois par mois.
ATTTENTION: Ce produit contient des pièces à ressort à gaz à haute pression. Ne le mettez pas au feu ou à de hautes températures, ou ne le démontez pas car il pourrait
survenir des blessures corporelles inattendues. Les produits périmés peuvent être retournés au manufacturier ou à des institutions professionnelles..
Heartwood Distributors Ltd
Heartwood Manufacturing Ltd
QUESTIONS OR CONCERNS?
PHONE Customer Service
1-800-567-3060
M-F 6am - 4:30 pm PST
www.heartwood.ca
www.heartwooddl.com
7
Utilisez le câble pour attacher