5
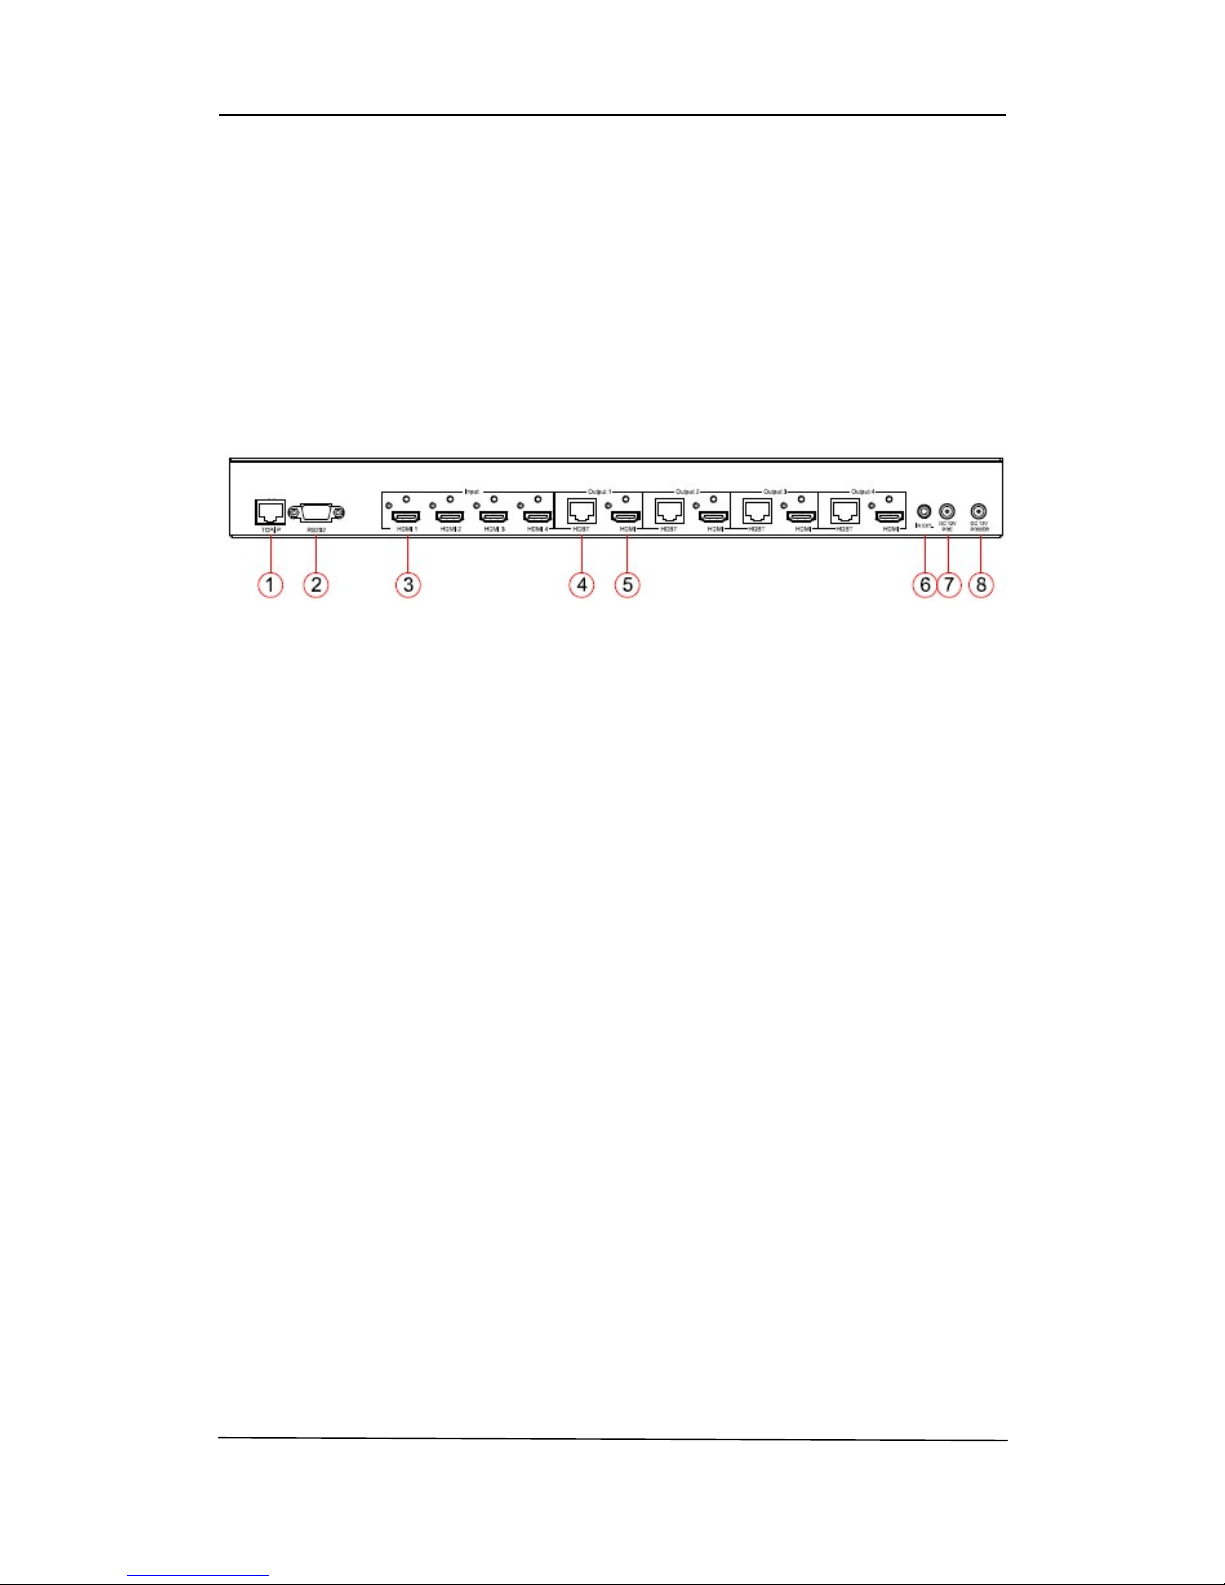
2. IR receiver window----Receive the IR from the remote control of HDTVMT0404VL1.
3. Power LED indicator---Indicate the status of the power for the matrix.
4. Power button---Press to power on/off the matrix.
5. HDMI output selection button 1 to 4---Press to select the output from 1 to 4.
6. All button for HDMI outputs---Press to select all of the outputs from 1 to 4.
7. Menu button---Press to enter EDID set mode. Three EDID segments will display on the LCD
panel formatted as: INPUT VIDEO AUDIO, for example: IN1 1080P 2.0CH, means to set
1080P 2.0CH EDID to INPUT1. The blinking segment is the one can be changed currently.
Segment content items as below:
INPUT VIDEO AUDIO Note
IN1 1080I 2.0CH.
IN2 1080P 5.1CH
IN3 3D 7.1CH
IN4 4K2K NONE
IN5 D1024 D1024=DVI 1024 x 768
IN6 D1080 D1080=DVI 1920 x 1080
IN7 D1200 D1200=DVI 1920 x 1200
IN8 OUT1 OUT1=Copy OUTPUT1 EDID to INPUTx
ALL OUT2 ALL=Set EDID to ALL INPUTs
OUT2=Copy OUTPUT2 EDID to INPUTx
OUT3 OUT3=Copy OUTPUT3 EDID to INPUTx
OUT4 OUT4=Copy OUTPUT4 EDID to INPUTx
OUT5 OUT5=Copy OUTPUT5 EDID to INPUTx
OUT6 OUT6=Copy OUTPUT6 EDID to INPUTx
OUT7 OUT7=Copy OUTPUT7 EDID to INPUTx
OUT8 OUT8=Copy OUTPUT8 EDID to INPUTx
8. Up selection button--- Press to change segment’s value.
9. ESC---Press to quit EDID set mode.
10. Lock LED indicator---Indicate the status of Lock.
11. Lock button---Press to lock the buttons of the front panel.
12. HDMI input selection button 1 to 4---Press to select the input from 1 to 4.
13. PTP button---Press to mirror all inputs and outputs (e.g. output 1 to input1, output 2 to
input2 and so on).