Healthmark MICR007 User manual

Instructions for Use: MICR007
Brand Name of Product
USB Microscope
Generic Name of Product
USB Microscope
Product Code Number(s)
MICR007
Purpose of Product
To visually inspect instruments once they have been reprocessed. The microscope allows
you to magnify up to 270x to ensure that instruments have been cleaned and are in good
working order. The software allows you to capture still and video images when inspecting
the instruments.
Range of Applications for Product
Surgical instruments that require visual inspection.
Key specifications of product
LENS & CMOS Sensor: 2 M Pixels
Magnification Ratio: 5x –270x
Light Source: 6 pcs of white LEDs
USB 2.0 High-Speed Transmission
Dimension: 165mm (L) x 8mm (D)
Device Platform: Microsoft Windows XP 32bit SP2, Microsoft Windows XP 64bit,
Microsoft Windows Vista 32 bit, Microsoft Windows Vista 64bit, Windows 7, Mac
OS (4.8 or later) and Linux with UVC driver (open source)
Shipping & Storage
Shipping Conditions & Requirements
Storage Conditions
Packaging Conditions
Shelf Life
Instructions for Using Product
Description of Use (s)
To help ensure quality control for the CSSD by visually inspecting reprocessed
instruments.
Preparation for Use
Diagrams (drawings, pictures):
1)
2)
3)
4)
5)
6)
7)
8)
9)

10)
11)
12)
13)
14)
15)
16)
17)
18)
19)
20)
21)
22)
23)
24)
25)
26)
27)
28)
29)
30)
31)
32)
33)

Steps for Use of Product
1) Open the box and be sure that all of the parts are included (LENS & CMOS Sensor
with built in light source, USB drive and microscope stand).
2) Place USB drive stick in PC port to install software.
3) A screen will pop up. Click on “Open folder to view files” and then click on the
“Install folder.
4) Next click on the “Setup” folder. A welcome screen will pop up. Click the Next button
to continue.
5) The next screen that pops up will identify where on your computer the installation will
be. If you would like to change the location of the software click the Browse button to
your right. To continue click the Install button. After installation is complete click the
“Finish” button and remove USB stick from the PC port.
6) To launch the software double-click the UM07 icon. When launched, the window will
show a camera window to preview images and a task bar to execute different functions
of the microscope camera.
7) The task bar is located along the top of the screen.
8) This is the connect icon, which allows you to connect and disconnect to a microscope
camera.
9) This is the snapshot icon: press the button to capture image from video preview
window. The still image will be displayed in the window.
10) This is the save image icon. Select this option when saving and storing in the images
preview window. When pressed, a screen will pop up. Click on the folder you want the
image saved in and rename the file. The image will be saved as a JPEG.
11) This next icon is for the edit image function. Click on the button to enter several
options of tools to edit pictures.
12) This is the delete image icon. When selected, this will delete the image.
13) This is the video record option. When pressed a screen will pop up for you to select a
folder for your video to be saved. Once you click the “Save” button your video will
start recording in the window preview. When the icon is clicked again it will stop
recording. The video is saved in the folder you selected earlier.
14) This icon will allow you to play the video that you recorded. Playing files will be
displayed in window preview.
15) This is the image process icon. By selecting this tool it will allow you to use image
processing including reversed video, grey scale, black and white, edge detection and
other basic functions.
16) This is the print image icon. Select this button when printing images displayed in the
preview window.
17) This is the exit application icon. By clicking this button. You will exit the application.
18) Plug in the USB Microscope cable from the camera into your PC USB port.
19) When assembling the stand, start with the microscope stand arm that adjusts the
microscopes height.
20) Place camera holder onto the microscope arm.
21) Screw on the end bolt that will secure the camera holder in place.
22) Next screw on the microscope arm to the base. Be sure that the arm is firmly tightened
to the base. This will ensure the microscope will have the best possible focus on an
object.
23) Insert the camera through the holder into the desired position.
24) Screw in bolt into the holder to secure camera in place.
25) Microscope stand is now assembled and ready to use.
26) Preview image window will now display the image of object that is on camera. If the
camera isn’t showing an image on the screen click the “Setting”button in the upper
left hand corner. Click Input Device and then click on the Digital Microscope Camera
button that comes up to the right.
27) The microscope has a focus wheel located on top. Magnification is determined by the
distance of the microscope to the object to be viewed. Use the focus wheel to bring the
image into focus. The distance to the object viewed can be controlled by sliding the
microscope up and down in the mounting hole. Fine tune adjustments can be controlled
by turning the adjustment wheel on the camera stand.
28) By pressing the button on the camera cord, you will instantly be able to take a snap
shot photo.
29) By adjusting the LED light control wheel, you can control the amount of light coming
through the light source.
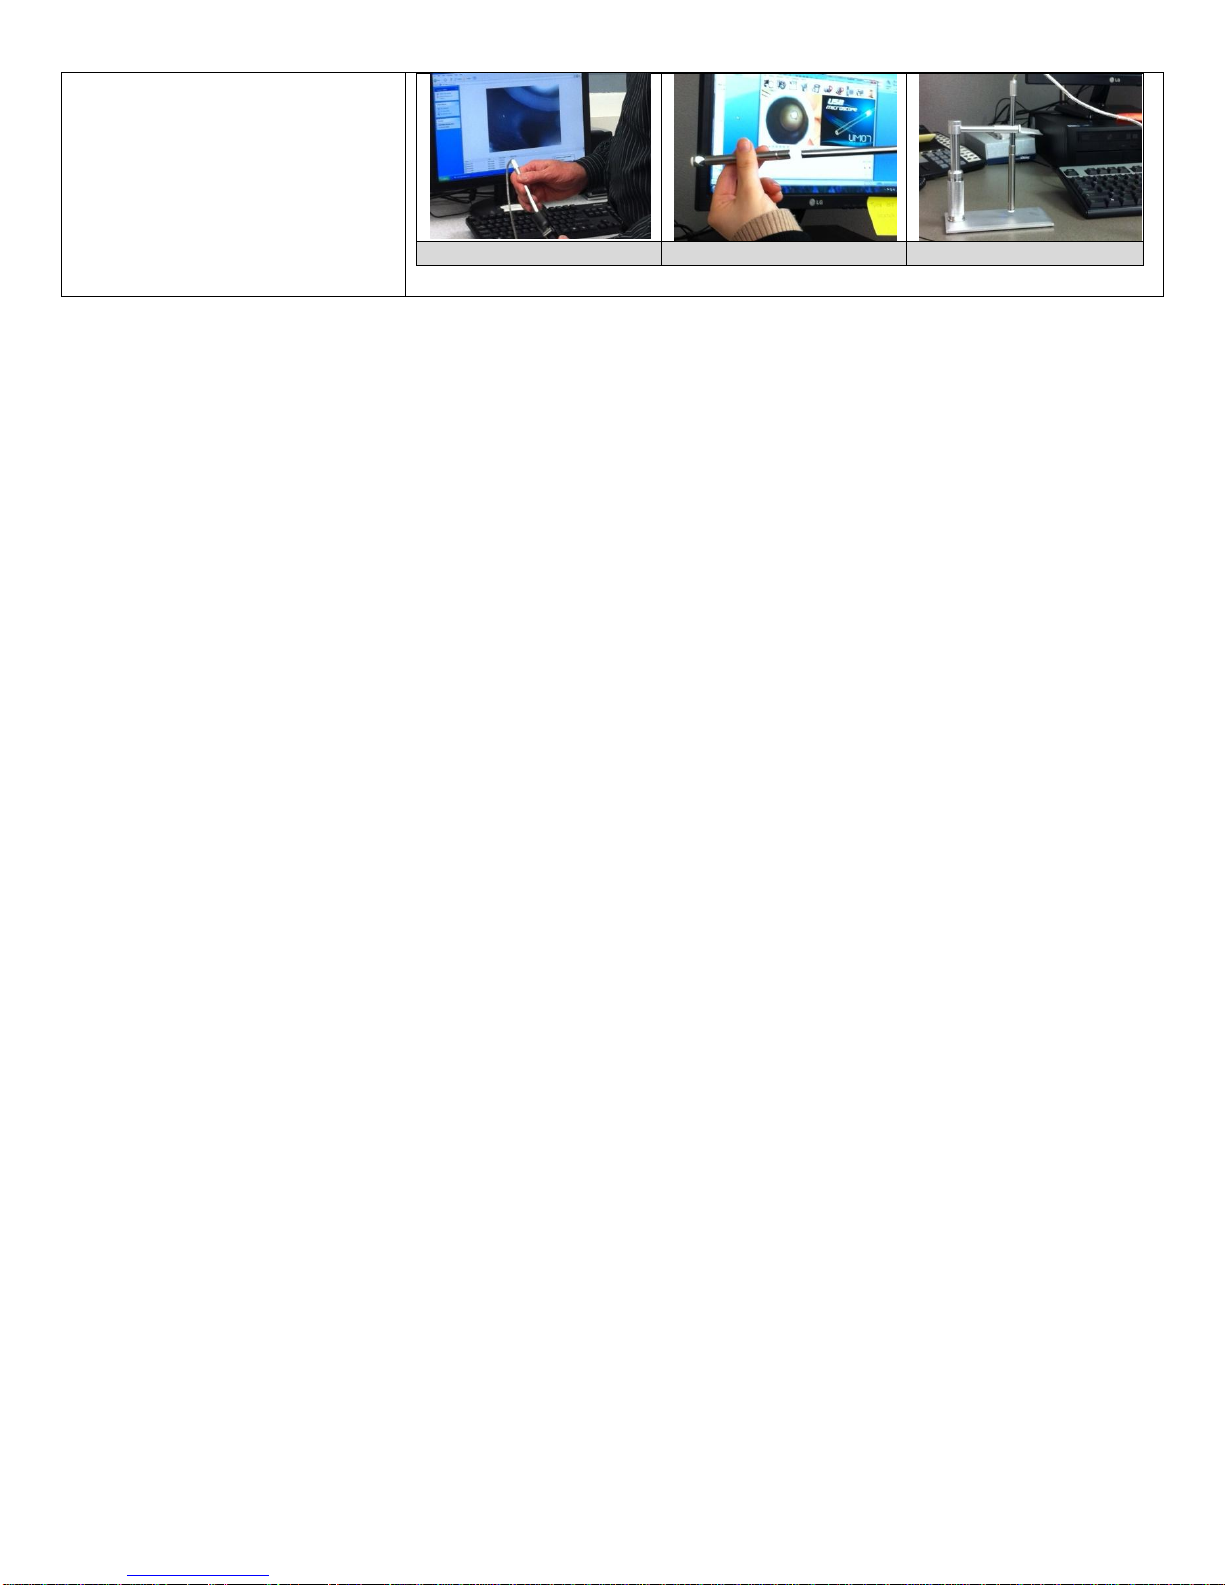
30) Place object that you are examining under the microscope for observation. It is

recommended to with the microscope as close as possible to the object and adjust
farther away until preferred magnification view is received.
31) Use the preview window on your computer monitor to view image you are observing.
32) For optional angler views. Attach the angular lenses to your camera. This will allow
you to inspect objects that have hard to see angles with bends and curves.
33) Picture shown is of the complete stand with the angular lens included.
Interpretation of Results
Contraindications of Test Results
Documentation
Special Warnings and Cautions
Do not use the other extension USB cable or transmission line
Disposal
Reprocessing Instructions
Point of use:
Preparation for decontamination:
Disassembly Instructions:
Cleaning –Manual:
Use ethyl alcohol to clean the camera lens. Don’t use steam.
Cleaning –Automated:
Disinfection:
Use ethyl alcohol to clean the camera lens. Don’t use steam.
Drying:
Maintenance, inspection, and testing:
Reassembly Instructions:
Packaging:
Sterilization:
Storage:
Additional Information:
Related Healthmark Products
Other Product Support Documents
Reference Documents
Prosys Brochure, Prosys Price List
Customer Service contact:
Healthmark Industries Company, Inc
33671 Doreka
Fraser, MI 48026
1-586-774-7600
hmark.com
2013-03-04 msmith


