13
If you have any questions , please contact The Fitness Generation, +61 (03) 9765 9999.
www. healthstreamfitness.com.au
Free call number 1300 796 636
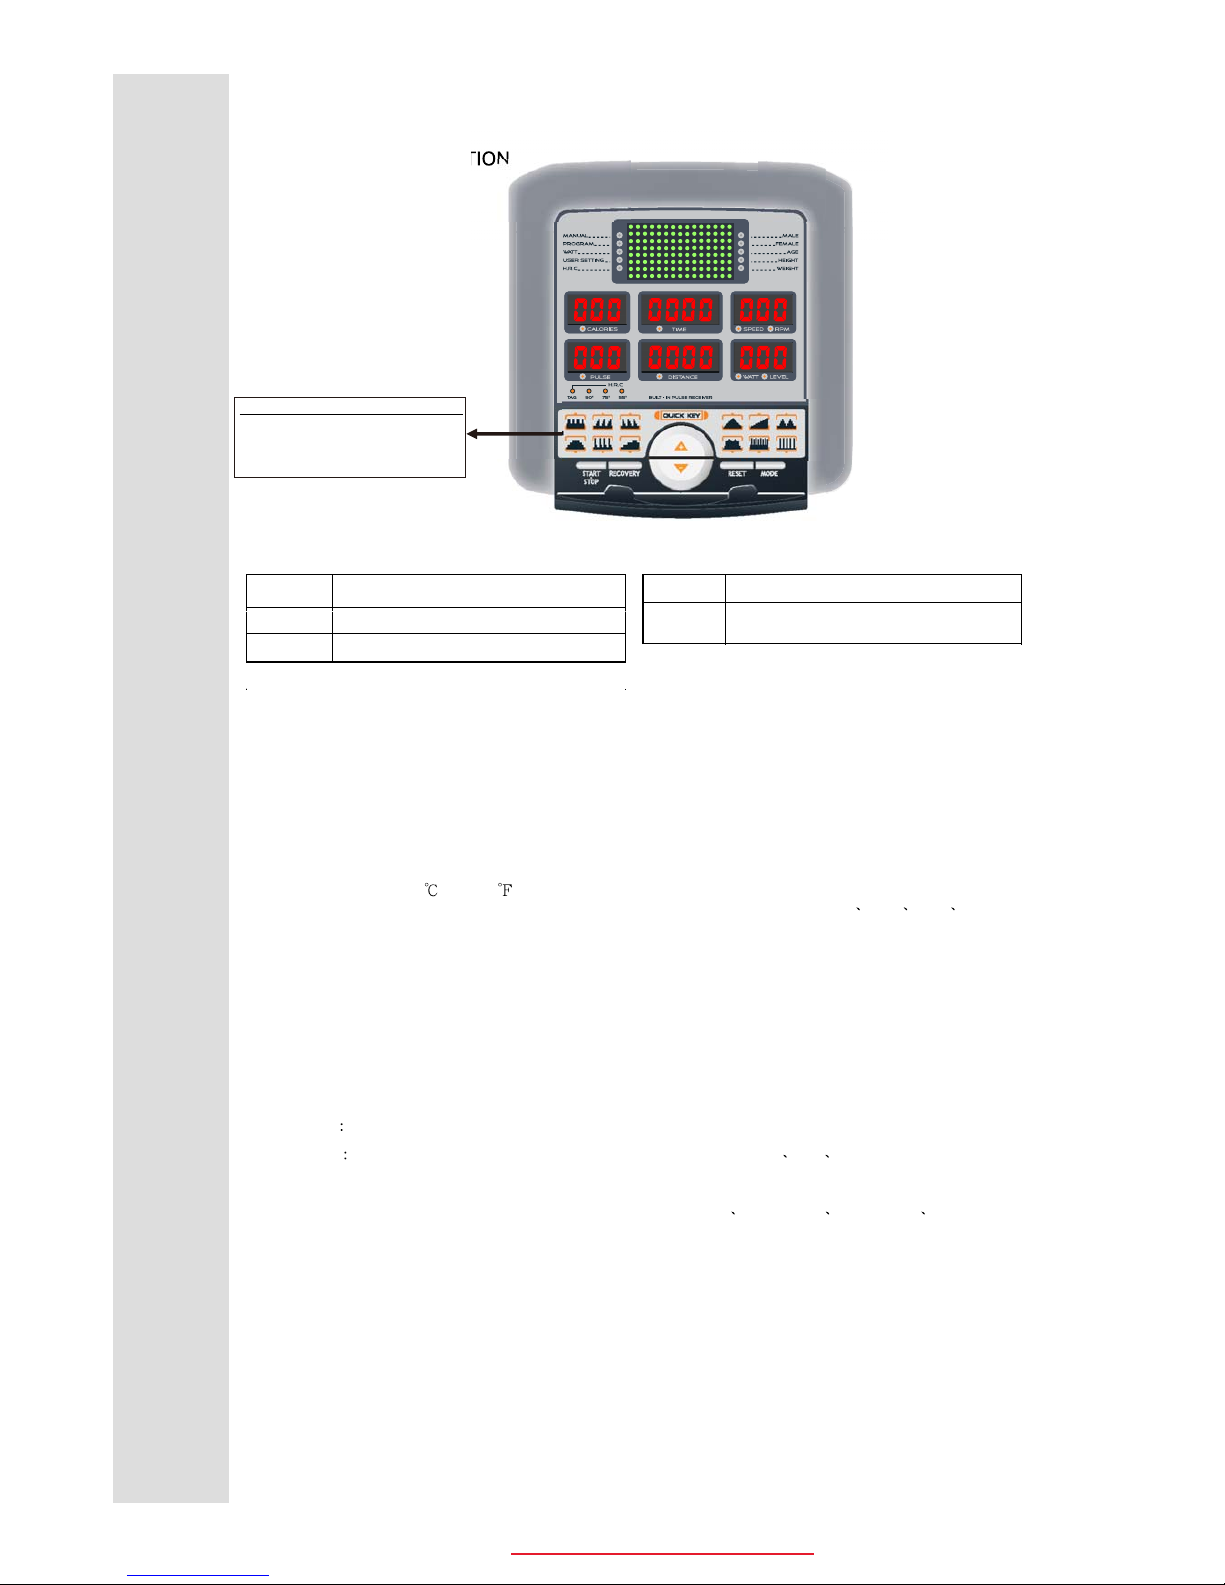
3.OPERATION
1ˊAfter power-on U1 by default but you can select any User Mode by turning the UP/DOWN knob the press the MODE
key for confirmation. Thereafter, sex, age, height, weight and other personal information can changed top right display.
please press MODE key for confirmation again.
2ˊFunction Control display will flash indicating you can select the Programs P1-P12 by turning UP/DOWN knob and then
press MODE key for confirmation. Any of the default values can be changed by pushing the MODE key until the
desired display is flashing. Press the MODE key again for confirmation.
When the Program and other protocols are entered press START/STOP key and begin your workout
3. WATT- press Mode-key for confirmation,WATT value will blink, now press Ÿ,źKEY for adjustment
WATT value, press Mode-key for confirmation and then pressŸ,źKEY for setting Press START and begin to exercise
after finish all functions’setting(I.e.TIMEΕDISTΕCALΕPULSE), You can pressŸ,źKEY for adjusting Watt set value
when exercise
4. PERSONAL- Regarding different user U1-U4, user could be set individual program file from this mode. press
Ÿ,źKEY for adjusting LOAD value and Mode-key for confirmation. pressŸ,źKEY for setting. Press START and
begin to exercise after finish all functions’setting(I.e.TIMEΕDISTΕCALΕPULSE).
5. PULSE – User shall hold on the grip or puT on the chest belt, LCD show the user current heart rate value on pulse
window and see the heart symbol blinking. You may preset target pulse before workout by pressing Ÿ,źKEY for
setting. The range is from 30 to 240 BPM. How to put on chest belt, please refer our Chest Belt user manual.
6. H.R.C.- display personal pulse 55% maximum value in PUL SE window, 55% symbol on the right blink PressŸ,źKEY
for adjusting value(55%Ε75%Ε90%ΕIND(100%)
i. 55% -- DIET PROGRAM
ii. 75% -- HEALTH PROGRAM
iii. 90% -- SPORTS PROGRAM
iv. TARGET—USER SET TARGET HEART RATE
7. BUILT-IN Heart Rate Receiver with chest Belt :
The computer with built-in Heart Rate receiver , the user can put on chest belt to detect the Heart Rate beat.;
How to put on chest belt, please refer Chest Belt user manual.
8.12 Program Profiles Graph Key
Quick key of press 12 Program Profiles by pressing panel.
9. RECOVERY KEY
a.Press the KEY after displaying of Pulse value, Only TIME and pulse are working under RECOVERY
funciton,no display for any other functions, motor will go back to LOAD1Ζ
b.TIME display "1:00" and begin to count back(During this period, if no PULSE input, auto off time won’t be
influenced).
The RECOVERY will determine your fitness level after your workout. When you have finished your
workout press RECOVERY. For RECOVERY to function correctly it needs your Heart Rate input. TIME will
countdown from 1 minute and then your fitness level from F1 to F6 will be displayed. NOTE; during
RECOVERY no other displays will operate.
Score Condition Heart Rate Per Minute
F1 Excellent 75 - 80
F2 Good 85 - 90
F3 Average 95-115
F4 Fair 120-125
F5 Poor 130-135
F6 Very Poor 135+