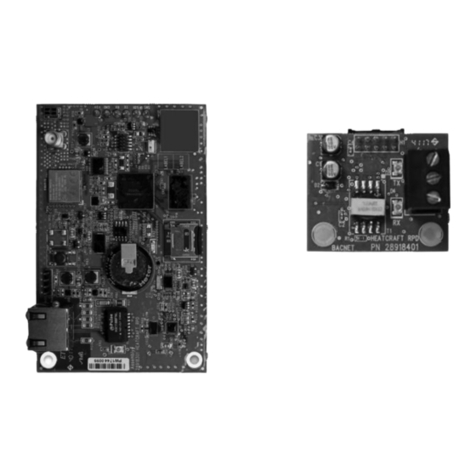
Heatcraft INTELLIGEN User manual

Please keep these instructions for future reference.
Equipment assembly and Wiring is required before using this Guide.
For assembly please consult Intelligen Assebly and Wiring Guide.
PRIOR ASSEMBLY NEEDED
IMPORTANT!
This Quick Start Guide is only for Intelligen Series XXKSJFS Model.
IMPORTANT!
Since product improvement is a continuing effort, we reserve the
right to make changes in specifications without notice.
Normal Business Hours – 8:00 AM – 8:00 PM EDT
(800) 321-1881
After Hours (after 5:00 PM EDT, weekends and holidays)
(877) 482-7238
heatcraft.com/intelligen/support
support@heatcraft.com
US. Customer Service
Normal Business Hours – 8:00 AM – 8:00 PM EDT
(800) 321-1881
After Hours (after 5:00 PM EDT, weekends and holidays)
(877) 482-7238
heatcraft.com/intelligen/support
support@heatcraft.com
Canada Customer Service
QUICK START GUIDE
INTELLIGEN 00049DFS
MARCH 2018*
*REPLACES JANUARY 2018
PART NO. 099483
intelliGen 00049DFS
QUICK START GUIDE FEBRUARY 2019
PART NO. 25010301
PRIOR ASSEMBLY NEEDED
Please keep these instructions for future reference.
Equipment assembly and wiring is required before using this guide.
Please make sure control circuit transformer is properly setup.
Please ensure your board has the latest rmware. Latest rmware revision
can be found at https://intelligencontrols.com/resources
For assembly, please consult intelliGen installation & operation manual.
U.S. Customer Service
Normal Business Hours
-
8:00 AM
-
8:00 PM EDT
(800) 537-7775
After Hours (After 5:00 PM EDT, weekends and holidays)
(877) 482-7238
heatcraft.com/intelligen/support
SESweb@heatcraftrpd.com
Legend
Long Name Abbrev. Name
Evap/Evaporator EV
Set-Point SP
Auxiliary AUX
Temperature/Temp TEMP
Calibration CALIB
Electronic Expansion Valve EXV
Condensing Unit CU
Compressor COMP
intelliGen™Refrigeration Controller
IMPORTANT!
Control transformers come with the voltage tap on 240V (as shown).
If your site has less than 215VAC, the tap will need to be moved to 208V
in order to ensure 25VAC to 29VAC power to IntelliGen board.
240V
208V

LED GREEN STATIC
The System or EXV does not
present any anomalies.
GREEN
LED RED STATIC
The System or EXV presents
an Alarm.
LED RED FLASHING
The EXV where the Alarm
was originated.
RED
LED YELLOW STATIC
The System or EXV presents
an Error.
LED YELLOW FLASHING
The EXV Unit where the
Error was originated.
YELLOW
LED Status Light
EXV CONTROLLER
A
B
E
D
C
F
A. Home Button: press to go Back to Main Menu ( See page 8 for Main Menu.
B. Back Button: press to go Back to the previous Menu.
C. Favorites Button: press to go to your Favorites
D. Screen: shows the content like temperature, paramenters and others.
E. LED Status Light: indicates the current status of that specific EXV (See Page 3 more).
F. Wheel Knob / Enter Button: Rotate the wheel left and right to Navigate between Menu Options. Press the wheel to ENTER.
HOW TO NAVIGATE?
Get to know the EXV Controller
INTELLIGEN XXKSJFS QUICK START GUIDE
MARCH 2018
PAGE
2
EXV CONTROLLER
You can find the EXV Control-
ler attached to each Unit.
LED WHITE FLASHING
The EXV Unit is being
identified.
WHITE
The EXV Unit is currently
OFF.
NO LED ON
iRC User Interface
You can nd the User Interface
(iRC UI) attached to each unit.*
Get to know the intelliGen Refrigeration Controller (iRC)
HOW TO NAVIGATE?
LED Status Light Bar
A. Home Button:
Press to go back to Main Menu
B. Back Button:
Press to go back to Previous Menu
C. Favorites Button:
Press to go to your Favorites
D. OLED Screen:
Shows the content like temperature, paramenters and others.
E. LED Status Light Bar:
Indicates the current status of all specic evaporators on the system (See below).
F. Knob / Enter Button:
Rotate the knob left and right to navigate between Menu Options. Press the knob to ENTER.
LED GREEN STATIC
The System or EV
does not have any
anomalies/issues.
LED RED STATIC
The System or EV has
an Alarm.
LED RED FLASHING
The EV Unit where the
Alarm originated.
LED GREEN STATIC
The System or EXV does not
present any anomalies.
GREEN
LED RED STATIC
The System or EXV presents
an Alarm.
LED RED FLASHING
The EXV where the Alarm
was originated.
RED
LED YELLOW STATIC
The System or EXV presents
an Error.
LED YELLOW FLASHING
The EXV Unit where the
Error was originated.
YELLOW
LED Status Light
EXV CONTROLLER
A
B
E
D
C
F
A. Home Button: press to go Back to Main Menu ( See page 8 for Main Menu.
B. Back Button: press to go Back to the previous Menu.
C. Favorites Button: press to go to your Favorites
D. Screen: shows the content like temperature, paramenters and others.
E. LED Status Light: indicates the current status of that specific EXV (See Page 3 more).
F. Wheel Knob / Enter Button: Rotate the wheel left and right to Navigate between Menu Options. Press the wheel to ENTER.
HOW TO NAVIGATE?
Get to know the EXV Controller
INTELLIGEN XXKSJFS QUICK START GUIDE
MARCH 2018
PAGE
2
EXV CONTROLLER
You can find the EXV Control-
ler attached to each Unit.
LED WHITE FLASHING
The EXV Unit is being
identified.
WHITE
The EXV Unit is currently
OFF.
NO LED ON
LED YELLOW STATIC
The System or EV
has an Error.
LED YELLOW FLASHING
The EV Unit where the
Error originated.
LED WHITE STATIC
The EV Unit is being
identied.
The EV Unit is
currently OFF.
intelliGen REFRIGERATION CONTROLLER
* Figure shows a Low Prole unit cooler; location might vary on other units.
Scan QR code to view the
Quick Start Configuration video.

QUICK SETUP FROM iRC UI
STEP 3B.
Equipment Discovery
After polling for connected units, the
iRC UI will display the number of EV
that are found to be wired together.
If all connected EVs were found, press
Enter knob to continue.
# EV FOUND
Continue?
STEP 5.
Choose Box Temp Sensor
If more than 1 Evap was congured,
turn knob to change primary evap
which will be sensing the box temp.
Push knob to choose primary evap.
SELECT PRIMARY EV?
NAME Freezer 2B
STEP 4A.
Choose Unit Base Name
The Unit being named will have its
LED flashing white. Turn knob to
change base name: [Freezer, Cooler,
Unit, Box]. Push the knob to choose
the base name.
UNIT ADDRESS 123
NAME: Freezer 2 A
STEP 1.
Enter Expert PIN
First digit in PIN automatically flashes
for edit. Turn dial to change rst PIN
digit 0-9. Push Enter to choose digit.
Repeat with all digits. The Default
Expert PIN is 999999.
ENTER EXPERT PIN
X X X X X X
STEP 2.
Select Conguration Mode
Select EV to proceed with conguring
the system from the iRC UI.
CONFIG FROM?
EV
STEP 3A.
Equipment Discovery
After Conguration Mode is selected
as ‘EV’, the iRC will automatically
attempt to discover all units in the
system.
DISCOVERING
Equipment...
STEP 4B.
Choose Unit Sufx
Turn knob to change unit name
sufx: [ 1A, 1B, ..., 8H ]. Push the knob to
choose unit name sufx.
(Repeat this step with all your EV’s as
necessary)
UNIT ADDRESS 123
NAME: Freezer 2 A
STEP 6A.
Select if Condensing Unit
Wired
Press the knob to select YES, if there
is a condensing unit wired to an
evaporator.
CU WIRED?
NAME Yes
STEP 6B.
Select EV wired to Condensing
Unit
Turn the knob to select the evaporator
wired to the condensing unit.
Press the knob to choose the
evaporator.
CU WIRED TO EV?
NAME Freezer 2A

QUICK SETUP FROM iRC UI
STEP 11.
Select Defrost Type
Defrost type eld will automatically
flash for edit. Turn knob to change
defrost type selection. Push the knob
to choose defrost type.
STEP 12.
Select Defrost Style
Defrost style eld will automatically
flash for edit. Turn knob to change
defrost style selection. Push the knob
to choose defrost style.
STEP 13.
Select Refrigerant
Refrigerant eld will automatically
flash for edit. Turn knob to change
refrigerant selection. Push the knob
to choose refrigerant.
STEP 14.
Select Box Temp Set-Point
Box temp setpoint will automatically
flash for edit. Turn knob to change
box temp setpoint selection. Push the
knob to choose box temp setpoint.
STEP 15.
Start System
Start System will automatically flash
for edit. Push the knob to start the
system when ready.
STEP 8.
Time Zone
Time Zone eld will automatically
flash for edit. Turn knob to change
time zone. Push the knob to choose
the time zone.
TIME ZONE
Non-Standard
STEP 10.
Date & Time
Year eld will automatically flash for
edit. Turn knob to choose year. Push
the knob to choose year.
Repeat steps with Month, Day, Hours
and Minutes
DATE/TIME
2018 Aug 29 23:59
DEFROST TYPE
NAME Low Temp Electric
DEFROST STYLE
NAME Smart
REFRIGERANT
NAME R404A
BOX TEMP SP
NAME 3 4 .5 F
2 UNITS CONFIGURED
NAME Start System?
STEP 7.
Setting Date & Time/Country
Country eld will automatically flash
for edit. Turn dial to change country.
Push the knob to choose the country.
COUNTRY
NAME USA
STEP 9.
Daylight Savings
Turn the knob. Push knob to select
either Yes or No.
DAYLIGHT SAVINGS?
Yes
Other Heatcraft Controllers manuals
Popular Controllers manuals by other brands
Johnson Controls
Johnson Controls T-5800 Series Installation and Calibration
Cirrus Logic
Cirrus Logic CS44600 manual

Mitsubishi Electric
Mitsubishi Electric NZ2GF2BN-60DA4 user manual

Blueweld
Blueweld Speed Start 1212 instruction manual
Dodge
Dodge SP600 Series datasheet
Fright Ideas
Fright Ideas BooBox Flex quick start guide
