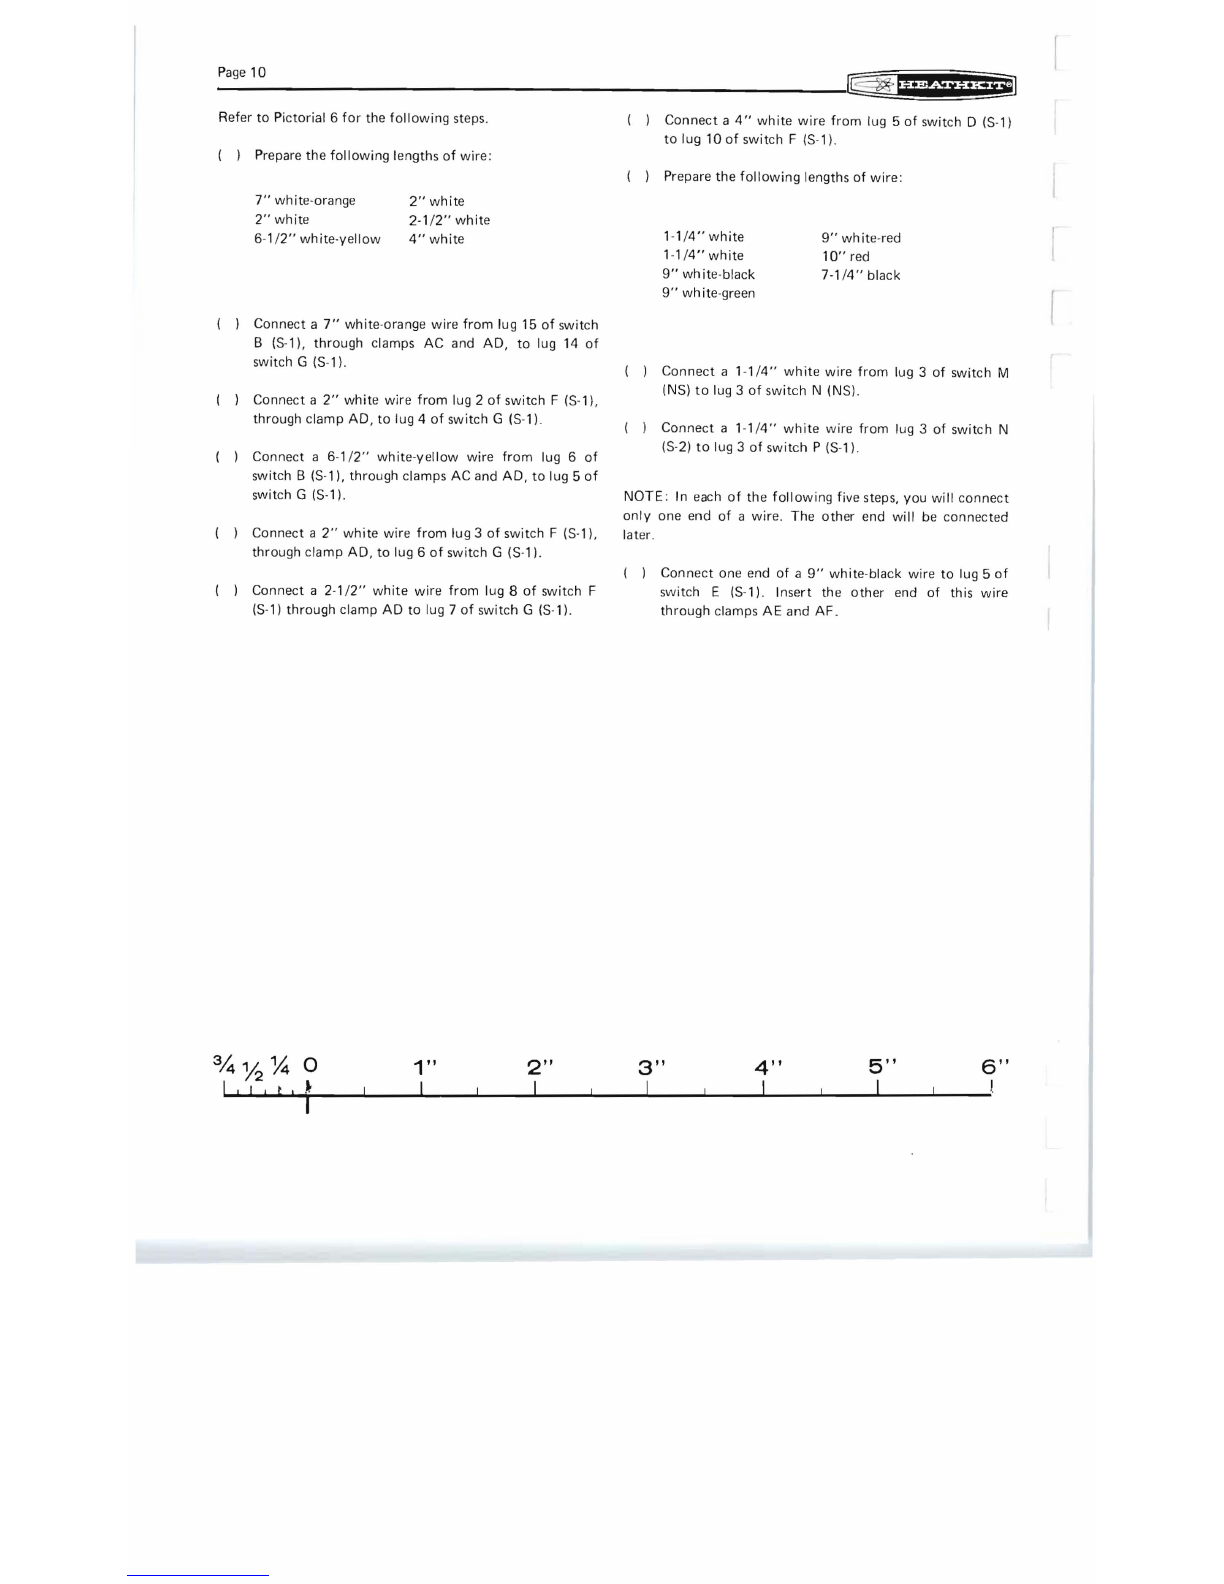
Heathkit IT -3120 User manual

Heathkit@ Manual
for the
FET/TRANSISTOR
TESTER
Model IT-3120
595-1989-04
• • -
'':It
TABLE OF CONTENTS
Introduction
..
.
..
. . .
..
..
.
....
.
..
.
......
.
..
..
. .
..
.
....
2 Operation
......
..
.
..
.....
.
.......
.
..
.
....
.
..
. .
.....
20
29
30
31
32
38
39
41
Test and Adjustment
...
.
.....
.
......
. .
....
. .
..
.....
.19
Final Assembly .
..
......
. . .
..
. . . . . . .
.....
. .
.......
. .20
Parts List . . .
..
...
.
...
. . .
..
. .
...
.
..
...
.
....
. .
........
2
In
Case
of
Difficulty . .
..
.
..
.
.....
. . . . . . . . . . .
..
.......
Assembly Notes
..
........
...
.
.....
.
..
...
. . .
..
. .
....
.4 Troubleshooting
...
. .
.......
.
.....
..
..
.
.......
.
Step-by-Step Assembly
.....
. .
..
...
. . .
.....
.
..
.
..
...
..
5 Specifications . . .
..
.....
.
..
. . .
..
. . .
......
. . . .
.......
Subpanel Assembly and Wiring . .
......
. ..
..
. .
..
.8 Circuit Description
.......
. . . .
..
. . . . .
......
.
.....
..
. .
Front Panel Assembly and Wiring
..
. . .
......
.
..
.
13
Chassis Photograph
.........
.
..
.
...
. .
......
. .
..
...
. .
Subpanel Installation
...........
.....
. . . .
..
.
....
15 Circuit Board X-Ray Views
....
..
..
.
..
.....
. .
....
. . . . .
Final Wiring
..
.
..
..
..
.
.........
.
..
. . .
..
...
.
....
17 Schematic
...
(Fold-out from page) .
..
. .
..
..
.........
.
.
HEATH
COMPANY
BENTON
HARBOR,
MICHIGAN
49022
Warranty
.....
.
...
..
..
.........
.
..
...
Inside Front Cover
Customer Service
...
. .
...
.
..........
..
Inside Rear Cover
Copyright ©
1976
Heath Company
All Rights Reserved
Printed
in
the United States of America

Page
2
INTRODUCTION
The Heathkit Model IT-3120 FET/Transistor Tester
is
a quality
instrument for quick, accurate tests of conventional (bipolar)
transistors, diodes, FET's, SCR's, triacs. and unijunction
transistors. Gain (DC Beta), transconductance (Gm), and
leakage values are read directly
on
the large easy-to-read
meter.
You
can
quickly
and easily test devices either in-circuit
or
out-of-circuit. The Tester provides special
circuitry
to
balance
out
in-circuit impedances.
Use
either the
color
coded
leads
for
in-circuit tests
or
the
built-in
transistor and
FET sockets
for
out-of-circuit tests.
Five current
ranges
permit
leakage measurements
as
low
as
1
microampere and collector currents
as
high
as
1 ampere.
Pushbutton
type
range, mode, and
function
switches
assure
easy,
consistent operation.
A special battery testing
circuit
provides a meter indication
of
the
condition
of
the
self-contained power supply.
Another convenience
of
this portable instrument
is
the
two-color
front
panel design, black lettering
for
conventional (bipolar) transistors and
red
lettering
for
FET's. Also, separate, brief operating instructions
are
printed on the rear panel.
Refer
to
the
"Kit
Builders
Guide
"
for
information
on tools,
wiring,
soldering,
resistors
,
and
capacitors.
PARTS
LIST
Check
each
part against
the
following
list. The key numbers
correspond
to
the numbers on the
Parts
Pictorial
(fold-out
from
Page
5).
Any
part
that
is
packaged in
an
envelope
with
a
part
number
on
it
should
be
placed back in its envelope after
it
is
identified
until
that
part
is
called
for
in a step.
KEY
HEATH
No. Part No.
RESISTORS
1/2-Watt
A1
1-129
A1
H05
A1
6-1509
PARTS DESCRIPTION
Per
Kit
3 4.7
n,
10% (yellow-
violet-gold)
10
kn,
5%
(brown-
black-orange)
15 n.1% (brown
green-black-gold)
1/4-Watt,
1%
Precision
A2 6-1
660-12
2 166 n
(brown-blue-
blue-black)
A2
6-3600-12
360
n
(orange-blue
black-black)
A2
6-1501-
12
1500
n
(brown-green-
black-brown)
Other
A3 2-11-2 1.5
n,
2-watt, precision
A4 3-13-3 .15
n.
3-watt,
To
order a replacement part,
use
the Parts Order Form
furn
i
shed
with
this
kit
.
If
one
is
not
available,
see
"Replacement Parts" inside the rear cover
of
the Manual.
For pricing information, refer to separate "Heath Parts Price
List."
KEY
HEATH PARTS DESCRIPTION
No. Part No.
Per
Kit
CAPACITORS-DIODE-CONTROLS
81
'
82
83
84
85
21-57
57-65
10-934
10-926
14-
11
2 .005
J-lF
disc capacitor
1N4002 silicon diode
750 n control
15
kn
control
250
kn/5000
n (5
k)
control
HARDWARE
#2
Hardware
C1
C2
C3
250-1'75
252-51
254-7
10
10
10
2-56 x
3/8"
screw
2-
56
nut
#2
lockwasher
#4
C4
C5
C6
Hardware
250-52
252-2
254-9
8
8
8
4-40 x
1/4"
screw
4-40
nut
#4
lockwasher

-----
---
Page
3
I§
~
fUitSf§hi9
KEY
HEATH PARTS DESCR IPTION
KEY
HEATH PARTS DESCRIPTION
No. Part No.
Per
Kit
No. Part No.
Per
Kit
~-
-
--
#6
Hardware
Wire
(cent'd.l
344-70 White-black
C7
250-155 6
#6
x
3/8"
sheet 344-71 White-brown
metal screw 344-72 White-red
C8 255-49 3
#6
spacer 344-73 White-orange
344-74 White-yellow
#10
Hardware 344-75 White-green
344-77 White-violet
C9 250-83 2 # 10 x 1/2" hex head 344-78 White-gray
self-tapping screw
MISCELLANEOUS
Control Hardware
C10 252-7 2 Control nut 85-1167-1 Circuit board
F1
203-1412-2 Front panel
C11
253-10 2 Control flat washer
C12 254-4 2 Control lockwasher F2 90-561-3 Cabinet shell
F3
204-1837 Subpanel
F4
207-82 5 Clamp
SOCKETS -JACKS -PLUGS F5 211-15 Handle
F6 214-76 2
01 434-342 2 Transistor socket Battery holder
02
434-343 9 Socket pin
F7
407-173 1 Meter
03
436-11 Red banana jack
F8
455-50 2 Knob bushing
'03 436-22 Black banana jack F9 64-97 Mode switch
03
436-24 White banana jack F10 64-98 Range switch
03
436-29 1 Green banana jack
F11
64-99 Function switch
D4 438-47 4 Banana plug F12 490-5 Nut starter
05
260-53 4 Alligator clip 597-260 Parts Order Form
597-308 Kit Builders Guide
FEET-KNOBS-INSULATORS 391-34 Blue and white label
Manual (See front cover
E1
261-49 8 Rubber
foot
for part number.)
E2
462-362 2
Knob
E3
70-10 Black banana plug Solder
insulator
E3
70-11
Red
banana plug
insulator
E3
70-12 Green banana plug The
following
batteries should
be
purchased
at
this time
for
insulator
use
in
the
completed
Kit:
E3
70-13 White banana plug
insulator 2 O-cell flashlight batteries (alkaline
type
preferred
for
E4
73-34 4 Rubber insulator longer
life).
WIRE
341-1 Black stranded
341-2
Red
stranded
341-5 White stranded
341·6 Green stranded
344-50
Bla.::k
344-51 Brown
344·52
Red
344-54
Yellow
344-55 Greer.
344-59 White

Page
4 = = :
ASSEMBLY
NOTES
1.
Before
starting
to
assemble
this
kit. be
sure
you
have read
the
wiring and
soldering
information
in
the "Kit
Builders
Guide."
2. Resistors
will
be
called
out
by their respective value in
n,
or
kn,
and color code.
Use
1/2-watt resistors unless
directed otherwise.
3. Capacitors
will
be
called
out
by their capacitance value
(in
11F)
and
type (disc).
SAFETY
WARNING:
Avoid
eye
injury
when you clip
off
excess
leads.
We
suggest
that
you wear
glasses,
or
at least clip
the
leads
so
the
ends
will
not
fly
toward
your
eyes.
1"
2"
3"
4"
5"
6"
I I I I I I

Page
5
~
~fh*iifHfj]
STEP-BY-STEP
ASSEMBLY
CONTINUE
NOTE
DIODES MAY
BE
SUPPLIED
I
NAN
Y 0 F
THE
F0 L
LOW
IN
G SHAPES.
ALWAYS
POS
ITION
THE
BANDED
END
AS
SHOWN
ON
THE
CIRCUIT
BOARD.
START
Position
the
circuit board as shown. Then
complete each
step
on
the
Pictorial.
NOTE: When wiring this kit, you will be
instructed
to
prepare lengths of wire ahead
of time,
as
in
the
next
step. To prepare a
wire,
cut
it
to
the
indicated length
and
remove
1/4"
of insulation from each end.
The wires are listed
in
the
order
in
which
they will be used.
Do
not
use
~
wire until you are specifically instructed
to
do so
in
a step.
( ) Prepare
the
following lengths of
white wire;
2·
1/4"
1"
5"
5·1/2"
4"
3·1/4"
As
you install each wire
in
the following
steps, turn
the
circuit board over, solder
the
wire
to
the
foil, and
cut
off
the
excess
lead
1"
white wire.
5"
white wire.
5·1/2"
white
wire.
4"
white wire.
3·1/4"
white wire.
rOR
GOOD
SOLDER
CONNECTIONS
,
YOU
MUST
4tl
..
K(EP
THE
SOLDERING
~"
~~:
TII~
c~~~:~.
WITH
A -._ _ ~ I
DAMP
SPONGE
OR
CLOTH
.
Il
lrlll
, v '
BANDED
END
1N4002 silicon diode
(#57-65).
750 n control.
10
kn
(brown-black-orange).
360
n.
1%
precision
(o
range
·
blu
e-black-black)
.
4.7 n (Yellow-violet-gold).
.15
n,
3-
watt
precision.
1.5
n,
2-watt precision.
Solder the leads
to
the
foil and
cut
off
the
excess lead lengths.
( )
15
n.
1%
precision
(brown-
I'
green-black-gold)
.
166
n.
(brown-
over
the
outlines
on
the
circuit board.
4.7 n (yellow·violet·gold).
1500
n. 1%
precision
(brown-
green-black-brown)
.
4.7 n (yellow·violet-gold).
Solder
the
leads
to
the
foil and
cut
off
the excess lead lengths.
PICTORIAL
1

_pa_g_e_6
______________________________________________________________________
~~~fifi6Sfff{¥~
Refer
to
Pictorial 2
for
the
following
steps.
( ) Prepare
the
following
lengths
of
hookup
wire:
6"
yellow
2-1/2"
white
8-1/2"
red
7"
green
8-1/2"
brown
7"
black
7-1/2"
white
8-1/2"
red
NOTES:
1.
In
the
following
steps,
connect
only
one
end
of
a
wire
to
the
circuit
board
.
The
other
end
will
be
connected
later
.
2. In
the
following
steps,
(NS)
means
not
to
solder
be-
cause
other
wires
will
be
added
later.
"S-"
with a
number,
such
as
(S-3),
means
to
solder
the
connec-
tion.
The
number
following
the
"S"
tells
how
many
wires
are
at
the
connection.
Connect a
6"
yellow
wire
to
hole
E
(S
-1).
Connect
an
8-1/2"
red wire
to
hole
F (S-1).
Connect
an
8-1/2"
brown
wire
to
hole A (S-1).
Connect a 7
-1/2"
white
wire
to
hole
B (S-ll.
Connect a
2-1/2"
white
wire
to
hole
G (S-1).
PICTORIAL
2 Connect a
7"
green
wire
to
hole C (S-1).
Connect a
7"
black wire
to
hole 0 (S-1).
Connect
an
8-1/2"
red
wire
to
hole
M (S-1).
Cut
off
the excess lead lengths
from
the foil side
of
the
circuit
board.
34% % 0
I , I I I 1 I
1"
I
2"
I
3"
I
4"
I
5"
I
6"
,

///1

~
..
fU=.MiifH£§l
_____________________________________
P_a_
g
e_7
w...
~
_ .
....
..
~
.
..
."
.:
....
'..
~
..
,'
: ,-,-, .
./
'.~
..
.
~,
..
"
,'.
-'
""'
.
..-..
-..
JIll...
f18c.
J""\
• • • • • • • • • •
• • • • • • • • •
• • • • • • • •
• • • • • • • • •
r..:
:
::
:
::
~
cB
oaa
~
~
. .
YerQ~~:--_?8--
~~
0
PICTORIAL 3
Refer
to
Pictorial 3 for
the
following steps.
NOTE:
In
the
following steps, install
the
mode
and
fu
nction
switches as follows:
1. Align
the
switch over
the
holes
on
the
circuit
board.
Then
insert
the
switch lugs into
the
circuit board holes.
2. Press
the
switch against
the
circuit board;
then
turn
the
circuit board over and solder
one
lug
at
each
end
of
the
switch
to
the
foil.
3. Re-examine
the
switch
to
make sure it
is
still
seated against
the
circuit board.
4. Make sure
the
jumper wires on
the
component
side
of
the
circuit board
do
not
touch
the
lugs
of
the
switch.
5.
Then
solder
the
remaining lugs (those
surrounded
with foil)
to
the
circuit board foil.
Install
the
mode
switch
(#64-97)
on
the
circuit board
at
AA. NOTE: To make sure you use
the
correct
switch,
compare
it
to
the
one
shown
at
location
AA
on
Pictorial 3.
Install
the
function switch
(#64-99)
on
the
circuit
board
at
AB.
Carefully
examine
the
circuit
board foil
to
make sure
all
leads
are
soldered
to
the
foil.
Then
cut
off any
excess lead lengths.
NOTE:. You should have a
166
n precision resistor left. Set
it
aside; it will
be
used later.

Page
8
:::
o
PICTORIAL 4
SUBPANEL ASSEMBLY AND WIRING
Refer
to
Pictorial 4
for
the
following
steps.
NOTE: The plastic clamps you will install in the next two steps
are quite brittle. Place them in warm water
for
a few minutes to
make them more flexjble before you install them.
( ) Refer
to
the inset drawing and install a clamp
on
the
subpanel at AC. Support the back
of
the subpanel;
then
use
a screwdriver
to
press
the clamp
into
the
hole. Position the clamp
as
shown in
the
Pictorial.
( ) Likewise, install the clamps
at
AD, AE,
AF,
and AG.
NOTES:
1. The term
"hardware"
will
be
used
to
refer
to
the
screws, nuts, and lockwashers when parts are being
mounted in some
of
the
following
steps. The phrase
"Use 2-56 x
3/8"
hardware,"
for
example, means
to
use
a 2-56 x
3/8"
screw, one
or
more
#2
lockwashers,
and a 2-56 nut. Refer
to
the Pictorial called
out
in a
step
for
the
correct
number
of
lockwashers and the
correct way
to
install the hardware.
2.
Use
the plastic
nut
starter supplied
with
this
kit
to
hold
and start 2-56 and 6-32 nuts on screws.
( )
Mount
the assembled
circuit
board on the subpanel.
Use
2-56 x
3/8"
hardware
at
AH,
AJ,
AK,
and
AL.
( ) Install the range switch
(#64-98)
on the subpanel
as
shown.
Use
2-56 x
3/8"
hardware at
AN
and AP.
NOTE:
The push
buttons
of
this switch are larger than
the
cutout
in the subpanel. Therefore, you must
tilt
the switch and insert one end at a time
into
the
cutout.

_p_ag_e
__
1_0
_____________________________________________________________________
~
fifPhSiifi¥£iU
Refer
to
Pictorial 6
for
the
following
steps.
Prepare the
following
lengths
of
wire:
7"
white-orange
2"
white
2"
white
2-1
/
2"
white
6-1/
2"
white-yellow
4"
white
Connect a
7"
white-orange
wire
from
lug 15
of
switch
B
(S
-1).
through
clamps
AC
and
AD
.
to
lug 14
of
switch G
(S
-1).
( ) Connect a
2"
white
wire
from
lug 2
of
switch
F
(S
-
1)
.
through clamp
AD.
to
lug 4
of
switch G (S-1).
( ) Connect a 6-1/
2"
white
-
yellow
wire
from
lug 6
of
switch B (S-1), through clamps
AC
and
AD,
to
lug 5
of
switch G (S-1).
( ) Connect a
2"
white
wi
re
from
lug 3
of
switch F (S-1),
through
clamp
AD,
to
lug 6
of
switch G
(S
-
1)
.
Connect a 2-1/
2"
white
wire
from
lug 8
of
switch F
(S-1)
through
cla
mp
AD
to
l
ug
7
of
switch G
(S
-
1)
.
( )
Connect
a
4"
wh
ite
wire
from
lug 5
of
switch D
(S
-
1)
to
lug
10
of
switch F
(S
-1).
( ) Prepare
the
following
lengths
of
wire:
1-1
/
4"
white
9"
white
-red
1-
1/4"white
10"
red
9"
white-black
7-1
/
4"
black
9"
wh
ite-green
( )
Connect
a 1-1/
4"
white
wire
from
lug 3
of
switch M
(NS)
to
lug 3
of
switch
N (NS).
( )
Connect
a 1-
1/4"
white
wire
from
lug 3
of
switch
N
(S
-
2)
to
lug 3
of
switch
P
(S
-1).
NOTE
: In each
of
the
following
fiv
e steps,
you
will
connect
only one end
of
a wire. The
other
end
will
be connected
later.
( )
Connect
one end
of
a 9"
white
-black wire
to
lug 5
of
switch E
(S
-1).
Insert
the
other
end
of
this
wire
through
clamps
AE
and
AF.
3,4
% % 0
1"
2"
3"
4"
5"
6"
~1~,~I~,~t~,~~----L---~I~--~--~I----~--~1
____
L-
___
!L-
__
~
__
~!
____
~
___
,
I

~
>
fif=f§fiif{~
_______________________________________________________________________
pa
_g_e_9_
( )
Temporarily
install a
250
kD/5000
D (5
k)
control
on
Connect
a
1"
bare
wire
from
lug 9 (NS)
through
lug 4
the
su
bpanel at
S.
Use
a
control
lockwasher and a (S-2)
of
switch
M
to
lug 6
of
switch
N (NS).
control
nut.
Connect
a
1-1/4"
white
wire
from
lug 6
of
switch
N
( )
Temporarily
install a 15
kD
control
on the subpanel
at
(S-2)
to
lug 6
of
switch
P (NS).
T.
Use
a
control
lockwasher and a
control
nut.
( )
Connect
a
1-1/4"
white
wire
from
lug
6
of
switch
P
(S-2)
to
lug 6
of
switch
R (NS).
Refer
to
Pictorial
5
(fold-out
from
this
page)
for
the
following
steps.
( ) Prepare the
following
lengths
of
wire:
( ) Position the free ends
of
the wires
coming
from
the
circuit
board
out
of
the way
as
shown.
8"
white-red
12"
white-gray
NOTE:
When bare
wire
is
called
for
in the
following
steps,
9"
brown
8"
yellow
cut
the
white
wire
to
the
indicated
length;
then remove all
6"
white-violet
7"
wh
ite-green
of
the insulation.
3"
white
( ) Prepare the
following
lengths
of
hookup
wire
:
1"
bare 3/
4"
bare
1-1/2"
white
1"
bare
NOTE:
Most
wire
lengths are longer than needed
to
reach
3/4"
bare
1-1/4"
white
their
terminating
points.
Therefore,
use
square corners (bent
3/4"
bare
1-1/4"white
90 degrees)
when
you
position
the wires
to
make the
kit
as
neat
as
possible when
it
is
completed.
( ) Connect an
8"
white-red
wire
from
lug
10
of
switch
B
(S
-
l),
through
clamps
AC
and
AD,
to
lug 5
of
switch
( )
Connect
a
1"
bare
wire
between lugs 3 (NS) and 6 K
(S-l).
(S·l)
of
control
S.
Connect
a
9"
brown
wire
from
lug
11
of
switch
B
( ) Connect a
1-1/2"
white
wire
between lugs 5
(S-l)
and
(S-l),
through
clamps
AC,
AE,
AF,
and
AG,
to
lug 3
7
(S-l)
of
con
trol
S.
of
control
S (S-2).
NOTE:
Use
the
switch
lug
numbering
drawing
of
Pictorial 5
for
help in
identifying
the
pushbutton
switch lugs in the ( )
Connect
a
6"
white
-
violet
wire
from
lug 3
of
switch
B
following
steps.
(S-l),
through
clamps
AC
and
AD,
to
lug 2
of
switch
G
(S-l).
( )
Connect
a
3/4"
bare
wire
from
lug 2
of
switch M
(S-l)
to
lug 5
of
switch
N (NS).
Connect
a
3"
white
wire
from
lug 5
of
switch
B
(S-l),
through
clamp
AC,
to
lug 2
of
switch
D
(S-l).
( ) Connect a
3/4"
bare
wire
from
lug 2
of
switch
N
(S-l)
to
lug 5
of
switch P (NS). ( ) Connect one end
of
a
12"
white-gray
wire
to
lug 2
of
switch A
(S-l).
Insert the
other
end
through
clamps
( ) Connect a
3/4"
bare
wire
from
lug 2
of
switch
P (NS) AC,
AE,
and
AF.
It
will
be
connected later.
tolug50fswitch
R
(S-l).
( )
Connect
an
8"
yellow
wire
from
lug 7
of
switch
A
NOTE
: Where a
wire
passes
through
a
connection
and then
(S
-
1),
through
clamps
AC,
AE,
and
AF,
to
lug 2
of
goes
to
another
point,
as
in
the
next
step,
it
will
count
as
control
T
(S-l)
.
two
wires in the solder
instructions
(S-2) one
entering
and
one leaving the
connection
.
Be
especially
careful,
when ( )
Connect
a
7"
white-green
wire
from
lug 18
of
switch
B
soldering these connections,
to
apply
enough solder and heat
(S-l),
through
clamps
AC
and
AD,
to
lug
11
of
switch
to
solder
these
"through
wires."
G
(S-l).
1"
2"
3"
4"
5"
6"
I I I I I I

Page
9
n lug 9 (NS) through lug 4
,witch
N (NS).
'e
from
lug 6
of
switch N
5)
-e
from
lug 6
of
switch P
5)
;
of
wire:
Nhite·gray
,
II
ow
hite-green
'ger than needed
to
reach
~
.
us
e square corners (bent
?
INires
to make the kit
as
,d .
-e
from
lug
lOaf
sw
itch
B
,d
AD.
to
lug 5 of switch
from
lug
11
of
switch B
IE,
AF,
and AG,
to
lug 3
ire
from
lug 3
of
sw
it
ch B
,d
AD,
to
lug 2 of switch
m lug 5
of
switch B (5·
11
,
.f
sw
itch D
(5·1
J.
,hiIe
-g
ray wire
to
lug 2
of
ther end through clamps
mnected late
r.
from
lug 7
of
switch A
>.E,
and
AF,
to
lug 2
of
e
from
lug
18
of
sw
itch
B
dAD,
10
lug
11
of
switch
5"
6"
I I
SWITCH
LUG
NUMBERING
Q
Q
PICTORIAL
5

IIhT \
SlK
SWITCH
LUG
NUMBERING
wH"
-eRN
~
R n\'lhT R[D
Pi
~
'n
n n/ I Q
Q
PICTORIAL
6
Page
10
Refer
to
Pictorial 6
for
the
( ) Prepare the
followin'
7"
white-orange
2"
white
6-1
/2"
white-yellow
( ) Connect a
7"
white-
B
(5-
1
),
through
cl
switch G (5-11.
( ) Connect a
2"
white
through clamp
AD,
I
( ) Connect a
6-1/2"
v
swil
ch
B (5-1),
throu
switch G
(S-l).
( ) Connect a
2"
w
hile
through clamp
AD,
t
( ) Connect a
2-1/2"
11\
(5-1) through clamp
%%~O
I I ! t! t !

Page
13
Refer
to
Pictorial 8
for
the
following
steps.
OPEN
Prepare a
10"
length
of
black solid wire.
Connect one end
of
a
10"
black wire
to
lug
11
of
switch A
(S-l).
Insert
the
other end
of
this wire
through clamps
AC
and
AD.
It
will
be
connected later.
( ) Route the red wire coming
from
circuit
board hole M
through clamps AC and
AD.
It
will
be
connected later.
( ) Connect the
yellow
wire coming
from
circuit
board
hole
E,
through clamps
AE
and
AF,
to
lug 1
of
control
T
(S-l).
( ) Connect the black wire coming
from
circuit
board
hole D, through clamps AE,
AF,
and
AG,
to
lug 2
of
switch P (S-2).
( ) Connect the green
wire
coming
from
circuit
board
hole
C,
through clamps
AE,
AF,
and
AG,
to
lug 5
of
switch P (S-2).
( ) Connect the
white
wire coming
from
circuit
board
hole B, through clamps
AE,
AF,
and
AG,
to
lug 5
of
switch N (S·2).
( ) Connect the brown
wire
coming
from
circuit
board
hole
A,
through clamps
AE,
AF,
and AG,
to
lug 8
of
switch M
(S-l).
( ) Connect the red wire coming
from
circuit
board hole
F, through clamps
AE,
AF,
and
AG,
to
lug 6
of
switch
M (S-1).
( ) Connect the
white
wire coming
from
circuit
board
hole G
to
lug 3
of
switch D
(S-l)
.
( ) Refer
to
the
inset drawing on Pictorial 8 and close
each
clamp.
To
do
this, push inward on
the
flexible
arm
until
it
locks
to
the stationary arm.
This completes the assembly and
wiring
of
the
subpanel. Set
it
aside temporarily.
FRONT PANEL ASSEMBLY AND
WI
RING
Refer
to
Pictorial 9
for
the
following
steps.
( )
Place
a
soft
cloth
on
your
work
surface
to
protect
the
front
panel
from
becoming scratched.
( ) Locate the
front
panel and position
it
as
shown.
'Refer to Detail 9A for the following six steps.
( )
1.
Position a transistor socket as shown.
. / 5
IDE
. 13
't
/
~~
;
0'
1,
15
~~~
'
C~K
70
'~
TURN
~
45°
Detail 9A
( )
2.
Start a socket pin down through socket hole 1. Be
sure the open side of the top of the pin faces the
center of the socket.
( )
3.
Push the pin as far as you can into the socket. Then
pull it with long-nose pliers until it is fully seated.
( ) 4. On the underside of the socket. grasp the full length
of the pin with pliers and twist the pin about 45 de-
grees to hold it into the socket.
( ) 5.
In
the same manner. install four more pins into the
socket.
( ) 6. Similarly. prepare a 4-pin socket; do not install a pin
in
hole
5.
( ) Install a prepared 5-pin transistor socket at BA with 2-56
x 3/8" hardware.
( ) Install the prepared 4-pin socket at BF with 2-56 x 3/8"
hardware. Be sure to position the socket with lug 2 as
shown.
( ) Install a black banana jack
at
BB.
Use
the
nut
supplied
with
the
jack. Do
not
overtighten
the
nut.
( ) Install a
white
banana jack at BC.
Use
the
nut
supplied
with
the
jack. Do
not
overtighten
the
nut.
( ) Install a red banana jack
at
BD.
Use
the
nut
supplied
with
the jack. Do
not
overtighten
the
nut
.
( ) Install a green banana jack at
BE
.
Use
the
nut
supplied
with
the jack. Do
not
overtighten the nut.
( )
Mount
a
battery
holder at
BG
with
4·40
x
1/4"
hardware.
Be
sure
to
position the positive (+) end
as
shown.
( )
Mount
a battery holder at
BH
with
4-40
x
1/4"
hardware.
Be
sure
to
position the positive (+) end
as
shown.
( ) Mount the handle at BN with
#10
x 1/2" hex head
self-tapping screws.

Cl
-
Page'
I
G£j
9jijF-ij
SWITCH
LUG
NUMBER
ING
( 1
Con
r'\el":.t
o
ne
end of a 9" ,
.·
..
htl
e-geen w;re
to
luq 6 o f Connect 8 7 1
.'
2"
'IIhil
e'~fa
\'
~he
from lug aof
~
it
C
h
wrl .
......
rh
rc
A,.Ig
h d
c;
I.,J
)S
AE
a
nf!
.AF 6 of n"Jitch R IS·2
).
sw
il
c:h
E (S-
1).
I
nsi1f
l '
-"c
o
ther
enc 01
th
is wire H (S·
1)
, thro.Jgh clarn
ps
AD.
AE.
Af:
, G
nd
A
G,
to
lug ' Q
I )
Can
t"K!C
l Om:
Qfld
(I
t " g"
·....,n
ne
md
w
ir
~
iO
lug 2
of
5'..'.
'1
1c:h
f.
IS q. In!re t th
e:
oth
er
md
ot
'hi,
wl
r~
I)
Cu
nn
L"'.:1
on
E!
end
of
a 9
IFr
'
gr
een
"'life
to
lu
g 5
01
throoqh d
..
rnps
AE
.a
nd AF .
S"
1"I
llcfl
H IS'
l)
In~
~
n
the
othe-
en
d of Ihis wi
re
I
hr
OlHI~
ci""TJ1
P5
AD.
AI:;
.
IlIlfI
Af
. If wiU
be
c
on
oecIDd
t 1 Connec t o
l"'
e end
01
a 10" rea WIfe
!O
tug 8 ot
'S\'V
Irc: tl l
ilte!
.
8
(S
-II. 'n
sen
;
he.
ot
her
Lll
d of th
l'
wr
re
lh
rolJyn
':
Y
~,'-
.!'
"'-
':._
E]"
f.
!_
clam
p$
AC
,
AE
.
~
nd
AF. ( )
Co
nC'l~[..I
1
0
"
VJhll@wlrQl
ro
mll.t
g7
of,w;
tc.hJtS
-
l
!,
J
l
~
I .
'f
U
thrOugh
damp'i
AD,
AI:.
AF.
and
AG,
to
lug 3 0 1
I )
Co
nc1
£!ct
a 7 l i4 bl
dCk
..m e !tUni l
ug
9 1
)1
switc
h M
~
"Jit
Ch
M {S· 2. o 0
~S2)
.
II"'Seff th
o.!
vth£rr "
00
u'
'
n
i~.
wir£:
thl
OU
~
clam
p
AG
HeTer
to
Picto rial ,
itoldoul
from
If'is
P<WiC
j {
or
thl'
I 1
Connec:
.!I
l OU
~·,h
l
l
(}-~
'I
O
I
\!t
W
LI
e fr
om
lug
lO
a f 5Whch
foll
ow
l"';!
s,tJ!pi
. J {S
·1
),
Ih
ro
llgh
c.
liVnPS
AD.
AF
,
AF,
and AG,
to
IUQ
5
of
>Wl~
M
rs
li
.
( )
P
r
ep
.a
~
the lo
ilCW
"
In-Q
iI
!r'lglh'i
,j
1 WU
l!
:
4·
1
/
~
"
·
...
h,l
&-
nrcrwr>
10" w
hlte
~
~
~
o
l
e
!
-.
~
fl
'.
( ) Connect a 10" br
Ol.'
m \\
;r
e
fr
om lug 2 of s
....
!tcn J
!;
-!
.
,.
:.t.
"
!
':::'
u';
7· 1-'2'
wh
~
te
·
b
l
<K:k
10" br
O\v
n
IS-
i I. lhroug,.
da
;nps
AD.
AE. AF. and
AG
.
to
lug 2
i'
I , l
7 If2
'-
'
wh
l
!6
g!
ay
2" ¥
/h
i
l6'
of -control S {NSt ,!._ ' '
i.!
'.!!
~
I
~
~
l,.
,
~
~
o
J
~
11f
9·1.'2··
qr
een
71n
..
·
.·Jh
l
te
10" w
hit
e
f
,'
~
t
1
,
~
~
J.
( 1 Connec.t
-d
4·1
.'
2'
....
hlre
blow
" wrre 'r
om
lUll
8
of
I I Cormecr
ii
2 . \·
..
hi
te
wire
be
r
...
een lugs 2 I
S'2
)
arn.:l
8 o
~
.
:i'o\ll
\ch
A
(S
11
.
!}1
rough
dam
p
AC
, 10
IU
!J
'3
of
S'
o';;
t
ch
tNS\
01
s\".
'ilCh S.
~
!.
E IS-1\ . Ie
l I Cotmu
:.:.r
d
71
2"
" h
ile
lJh
.c
,
o(
'I"I
jr
~
hom
luq It l ) 1
Co
nn:c
t
on
e
eO(
j
of
11
7
·'
'2"
wh
ite
Wire
tD
t
u
~
g ct g
5W
ilCh 8
[S
1\.
Ill
fOUWl
(:It.!m~
AC
';
ttd
AD
,
to
lug G a t c
o.,tru
l 5 IS 2!
I
n
5~t
toe
ot
her
t:f1(.
i Of this wlr
(-
~
w
lt
ch
F (5
·1
1 lh·ougt! doll'
ll)
.AG. It
will
be ccnnected later.
P
ICTORIA
L 7

----------
o
o
.,
.r
....
.
--r
...
·
....
"")
.
I
~
.
~
:
...
_
nn~
1
.
r
:~
:
:~ .;
;t..
-
--.
o
a ;£.
"
o
~
o
.....
i
I
o
l:J
>
r-
eo
o I o /
'"
o
'"
·1
.
~
"
o
.....
o
:0
»
r
;!:?
l-
:-;:;:
IV
1
~
0
-,
-Ul I

Page 14 ®
~
fH*iifH£il
o o
PICTORIAL
10
.l
1"
2"
3"
4"
5"
6"
I I I I I I

Page
15
:;: :;:
~
Refer
to
Pictorial 10
for
the
following
steps.
( ) Prepare the
following
lengths
of
wire:
3-1/2"
green
6"
black
5"
white
4"
red
5"
white
5-1/2"
red
4"
black
( ) Connect a
3-1/2"
green
wire
from
lug 4
of
socket BF
(S-1)
tothe
lug
of
jack
BE
(NS).
( ) Remove
an
additional
1/4"
of
insulation
from
one
end
of
a
5"
white
wire. Connect this end
of
the wire
through lugs 2
(S-2)
and 5
(S-2)
to
lug 4
(S-1)
of
socket
BA
. Connect the other end
to
the lug
of
jack
BC
(NS).
( ) Connect a
5"
white
wire
from
lug 1
of
socket BF (S-1)
to
the lug
of
jack
BC
(NS).
( ) Connect a
4"
black wire
from
lug 3
of
socket
BA
(S-1
)
to
the lug
of
jack
BB
(NS).
( ) Connect a
6"
black wire
from
lug 3
of
socket
BF
(S-1)
to
the lug
of
jack
BB
(NS).
Connect a
4"
red wire
from
lug 2
of
socket
BF
(S-1)
to
the lug
of
jack
BO
(NS).
Connect a
5-1/2"
red wire
from
lug 1
of
socket BA
(S-1)
to
the lug
of
jack
BO
(NS).
( ) Cut both
leads
of
a .005
IlF
disc capacitor
to
3/4".
Then connect this capacitor
from
the lug
of
jack
BC
(NS)
to
the
lug
of
jack
BO
(NS).
SUBPANEL
INSTALLATION
Refer
to
Pictorial
11
(fold-out
from
Page
17)
for
the
following
steps.
( )
Mount
the
meter on the
front
panel. Position the
meter
with
the positive (+) terminal
as
shown. Install
only
a lockwasher and
nut
at
BJ.
Use
the hardware
included
with
the meter.
( ) Place a #6 spacer on meter mounting bolts BK, BL,
and BM.
( ) Locate the assembled subpanel and remove the control
nuts
from
controls
Sand
T.
( ) Install the assembled subpanel on the inside
of
the
front
panel.
( ) Install lockwashers and nuts
at
BK,
BL,
and BM.
Use
the hardware included
with
the meter.
Be
sure
pushbutton switches do
not
bind against the
front
panel.
If
necessary, reposition the
su
bpanel.
( ) Install
control
flat
washers and control nuts on
controls
Sand
T.
()
Remove and discard the shorting wire from between
the meter terminals.

/ \
Page 16
o o
( o o )
PICTORIAL
12

[[
~
fffWSi*fl5fj)
FINAL
WIRING
Refer
to
Pictorial 12 (on
Page
16)
for
the
following
steps.
Connect
the
red
wire
coming
from
clamp
AD
to
the
positive (+)
terminal
of
the
meter
(S-l).
Connect the black
wire
coming
from
clamp
AD
to
the
negative
(-)
term
inal
of
the
meter
(S-l).
( ) Connect
the
black
wire
coming
from
clamp
AG
to
the
lug
of
jack
BB (S-3).
Connect the
white
wire
coming
from
clamp
AG
to
the
lug
of
jack
BC (S-4).
Connect
the
wires
coming
from
clamp
AF
as
follows:
Red
wire
to
the
lug
of
jack BD (S-4).
Green
wire
to
the
lug
of
jack BE (S-2).
White-red
wire
to
lug 1
of
battery
holder
BG
(S-l).
White
-black
wire
to
lug 2
of
battery
holder
BG
(S-l).
White·green
wire
to
lug 1
of
battery
holder
BH
(S-l).
White-gray
wire
to
lug 2
of
battery
holder
BH
(S-l).
This
completes
the
wiring
of
your
Transistor
Tester.
Check
to
see
that
all
connections
are soldered.
Switches C and L should
not
have
any
wires connected
to
the switch lugs.
Refer
to
Pictorial 13
for
the
following
steps.
Prepare
the
red test lead
from
red stranded
wire
as
shown
in Part A
of
Pictorial 13. Then install a banana
Page
17
IAI
REMO
VE
THE
INSULA
TIO
I\ I
RO
M TACH END OF T
HE
lES
T
LE
AD
A
II.
D
TW
I SI T
OGUHER
T
HE
FI
NE WI
RES
.
r-
3/
4~
0 r 1/4'4
c~
;;:»
;:)
sst
ae
~
0
-
'I
I BI I
II:
SERT
TH
E
3/
4" BAR 10
IV
I
RE
I I" T
OT
HE
BA
NANA P
LUG
. 8[ I\D BOl H
WI
RE [ N
OS
I",
fl
AT
AG
AI
N
ST
TH
E P
LU
G
BO
DY.
Ir
~
:~~l
:
AT
~:
U
G
_ '
''"
''lEO
.,"
~
~
I / PHI LLI
PS
~O]
-
-=
- -
I SC
RE
W
DR
I
VE
R -
t
~/
, P
LA
CE T
HE
BANANA PLUG ON A
sr
.1
ALL
l/ PHI LL
IP
S
SC
REW
DR
I VER ,
OR
SIM IL
AR
'1/8"
TOOl !. PUSH THE
I
~SU
IAT
OR
OV
ER
I HIE BANA
1\
A P
LU
G A
ND
\'
11RE
UN
TIL T
HE
-rr
11\5 UL
AT
OR SNAPS IN
PL
ACE.
(C
I
IN
S
ERT
THE
O
THER
E
ND
OF
TH
E
TE
ST LEAD
INTO
THE
ALLIG
AT
OR
CLI P.
SO
LD
ER
THE
LEA
D.
T
HEN
IN
STALL THE CLI P
IN
SU
LAT
OR
ON
THE
C
LI
P.
G
/.-d~
~
-
~
CRI MP A
ND
~
~
"
t
~/
~
TESTCLIP
__
INSULATOR
PICTORIAL
13
plug
with
a red
insulator
on one end and an
alligator
clip
and
rubber
insulator
on
the
other
end
of
the
test
lead
as
shown
in
Parts
Band
C
of
the Pictorial.
In a similar manner,
use
stranded
wire
and prepare the
black,
white,
and green test leads.
34
Y2
X 0
I
1"
2"
3"
4"
5"
6"
I , I , I , 1 1 I J
Table of contents
Other Heathkit Test Equipment manuals