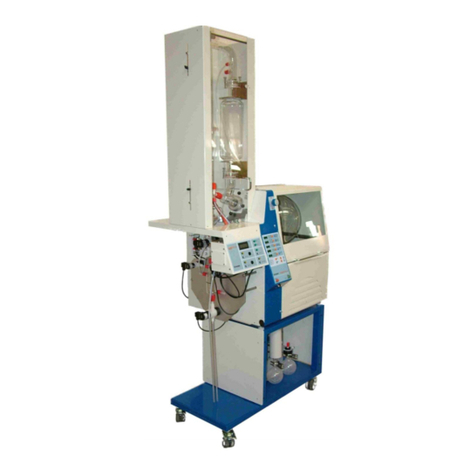
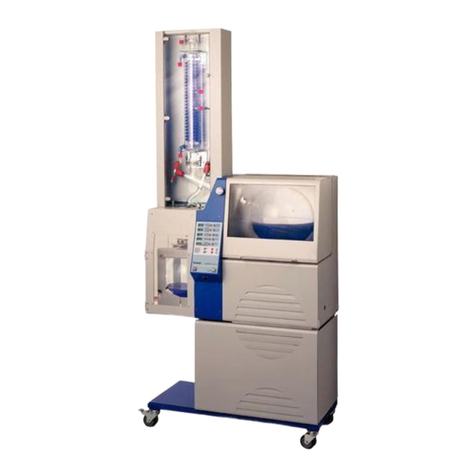
Heidolph Hei-VAP Industrial User manual

Leading Safety Standards Superior Ease of Use Reduced Cost of Ownership
Large-scale evaporator Hei-VAP Industrial
Operating manual must be read before initial start-up.
Please follow the safety instructions provided.
Please keep for future reference.
Großrotationsverdampfer Hei-VAP Industrial
Betriebsanleitung vor Erstinbetriebnahme unbedingt lesen.
Sicherheitshinweise beachten.
Für künftige Verwendung aufbewahren.
Operating Manual Page 2
Original-Betriebsanleitung Seite 80
Industrial
Evaporation

Contents
Inhaltsverzeichnis
About this Document 4
Version and variants ...........................................................................................4
About this manual ..............................................................................................4
Symbols and keywords........................................................................................5
Safety Instructions 6
General safety instructions...................................................................................6
EU Declaration of Conformity.........................................................................6
Intended use...............................................................................................6
Installation / electrical safety .......................................................................7
Qualications of employees...........................................................................7
Obligations of the operator ..................................................................................7
Installation site ...........................................................................................7
Modications to the device............................................................................8
Employee safety..........................................................................................8
Safety during use ...............................................................................................8
Disposal ............................................................................................................9
Device Description 10
Device overview ...............................................................................................10
Overall view..............................................................................................10
Control panel ............................................................................................11
Start-Up 12
Main switch / Emergency stop button ..................................................................12
Main switch...............................................................................................12
Emergency stop button ..............................................................................12
Control panel features.......................................................................................13
Menu navigation ........................................................................................13
Operation guide.........................................................................................13
Symbols used............................................................................................16
Pre-settings .....................................................................................................17
Menu “Setup”............................................................................................17
Operation 24
Process sequence .............................................................................................24
Parameter ................................................................................................24
Set Parameters .........................................................................................25
Vacuum control choices ..............................................................................26
Adjusting the rotation speed .......................................................................28
Adjusting the heating bath temperature........................................................29
Bath ll and heating bath lift .......................................................................30
Automatic water bath rell system ...............................................................31
Start process ...........................................................................................32
Start process with timer .............................................................................33
Favorites .........................................................................................................34
Edit Parameters.........................................................................................34
Edit Proles ..............................................................................................35
Store and use Favorites ..............................................................................38
Operating Manual Page

Contents
Interfaces........................................................................................................40
Fill/Change/Empty heating bath uid...................................................................41
Evaporating ask..............................................................................................43
Rotation lock.............................................................................................43
Attach - remove evaporating ask................................................................44
Adjust EASY LOCK contact pressure .............................................................49
Safety hood .....................................................................................................50
Safety hood ..............................................................................................50
Safety features ................................................................................................51
Overpressure safety shutdown.....................................................................51
Cleaning and Maintenance 52
Cleaning..........................................................................................................52
Maintenance ....................................................................................................53
Troubleshooting 54
Errors .............................................................................................................54
Assembly 58
Electrical connections........................................................................................58
Installation ......................................................................................................59
Vapor tube................................................................................................59
Condenser ................................................................................................61
Connection scheme glassware .....................................................................63
Inlet valve ................................................................................................66
Receiving ask ..........................................................................................66
Attaching the peripheral devices.........................................................................69
Disassembly and Storage 73
Dismantling, transportation and storage ..............................................................73
Dismantling ..............................................................................................73
Transportation and storage .........................................................................74
Accessories and Spare Parts 75
Scope of delivery..............................................................................................75
Accessories......................................................................................................75
Attachments 76
Technical data ..................................................................................................76
Service 77
Contact / Technical Service ................................................................................77
Warranty.........................................................................................................78
Conrmation of condition...................................................................................79

About this Document
4
About this Document
Copyright
This operating manual is protected by copyright and is exclusively intended for the
internal use of the purchaser.
Handing over this operating manual to third parties, reproducing it in any type or form
– in part or in full – and utilizing and/or communicating its contents is prohibited without
prior written approval from the manufacturer.
Any violations will result in an obligation to provide compensation for damages. Other
claims remain unaected.
Version and variants
Version
This manual describes the function, operation and maintenance of the large-scale rotary
evaporator Hei-VAP Industrial.
Version Alteration date
0.1.6 08/2019
Variants
The device is available in dierent variants. Certain features or functions are only
available in specic product variants. These variants are described in this operating
manual.
About this manual
This operating manual is an integral part of the device described here.
➜Carefully read through this operating manual and observe all of the
safety instructions and warnings notices.
➜Ensure that every user has carefully read the operating manual
before using the device for the rst time.
➜Store this operating manual so that it is accessible to all users at
all times.
➜Pass the operating manual on to any subsequent owner.
The current version of this operating manual can also be found at:
https://heidolph-instruments.com/en/service/downloads/operation-
manuals#large-scale rotary evaporators (Hei-VAP Industrial)
In addition, also observe the local regulations at the installation site.

5
About this Document
Symbols and keywords
Standardized symbols and signal words are used in this operating manual to warn against
any dangers and provide important instructions. These instructions must be strictly
observed to avoid accidents and damage.
The following terms and basic symbols are used:
Symbol Additional signal words / explanation
Warning
signs The yellow triangle indicates hazardous situations. It is used in
combination with the following signal words:
DANGER:
Indicates a hazardous situation which, if not avoided, will result in
serious injury or death.
WARNING:
Indicates a hazardous situation which, if not avoided, may result in
serious injury or death.
CAUTION:
Indicates a hazardous situation which, if not avoided, may result in
property damage and minor or moderate injury.
Prohibitory
signs Prohibited:
The red circle indicates a situation that should be avoided under all
circumstances and which, if not avoided, may result in serious injury
or death.
Mandatory
signs Must be observed:
The blue circle indicates important information. Please observe this
information to avoid any property damage.
Other symbols used:
Symbol Description
➜Handling instruction, action required
✓Result of action
▪
▪
▪
List of information
a.
b.
c.
List of variants

Safety Instructions
6
Safety Instructions
General safety instructions
EU Declaration of Conformity
This device complies with the following EC-Directives*:
▪2006/42/EC Machinery Directive
▪2014/30/EU Electromagnetic Compatibility Directive
*Also see the attachment “EU Declaration of Conformity”.
This device was tested according to the following Directives:
▪UL 61010-1 :2012/R:2016-04
CAN/CSA-C22.2 No. 61010-1:2012/U2:2016-04
▪UL 61010-2-010:2015
CAN/CSA-C22.2 NO. 61010-2-010:2015
The device has been manufactured according to state-of-the-art technology and in
compliance with recognized safety regulations. However, risks may still arise during
installation, operation and maintenance.
➜Please ensure that the operating manual is available at all times.
The device may only be used under the following conditions:
➜Only operate the device if it is in a technically perfect condition.
➜Only operate the device if you are properly aware of the risks and required safety
measures.
➜Only operate the device in accordance with the instructions given in this operating
manual.
➜If any information is ambiguous or missing, ask your superior or contact the
manufacturer.
➜Do not operate anything on the device without authorization.
➜Only use the device in accordance with its intended use.
Intended use
The device may only be operated by authorized personnel.
The device is suitable for the
following uses:
▪Distillation to separate substances
▪Concentration
▪Crystallization
▪Powder drying
The device may be operated
in research laboratories,
other laboratories and
production facilities in the
following sectors:
▪Chemistry
▪Pharmacy
▪Biology
▪Environmental analytics
▪Basic research
▪Similar research laboratories
Uninteded use/Reasonable foreseeable misuse
Any use which deviates from the device‘s intended use is considered to be improper. The
manufacturer is not liable for damage that occurs as a result. The risk is borne by the
operator alone.
When used in medical and food sectors the operator alone is responsible for compliance
with the applicable regulations and standards.

Safety Instructions
7
Installation / electrical safety
▪The device may only be connected up if the available power supply voltage
corresponds to the information stated on the rating plate for the device.
▪The power supply connection must be easily accessibly at all times.
▪An RCD circuit breaker (residual current circuit breaker) must be tted to the
electrical system in the building so that the device is disconnected from the power
circuit in the event of a fault.
▪Repairs may only be performed by electricians authorised by Heidolph Instruments.
▪Never operate the device with a damaged power cord.
▪Always turn the device OFF and disconnect the power cord before carrying out any
maintenance or repair work.
Qualications of employees
▪The device may only be operated by trained personnel.
▪The device may only be operated by persons who have been instructed and
supervised in its proper use by trained specialist personnel.
▪The device may only be operated by specialist personnel who are above the legal
minimum age.
▪Other persons may only work on the device under the constant supervision of
experienced and trained specialist personnel.
▪This operating manual must be read and understood by all persons working with the
device.
▪Personnel must receive safety training that ensures responsible and safe working
practices.
Obligations of the operator
Installation site
▪The device must be installed in a suitable location.
▪The device must be installed on a rm stable and temperature resistant surface.
▪Ensure that the device and all of its components are easily accessible at all times.
▪Maintain a sucient safety clearance to, in particular, any moving and/or hot
equipment components.
▪It is not permitted to place or store any objects such as accessories, tools or
chemicals within this clearance area during operation.
▪All screw connections must be securely tightened.
▪It is not permitted to operate the device near to highly ammable or explosive
substances.
▪Operate the device in conjunction with an extractor hood, if working with potential
harmful media (see DIN EN 14175 and DIN 12924).

Safety Instructions
8
▪The device is designed for indoor use only and under the following ambient conditions:
Ambient temperature 5 - 31 °C at 80 % relative humidity
32 - 40 °C decreasing linearly to a
maximum 50 % relative humidity
Installation altitude 0 - 2,000 m above sea level
Contamination level 2
Overvoltage category II
Permissible supply deviations ± 10 %
▪If the device is operated in corrosive atmospheres, the service life of the device will
decrease based on the concentration, duration and frequency of the exposure to the
corrosive atmosphere e.g. concentrated hydrochloric acid (HCI).
Modications to the device
▪It is not permitted to make any unauthorised modications or changes to the device.
▪Do not attach or install any parts that have not been approved by the manufacturer.
▪Unauthorized modications or changes will void the EC Declaration of Conformity for
the device and operation of the device will no longer be permitted.
▪The manufacturer is not liable for any damage, dangers or injuries that result
from unauthorized modications and changes or due to the non-observance of the
instructions in this manual.
Employee safety
➜Ensure that the device is only operated by qualied specialist personnel and trained
employees.
➜Observe the following instructions to avoid any personal injuries and property
damage:
- Laboratory regulations
- Accident prevention regulations
- Hazardous Substance Act
- Other generally accepted occupational health and safety regulations
- Local regulations
Safety during use
➜Wear the appropriate clothing when working on the device (protective clothing, safety
glasses and, if necessary, safety gloves).
➜Do not use the device in potentially explosive areas. The device is not protected
against explosion. There is no explosion or ATEX protection available.
➜Do not carry out work with exposed ames in the vicinity of the device (risk of
explosion).
➜Do not operate or assemble devices in the vicinity which are emission or radiation
sources (electromagnetic waves) for the frequency range (3*1011 Hz to 3*1015 Hz).
➜Do not operate or assemble appliances in the vicinity of the device which constitute
emission or radiation sources for ionizing radiation or in the ultrasonic range.
➜Do not operate the device where adiabatic compression or shock waves might occur
(shock wave combustion).

Safety Instructions
9
➜Do not use materials which pose a potential risk of uncontrolled energy release which
might result in pressure increase (exothermic reaction; spontaneous combustion of
dusts).
➜Do not work with hard, brittle materials (such as stones, soil samples, etc.) which
could result in the destruction of the evaporating ask.
➜Use only heating bath uids which guarantee suitable heat transfer.
➜Do not operate the device with excess pressure.
➜Limit the pressure dierence for glass components to a maximum of 2 bar.
➜Do not increase the maximum excess pressure of the cooling uid above 2 bar.
➜Wear safety gloves and safety glasses when working with coolants in very low
temperature ranges, such as with dry ice.
➜Do not increase the ow speed of 1 m/s while siphoning liquids in with combustible
materials (electrostatic charge; risk of ignition).
➜Eliminate the production of gases classied in explosion group IIC during distillation
by materials or due to chemical reactions, such as hydrogen.
➜Do not use distillation material where the distillation residue might be explosive.
➜Only connect clean ground joints.
➜Attach ground joints securely in order to connect them leak-tight.
➜Attach all tube connections securely to ensure safe operation.
➜Connect all cables and tubes without kinks and locate them outside the operating and
danger zone.
➜Avoid putting pressure on the display when you are not operating the device.
➜Do not spill liquids over the device or any parts of it.
➜Remove any accidentally spilled liquids immediatly.
➜Eliminate errors immediately.
➜Do not use abrasive material to clean the surface. Only wipe with damp cloth.
➜Always switch the device OFF after use.
Disposal
➜Check the device components for hazardous substances and
solvents.
➜Clean all components before disposal.
➜Dispose of the device in accordance with the relevant national
regulations.
➜Dispose of the packaging material in accordance with the
appropriate national regulations.
Caution:
Possible environmental damage!
The device contains a lithium button cell battery with the designa-
tion CR2032 as per IEC-2. Batteries must be disposed of separately
pursuant to the European Batteries Directive.
When disposing of the device, make sure that the waste
management facility takes part in the joint return system for
batteries or has specically established and practices an approved
return system according to the Battery Directive 2012/56/EU.

Device Description
10
Device Description
Device overview
Overall view
EASY LOCK clamping
system
Safety hood
Evaporation ask
Control panel
Emergency Stop
Button
Flask lock
Glassware enclosure
(with PMMA door
housing protect)
Receiving asks
Receiver cassettes
(with PMMA door
housing protect)
Drain valves
Base cart
(optional)

Device Description
11
Control panel
The control panel is touch sensitive.
Pre-program
and read out
actual process
settings
Change menu
Height adjustment
heating bath
Start / Stop
single Parameters
Manual vacuum
override knob
ON/OFF switch
Additional settings, depending on menu
Start / Stop
all Parameters
LAN and USB
interface
Save process
settings
Start and stop
process via timer

Start-Up
12
Start-Up
Main switch / Emergency stop button
Main switch
The main switch is located on the rear
side of the device.
With the main switch the device is entirely
switched on to the electric system and o.
➜Turn the knob clockwise 90° to position
“ON”.
✓The device is now connected.
➜Turn the knob counter-clockwise 90° to
horizontal position “OFF”.
✓The device is now disconnected. Position “ON” Position “OFF”
Emergency stop button
The Emergency stop button is located
above the operating panel.
➜Press the Emergency stop button.
✓The device is now entirely powered o.
✓The Emergency stop button is illumi-
nated in red.
✓For ve seconds there is an acoustic
warning.
➜Conrm the error message on the
operating panel.
➜Identify and resolve the problem.
Emergency stop button
Warning:
Risk of poisoning
Ventilating the system may result in chemical reactions.
Implement pre-caution measurements (e.g. protective gas, seal,
vent valve).
Prior to switching the device back on resolve initial problem, if
necessary consult a professional.
➜Switch the device OFF.
➜Wait approximately 10 to 20 seconds.
➜Turn the Emergency stop button slightly to the right or left.
✓The Emergency stop button springs forward and is released.
➜Switch the device ON.

Start-Up
13
Control panel features
Menu navigation
The menu is divided into 2 main menus
and 2 submenus:
Main menu:
Here you can set all Parameters for your
application.
You have two options to control vacuum:
▪Manually in the “Set pressure” mode
▪Automatically in the “Auto accurate”
mode
Submenu “Setup”
Here you can set basic functions such as
language, actual time and date.
Submenu “Favorites”
Here you can set basic functions such as
language, actual time and date.
Operation guide
Power device ON/OFF
➜Touch the ON/OFF soft key .
✓The device is switched on.
✓The software work requires a short
time to boot completely.
✓The main menu is displayed.
➜Touch the ON/OFF soft key .
✓You will be asked if you want to shut
down.
➜Touch the soft key “No”.
✓You will return to the main menu.
➜Touch the soft key “Yes”.
✓The device is now switched o.

Start-Up
14
After switching on the device for the rst time you will have the
option to select your glassware assembly and checklist on all
details required to operate the device. Then the main menu will be
displayed.
Both options can also be selected in the menu “Setup” (see chapter
“Start-Up”, section “Setup”). Here you can also deselect the
repeatedly pop up of both menus.
Change main menu
✓The device is switched on.
✓You are currently in the main menu
“Set Pressure”.
➜Touch the soft key “Auto Accurate”.
✓The soft key will be marked orange.
✓You will see the main menu with
Parameters for “Auto Accurate”.
Call up submenu
✓You are currently in the main menu
“Set Pressure”.
➜Touch the soft key .
✓The choice of 2 submenus is displayed.
➜Touch the soft key “Setup”.
✓The screen changes to the menu
“Setup”.
➜Touch the soft key .
✓This gets you back to the main menu.
Switch submenu
To some menus you will nd numerous submenus.
➜Select the menu “Setup”.
➜Touch soft key arrow which is
located on the right side of most
settings.
✓The submenu opens.
➜Touch the soft key arrow .
✓Submenu closes.
➜Touch the soft key conrm .
➜That brings you back to the main
menu.

Start-Up
15
Enter and change numbers
All Parameters are changed on a numeric pad. As soon as you touch any SET eld on the
panel the number pad will appear.
➜Touch the set Parameter you want to
change.
✓A number pad will appear.
➜Enter the required number via number
pad.
➜To change your settings touch the soft
key .
➜To escape without changing the set
Parameter touch the soft key “Cancel”.
➜To conrm your settings touch the soft
key “Ok”.
General Parameters
There are certain options you can choose from by either activating or deactivating them.
As soon as an option has been activated the color will change from grey to orange.
Option 1
➜Select your choice by touching the
appropriate option.
✓The selected option will change to
orange.
Option 2
➜To activate touch the soft key .
✓The symbol will change to .
➜To deactivate touch the soft key .
✓The symbol will change to .
All settings on the number pad and those which are activated and
deactivated apply without a separate step to conrm.

Start-Up
16
Symbols used
Symbol Name Function
On/O ON/OFF switch
Submenu Bring up submenu
Start, Stop Start / stop functions
Up / down Lift heating bath up / down
Timer Enter, activate start time
Deactivate Function deactivated
Activate Activate function / activated
Information Bring up information (Checklist)
End of menu Jump to end of menu list (Checklist)
Backward /
forward Go one step backward / forward
Correction Undo last entry
Alphabetic / Digit Switch between letters / numbers and
symbols
Shift Switch to capital letters
Blank Enter space
New ▪Add new Favorite
▪Add new line (Prole)
Remove Remove single item from list
Delete Delete complete cycle or Prole
Zoom on, o Zoom in / Zoom out
Store Save and store Favorite
Conrmation Store Favorite and apply

Start-Up
17
Pre-settings
Menu “Setup”
Prior to operating your device please ensure that all pre-settings have been made.
➜Switch to the menu “Setup”.
✓The menu “Setup” is now displayed.
In addition to various basic settings such
as language, date, time you are also able
to view information for example software
and rmware version.
➜Swipe the screen with your ngers
bottom-up.
✓Additional setting options are now
displayed.

Start-Up
18
1. Safety Settings
You can determine under which circumstances the device is automatically powered o:
by reaching the pre-programmed maximum pressure or in case of leakage.
Warning:
Risk of implosion and poisoning
Flasks which show even the slightest signs of damage may burst and
depending on the solvent poison the environment.
Increase vacuum pressure and/or leakage pressure only if necessary.
Do not increase pressure/under-pressure beyond the limit required by
your solvents.
Pre-settings on your device
Factory pre-settings
▪Overpressure: 1,200 mbar
▪Leakage pressure: 900 mbar (deactivated by factory)
Possible maximum numbers:
▪Overpressure: 900 mbar - 1.400 mbar
▪Leakage pressure: 1 mbar - 1,399 mbar
✓You are currently in the menu “Setup”.
➜Change to menu “Safety Settings”.
Max. overpressure
➜Touch the number eld “Overpressure”.
➜Enter a maximum pressure via number
pad.
✓If during operation this number shall
be reached the process will stop
automatically and a warning will be
displayed on your operation panel.
Max. leakage pressure
➜Enter a maximum pressure via number
pad.
➜Activate leakage pressure function.
✓The symbol changes to .
✓If during operation this leakage rate is
exceeded a warning will be displayed
on your operation panel.
2. and 4. Choose scale device for pressure and temperature
➜Touch the soft key for the scale you
wish to operate.
✓The selected scale is displayed in
orange.
✓The selected scale will be displayed on
the main menu.

Start-Up
19
3. Information on Change bath uid
To change heating bath uids ensure that hardware settings are carried out on the back
side of your device (see item “Change bath uid”).
In the menu “Setup” you can determine
which bath uid your device has been
currently set to.
➜Touch the soft key “How to change”.
✓Acknowledge the information
displayed.
Details on changing bath uid are documented under chapter
„Heating bath”.
5a. Lock and unlock screen
To avoid that Parameters or numbers are changed accidentally during operation the
screen will be locked automatically after a specic period of time.
▪Factory pre-setting: 3 minutes
▪Possible setting: between 1 to 5 minutes
The countdown for the timer only starts after the last activity.
The screen lock will be activated in any menu you have selected last.
➜Select submenu “Lock screen after”.
➜Enter via number pad the time after
which you want to lock the screen.
✓Once the time frame you have entered
is over the screen will lock and display
this symbol.
5b. Unlock screen
➜Touch the operating panel on any spot.
✓At the bottom of the operating panel a
window will open.
➜Touch the circle on the left side with one nger and slide over to the right side.
✓The screen is now unlocked.
Once the time frame you have entered is over the screen will lock again.

Start-Up
20
6. Adjust vacuum while screen is locked
As soon as the screen is locked adjustments of any type of settings are disabled.
In case you wish for the possibility to ammend vacuum during screen lock you can
activate the manual vacuum override.
➜Activate “Manual Vacuum Override”.
✓The symbol changes to .
✓While screen is locked vacuum is
adustable by “Manual Vacuum Override”
knob.
7. Set date and time
➜Change to the submenu “Date/Time”.
➜Select the required format.
➜Enter current date and actual time via
number pad.
✓The actual time is displayed in the
right corner on top of your main menu.
8. Switch light inside safety hood on/o
➜Activate light inside safety hood.
✓The symbol changes to .
✓Safety hood and evaporating ask will
be illuminated, as soon as device is
switched on.
9. Select glassware assembly
➜Change to the submenu “Glassware
Assembly”.
Other manuals for Hei-VAP Industrial
1
Table of contents
Languages:
Other Heidolph Industrial Equipment manuals
Popular Industrial Equipment manuals by other brands
Kärcher
Kärcher TRS-SSG-503537 E/G manual

ZeroClamp
ZeroClamp ZeroVise M Series Assembly and maintenance instruction
Alfa Network
Alfa Network LU-VE Optigo FMS25 instruction manual

Fervi
Fervi 0022 Operation and maintenance manual

SCHUNK
SCHUNK ROTA TP Series Assembly and operating manual
RTI
RTI RHS 980 Operation manual
