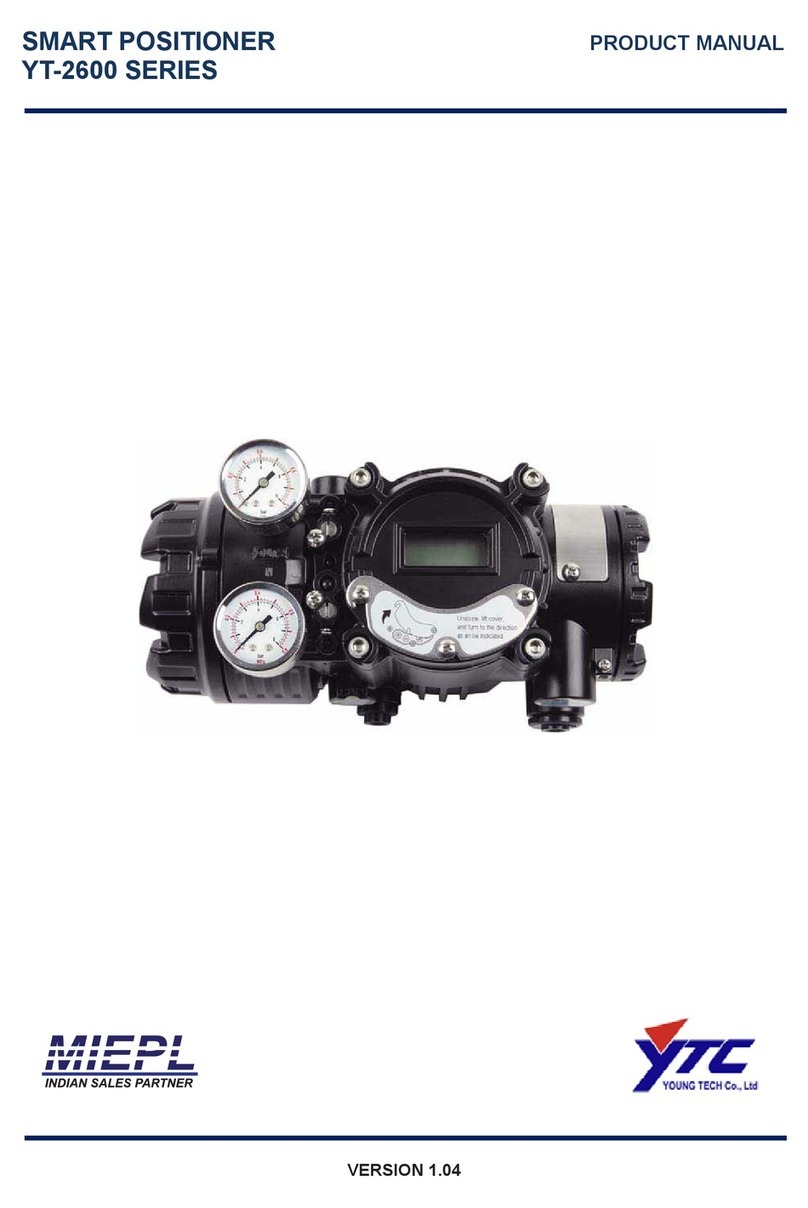
Heinzmann PANDAROS DC 6-06 User manual

Copyright 2008 by Heinzmann GmbH & Co. KG All rights reserved.
This publication may not be reproduced by any means whatsoever or passed on to any third parties.
Manual DG 08 001-e / 10-08
Heinzmann GmbH & Co. KG
Engine & Turbine Management
Am Haselbach 1
D-79677 Schönau/Germany
Phone: +49 7673 8208 - 0
Fax: +49 7673 8208 - 188
www.heinzmann.com
V.A.T. No.: DE145551926
HEINZMANN
Digital Positioners
PANDAROS
Positioner DC 6-06


The appropriate manuals must be thoroughly studied before
installation, initial start-up and maintenance.
All instructions pertaining to the system and safety must be followed in
full. Non-observance of the instructions may lead to injury to persons
and/or material damage.
HEINZMANN shall not be held liable for any damage caused through
non-observance of instructions.
Independent tests and inspections are of particular importance for all
applications in which a malfunction could result in injury to persons or
material damage.
All examples and data, as well as all other information in this manual
are there solely for the purpose of instruction and they may not be used
for special application without the operator running independent tests
and inspections beforehand.
HEINZMANN does not guarantee, neither expressly nor tacitly, that
the examples, data or other information in this manual is free from
error, complies with industrial standards or fulfils the requirements of
any special application.
To avoid any injury to persons and damage to systems, the following
monitoring and protective systems must be provided:
overspeed protection independent of the rpm controller
HEINZMANN shall not be held liable for any damage caused through
missing or insufficiently rated overspeed protection.
thermal overload protection
The following must also be provided for alternator systems:
Overcurrent protection
Protection against faulty synchronisation for excessively-large
frequency, voltage or phase difference
Directional contactor
The reasons for overspeeding may be:
Failure of positioning device, control unit or its auxiliary devices
Linkage sluggishness and jamming
The following must be observed before an installation:
Always disconnect the electrical mains supply before any
interventions to the system.
Only use cable screening and mains supply connections that
correspond with the European Union EMC Directive
Check the function of all installed protection and monitoring systems

Please observe the following for electronically controlled injection
(MVC):
For common rail systems each injector line must be equipped with a
separate mechanical flow-rate limiter.
For unit pump (PLD) and pump-injector unit (PDE) systems, the
fuel enable is first made possible by the solenoid valve’s control
plunger motion. This means that in the event of the control plunger
sticking, the fuel supply to the injection valve is stopped.
As soon as the positioning device receives power, it can actuate the
controller output shaft automatically at any given time. The range of the
controller shaft or control linkage must therefore be secured against
unauthorised access.
HEINZMANN expressly rejects any implied guarantee pertaining to
any marketability or suitability for a special purpose, including in the
event that HEINZMANN was notified of such a special purpose or the
manual contains a reference to such a special purpose.
HEINZMANN shall not be held liable for any indirect and direct
damage nor for any incidental and consequential damage that results
from application of any of the examples, data or miscellaneous
information as given in this manual.
HEINZMANN shall not provide any guarantee for the design and planning
of the overall technical system. This is a matter of the operator its planners
and its specialist engineers. They are also responsible for checking whether
the performances of our devices match the intended purpose. The operator is
also responsible for a correct initial start-up of the overall system.

Table of Contents
Table of Contents
Page
1 Safety instructions and the signal words and symbols used.............................................. 6
1.1 Safety measures under normal operation ........................................................................ 7
1.2 Safety measures for maintenance and servicing.............................................................. 7
2 General ................................................................................................................................... 8
2.1 General System Description ............................................................................................ 8
2.2 Firmware.......................................................................................................................... 8
2.2.1 HEINZMANN Basic Software................................................................................ 9
2.2.2 Custom firmware ..................................................................................................... 9
2.3 Other Information.......................................................................................................... 10
2.4 Conventions................................................................................................................... 11
2.5 Parameter Lists .............................................................................................................. 12
2.6 Levels ............................................................................................................................ 12
2.7 Block Diagram............................................................................................................... 13
3 Parameterization of the HEINZMANN control units ..................................................... 15
3.1 Parameterization options ............................................................................................... 15
3.2 Saving the data .............................................................................................................. 16
3.3 DcDesk 2000 ................................................................................................................. 16
3.4 Value range of parameters............................................................................................. 17
3.5 Activating functions ...................................................................................................... 18
3.6 Parameterization examples............................................................................................ 18
3.7 Resetting a control unit.................................................................................................. 18
4 Setpoint................................................................................................................................. 19
4.1 Design of the setpoint generator.................................................................................... 19
4.1.1 Analogue setpoint .................................................................................................. 19
4.1.2 PWM Setpoint........................................................................................................ 20
4.2 Determining the actuator setpoint ................................................................................. 20
5 System monitoring............................................................................................................... 22
5.1 Operation mode ............................................................................................................. 22
5.2 Stopped state.................................................................................................................. 22
5.2.1 Stop request............................................................................................................ 23
5.2.1.1 External stop request by a digital input.......................................................... 23
5.2.1.2 External stop request by an analogue input ................................................... 24
5.3 Setpoint monitoring ....................................................................................................... 25

Table of Contents
5.3.1 Monitoring the analogue setpoint .......................................................................... 25
5.3.2 Monitoring the PWM setpoint ............................................................................... 26
5.4 Monitoring the analogue stop signal ............................................................................. 26
5.5 Electronics monitoring .................................................................................................. 27
5.5.1 Voltage references ................................................................................................. 27
5.5.2 RAM memory test ................................................................................................. 27
5.5.3 Program memory test............................................................................................. 28
5.5.4 Stack Depth Test.................................................................................................... 28
5.5.5 Program flow test................................................................................................... 28
5.5.6 Operating voltage monitoring................................................................................ 28
6 Inputs and outputs .............................................................................................................. 30
6.1 Switch functions via digital inputs ................................................................................ 30
6.1.1 Assignment of digital inputs.................................................................................. 31
6.2 Setpoint selection and stop request via analogue inputs ............................................... 32
6.2.1 Adjusting the current/voltage inputs...................................................................... 32
6.2.2 Filtering the analogue inputs.................................................................................. 33
6.2.3 Error detection with the analogue inputs ............................................................... 33
6.3 Setpoint selection by PWM input.................................................................................. 34
6.3.1 Filtering the PWM inputs ...................................................................................... 35
6.3.2 Error detection with the PWM inputs.................................................................... 36
6.4 Actuator position output with analogue output ............................................................. 36
6.4.1 Value range of the analogue output ....................................................................... 36
6.5 Actuator position output with PWM output .................................................................. 37
6.5.1 Value range of the PWM output............................................................................ 37
6.6 Common alarm via alarm output ................................................................................... 37
6.7 Auto adjust with pushbutton.......................................................................................... 38
7 Technical data...................................................................................................................... 39
7.1 General .......................................................................................................................... 39
7.2 Inputs and Outputs......................................................................................................... 40
7.3 Terminal connection diagrams ...................................................................................... 41
7.3.1 Analogue setpoint, stop signal digital and/or analogue, actuator with disc rotor
motor ..................................................................................................................... 42
7.3.2 Analogue setpoint, stop signal digital and/or analogue, gearless actuator ............ 43
7.3.3 PWM setpoint, stop signal digital, actuator with disc rotor motor ........................ 44
7.3.4 PWM setpoint, stop signal digital, gearless actuator............................................. 45
7.3.5 PWM setpoint, stop signal analogue, actuator with disc rotor motor.................... 46
7.3.6 PWM setpoint, stop signal analogue, gearless actuator......................................... 47
8 Actuator and feedback........................................................................................................ 48
8.1 Calibrating the actuator ................................................................................................. 49
8.1.1 Manual calibration ................................................................................................. 49

Table of Contents
8.1.2 Automatic calibration ............................................................................................ 50
8.1.2.1 Saving the calibration data............................................................................. 51
8.1.3 Error detection from the feedback ......................................................................... 51
8.2 Limiting the actuator stroke........................................................................................... 52
8.3 Servo loop...................................................................................................................... 52
8.3.1 Servo control loop.................................................................................................. 52
8.3.2 Actuator current ..................................................................................................... 53
8.4 Test mode ...................................................................................................................... 54
9 Data Management ............................................................................................................... 56
9.1 Serial Number of the Control Unit ................................................................................ 56
9.2 Identification of the Control Unit .................................................................................. 56
9.3 Identification of the PC Program and Hand Programmer ............................................. 57
10 Error handling................................................................................................................... 58
10.1 General ........................................................................................................................ 58
10.2 Error types ................................................................................................................... 58
10.3 Error display ................................................................................................................ 59
10.4 Error memory .............................................................................................................. 59
10.4.1 Operating data memory and enhanced error memory ......................................... 60
10.5 Bootloader ................................................................................................................... 60
10.5.1 Bootloader Start Tests.......................................................................................... 61
10.5.2 Bootloader Communication................................................................................. 62
10.6 Configuration error...................................................................................................... 62
10.7 Emergency shutdown errors ........................................................................................ 63
10.8 Error parameter list...................................................................................................... 64
11 Parameter Description...................................................................................................... 71
11.1 General ........................................................................................................................ 71
11.2 List 1: Parameter.......................................................................................................... 72
11.3 List 2: Measured values............................................................................................... 78
11.4 List 3: Functions .......................................................................................................... 85
11.5 List 4: Curves and Control Maps................................................................................. 88
12 Figures ................................................................................................................................ 89
13 Tables.................................................................................................................................. 90
14 Index ................................................................................................................................... 91
15 Download of Manuals ....................................................................................................... 94

1 Safety instructions and related symbols
6Positioner DC 6-06
1Safety instructions and the signal words and symbols used
This publication offers practical safety instructions to indicate the unavoidable residual risks
involved when operating the machine. These residual risks involve hazards to
Personnel
Product and machine
The environment
The primary aim of the safety instructions is to prevent personal injury!
The signal words used in this publication are specifically designed to direct your attention to
possible damage extent!
DANGER indicates a hazardous situation the consequence of which could
be fatal or severe injuries if it is not prevented.
WARNING indicates a hazardous situation which could lead to fatal
injury or severe injuries if it is not prevented.
CAUTION indicates a hazardous situation which could lead to minor
injuries if it is not prevented.
NOTICE indicates possible material damage.
Safety instructions are not only denoted by a signal word but also by
hazard warning triangles. Red hazard warning triangles indicate
immediate danger to life. Yellow hazard warning triangles indicate a
possible risk to life and limb. Hazard warning triangles can contain
different symbols to illustrate the danger. However, the symbol used is no
substitute for the actual text of the safety instructions. The text must
therefore always be read in full!
This symbol does not refer to any safety instructions but offers important
notes for better understanding the functions that are being discussed.
They should at any rate be observed and practiced. The respective text is
printed in italics.
Note

1 Safety instructions and related symbols
Positioner DC 6-06 7
1.1 Safety measures under normal operation
The system may be operated by qualified and authorised personnel only,
who are both familiar with the operating instructions and who can carry
them out!
Before switching on the system, check and ensure that:
only authorised personnel are in the machine’s operating range
no-one can be injured by the machine starting up
Before each start of the motor:
Always check the system for visible damage and ensure it is not put into
operation unless it is in perfect condition! Always notify the responsible
department immediately about any defects
Check and ensure that all safety devices are in proper working condition
Remove all material and objectives surplus to requirements from the operating
range of the system or motor
1.2 Safety measures for maintenance and servicing
Before starting maintenance or repair work:
Block off access to the machine’s working area for unauthorised persons!
Put up an information board that indicates that such work is underway
Switch off main switch for mains supply and secure with a padlock! The key
to the padlock must be held by the person carrying out the maintenance or
repair work
Ensure that all parts that are capable of being touched have cooled down to
ambient temperature and have been isolated from the mains
Re-fasten loose connections
Replace any damaged lines or cables immediately
Keep the switch cabinet closed at all times! Access is solely for authorised
persons with key/tools
Never use a water spray or high-pressure cleaners on switch cabinets and
other electrical equipment enclosures for cleaning purposes! Risk of short
circuit and corrosion to positioning device

2 General
8Positioner DC 6-06
2General
2.1 General System Description
The HEINZMANN positioner is used to trigger an actuator, with the setpoint being
externally selected by either an analogue or a PWM input.
The heart of the control unit is a very rapid and highly powerful microprocessor (CPU).
The actual control unit programme – the so-called firmware on which the microprocessor
operates – is permanently stored in a Flash ROM. The application-dependent configuration
is stored in an E2PROM.
The actuator is triggered by means of a PWM signal. Both 2-quadrant (electrically single
acting) and 4-quadrant (electrically double acting) actuators can be triggered.
The operating states of the positioner are supplied as analogue and digital output signals.
The positioner communicates with the DcDesk 2000 parameterization and visualization
tool or with a hand programmer across a serial interface.
2.2 Firmware
The control unit software is designed for universal use while providing a high
functionality. Consequently the firmware contains more functions than are required for a
specific application. The customer can configure the input/output assignment of the control
unit and can also activate and parameterize functions.
Each control unit contains a bootloader (
10.5 Bootloader) with which the actual
firmware is loaded to the unit. HEINZMANN normally ships these units with the so-called
HEINZMANN basic software which contains the functionality that is available as
standard.
Customized firmware variants can be created from this basic software on request.
The software version number xx.y.zz or xxxx.yy.zz in the parameter 3842 SoftwareVersion
consists of the following parts:
Customer number xx or xxxx
Variant y or yy
Change index zz.

2 General
Positioner DC 6-06 9
2.2.1 HEINZMANN Basic Software
The HEINZMANN basic software has the customer number x = 0 in each unit.
It is supplied in various different basic variants y = 0..99.
The change index z = 0..99 is a running index and is incremented by variant with every
new software release. Each higher index fully includes the lower index and
consequently supersedes it. At any given time there is only one valid version of a basic
software variant, namely the one with the highest current change index.
The following variants of the HEINZMANN basic software are currently supplied for
PANDAROS positioners.
Variant Firmware Meaning
DC 6-07 00.0.zz Peripheral module with HZM CAN protocol
DC 6-06 00.1.zz
Positioner with setpoint selection
via analogue or PWM input
DC 6-12 00.2.zz
Elektra gas measuring unit with air/fuel ratio
control
Peripheral module with HZM CAN protocol
DC 6-13 00.3.zz
Speed and power-dependent
Gas positioner with misfire detection
DC 6-15 00.4.zz Elektra gas measuring unit withgas flow control
DC 6-16 00.5.zz
Gas positioner with accelerator pedal manipulation
(idle/final speed governor in the diesel control unit)
DC 6-17 00.6.zz Elektra gas measuring unit with lambda control
DC 6-18 00.7.zz
Gas positioner with diesel injection time or diesel
position control
(variable speed governor in the diesel control unit)
Table 1 Basic firmware variants
This brochure describes the DC 6-06 positioner with setpoint selection by analogue or
PWM input
2.2.2 Custom firmware
Custom firmware always has an unique customer number x > 0. Once a customer
number has been assigned to a customer it remains dedicated to him and is used for
each custom software he orders, irrespective of the control unit that is used.
Different software variants y = 0..99 are created at the customer's request, e.g. for
different systems or different applications with one and the same control unit.

2 General
10 Positioner DC 6-06
The change index z = 0..99 is a running index and is incremented per variant with every
new software release. Each higher index fully includes the lower index and
consequently supersedes it. At any given time there is only one valid version of a
customer software variant, namely the one with the highest current change index.
HEINZMANN communication modules such as the PC program
3.3 DcDesk 2000 or
a hand programmer allow the customer to access the general HEINZMANN basic
software 00.y.zz and his own custom software. This means that although many
customers can access the so-called 'zero' software, only one customer (and his
authorised representatives) can access his own custom software. If a customer wishes to
protect an application against access by other HEINZMANN customers therefore, he
must ask HEINZMANN to create custom firmware for him.
2.3 Other Information
This brochure mainly describes the functions of the individual setting parameters. Trouble-
shooting is described in detail.
The general operation of the PANDAROS control units, the technical specifications and
connections for the control electronics, sensors, setpoint generators and actuators are
comprehensively described in the following publications:
PANDAROS
Title Order Number
The PANDAROS VI digital basic system DG 03 006-d
Table 2 PANDAROS Basic Systems
The sensors available from HEINZMANN are described in the following publication.
Title Order Number
Product Overview Sensors E 99 001-d
Table 3 Product Overview Sensors

2 General
Positioner DC 6-06 11
The method of operation of the DcDesk 2000 communication program as either a local or
remote communication variant will be found in the following publications or in the
programs' online help.
Title Order Number
Operating instructions communication program DcDesk 2000 DG 00 003-d
Basic information remote communication program
DcDesk 2000/Saturn
DG 05 008-d
Basic information remote communication program SATURN DG 05 006-d
Table 4 Communication programs
2.4 Conventions
The following typographical conventions are used in this brochure:
1911 ServoGain Parameter names are always shown in italics. No
distinction is made between the four
2.5 Parameter
Lists.
1911 ServoGain An arrow with a parameter means that the parameter is
explained in detail elsewhere. A brief description of the
parameter can be found in Chapter
11 Parameter
Description which also gives page references to the
detailed description of the parameter.
<1911> In drawings, numbers in angle brackets are used when the
point being described corresponds to a parameter number.
An arrow followed by text in italics refers to a chapter in
which a function is described in detail.

2 General
12 Positioner DC 6-06
2.5 Parameter Lists
A certain number of parameters must be set for each function of the firmware. These
parameters are divided up into four lists:
1. Parameters Parameters for configuring and setting
(Parameter numbers 1..1999)
2. Measured values Parameters for displaying the current states
(Parameter numbers 2000..3999)
3. Functions Parameters for activating and switching between functions
(Parameter numbers 4000..5999)
4. Curves Parameters for parameterizing curves and control maps
(Parameter numbers 6000..9999)
Each parameter has a number and a name. The parameter number indicates the list to
which the parameter belongs. Within the various lists, the parameters are arranged in
groups to make them easy to locate.
This brochure explains all of the functions that can be executed by the PANDAROS
DC 6-06 positioner. Some of these functions may be absent from special applications if
they are not relevant for them. In this case the parameter that belongs to an absent function
will also be omitted.
Custom applications can contain new or enhanced functions. These are described in
separate brochures.
2.6 Levels
Because the control unit determines a system's operating characteristics, parameterization
should be left exclusively to the system manufacturer. However to ensure that the benefits
of the digital device can be enjoyed right down to the end customer, the parameters of the
HEINZMANN control unit are divided into seven levels.
Level 1: Level for the end customer
On this level, the most important operating values (e.g. setpoints and actual values for
filling) and errors can be displayed. The configuration data cannot be changed.
Level 2 and 3: Level for the device manufacturer
The device manufacturer can activate the actuator test mode.
Level 4: Level for the system manufacturer's service department
All the parameters for adjusting the system's operating characteristics are available on
this level.

2 General
Positioner DC 6-06 13
Level 5 and 6: Level for the system manufacturer
Intervention in the control unit functions is possible on this level.
Level 7: Level for development
This level is reserved for use by HEINZMANN's development department.
As this list shows, higher levels automatically incorporate all lower levels. The particular
level of a parameter is listed in Chapter
11 Parameter Description. The maximum
possible level, i.e. the choice / number of parameters which can be accessed, is determined
by the diagnostic tester that is used, and cannot be changed. It is possible however to move
down from the currently valid level by means of a menu option in the PC program or by
using the parameter
1800 Level and so to reduce the number of currently visible
parameters and functions.
2.7 Block Diagram
The block diagram shows a simplified schematic of the control configuration of
HEINZMANN positioners. It shows the basic functions and the signal paths of major
functions.

2 General
14 Positioner DC 6-06
Fig. 1 Block Diagram
Actual-value
calculation
Actual-value
out
p
ut
Test mode
current
selection
Current control
and limitin
g
Output stage
Actuator
Position feedback
A
ctuator
reference
v
a
l
ues
O
utput
reference
v
a
l
ues
Actuator
limits
Control value
limiting
Target/actual
value
comparison
Test mode
setpoint
selection
Actuator
position setpoint
Linearisation
curve
Input
reference
values
Filling
selection
Voltage input
Current input
PWM input
PWM output
Stop request
Current output

4 Setpoint
Positioner DC 6-06 15
3Parameterization of the HEINZMANN control units
The following chapters describe the functions of the HEINZMANN control units and how
they are set. Some functions only act together with others, or are influenced by other
functions. When functions like these are parameterized and optimized, it is often advisable to
deactivate other functions so that only the effect of the required function is seen. The setting
of these functions is described in the individual chapters.
3.1 Parameterization options
There are a number ways in which HEINZMANN control units can be parameterized. For
experimental work and first commissioning HEINZMANN recommends the use of
3.3
DcDesk 2000 as a diagnostic and parameterization tool. DcDesk 2000 can also be used for
service purposes, although the hand programmer units PG 02 and HP 03 are also available.
The DcDesk 2000/Saturn remote communication option also provides considerable
assistance for servicing.
The following list gives an overview of all the parameterization options that are available.
Parameterization by HEINZMANN
Control unit operation is tested with a test routine during final inspection at the factory.
Parameterization with the hand programmer
Complete parameterization can be carried out with the hand programmer PG 02 or
HP 03 depending on the level. This handy device is suitable for use mainly by service
personnel.
Parameterization with DcDesk 2000 or DcDesk 2000/Saturn
Depending on the level, a number of parameters can be continuously displayed and
edited with a DcDesk 2000 PC program. The PC program also allows the graphic
display and simple setting of curves. Control unit data can be stored on the PC or
uploaded from the PC back to the control unit. Another advantage of the PC program is
the high resolution visualisation of measured values against time or against one
another.
Transferring records
Once the parameterization for an application has been finalised, the data record can be
stored in the hand programmer or on the PC. If there are other applications of the same
type, these data records can be transferred to the new control units.
End-of-line parameterization
This option is used for test bench runs by the system manufacturer. The control unit is
adapted to the requirements specified in the order. Both the control unit firmware and a
delivery data record can be programmed during the end-of-line run with a command
line call from the DcDesk 2000; operator action is not required.

4 Setpoint
16 Positioner DC 6-06
3.2 Saving the data
Basically the communication programs/devices that have been referred to only change the
parameters in the volatile memory of the control unit. Although the control unit will
immediately operate with the new settings, any values changed in this way will be lost
when the voltage supply is turned off. A storage command must be used to permanently
save the parameter settings in the control unit. DcDesk 2000 uses the function key F6 for
this, while the hand programmers work with the “Save Parameter” key or menu option. It
is this operation that is meant whenever there is a reference to the need to save parameters
in the following descriptions.
3.3 DcDesk 2000
The HEINZMANN DcDesk 2000 PC program is used to set up and distribute operating
data in all digital HEINZMANN systems, in particular the systems described here.
The PC and the control unit are connected by a serial interface. A remote communication
variant allows “extended” access over the Internet, Intranet or by direct modem
connection.
As a Windows®program it offers all of the numerical and graphic features that are needed
for experimental work, first commissioning and servicing, and facilitates the associated
documentation work.
DcDesk 2000 also allows the user to print off screen displays and data recordings. The data
are stored in a standard text format for the purposes of further processing, importing into
reports etc.
The data record of a connected control unit can be edited and the response to parameter
changes can be observed at the same time. A parameter set can also be edited and recorded
data can be evaluated without a control unit. A parameter set that is created in this way can
be transferred to the control unit later on.
All settings can be made directly by accessing parameter numbers. However there are also
additional windows which can significantly simplify special functions, especially
configuring the system and parameterizing curves.
Current measured values are displayed numerically and/or graphically. There is a separate
window in which up to ten freely selectable measured values can be displayed
simultaneously as a function of time. There is another window in which nine measured
values can be displayed as a function of a tenth. Data recordings can also be logged for
analysis and printing at a later time.
All of the curves that are available in the control unit can be shown in separate windows
two-dimensionally. This can provide an immediate impression of the curve profile. The
current point where the system is on the curve is displayed online. A knowledge of the
relationship between the parameter number and the point on the curve is not necessary for

4 Setpoint
Positioner DC 6-06 17
setting purposes, as there is a special input section. Here all the particular aspects of curve
parameterization are taken into consideration, so input errors cannot occur.
DcDesk 2000 is being continuously developed and enhanced with additional functions.
HEINZMANN strongly recommends the use of DcDesk 2000 for experimental work and
first commissioning. The program is also of major benefit to service engineers conducting
diagnosis and trouble-shooting.
3.4 Value range of parameters
Each parameter is assigned a particular value range. The large number of parameters and
functions means that there is also a large number of value ranges. The value range for each
parameter is listed in Chapter
11 Parameter Description. The value range of the
parameters is also displayed by the PC or hand programmer (
3.1 Parameterization
options).
Some parameters have a value range that can have only two states: 0 or 1. These
parameters are used to activate or toggle individual functions or to display the status of
errors, external switches etc. Parameters with this value range can only occur in List 2 and
List 3 (
11.3 List 2: Measured values and
11.4 List 3: Functions).
State “1” means that the function is active or that the error is present, whereas with state
“0” the function is inactive or the error is not present.
With toggles or parameters that choose between two functions, the parameter name always
contains an “Or” (example: 4330 FuelSetpPWMOrAnalog). The function before the “Or”
is active when the parameter value corresponds to the maximum, the function after the
“Or” when the parameter value corresponds to the minimum.

4 Setpoint
18 Positioner DC 6-06
3.5 Activating functions
A function can be activated in one of two ways:
Parameters
Parameters on List 3 (
11.4 List 3: Functions) activate functions which the user
selects and they are then always active.
Switch functions
External switches (
6.1 Switch functions via digital inputs) can tell the control unit
about desired operating states which change frequently during continuous operation,
such as a stop request, or which are to be activated by external switches (e.g. resetting
errors). The state of the switch functions can be seen from the parameters starting from
number 2810.
3.6 Parameterization examples
A parameterization example exists for most functions. This example contains all the
parameters that are needed for the described function. However the settings that are given
may vary depending on the application and should only be taken as examples. Sensible
settings which are appropriate for the specific application should therefore be used when
setting a function.
3.7 Resetting a control unit
A reset involves resetting and restarting the control unit. This can be achieved by briefly
turning off the power supply or by using a special command from DcDesk 2000 or the
hand programmer HP 03.
A reset loses all the data which were not stored in the control unit's read-only
memory. It is absolutely essential therefore to save the data to the control unit's
read-only memory before a reset if you wish to retain the data.
Certain parameters or functions of control units only become active after a reset. These are
mainly functions which can put the control unit in a different operating state, or parameters
which must not be changed during continuous operation for safety reasons.
Positioning device shaft may start up unexpectedly!
Control unit is briefly non-operational during a reset.
Risk of injury through moving elements
A reset may only be carried out when the application is stopped!
Note
Table of contents
Popular Valve Positioner manuals by other brands
Spirax Sarco
Spirax Sarco SP7-20 Installation and maintenance instructions
API
API API 3200 G Series instructions
VAC
VAC TZIDC Configuration and parameterization instruction
Baker Hughes
Baker Hughes Masoneilan 4700P instruction manual
Festo
Festo DG..-...-GA Series operating instructions
Newport
Newport ZVR Series user manual
