Hella ONYX.CONNECTOR User manual

Installation Instructions and Instructions for Use
These instructions must be read
prior to installation
and use!
Adapter plug ONYX.CONNECTOR
Q
Installation instructions
Q
Operating guidelines
Installation Instructions and Instructions for Use
Table of Contents
Preliminary remarks HELLA Adapter plug ONYX.CONNECTOR .........................................1
General notes ........................................................................................................................2
Safety instructions..................................................................................................................3
Designated use ......................................................................................................................4
Scope of delivery ...................................................................................................................5
Device description..................................................................................................................5
Technical data........................................................................................................................6
Installation..............................................................................................................................6
Connection diagram...............................................................................................................7
Configuration........................................................................................................................10
Operating guidelines ............................................................................................................10
Settings ................................................................................................................................11
Ideal use of the radio signal .................................................................................................13
Fault removal .......................................................................................................................13
Disposal ...............................................................................................................................15
Installation Instructions and Instructions for Use
Subject to technical modifications – Date of Issue May/2020 1
Preliminary remarks HELLA
Adapter plug ONYX.CONNECTOR
With this HELLA product you have opted for a high-quality product with a most up-to-date
technology that can nevertheless be easily installed and operated. In these instructions we
describe the basic installation, commissioning and use.
Ü
These instructions are addressed to trained electricians.
The following symbols will assist you with the installation or use and require a safety-
conscious conduct:
Attention!
This symbol indicates instructions that, if disregarded, can put the user
in danger.
Attention!
This symbol indicates instructions that, if disregarded, can potentially
result in damage to the product.
This symbol indicates instructions for use or helpful information.
This symbol requires you to act.
Attention!
This symbol indicates a risk of injury or danger to life due to an electric
shock.
This symbol indicates parts of the product, for which you will find im-
portant information in these installation instructions.
Installation Instructions and Instructions for Use
2 Subject to technical modifications – Date of Issue May/2020
General notes
Ü
Questions
In case of questions concerning the installation or the use of your product, please consult
your authorized specialist shop.
Ü
Warranty
Warranty claims are subject to statutory limitation periods. Wear parts are excluded from
the warranty; the same applies for changes in colour and changes in characteristics
caused by UV radiation.
Ü
Liability
In case of non-observance of the directions and information given in these instructions and
in case of improper operation or unintended use, the manufacturer shall not accept any
warranty claims concerning any damage to the product. In these cases the liability for
consequential damage to any parts or persons is ruled out as well.
Ü
Legal notes
The graphs and texts of these instructions were carefully prepared. We cannot be held
liable for any errors and their potential consequences! Subject to technical modifications to
the product and to these instructions! These instructions include copyrighted information.
All rights reserved! The listed product or brand names are trademarks of the respective
owners.
Ü
EC declaration of conformity
The HELLA Sonnen- und Wetterschutztechnik GmbH hereby declares that this product
complies with the basic requirements and the other applicable regulations of the EC direc-
tives. The complete declaration of conformity can be found in the download area of our
website https://www.hella.info.
Installation Instructions and Instructions for Use
Subject to technical modifications – Date of Issue May/2020 3
Safety instructions
These installation instructions refer to prefabricated elements, that (1) for
100% are made from parts, which are defined by us, and (2) which are made
in manufacturing processes, which are defined by us too; in all other cases
we do not provide any guarantee!
The safety instructions as well as the appropriate instructions must be read
carefully before installation and use. In case of non-observance of the direc-
tions and information given in these instructions and in case of improper
installation and operation or unintended use, the manufacturer shall not
accept any warranty claims concerning any damage to the product. In these
cases the liability for consequential damage to any parts or persons is ruled
out as well.
- Follow the described installation steps and pay attention to recommenda-
tions and notes.
- Keep these instructions in a safe place.
- All installation and removal works, as well as maintenance and repair
works are only allowed to be carried out by authorised and qualified spe-
cialist staff.
- Observe the regulations for prevention of accidents of the employer's
liability insurance association!
- Before operation check the unit for visible damage. If the unit is damaged,
it should not be used; please consult authorized specialist staff immedi-
ately.
- Only use unmodified original parts from HELLA.
- In case of unauthorised opening of the device, improper use, incorrect
installation or incorrect operation, there is a risk of damage to persons or
property.
- Never let children play with the unit.
In the outdoor area the ONYX.CONNECTOR must be protected against the
weather at its place of installation.
Installation Instructions and Instructions for Use
4 Subject to technical modifications – Date of Issue May/2020
Safety instructions
Attention! Risk of injury or danger to life due to an electric shock!
- Set-up, examination, commissioning and error correction of the unit must
only be performed by authorised or trained expert staff (as per VDE
0100).
- Switch off the current to the connecting lines when working at the unit.
There is danger to life! Take safety precautions against unintentional
switching on!
- Check the electrical wires regularly for damage. Do not use the unit if any
damage is found.
Observance of regulations and rules
The building owner is responsible for the observance of statutory rules and
country-specific provisions on site.
Designated use
The radio receiver ONYX.CONNECTOR may only be used for the control of outdoor blinds
/ exterior Venetian blinds, roller shutters, awnings and facade blinds that are provided with
drives that are intended for this use. With ONYX.CONNECTOR, the lighting may be used
up to the performance data given. Any use other or beyond that is not considered intended
use. The connection of external devices must be carried out in consultation with the spe-
cialist staff.
- It is not allowed to use radio system in areas with an increased risk of
interference (e.g. hospitals, airports).
- The remote control is only admissible for devices and systems, where a
malfunction in the transmitter or receiver does not pose a risk to persons,
animals or objects, or if this safety risk is covered by other safety installa-
tions.
- Follow the wiring diagram precisely!
- We cannot accept responsibility for damage, that can result from improper
installation.
Installation Instructions and Instructions for Use
Subject to technical modifications – Date of Issue May/2020 5
Scope of delivery
The following components are included in the scope of delivery:
- Adapter plug ONYX.CONNECTOR (quantity as per order)
- Installation instructions adapter plug ONYX.CONNECTOR
Device description
Adapter plug ONYX.CONNECTOR
Art. no. 50680302
220-240 V AC / 50 Hz
The ONYX.CONNECTOR is a control device that is plugged in-between the motor / load
and the power supply. It is suitable for the control of 230 V Venetian blind, roller shutter
and awning motors, as well as for the switching on/off of 230 V lights.
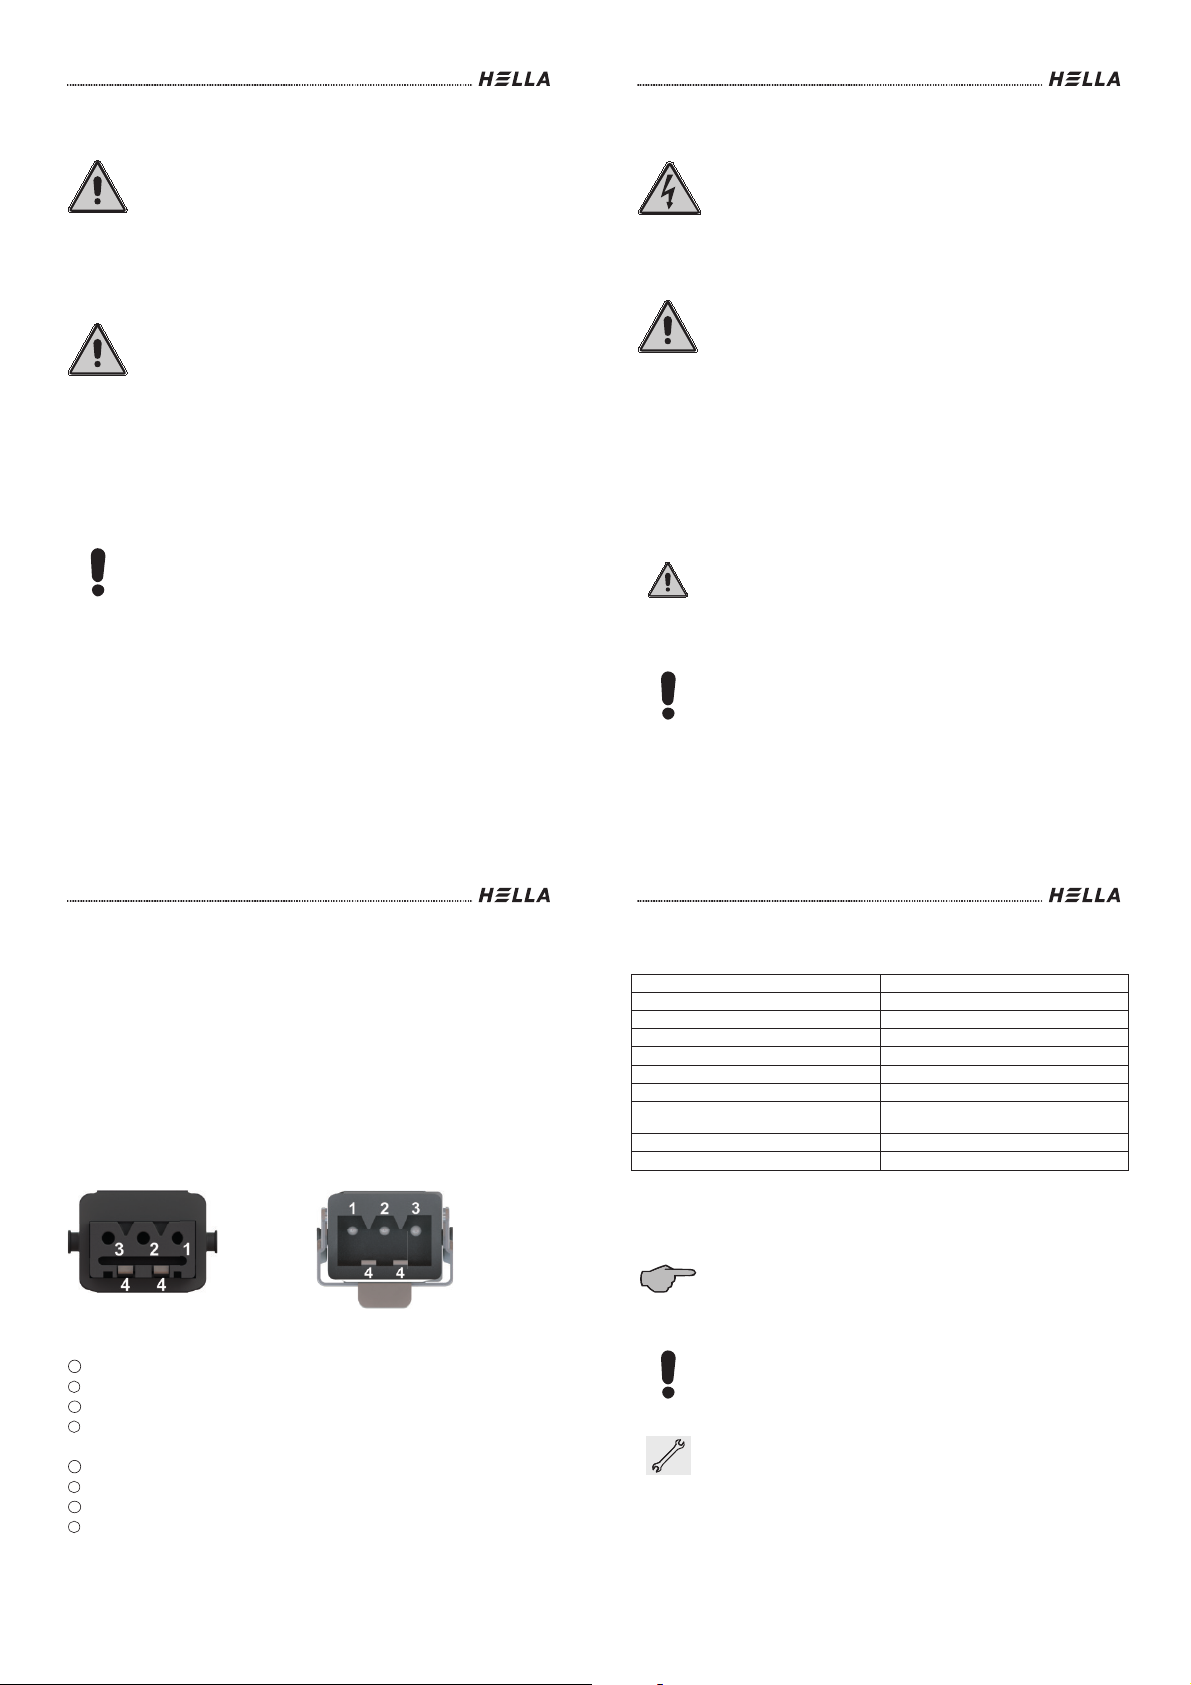
Hirschmann cable socket STAK 3 Hirschmann connector STAS 3
Fig. 1: Connections:
Legend
Hirschmann cable socket STAK 3 for connection to the motor
1
Neutral conductor N
2
Phase UP
3
Phase DOWN
4
Protective conductor PE
Hirschmann connector STAS 3 for mains connection
1
Neutral conductor N
2
Phase L
3
Connection 3 not assigned
4
Protective conductor PE
Installation Instructions and Instructions for Use
6 Subject to technical modifications – Date of Issue May/2020
Technical data
Input 220-240 V AC / 50 Hz
Output 450 VA
Nominal capacity 0.2 W
IP rating IP54
Admissible ambient temperature -25 °C to +55 °C
Radio frequency 868.3 MHz
Transmission power 12.6 mW
Installation type Is plugged in-between the motor and the
power supply
Dimensions LxWxH 132 (+100 mm lengthening) x29x24 mm
Weight 102 g
Installation
Prior to starting the installation, check the proper function of the transmitter
and the receiver at the desired installation position.
Extended instructions for the electrical installation can be found in the down-
load area of our website http://www.hella.info.
The place of installation must be selected in a way that the ON-
YX.CONNECTOR is always protected against wind and weather. ON-
YX.CONNECTOR may not be mounted to places, where rain water may be
accumulated.
1. ONYX.CONNECTOR is mounted in the box system of your sun protec-
tion unit. Usually the control device is fixed to the top rail.
2. Connection to the power supply as per Fig. 2.

Installation Instructions and Instructions for Use
Subject to technical modifications – Date of Issue May/2020 7
Connection diagram
ONYX.CONNECTOR
2 2
3 3
1 1
4 4
Hirschmann
STAS3
PE
N
Hirschmann
STAK3
M
~
1,5mm
ONYX.CONNECTOR
2 2
3 3
1 1
4 4
Hirschmann
STAS3
PE
N
Hirschmann
STAK3
N
L
PE
1,5mm
1,5mm
1
2
2
3
3
4
5
4 4
1 1
3 3
2 2
PE
N
L
Hirschmann
STAK3
Hirschmann
STAS3
3
N
L
PE
1,5mm
1
4 4
1 1
3 3
2 2
PE
N
L
Hirschmann
STAK3
Hirschmann
STAS3
3
Fig. 2: Wiring diagram for Venetian blind, roller shutter and awning motor, lighting
Legend
1
Junction box
4
Motor
2
Adapter plug ONYX.CONNECTOR
5
Lighting
3
Hirschmann connector-in connection
Installation Instructions and Instructions for Use
8 Subject to technical modifications – Date of Issue May/2020
Connection diagram
Attention!
The motor cable must be directly connected to the control device ON-
YX.CONNECTOR. Clamping points/junctions in the motor cable are unac-
ceptable.
Attention!
When actuating the 230 V lighting, the maximum output power of 450 VA
may not be exceeded. This must especially be observed with lightings with
electrical ballasts, which have a high inrush current.
In addition, a cut-off relay must be used with higher electric capacities.
Connection of the mains voltage (230 V AC / 50 Hz) to the ONYX.CONNECTOR
The ONYX.CONNECTOR is connected to the mains via the mounted Hirschmann con-
nector STAS 3. If the connection cable made available by the client is not provided with a
Hirschmann cable socket STAK 3 (Fig. 4), it must be mounted later. Please observe the
terminal assignment as shown in Fig. 1 and Fig. 2.
Connecting the motor / lighting to the ONYX.CONNECTOR
The motor / lighting is directly plugged to the ONYX.CONNECTOR via the Hirschmann
connector-in connection. If the motor / lighting is not provided with a STAS 3 connector
(Fig. 3), it is necessary to provide the connection cable subsequently with it. Please ob-
serve the terminal assignment as shown in Fig. 1 and Fig. 2.
The unintentional drawing-out of the connection cables during opera-
tion can cause life-endangering situations due to electric shock or
short circuit.
Installation Instructions and Instructions for Use
Subject to technical modifications – Date of Issue May/2020 9
Connection diagram
Direction assignment of the outputs when connecting a Venetian blind, roller shut-
ter, awning motor
After having connected the drive, please check the direction assignment of the outputs.
When operating the sun protection unit via ONYX®-app into the UP-direction, the motor
must move into the retracting direction. When operating the sun protection unit via ONYX®-
app into the DOWN-direction, the motor must move into the extending direction. If this is
not the case, please change the settings for the rotational direction of the motor via your
ONYX®-app, as described in the chapter “Settings”.
Hirschmann connector-in connection (IP54, max. 16 A)
- Plug STAS 3 K (Art.-No. 05350019)
- Coupling STAK 3 K (Art.-No. 05350020)
Fig. 3: STAS 3 connector with bracket
Fig. 4: STAK 3 linkage
Installation Instructions and Instructions for Use
10 Subject to technical modifications – Date of Issue May/2020
Configuration
Before configuring the ONYX.CONNECTOR, download HELLA’s free app
ONYX®from the App store / Google Play to your smart phone.
Before you can use ONYX.CONNECTOR in combination with ON-
YX.CENTER or ONYX.CLICK, ONYX.CONNECTOR must be added in the
app ONYX®. You will find all information regarding the configuration in the
instructions for ONYX.CENTER / ONYX.CLICK directly in the app ONYX®or
in the download area on our homepage https://www.hella.info.
Precondition:
ONYX.CONNECTOR is installed (see chapter “Wiring diagram”). The me-
chanical end positions of the drives must be adjusted.
Operating guidelines
Groups
Groups with their different sun protection units can be configured freely in the
ONYX®-app. All units in one group can be controlled together.
Favourite position (heart symbol)
In the ONYX®-app six freely selectable positions per sun protection unit can
be saved, which you simply can use again at a later time.
Automatic Operation
In the ONYX®-app you can set up as many time functions as you like, which,
at the desired times, make your sun protection units move to the adjusted
positions. ONYX®is also provided with an astro function, which, at sunrise or
sunset, moves your sun protection unit automatically to a defined position.
With the help of the sun sensor a particular position can be defined, if the
threshold value of the sun is below or exceeds the preset value.
Installation Instructions and Instructions for Use
Subject to technical modifications – Date of Issue May/2020 11
Settings
Device type
The different device types can be selected in the ONYX®-app under “ad-
vanced settings”.
It is necessary to define the type of device. By selecting the appropriate
category, it is assigned to this type. Device types are outdoor blind, roller
shutter, awning, facade blind and light. For device types, you do not want to
be displayed in the app, i.e. central pushbutton without a connected drive,
the drive type “Hidden” is available. By default the device type “Roller shut-
ter” is set.
Outdoor blind parameters
You find the outdoor blind parameters under “advanced settings” in the ON-
YX®-app.
Under “Tilting time” it is possible to transmit the time the outdoor blind re-
quires for a complete tilting to the ONYX®control. This must especially be
observed, if a drive with a slow slat tilting is mounted.
Preset tilting times:
Outdoor blind 90°: 1.25 s
Outdoor blind
180°:
2.5 s
Motor parameters
You find the adjustment possibilities for the motors under “advanced set-
tings” in the ONYX®-app.
If your sun protection unit moves contrary to the direction of your control
command, you can activate the reversal of the direction of rotation with the
icon “Reverse direction of rotation”.
In addition, the “automatic running time” can be activated/deactivated under
“motor parameters”. The automatic running time should be deactivated only,
if ONYX.CONNECTOR is not directly connected to a drive, i.e. to a cut-off
relay. The running time can be adjusted manually, when the automatic run-
ning time is deactivated. As a standard the automatic running time is activat-
ed.
Installation Instructions and Instructions for Use
12 Subject to technical modifications – Date of Issue May/2020
Settings
Wind resistance class
You find the wind resistance classes in the ONYX®-app under “advanced
settings”. These preset wind resistance classes are only relevant, if the op-
tional weather sensor ONYX.WEATHER is used. Please note, that the real
values set depend on the installation situation on-site; these values are
available in the documentation of the sun protection device and must be
strictly observed!
Preset wind resistance classes:
Roller shutter Class 4 (13.8 m/s)
Awning Class 2 (10.7 m/s)
Facade blinds Class 4 (13.8 m/s)
Outdoor blind Class 4 (13.8 m/s)
Output selection
This adjusting possibility is only available for the device type “light”.
Under “output selection” you can select which connection at the STAK 3
output is to be used for the actuation of the lighting. It is possible to select
between “Channel A” (connection 1 and 2) and “Channel B” (connection 1
and 3). As a standard “Channel A” is set.
A detailed description of all settings of the ONYX®-app are available in the
download area of our website https://www.hella.info.
Installation Instructions and Instructions for Use
Subject to technical modifications – Date of Issue May/2020 13
Ideal use of the radio signal
In case of bad reception, the position of the ONYX.CONNECTOR must be
changed.
Radio systems that send on the same frequency may cause interference
with reception.
It must be considered that the range of the radio signal is limited by statutory
regulations and structural measures.
Fault removal
Problem Possible cause Troubleshooting
Drive
does not
run or
runs only
briefly.
Motor connection
incorrect.
Check the connection as per Fig. 2. Change connec-
tion, if necessary.
Lighting
can not
be con-
trolled.
Incorrect connection.
Drive runs
into the
wrong
direction.
Directions were inter-
changed during in-
stallation.
Perform the reversal of the direction in the ONYX®-
app, as described in the chapter “Settings”.
The
adapter
plug for
the con-
trol can
not be
controlled
in the
ONYX®-
app (off-
line).
- The wrong control
device was added.
- No mains voltage
at the adapter plug
for the control.
- Check if the serial number is correct and add it
again.
- Provide mains voltage with ONYX.CONNECTOR.
Poor or
no radio
reception.
Adverse position of
ONYX.CENTER /
ONYX.CLICK or
Reposition ONYX.CENTER / ONYX.CLICK or ON-
YX.CONNECTOR.
Installation Instructions and Instructions for Use
14 Subject to technical modifications – Date of Issue May/2020
ONYX.CONNECTOR.
Device
locked.
ONYX.CONNECTOR
is already configurat-
ed in another net-
work.
Follow the instructions on your screen, perhaps
voltage interruption.
Installation Instructions and Instructions for Use
Subject to technical modifications – Date of Issue May/2020 15
Disposal
Dispose of the device in accordance with the current country-specific regula-
tions for electronic scrap (e.g. collecting points).
Installation Instructions and Instructions for Use
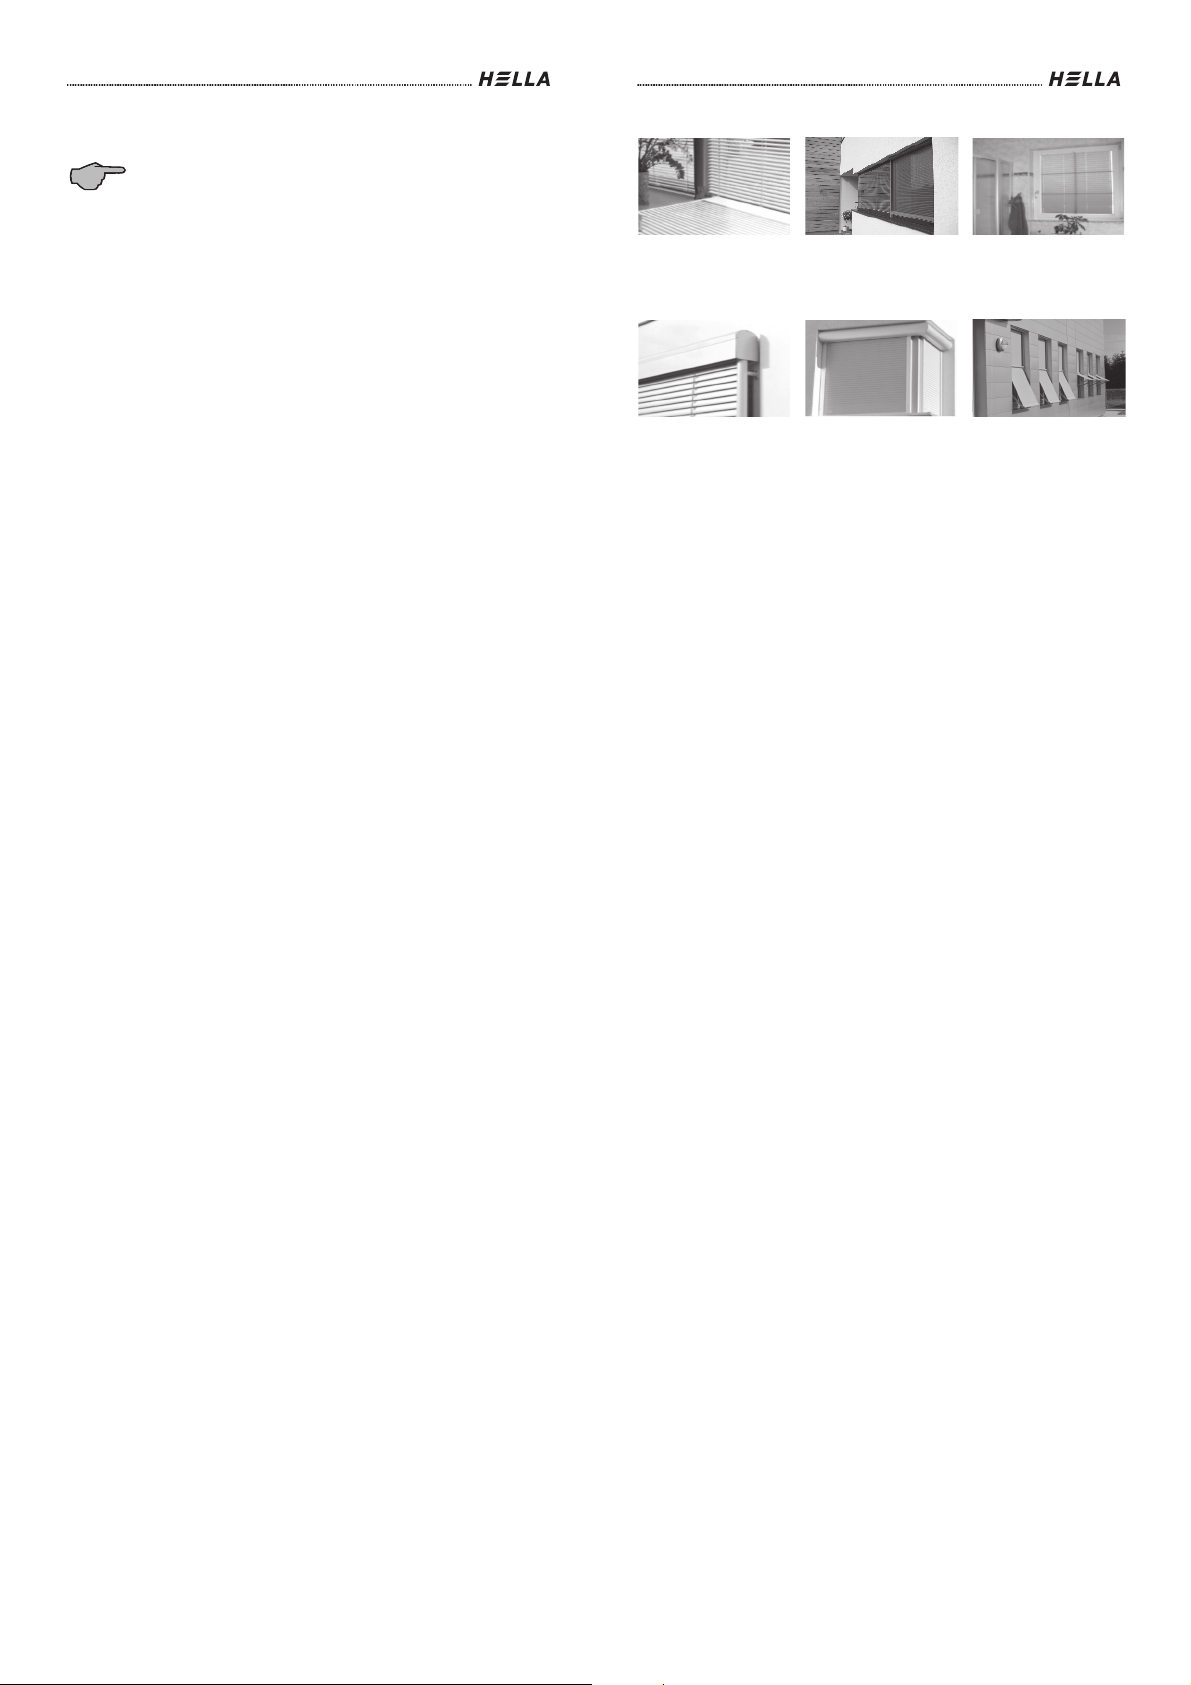
HELLA Interior Venetian
Blinds
regulate the lighting in a room
very comfortably, immediately
gracing it with much more at-
mosphere.
HELLA Insect Screens
and you decide who is allowed
to come in and who isn't.
HELLA Pleated Blind
folds up very compactly and
protects very well against the
sun and nosey glances where
only little space is available.
HELLA Venetian Blinds
serve for the light regulation, as
view protection, anti-glare blind
and heat protection.
HELLA Front-mounted
Roller Shutter
for more safety and protection
against rain, wind, heat, the
cold, noise and nosey glances,
also available for subsequent
installation.
HELLA Facade Awning
with exposing mechanism for
lovely facade design with per-
fect heat protection and anti-
glare blind.
For questions, wishes and ideas:
HELLA Infoline +43/(0)4846/6555-0
HELLA Sonnen- und Wetterschutztechnik GmbH
A-9913 Abfaltersbach, No. 125
Tel.: +43/(0)4846/6555-0
Fax: +43/(0)4846/6555-134
Internet: http://www.hella.info
Table of contents
Other Hella Cables And Connectors manuals

Popular Cables And Connectors manuals by other brands


Gefen
Gefen EXT-HDMI1.3-145 user manual

Rockwell Automation
Rockwell Automation Allen-Bradley 800G-ACGK1 installation instructions

cable matters
cable matters 102005 quick start guide

Goobay
Goobay 58482 user manual

Philips
Philips SWV2504W Specifications

Microsoft
Microsoft Xbox 360 HIGH SPEED HDMI Cable manual


