6
EN
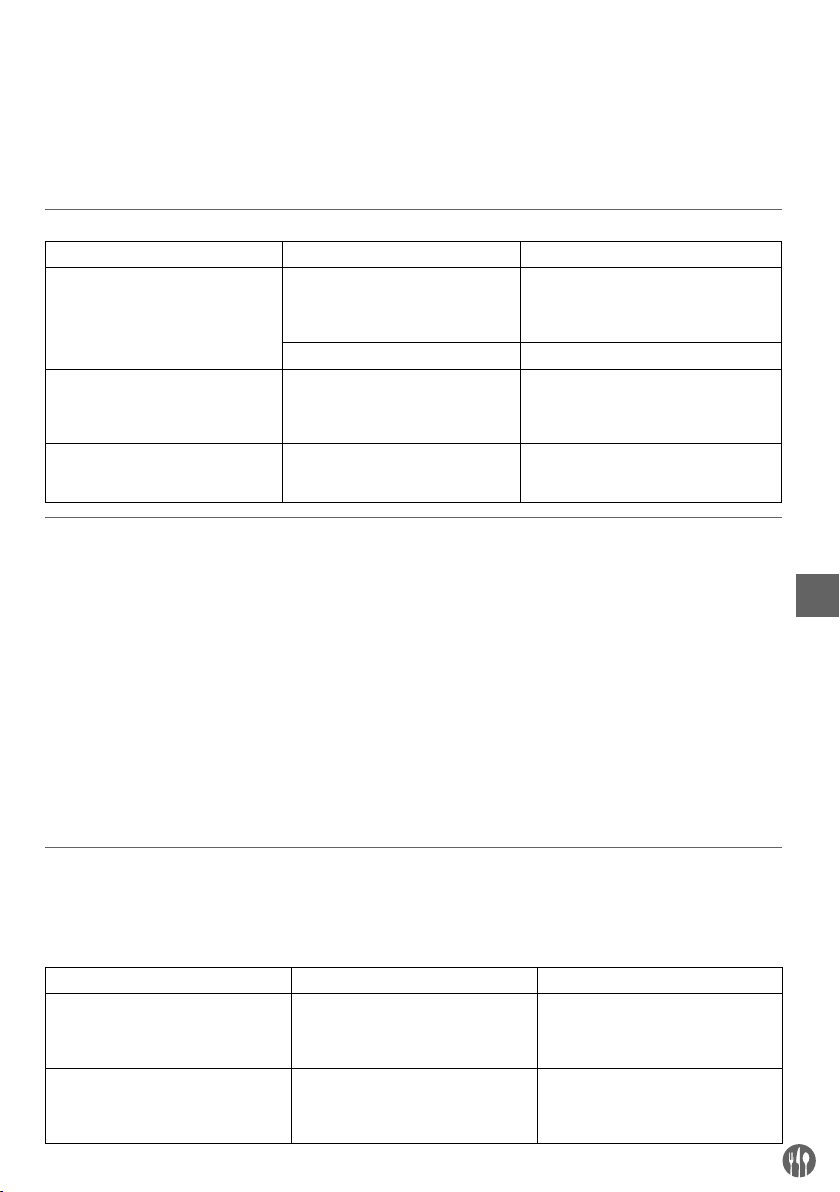
Suitable cooking equipment
Suitable Not suitable
Bottom of cookware Flat bottom Curved, uneven, rounded bottom
Material Cookware with iron, cast iron, mag-
netic stainless steel or enamelled iron
bottom.
Cookware with ceramic, glass, copper,
bronze, or aluminium bottom.
Diameter of the bottom Between 12 cm and 22 cm. Less than 12 cm or more than 22 cm.
Type of cookware Cookware with a bottom thickness
over 1.5 mm. Completely closed containers or cans.
Note: Using a pan or pot that’s not suitable for induction cooking may damage the appliance.
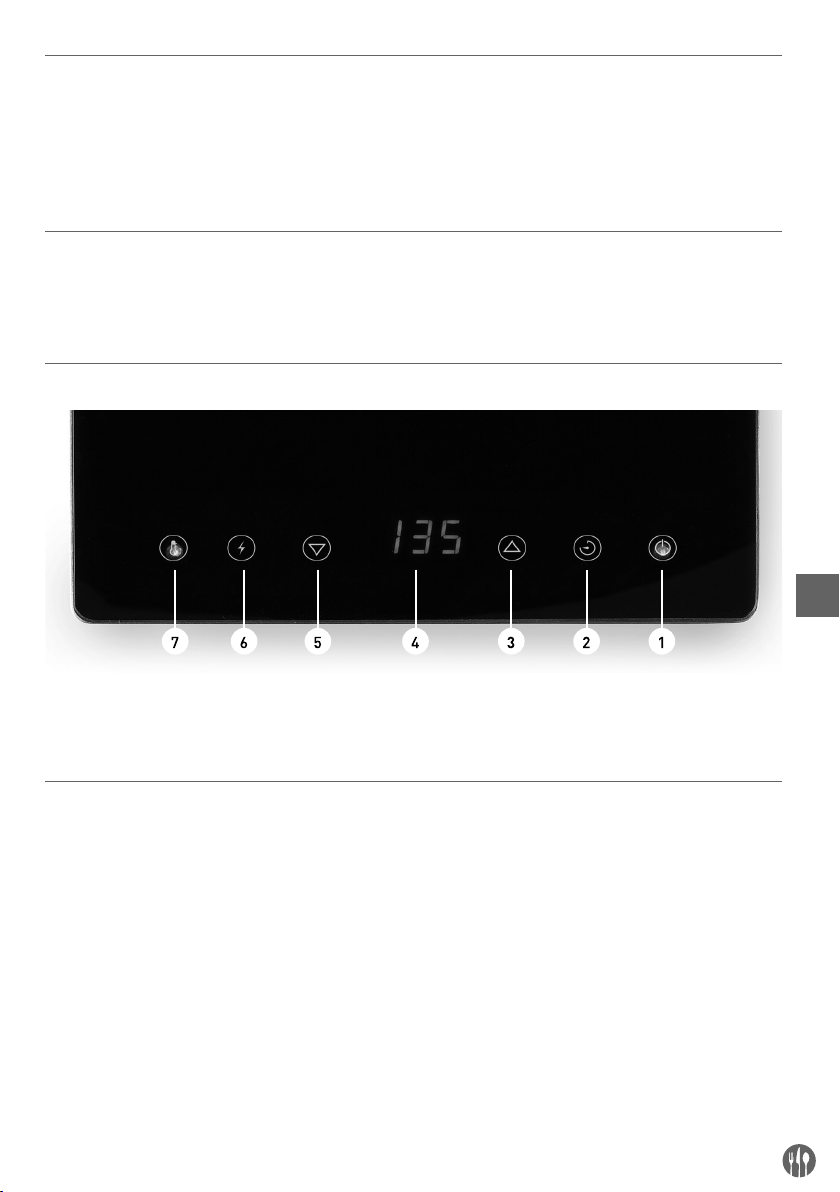
Operation
• Place a suitable pan or pot at the centre of the
heating surface of the appliance. (See --> Suitable
pans for the appliance).
Note: Do not place empty pan as this may damage
the pan and the appliance.
• Connect the power plug to a suitable electrical
supply outlet. On/Standby button (1) will be light
up and the appliance now in Standby mode.
• Then, switch On the appliance by pressing On/
Standby button (1) and Power button (6) will flash.
• Next, choose to press either the power button (6)
or temperature button (7) to start cooking. If the
timer button (2) is not set, the appliance will op-
erate continuously.
• Once you have finished cooking, switch to Standby
mode by pressing the On/Standby button (1). The
digital display (4) and all buttons will go off except
On/Standby button (1).
Note: If no any button on the control panel is
pressed during operation for 2 hours, the appliance
will then switch to Standby mode automatically.
Setting Power level
• During operation, press the power button (6) to
activate. The indicator light (6) will light up.
• Use the increase setting (3) or decrease setting
button (5) to increase or decrease the power level
(Range: 100W ~ 2,000W). Default setting is 100W.
Higher power level is suitable for steaming.
Setting Temperature level
• During operation, press the temperature button
(7) to activate. The indicator light (7) will light up.
• Use the increase setting (3) or decrease setting
button (5) to increase or decrease the tempera-
ture level (Range: 35°C ~ 240°C). Default setting
is 100°C. Higher temperature level is suitable for
roasting, grilling or frying.
Setting Timer
• After power or temperature setting for cooking,
you can opt for timer setting. Press the timer but-
ton (2) to activate. The indicator light (2) lights up.
• Use the increase setting (3) or decrease setting
button (5) to increase or decrease the cooking
time (Range: 0 min ~ 180 mins). Default setting
is 0 min.
• When the timer is set, it will be stored automat-
ically within 5 seconds. The appliance will then
start operation. It will display the remaining time
and the power setting / temperature setting al-
ternately on the display (4).
• The appliance will go into Standby mode when
the set time is elapsed.
• If the set time is reduced to “0 min” manually,
the appliance will go into Standby mode instantly.