Henkelman DT 60 User manual

Diptank
DT 60, DT 100
User Manual
Art No. 0894050
Original Instructions for Use
©Henkelman 2020

• The machine is not suitable for the packaging of toxic, corrosive, irritant or potentially
explosive materials.
• All persons responsible for the operation of this machine must at least fully read and
understand the chapters about the operation and safety provided in these operating
instructions.
• All persons responsible for the assembly, installation, maintenance and/or repairs must
fully read and understand these operating instructions.
• The user is at all times responsible for the interpretation and use of this manual.
Contact the owner or the manager in case of questions or doubts about the correct
interpretation.
• This manual should be kept near the machine and should be within reach for its users.
• All major maintenance work, modifications to the machine and observations must be
kept in a logbook; see Logbook on page 25.
• Modifications to the installation/machine are not allowed without the prior written
consent of the supplier.
• For specific maintenance work not included in this manual, please contact the supplier.
• Comply with the safety requirements as set out in Safety on page 9 at all times.
• The correct operation and safety of the system can only be guaranteed if the
recommended maintenance is performed on time and properly.
• Illustrations shown may differ from your machine.
Copyright ©Henkelman BV 2020
Henkelman BV reserves the right to change specifications and/or spare parts without prior notice.
The content of this user manual may also be changed without prior notice.
For information about settings, maintenance and repairs not provided for in this user manual, please contact the technical department of your supplier.
Henkelman BV accepts no liability for damage and/or problems arising from the use of spare parts not supplied by Henkelman BV.
This user manual has been compiled with all possible care. Henkelman BV assumes no responsibility for any errors in this manual and/or the
consequences of an erroneous interpretation of the instructions.
All rights reserved. No part of this publication may be reproduced, stored in computerised databases, or made public, in any form or by any means,
either electronic, mechanical, through photocopying, recording or otherwise, without the prior written consent of Henkelman BV. This also applies to the
associated drawings and diagrams.

Contents
List of Figures................................................................................................................................. 5
1 Preamble....................................................................................................................................... 6
1.1 List of the Symbols Used in this Manual...............................................................................6
1.2 Qualified personnel................................................................................................................ 6
1.3 Storing the manual.................................................................................................................7
1.4 Regulatory information...........................................................................................................7
1.5 Terms of Warranty.................................................................................................................7
1.6 Liability....................................................................................................................................7
1.7 Terms and abbreviations........................................................................................................8
2 Safety.............................................................................................................................................9
2.1 Pictograms on the Machine...................................................................................................9
2.2 General Warnings.................................................................................................................. 9
2.3 Warnings During Use...........................................................................................................10
2.4 Warnings for Operating Personnel.......................................................................................10
3 Introduction.................................................................................................................................12
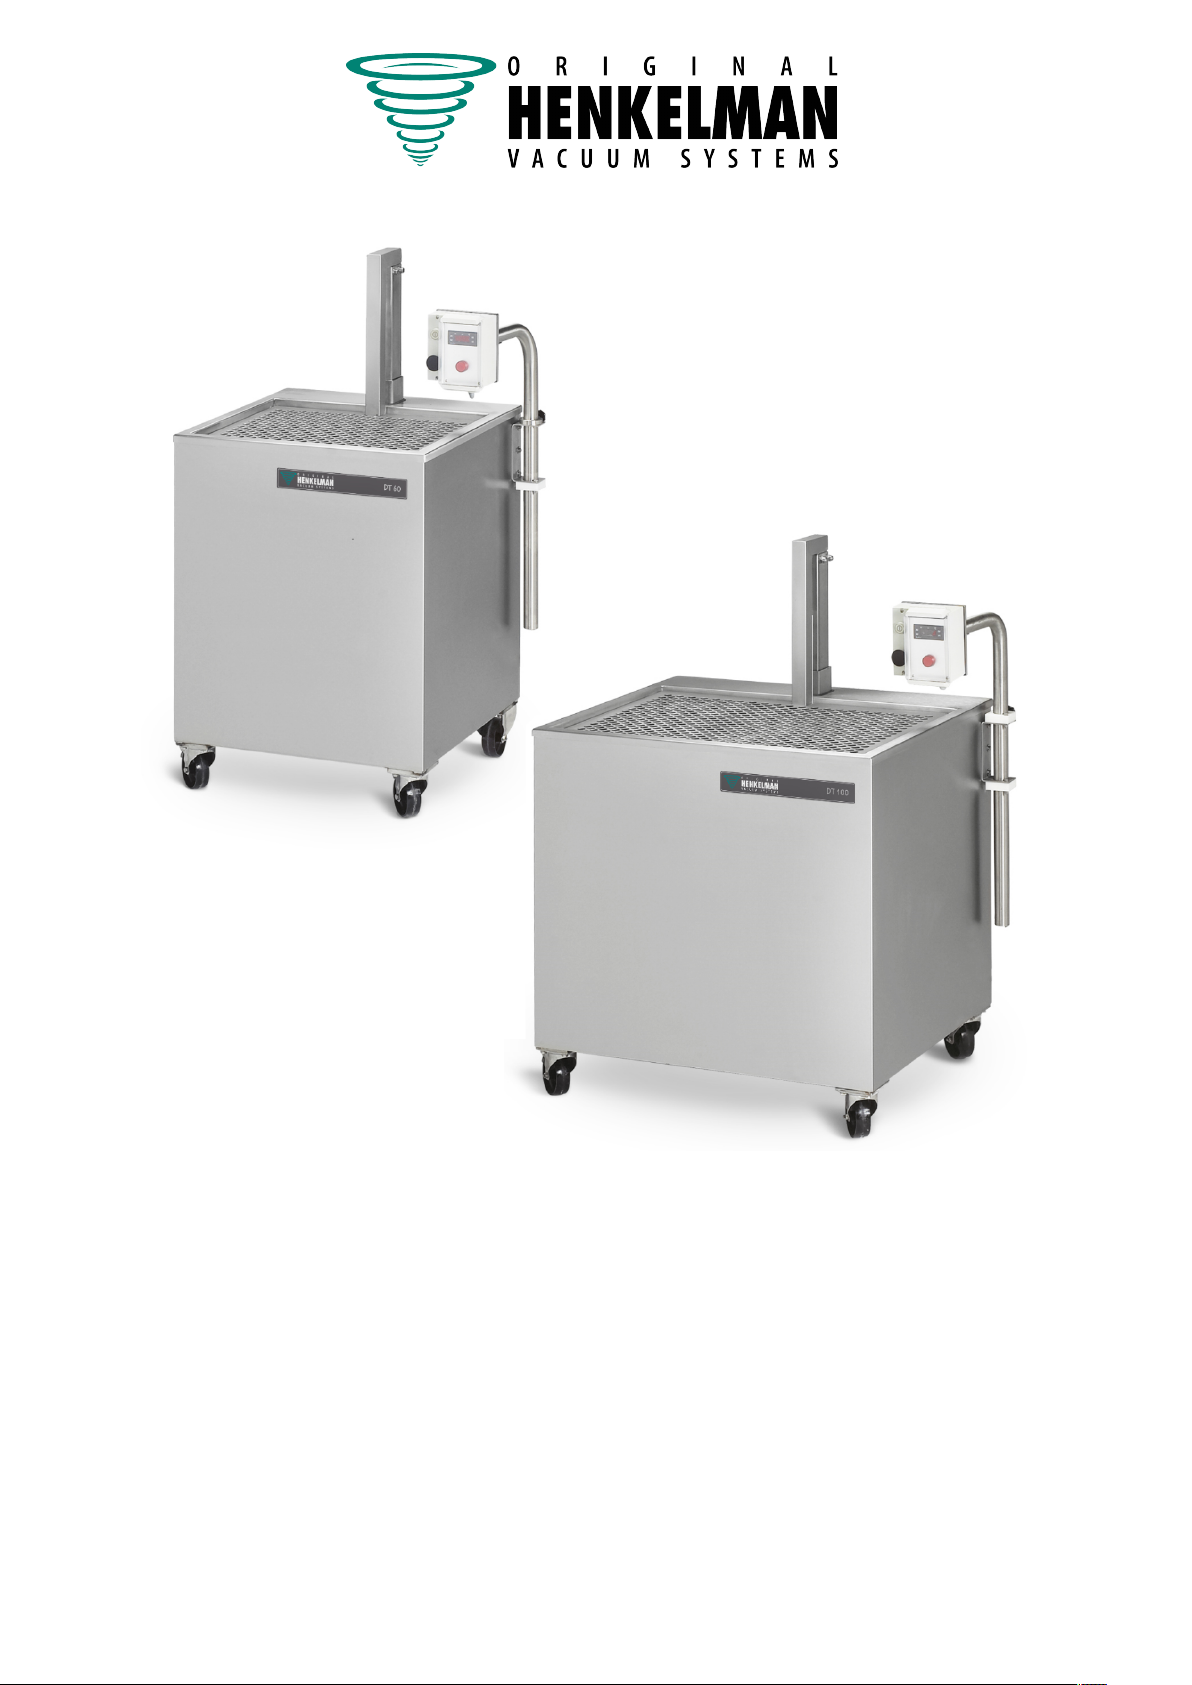
4 Description of the Machine.......................................................................................................13
4.1 Overview of the main components...................................................................................... 13
4.2 Description of the machine functions and shrinking process...............................................14
4.3 Control panel........................................................................................................................14
5 Installation...................................................................................................................................15
5.1 Transport.............................................................................................................................. 15
5.2 Placement.............................................................................................................................15
5.3 Connecting the machine...................................................................................................... 16
6 Operation.....................................................................................................................................17
6.1 Starting the machine............................................................................................................17
6.2 Setting the water temperature............................................................................................. 17
6.3 Starting the dipping cycle.....................................................................................................17
6.4 Draining the water from the machine...................................................................................18
6.5 Stopping the machine.......................................................................................................... 18
7 Maintenance................................................................................................................................19
7.1 Maintenance Schedule.........................................................................................................19
7.2 Cleaning the tank.................................................................................................................20
7.3 Checking the float................................................................................................................20
8 Troubleshooting......................................................................................................................... 21
9 Disposal.......................................................................................................................................23
Contents 3

10 Appendices............................................................................................................................... 24
10.1 Technical data DT 60 and DT 100 series..........................................................................24
10.2 Logbook..............................................................................................................................25
Contents 4

1 Preamble
This is the manual for your Henkelman Diptank series: DT 60 and DT 100.
This manual is intended for anyone who works with or services the machine.
This manual contains information and instructions for installation, operation and maintenance
of the machine. We recommend that you carefully read this manual before use and follow the
procedures and instructions strictly. This will ensure that you get the best out of the machine and
prevents possible accidents and serious injury.
1.1 List of the Symbols Used in this Manual
For all operations in which the safety of the operator and/or technician is at stake and where
caution should be exercised, the following symbols are used.
Indicates a hazardous situation that, if not avoided, could result in serious injury or death
and possibly material damage if one does not obey the safety instructions.
Indicates a hazardous situation that, if not avoided, could result in minor or moderate
injury and possibly material damage if one does not follow the safety instructions.
Provides additional information that is helpful to do a task or to avoid problems.
This symbol warns for high voltage.
1.2 Qualified personnel
This document is intended for qualified personnel.
The term "qualified personnel" is defined here as individuals who thoroughly understand
the equipment and its safe installation, operation or maintenance. Qualified personnel are
physically capable of performing the required tasks, are familiar with all relevant and local
safety rules and regulations and have been trained to safely install, operate or maintain the
equipment. It is the responsibility of the company installing, operating or maintaining this
equipment to ensure that its personnel meet these requirements.
Preamble 6

1.3 Storing the manual
This manual is a part of your product. Store the manual in the immediate vicinity of the product.
Always present a copy of the manual to operators and engineers working on the Diptank.
1.4 Regulatory information
The Henkelman DT 60 and DT 100 Diptank is designed to comply with the following directives:
• 2006/42/EC: Machinery Directive
• 2014/30/EG: EMC Directive
• 2014/35/EC: Low Voltage Directive
The CE Declaration is available upon request. Please contact the manufacturer.
1.5 Terms of Warranty
The warranty is subject to the following limitations. The warranty period for products supplied by
Henkelman BV is 3 years from the date indicated on the purchase document. This warranty is
limited to manufacturing and machining defects and therefore does not cover breakdowns involving
any part of the product that is exposed to any form of wear and tear. Normal wear and tear that
may be expected with the use of this product is therefore hereby excluded.
• The responsibility of Henkelman BV is limited to replacing defective parts; we shall not
acknowledge claims for any other kind of damage or costs.
• The warranty automatically expires in case of overdue or poor maintenance.
• If there are doubts about the maintenance activities or if the machine fails to work correctly,
always contact the supplier.
• The warranty does not apply if the defect is the result of incorrect or negligent use, or
maintenance that was conducted contrary to the instructions given in this manual.
• The warranty is void in the event of repairs or modifications to the product by third parties.
• Defects due to damage or accidents caused by external factors are excluded from the warranty.
• If we replace parts in compliance with the obligations of this warranty, then the replaced parts
become our property.
The provisions regarding the warranty and liability are part of the general terms and conditions of
sale, which can be sent to you upon request.
1.6 Liability
• We exclude all liability insofar as far as it is not required by law.
• Our liability shall never exceed the total amount of the machine value in question.
• With the exception of the applicable legal regulations of public order and good faith, we are not
liable to pay for any damage of any sort whatsoever to the opposite party or to third parties,
Preamble 7

directly or indirectly, including lost profits, damage to movable or immovable property or
personal injury.
• We are in no way liable for damages arising from or resulting from the use of the product used,
or the unsuitability thereof for the purpose for which the other party decided to purchase the
product.
1.7 Terms and abbreviations
Machine Diptank
Preamble 8

2 Safety
Your Diptank has been carefully designed and expertly built to be operated safely. This is
corroborated by the EC Declaration of Conformity. However, there are always dangers and safety
risks that cannot be eliminated. These dangers and risks are the result of the use functions of the
machine and operation of the machine by the user. This section discusses safety instructions and
precautions, how they will be pointed out to you and the requirements the user must meet. It is
essential that you are well aware of these safety instructions and requirements and observe them
at all times!
2.1 Pictograms on the Machine
Pictograms and warnings have been fitted on the machine to warn users of the possible risks.
Warning sign "High Voltage"
• Is located on the back of the machine.
Machine plate
• Is located on the back of the machine
Regularly check whether the pictograms and markings are still clearly recognisable and
legible. Replace them if this is not the case.
2.2 General Warnings
• All persons responsible for the operation of this machine must at least fully read and
understand the chapters Safety on page 9 and Operation on page 17.
• Failure to follow or disregard of the safety instructions may result in serious injury.
• Warranty and/or liability is void if any damage is caused by repairs and/or modifications
that are not authorised by the supplier or any of its distributors.
• In case of malfunction, contact the supplier.
• High pressure cleaning is not allowed. This may cause damage to the electronics and
other components.
• The work space around the machine must be safe. The owner of the machine must take
the necessary precautions to operate the machine safely.
• It is forbidden to start the machine in an explosive environment.
• The machine has been designed in such a way that production is safe under normal
ambient conditions.
Safety 9

• The owner of the machine must ensure that the instructions in this manual are actually
complied with.
• The available safety devices may not be removed.
• The correct operation and safety of the system can only be guaranteed if the
recommended maintenance is performed on time and properly.
• If work must be carried out on the machine, it must be disconnected and blocked from
the power, air and water supply.
• Only a technical expert may perform work on the electrical installation.
• Internal procedures and monitoring must be in place to ensure that all relevant power
supplies are disconnected.
• The machine may not be used during cleaning, inspection, repair or maintenance and
must be disconnected from the power supply by disconnecting the plug and/or using the
main switch.
• Never perform welding work on the machine without first disconnecting the cable
connection to the electrical components.
• Never use the power supply of the control unit to connect other machines.
• All electrical connections must be connected to the terminal strips according to the
wiring diagram.
2.3 Warnings During Use
• Before starting the machine, make sure no work is being performed on the installation
and that the machine is ready for use.
• The machine may not be operated by unauthorised persons. This should be monitored
by the machine operator(s).
• Immediately contact the service technician of your technical department or dealer if
something does not seem right, such as unusual vibrations or unusual noise.
• The fluid in the Diptank can become very hot. Contact with the fluid in the tank may
cause injuries.
2.4 Warnings for Operating Personnel
• Operating personnel must be 18 years or older.
• Only authorised persons are allowed to perform work on or with the machine.
• Personnel may only perform work for which it was trained. This applies to both
maintenance and normal use.
• The machine may only be operated by trained personnel.
• Operating personnel must be familiar with all circumstances, so quick and effective
action can be taken in case of an emergency.
• If an operator notices errors or risks or disagrees with safety measures, he or she
should report this to the owner or manager.
Safety 10

• Safety shoes are mandatory.
• Appropriate work clothing is mandatory.
• All personnel must obey the safety regulations to avoid danger to themselves and
others. Always strictly follow the work instructions.
Safety 11

3 Introduction
Henkelman BV is a supplier of ultra-modern Vacuum Packaging Machines. Our machines are
developed and manufactured to meet the highest standards. They combine a sleekly build and
functional design with optimal ease of use and a long service life. After mounting the plug, it is just
a matter of "plug & pack". The clever design ensures compliance with the hygiene standards at all
times.
The Diptank is applied in food packaging processes. Food products are usually packed in shrink
bags closed by a sealing process. The food packaging can also include a vacuum process for food
preservation. After the packaging process, food products are placed into the Diptank with warm
water in which the shrink bag will smoothly shrink around the food product. The main objectives
for the Diptank shrinking process is to shrink the plastic flaps from the packaging material around
the food product in order to enhance the product packaging presentation and to make the product
handling and distribution process easier.
Introduction 12

4 Description of the Machine
This section provides an short introduction to the machine and an overview of it's main
components and functions. If detailed information is available in this manual, you will be referred to
the specific sections.
4.1 Overview of the main components
The figure below shows the main components of the DT 60 and DT 100 series.
Figure 1: Overview of the main components
1. Tank
The tank is filled with hot water. When lowered in the hot liquid, the package shrinks around
the food product.
2. Platform
The platform lowers the packaged food products in the tank and it prevents accidental contact
with the hot water.
3. Arm
The arm enables you to adjust the height of the control panel.
4. Control panel
5. Sliding rod
Lowers the platform into the tank.
6. Main switch
7. Water discharge tap
Used to empty the tank.
Description of the Machine 13

4.2 Description of the machine functions and shrinking
process
The packaged food product is placed on the platform manually. At the start of the procedure,
the platform descends into the tank and shortly afterwards rises again. This process takes
approximately three seconds.
The water temperature in the tank is maintained automatically. Heating stops when the water
reaches the preset temperature. The default setting is 95 °C. Heating starts again after a drop in
temperature of 2 °C.
4.3 Control panel
The control panel is used to operate the Diptank.
Figure 2: Overview of the control panel
1. On/Off button
Serves to turn the control on or off.
2. Start button (S3)
Starts the dipping cycle.
3. Temperature settings
Used to adjust the water temperature setpoint. During normal operation the current water
temperature is displayed.
4. Power indication light
Indicates if the machine is switched on.
Description of the Machine 14

5 Installation
Consult Technical data DT 60 and DT 100 series on page 24 for the specifications of the
machine.
Before installing the machine, carefully read the safety instructions in Safety on page 9.
Failure to follow or disregard of the safety instructions may result in serious injury.
5.1 Transport
The machine must be moved and transported in an upright position.
The machine may not be transported using a crane. The machine may be transported with a forklift
provided it is still on the pallet packaging.
Moving the machine on wheels on uneven surfaces may lead to loss of stability of the machine.
Always move the machine slowly and carefully.
5.2 Placement
1. Place the machine on a flat, level surface. This is essential to ensure a trouble-free operation
of the machine.
2. Ensure the brakes of the machine are activated.
3. Verify that the machine housing is present and correctly fitted.
4. Position the control panel to the desired working height.
The control panel arm is released and locked with a turning knob.
Do not place the control panel directly above the tank.
Installation 15

5.3 Connecting the machine
Only a technical expert may perform work on the electrical installation.
Make sure the power supply for this machine matches to the voltage and amperage stated on the
machine plate.
Description DT 60, 230 V
23 / fuse 40 C DT 60, 400 V
13 / fuse 25 C DT 100, 230 V
38 / fuse 50 C DT 100, 400 V
22 / fuse 40 C
Nominal amperage 23 A 13 A 38 A 22 A
Minimum fuse value with the
recommended type of fuse 40 A 25 A 50 A 40 A
Fuse characteristic CCCC
1. Fit the correct plug on the cable in accordance with local legislation and connection data.
See the machine plate for the correct electrical connection.
2. Connect the machine to a wall outlet.
• Always use an outlet with protected earth to avoid fire or electrical shock.
• The power cable must be free at all times, and nothing may be placed on it.
• Immediately replace the power cable if damaged.
3. Close the water discharge tap.
4. Fill the tank with water.
Make sure the water level is at least 200 mm.
Use descaled water to prevent limescale build-up.
5. Turn the main switch to the on position.
6. Press the On/Off button on the control panel.
The power indication light switches on.
7. Make sure the electrical motor is turning in the right direction.
The platform moves down.
If the motor turns in the wrong direction, turn off the machine and interchange two phases in
the mains plug (e.g. L1-L2).
Re-check Placement on page 15 if you moved the machine while making the connections.
Installation 16

6 Operation
• All persons responsible for the operation of this machine must at least fully read and
understand this chapter and the chapter Safety on page 9.
• Failure to follow or disregard of the safety instructions may result in serious injury.
6.1 Starting the machine
1. Plug in the machine.
2. Turn the main switch to the on position.
3. Make sure that the water discharge tap is closed.
4. Fill the water tank.
• Use descaled water to prevent limescale build-up.
• The minimum water level is 200 mm.
• The maximum water is 100 mm below the edge of the tank. Take the volume of the
dipped food products into account.
5. Press the On/Off button on the control panel to enable operation.
The red power indication light turns on.
6.2 Setting the water temperature
The default water temperature is set to 95 °C. Use the temperature settings controller to change
this value.
1. Press the Temperature set button 2 times.
The temperature setting is displayed for 10 seconds.
2. While the temperature setting is displayed, press the Temperature ▲or ▼button to adjust the
temperature.
3. Press the Temperature On/Off button or FNC button twice to save the new temperature
setting.
If the Temperature set button is not pressed within 10 seconds, the new setting will not be
saved and the temperature controller will revert to the previously stored setting.
6.3 Starting the dipping cycle
Make sure that the machine is started, the correct temperature is set and that the water in the tank
has reached the set temperature.
1. Place a packaged food product on the platform.
2. Press the Start button.
The dipping cycle starts.
Operation 17

6.4 Draining the water from the machine
The water in the tank is very hot and can cause serious injury. Let the water cool
sufficiently before draining it from the tank.
1. Push the On/Off button to switch the machine Off.
The red power indication light turns off. The temperature controller switches off.
2. Wait and let the water in the tank cool.
3. Place a container under the water draining valve to collect the draining water.
4. Open the water draining valve.
The cooled water drains from the tank.
After draining the water from the tank, always clean the water tank. See Cleaning the tank on page
20.
6.5 Stopping the machine
Stop the machine before maintenance, when production is stopped for a longer period or before
relocating the machine. When the machine is stopped, the timer is also switched off.
1. Make sure that the red power indication light is switched off.
2. Make sure that the water is drained from the machine.
3. Turn the main switch to the Off position.
Operation 18

7 Maintenance
When carrying out maintenance work, always observe the following safety rules.
• Always drain the tank, see Draining the water from the machine on page 18.
• Always make sure the machine is stopped completely, see Stopping the machine on
page 18.
• Only trained technicians are authorised to perform the described maintenance activities.
• Test the machine after carrying out maintenance work or repairs to make sure the
machine can be used safely.
7.1 Maintenance Schedule
The diagram below shows the maintenance activities that must be performed and the interval with
which these activities must be performed.
For specific descriptions for performing maintenance activities, consult the appropriate section.
Activity Daily Monthly Quarterly
Draining the water and cleaning the tank ×
Checking the float ×
Checking the hydraulic oil (level / quality) ×
Maintenance 19

7.2 Cleaning the tank
Use a descaling solution for cleaning the inside of the water tank.
Clean the inside of the water tank.
Pay special attention to the cleaning of:
• the heating elements (A);
• the sliding rod;
• the float;
• the water temperature sensor (B).
7.3 Checking the float
1. Remove the platform from the tank to access the float.
2. Make sure that the float can move up and down freely along its axis.
Remove any material that may obstruct the free movement of the float.
3. Put the platform back into position.
Maintenance 20
Other manuals for DT 60
1
This manual suits for next models
1
Table of contents
Other Henkelman Kitchen Appliance manuals

Henkelman
Henkelman Marlin User manual

Henkelman
Henkelman Atmoz Series User manual

Henkelman
Henkelman Mini Jumbo User manual

Henkelman
Henkelman Jumbo Installation and operation manual

Henkelman
Henkelman Jumbo User manual

Henkelman
Henkelman Jumbo series User manual

Henkelman
Henkelman Boxer 35 User manual

Henkelman
Henkelman Aero User manual

Henkelman
Henkelman Boxer Series User manual