HEUTE Solamat 400 User manual

- 1 -
Industrial Sole Cleaning Devices
Solamat 400 / Art.-No. 065-4000 (dry)
Solamat 450 / Art.-No. 065-4500 (dry with suction)
Solamat 500 / Art.-No. 065-5000 (wet)
Operating instructions State: 2008/11
Power supply:
All machines will be delivered „ready for use“ with a standardized power connector. Please make sure
that the power specification on the rating plate is consistent with your actual power supply (110 volt
or 230 volt).
Installation and putting into operation:
The location needs to be roofed over and frost-proof in order to protect the machine and its electricity.
For a secure stand the ground should be plane; rubber stripes may be used for levelling.
After removal of packaging and protection provide for the aforementioned placement as well as power
supply and the Solamat cleaning device will be ready for use.
Solamat 450 should be connected to the industrial vacuum cleaner which is available optionally. To
do so, attach suction hose to the Solamat 450 and cleaner and put he power cord of the Solamat 450 in
the power supply of the industrial vacuum cleaner. The cleaner itself will have to be connected to the
mains and provides power to the Solamat 450 automatically.
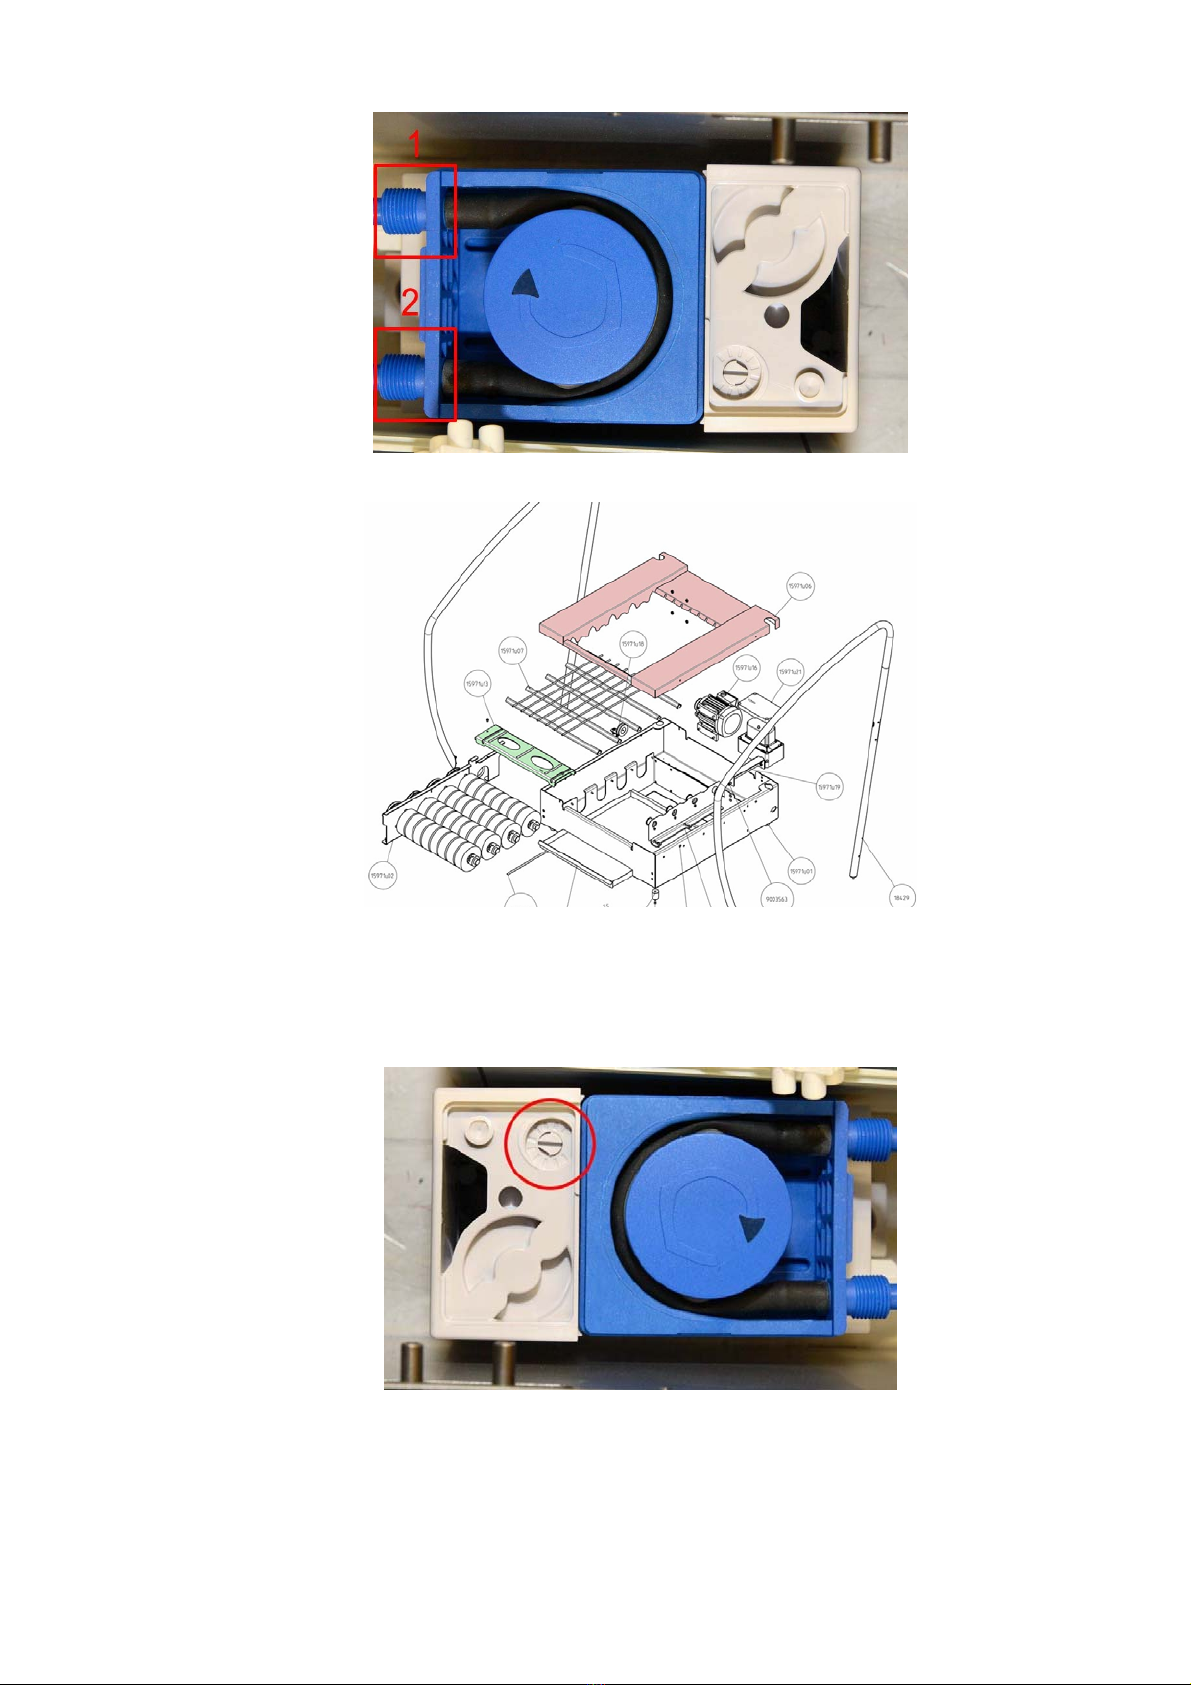
For Solamat 500 please screw the drip-off grate to the main cleaning device and attach an ½“ water
supply to the adapter (1 in picture 1) which leads to the magnetic valve.
Picture 1
A pressure of 3 to 5 bar can be applied to the water supply. The freshwater discharge can be regulated
by means of the dial on the magnetic valve (2 in picture 1).
Furthermore, a cleaning medium can be fed additionally with the 6 mm Ø hose (1 in picture 2 – 2
feeds the cleaning medium to the brushes inside the machine). The throughput of this additional
cleaning medium can be adjusted as well.
- 2 -
Picture 2
Picture 3
Having removed the steel cover (red in picture 3), the stablizier bridge (green in picture 3) and the
protective cap of the feeding pump the feeding amount of the pump can be adjusted from 0,15 bis 4,5
l/h with the regulator marked in picture 4.
Picture 4
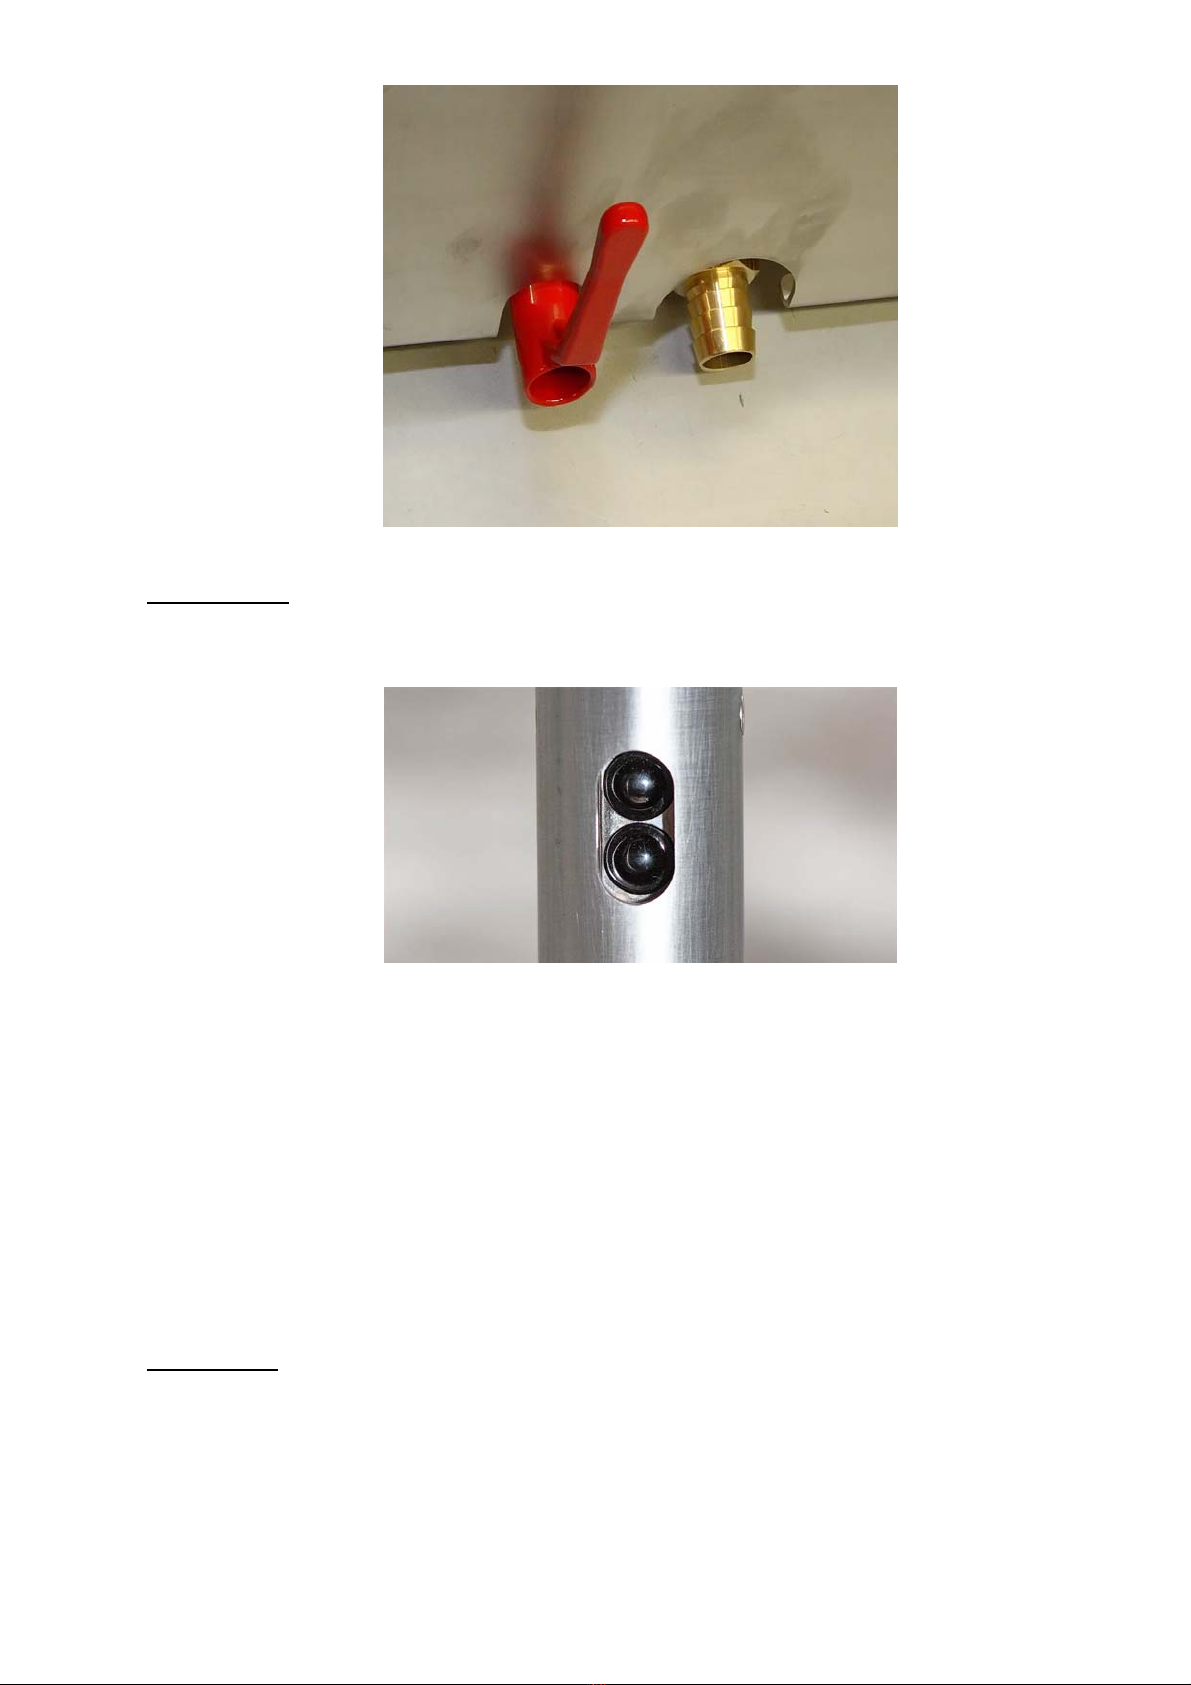
Make sure that the waste water hose (picture 5 shows stopcock and drain) has a downward gradient
and leads to a sewer oder sump for further disposal.
- 3 -
Picture 5
Sole cleaning:
The machines start automatically by means of an optical sensor, which is located in the handrail (see
picture 6).
Picture 6
The Solamat 450 automatically starts the suction and filter mechanism.
When Solamat 500 starts, its magnetic valve automatically provides water feed and the dosing pump
adds optional cleaning medium to the brushes at the same time. Abundant and dirty liquid is drained
away from the sink via spillover towards the sewage hose.
Moving shoes and soles slightly on the brushes can improve the cleansing process. As soon as a user
leaves the cleaning area on the „white side“ of the machine all functions stop and the devices runs out
automatically.
Adjustments:
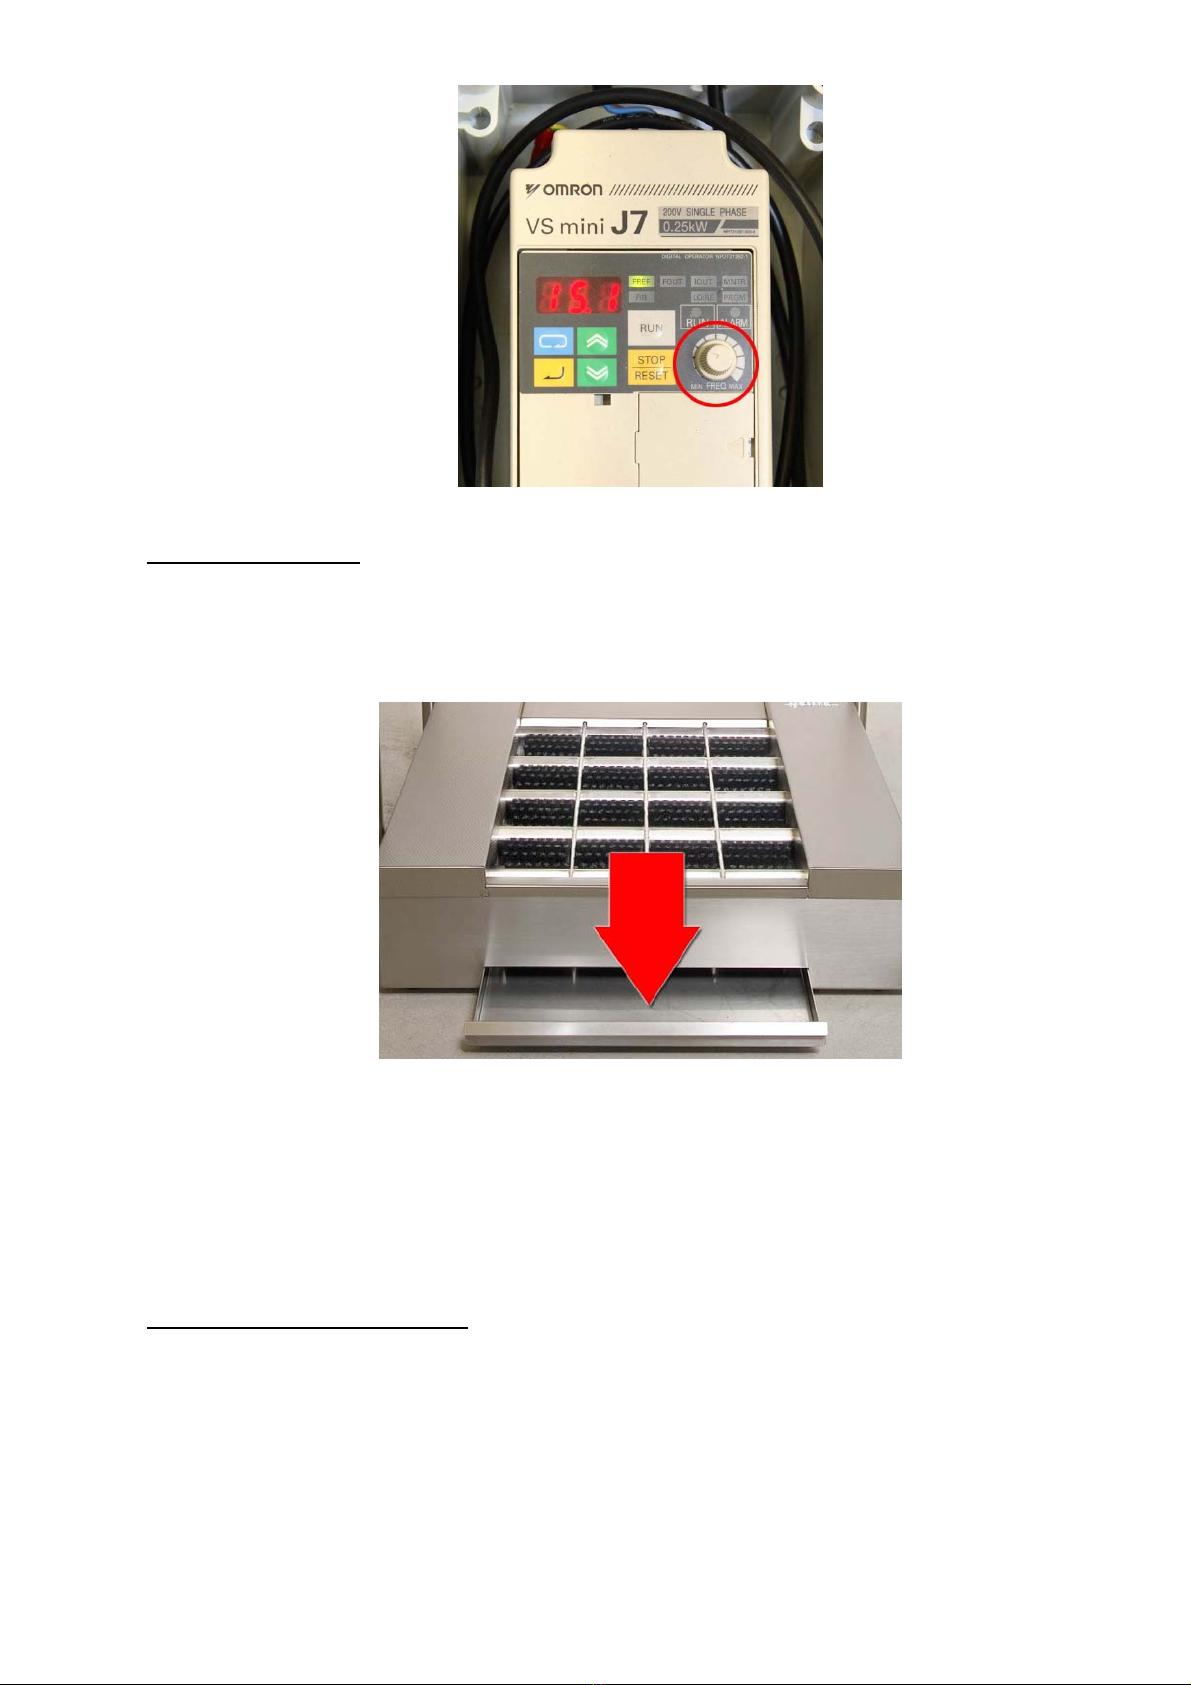
Speed of rotation of the brushes can be adjusted with the frequency inverter (c.f. marker in picture 7).
Factory defaults, however, are set to provide an optimum and are best left untouched.
- 4 -
Picture 7
Cleaning the devices:
Unplug machines from main power supply and only clean it when it has stopped completely!
Cleaning intervals depend on degree of utilization. When soiled heavily clean the device on
the inside as well as outsides.
Solamat 400 has a drawer underneath its brushes which should be cleaned regularly – cf. picture 8.
Picture 8
The industrial vacuum cleaner for the Solamat 450 has a filter which should be cleaned or exchanged
periodically. Chapter 3 of the vacuum cleaner manual provides a detailed description.
The entire liquid of Solamat 500 should be cleared via stopcock (c.f. picture 5) regularly. Afterwards
close stopcock again and fill up freshwater and cleaning medium by activating the machine for as long
as it takes to fill the bin up to the overflow.
Maintenance and service works:
Maintenance repairs dealing with electrical parts may only be executed by a service operator or skilled
staff. Unplug machine from power each time maintenance works takes place.
Check power cords and supply once a week and have it replaced/repaired if necessary.
Bearings should be checked for ease of movement and connections of the Solamat 500 should be
checked for liquid tightness.
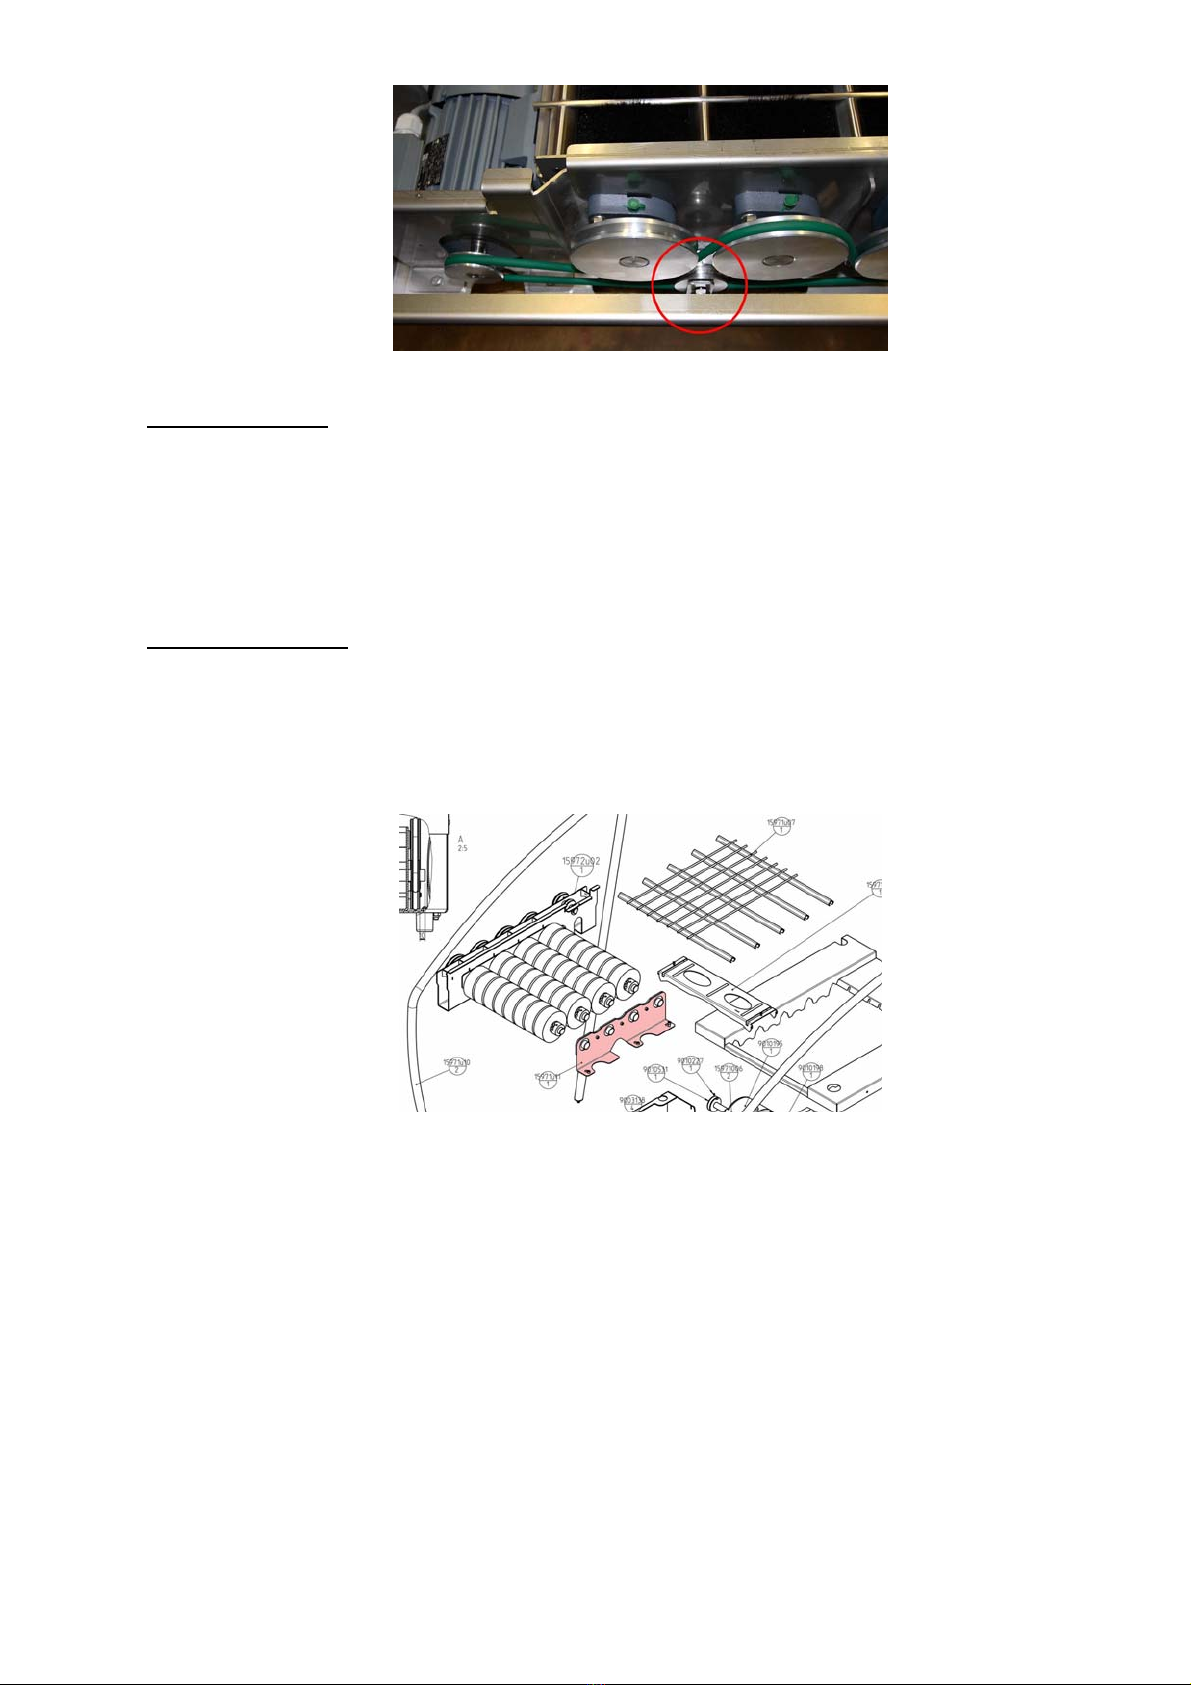
The strain of the driving-belt should be checked once a month to prevent belt slip. By means of the
clamping device (marked in picture 9) the belt can be tightened.
- 5 -
Picture 9
Exchanging belts:
Unplug machine from main power supply!
Remove steel cover (red in picture 3) and loosen belt tensioner (picture 9). Note down the way the
existing belt is located on the pulleys or take a picture; remove old belt and insert new one. Use belt
tensioner to tighten the belt.
Exchaning brushes:
Unplug machine from main power supply!
Unscrew the 4 screws of the steel cover and remove it entirely(c.f. picture 3). Next loosen the 3
screws of the plain bearing holder slightly (picture 10) but do not remove them completely.
Picture 10
Now move the plain bearing holder to the outside / away from the brushes in order to be able to
remove it completely.
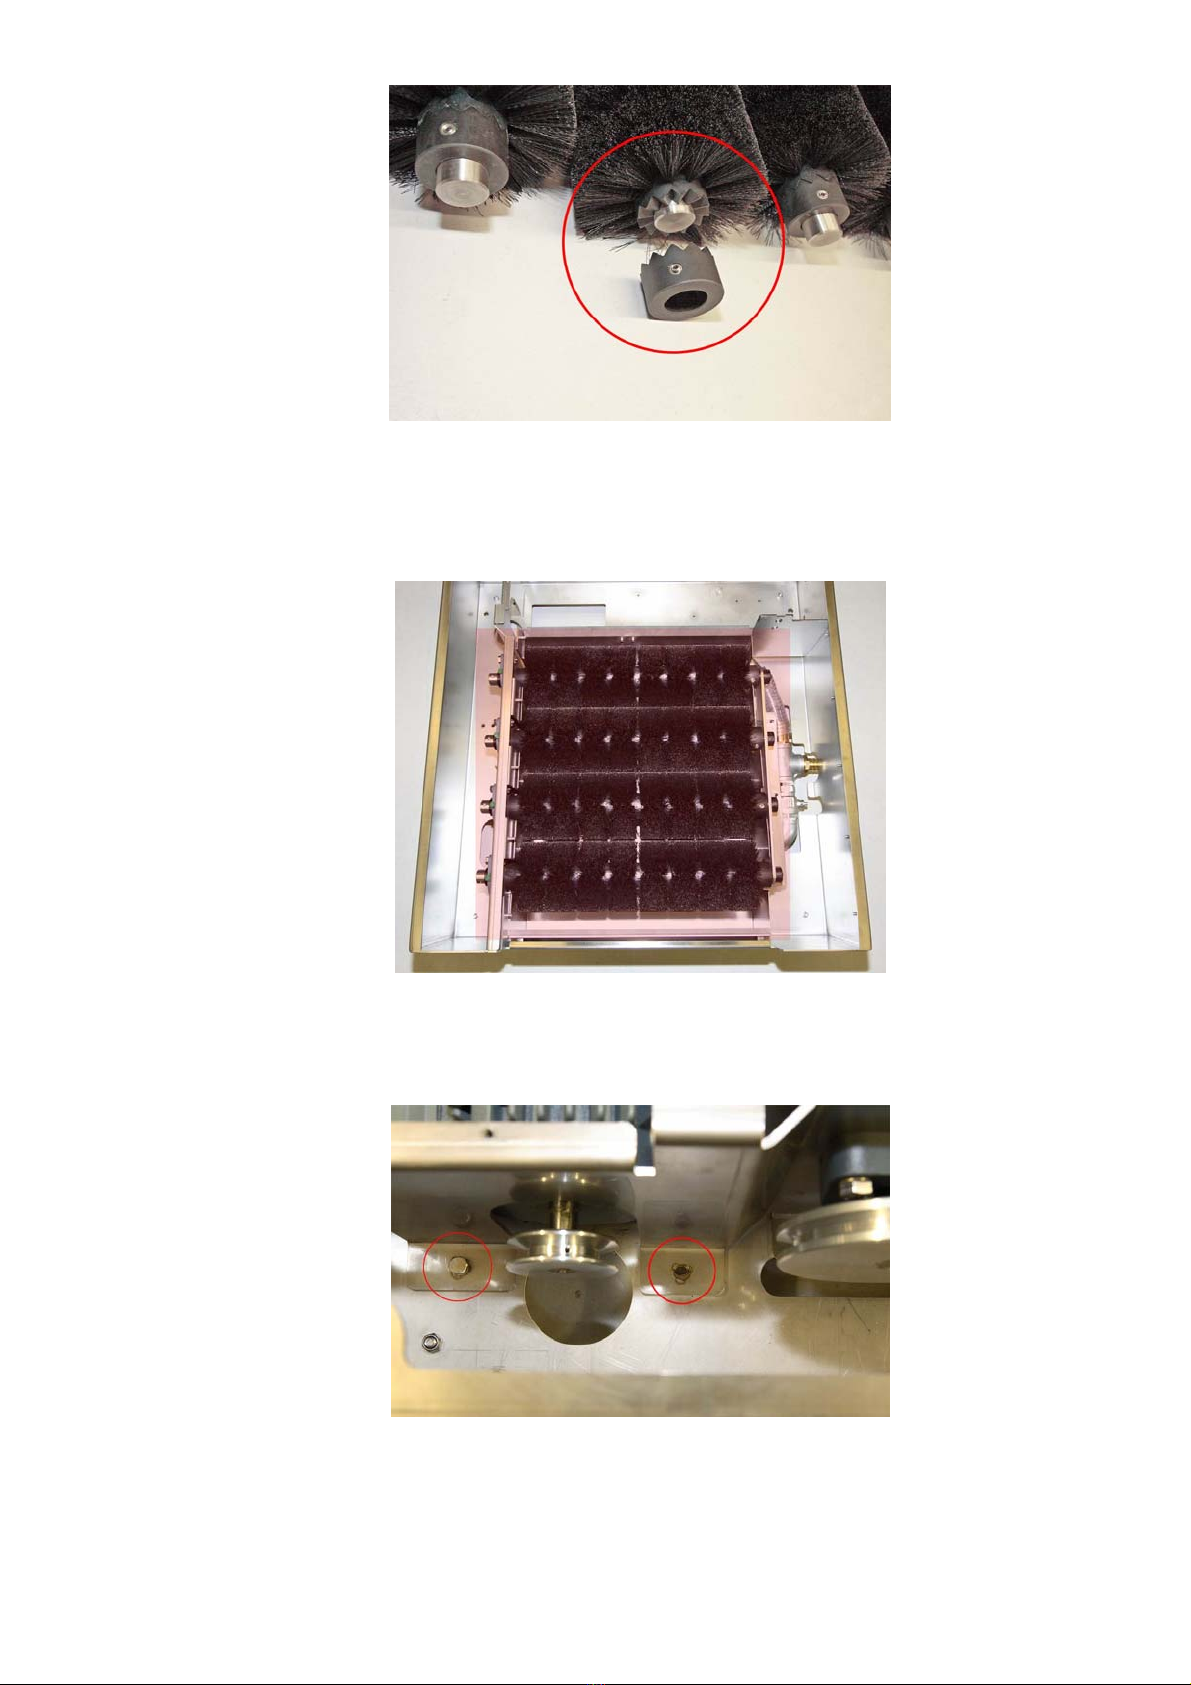
For (dry) models Solamat 400 + 450 you can now loosen the 2 grub screws at the brush fixing
element (c.f. picture 11) and remove this head from the axle. The brushes can now be pulled off
easily.
- 6 -
Picture 11
With Solamat 500 the entire brush holder unit incl. axles (c.f. picture 12) will have to be removed
because the liquid bin does not allow taking off the brushes sideways as described for the dry models
Solamat 400 & 450.
Picture 12
First remove the belt from the 4 pulleys, next detach and remove plain bearing holder as described
before but additionally remove the 5 screws of the element shown in picture 13.
Picture 13
The entire brush unit can now be removed. Afterwards loosen the grub screws, take off fixing element
and exchange brushes (c.f. picture 11).

- 7 -
Spare parts:
Please note down the machine number as well as date of production (c.f. label) and if possible let us
know the HEUTE article numbers for the spare parts you want to order.
Guarantee:
We warrant our products to be free of manufacturing and material faults. Warranty extends to 1 year
months on electrical components and to 2 years on metal components, commencing in each case on
the day of dispatch from the supplier’s premises or depot. Changes or modifications made by
customers to our products without our prior consent thereto given in writing will render the warranty
null and void.
Maschinenfabrik Heute GmbH & Co. KG
Weinsbergtalstr. 2-6
42657 Solingen
Germany
Fon: +49 – 212 – 380310
Fax: +49 – 212 – 818085
This manual suits for next models
5
Table of contents
Other HEUTE Cleaning Equipment manuals

Popular Cleaning Equipment manuals by other brands

Rainbow Pool Products
Rainbow Pool Products GritBuster Magic Wand W9320015 quick start guide

EGO
EGO AGC1000 Operator's manual

Nilfisk-Advance
Nilfisk-Advance Hybrid ECO SE11 Directions for use

Ultrasonic
Ultrasonic BT H Series manual

Glasdon
Glasdon NEXUS 100 Operational instructions

Mosmatic
Mosmatic TD-80611 A quick start guide


