HEUTE Solamat 90 User manual

Solamat 90
Solamat 100
Solamat 150
Solamat 200
Originalbetriebsanleitung
Operating Manual
Mode d'emploi
Istruzioni per l'uso
Manual de instrucciones
Руководство по эксплуатации
D
EN
F
IT
ES
RU
2
Solamat 90

3
Solamat 100/150/200
Solamat 100 Solamat 150
Solamat 200
14
IMPORTANT - READ FIRST
Only put the machine into operation once you have read and un-
derstood the operating instructions. We shall be happy to answer
any questions you may have.
HEUTE Solamat sole cleaning machines are built and tested in ac-
cordance with the latest safety regulations. The faultless functionality
and operational assurance of the device can only be guaranteed
if the generally applicable safety precautions and device-specic
safety information in this operating manual are observed during use.
The guarantee is not valid in relation to damages caused by a failure
to observe this operating manual. The manufacturer assumes no li-
ability for personal injury or damage to property arising as a result of
this. In the event of problems please contact our service department
immediately.
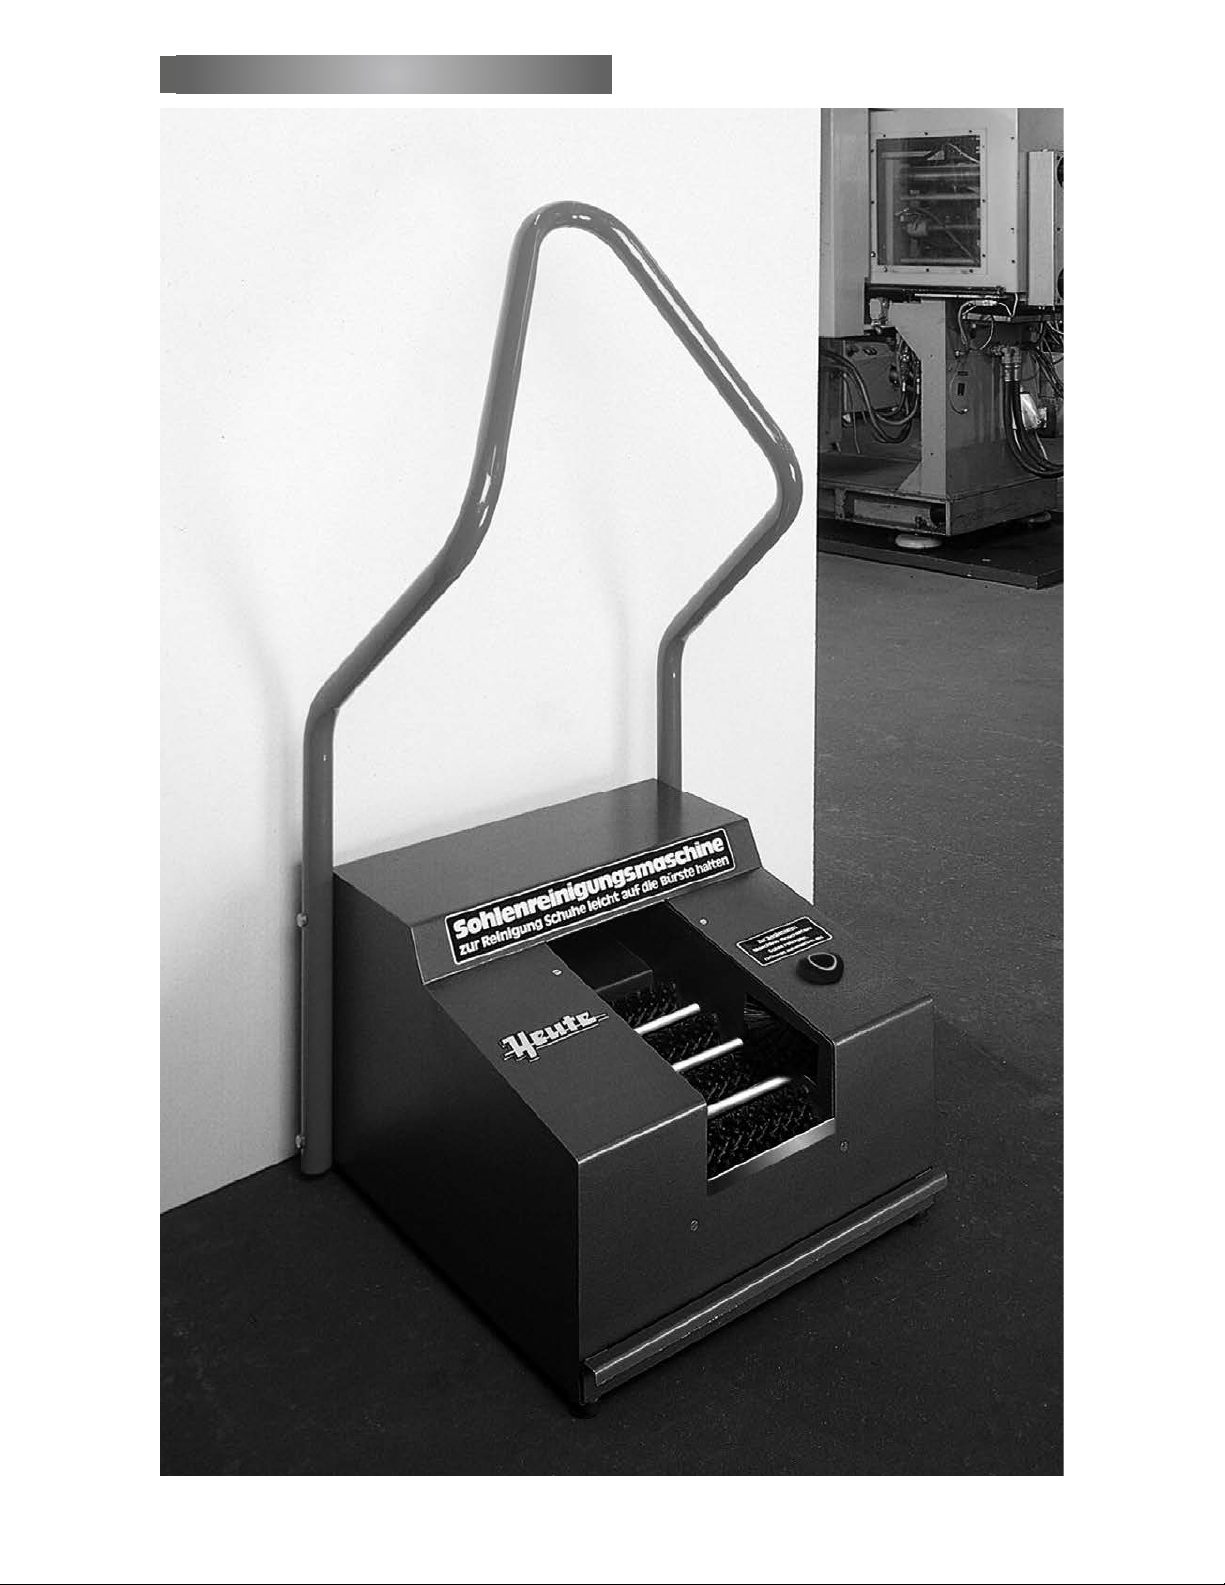
Intended use
HEUTE Solamat sole cleaning machines are used to clean the soles
of closed shoes and boots by means of electrically driven brushes.
No other use is permissible!
Only use the brushes approved for use with the machines by the
manufacturer.
Operation is only permissible in closed, dry rooms whilst observing
the specications listed in the "Safety instructions" section.
Use in potentially explosive areas is not permitted.
Foreseeable erroneous use
The shoe cleaning machine is not suitable for use as follows:
- Cleaning, cleansing and care of human body parts and objects
that are not parts of a shoe.
- Use as a tool for working on surface nishes
- Use with the addition of uids
Safety instructions
The machine must not be changed or modied be-
cause this can lead to risks such as a short circuit,
electric shock, re. Maintenance and repairs must
be carried out exclusively by authorised persons
with the use of original parts.
The use of non-original replacement parts or the
implementation of unauthorised modications
to the machine will result in the declaration of
conformity issued by the manufacturer/distributor
and the sign being voided with immediate
effect.
Only use the machine in closed rooms. Direct
contact with water must be avoided!
Operation is only permissible at ambient
temperatures between 0° C and 40° C.
The product must not be allowed to fall.
Do not continue to use the machine if the cleaning
brushes are worn. This can result in damage to the
shoe. The brushes must be replaced by a qualied
person.
The machine isn’t designed for continuous duty.
Necessarily please pay attention to page 21
(Technical Datas) where you will nd the parame-
ters of short-term operation (STO).
The design complies with protection class I.
The voltage supply is 230 V AC, 50-60 Hz or
115 Volt AC, 50-60 Hz. The concrete indications
mentioned on the fabrication label of the
machine are signicant.
During use, the motor can heat up to temperatures
of up to 90° C. Do not touch the motor without
wearing safety gloves.
Use by children, in particular when unattended,
must be excluded.
Ensure that any contact between (household)
animals and the machine is excluded.
Always disconnect the mains power plug prior to
service and repair work.
Do not continue to use the machine if it is dam-
aged and disconnect the mains power plug.
Excessive application pressure during use of the
brush can lead to damage to shoes/boots!
Necessarily shoelaces, laces, belts keep away from
ground level while using the wheel brushes. Those
parts could be taken by the brushes and could
cause injuries or damages of the shoes.
The operator is responsible for all personal
injury and damage to property that arises due to
unintended use, faulty machine connections and/
or operating errors.
Prior to cleaning, always unplug the mains
power plug and disconnect the power supply.
When cleaning the housing use of a dry or damp
microbre cloth is recommended.
Do not use cleaning products or household cleaner.
Protect the machine against moisture, spray water
and the effects of heat.
When in commercial establishments observe the
safety ordinance applicable on site as well as the
accident prevention regulations issued by the union
of professional associations for electrical systems
and equipment.
Ensure that the installation is level.

15
Welcome
Dear Customer, we would like to thank you for purchasing one of
our HEUTE industrial sole cleaning machines.
This operating manual is a constituent of the machine. It contains
important information on commissioning, operation and maintenance.
Please store this operating manual for future reference!
Scope of supply
Machine, power cable, operating manual
Declaration of Conformity
The manufacturer herewith conrms that the following machine of
type Solamat 90/100/150/200 complies with the directives listed
below:
- Machinery Directive (2006/42/EC)
- EMC directive (2014/30/EU)
Technical specications
- DIN EN 60335-1 (DIN VDE 0700-1):2020-08
- DIN EN 60335-2-82 (DIN VDE 0700-82):2020-10
- DIN EN 55014-1 (DIN VDE 0875-14-1):2018-08
- DIN EN 55014-2 (DIN VDE 0875-14-2):2016-01
- DIN EN 61000-3-2 (DIN VDE 0838-2):2019-12
- DIN EN 61000-3-3 (DIN VDE 0838-3):2020-07
- DIN EN 61000-6-2 (DIN VDE 0839-6-2):2019-11
- DIN EN 61000-6-3 (DIN VDE 0839-6-3):2022-06
Authorized representative Steffen Moersch.
Contact details (see address of manufacturer).
Christian Löwe, Managing Director
HEUTE Maschinenfabrik GmbH & Co. KG
Environmental protection
Disposal of transport packaging
The packaging materials in which your machine is supplied are
environmentally friendly and recyclable. Please help by disposing of
the packaging in an environmentally friendly manner. The packaging
must not be given to children to play with. There is a risk of
suffocation due to the folding box and lm.
Disposal of the product
Old devices that are no longer in use are not worthless waste.
Valuable raw materials can be recovered through environmentally
friendly disposal. Please inform yourself of the current disposal
methods by contacting the person responsible within your company
or your local authority.
Table of contents
Important – read rst 14
Intended use 14
Foreseeable erroneous use 14
Safety instructions 14
Welcome 15
Scope of supply 15
Declaration of Conformity 15
Environmental protection 15
Commissioning 16
Erection 16
Electrical connection 16
Filling the polish dispenser (only at Solamat 150) 16
Operation 16
Switching on and off 16
Sole cleaning 16
Leather upper cleaning (Solamat 100/200) 16
Leather upper cleaning (only Solamat 150) 16
Cleaning and care of the machine 16
Cleaning the housing 16
Coarse dirt drawer 16
Regular maintenance 16
Service and repairs 16
Disassembling the motor mounting 16
Changing the roller brushes – Solamat 90 17
Changing the roller brushes – Solamat 100/150/200 18
Changing the disc brushes – Solamat 90 18
Changing the disc brushes – Solamat 100/150/200 18
Changing the top brush – Solamat 100/150/200 19
Filter change – Solamat 200 19
Belt change – Solamat 90 19
Belt change – Solamat 100/150/200 20
Trouble-shooting 20
Technical data 21
Wiring diagram 21
Parts drawing – Solamat 90 22
Parts drawing – Solamat 100/150/200 23
EN
Other manuals for Solamat 90
1
This manual suits for next models
3
Table of contents
Other HEUTE Cleaning Equipment manuals

Popular Cleaning Equipment manuals by other brands


Suevia
Suevia 130.5011 EASYCLEANER Mounting instructions

i-MO
i-MO Öko 2000 user guide

unGer
unGer Hydro Power Ultra UNP01 operating instructions

Black & Decker
Black & Decker BHPC130 Original instructions

Uni-ram
Uni-ram UG5000E operating manual

Axi
Axi MTC HC-300 Installation, operating and maintenance manual