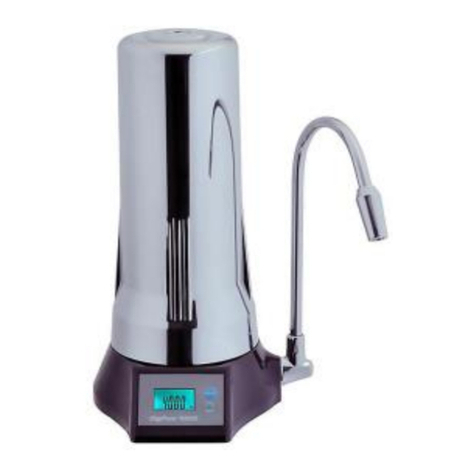
Hidro-Water ATHENEA User manual

ref: MA-UF-0002-EN-V14.0-ATHENEA.pdf
1
INDEX
1.- INTRODUCTION..................................................................................................................................2
2.- PRECAUTIONS AND WARNINGS .................................................................................................
2
3.- CHECKING THE CONTENTS .........................................................................................................
3
4.- INSTALLATION..................................................................................................................................
4
4.1.- Faucet installation ……………………………………………………..…………………………………………………….4
4.2.- Water inlet installation……………………………………………………………………………………………………….5
4.3.- Ultrafiltration instllation……………………………………………………………………………………………………...5
5.- ULTRAFILTRATION SYSTEM START UP ...................................................................................
7
6.- INSTRUCTIONS AND MAINTENANCE .........................................................................................
8
6.1.- Procedure for replacing cartridges and the membrane
..........................................................9
6.2.- Procedure for replacing the WATER STOP anyileak absorbent material
....................................10
7.- FAULTS, PROBABLE CAUSES AND POSSIBLE SOLUTIONS............................................
11
8.- SPARE PARTS.................................................................................................................................
14
9.- MONITORING AND MAINTENANCE CONTROL .....................................................................
12
9.1.- Ultrafiltration spare parts.
..........................................................................................12

ref: MA-UF-0002-EN-V14.0-ATHENEA.pdf
2
1.- INTRODUCTION
This manual explains the installation and operation of equipment made by HI-
DRO-WATER, S.L. for water treatment by ultrafiltration for household use. The equip-
ment has been designed to be connected to the housing facility.
It is easy installation and operation as it has already been semi-assembled. It
requires very little assembly as it is only necessary to connect the hydraulics and install
the faucet as indicated in point 4 of this manual.
In the absence of installation and maintenance as described in this manu-
al by technically qualified personnel to ensure the quality of water produced and
proper installation, the warranty is void.
2.- PRECAUCIONES Y ADVERTENCIAS
Please read this manual carefully following the warnings listed below before going
ahead with the installation and use of the ATHENEA ultrafiltration system. If you have
any doubts, please contact an official HIDRO-WATER S.L distributer.
•For the correct operation of osmosis systems with a pump, the pressure should
be between 2.5 and 4 bars.
•The temperature of the water to be treated should not be below 4ºC nor above
40ºC to avoid damaging the system.
•The ultrafiltration system is designed to treat tap water with a maximum salinity
of 1500 ppm. Do not use in places where the water is not microbiologically safe
or has an unknown quality. For water with a greater salinity level, please con-
tact an official HIDRO-WATER S.L distributer.
•It is advisable that the water to be treated has been softened or with a maxi-
mum hardness of 15ºHF for optimum performance.
•If the water has a high concentration of iron or magnesium, nitrate concentration
greater than 100 ppm, sulphate concentrations greater than 250 ppm, more
than 3 NTU turbidity and/or prolonged use of high chlorine levels, please con-
tact an official HIDRO-WATER S.L distributer to suggest an appropriate pre-
treatment system to ensure the correct operation of the system.
•If the osmosis system is not going to be used for a long period of time, close the
water passage.
•Install the system on a flat surface.
•Do not expose the system to direct sunlight or install it outdoors.
•The installation should be done by professionally qualified personnel and should
not be installed close to a heat source.
•Do not repair or take the system apart on your own. If the system is not working
correctly, please contact an official HIDRO-WATER S.L distributer. Any tam-

ref: MA-UF-0002-EN-V14.0-ATHENEA.pdf
3
pering of the equipment by unauthorized personnel will result in the warranty
be-ing void.
•Make sure the water passage is closed when a repair or maintenance is being
carried out.
•Do not bend the tubes to prevent flow and pressure blockages.
•Use original spare parts to assure the correct performance of the system.
•For installation, maintenance and cartridge change, please follow this manual;
otherwise the warranty will be void.
3.- CHECKING THE CONTENTS
Open the packaging and make sure that all of the components are inside, ready
for the installation.
Figure
Description
1 ATHENEA ultrafiltration system main unit
2
New Look Faucet
3
⅜” PE Tube
4 Feed adapter
5
¼” M x ¼” T
ball valve
6 ⅜” plastic insert
7
⅜” faucet tube adapter
8 ⅜” WATER STOP Antileak System
9
⅜” Pressure reducer 40 ps
10
Instruction manual
11 Sponge absorbent
X 1
X
1
X 1
X 1

ref: MA-UF-0002-EN-V14.0-ATHENEA.pdf
4
Figure
-
1
Figure
-
2
Figure
-
3
Figure
-
4
X 1
X
2
X 1
X 1
Figure
-
5
Figure
-
6
Figure
-
7
Figure
-
8
X1
X 1
X 1
Figure-9 Figure-10
Figure-11
4.- INSTALATION
The system can be installed anywhere in the residence where there is a water
input, a drain for water waste and sufficient space to be located. The most common
place is under the kitchen sink. The installation should be carried out by qualified per-
sonnel. onnel.
4.1. Faucet installation (Figure 2)
a. Choose the location on the counter where
you want to install the faucet.
b. Use a drill with a 12mm bit to make a
necessary sized hole to put the faucet.
c. Fit the tap in the hole as indicated in the fig-
ure using a spanner (our reference: OI-
0207-128 not supplied with system) to adjust
it tightening the nut.

ref: MA-UF-0002-EN-V14.0-ATHENEA.pdf
5
4.2. Water inlet installation (Figure-4 & Figure-5)
a. The water supply input consists of two parts; a brass ball valve (Figure 5
and an adaptor (Figure 4). The brass ball valve must be screwed to the
adaptor using sufficient Teflon on its thread, as shown in the figure below.
b. Turn off the water supply at the point where you are installing the ultrafiltra-
tion system.
c. The water supply input is designed to be used with hoses with a ⅜” connec-
tion. Insert the water feed adapter with the brass ball valve between the cold
water supply and the hose. (Never install a hot water connection as the ul-
trafiltration system will be damaged). Make sure that the brass ball valve is
closed.
4.3. Ultrafiltration system installation
The hydraulic connections should follow the contour of the surface cho-sen
for installation so that the tubes do not get mixed up or tangled. Leave a suf-
ficient length of tube to ease moving the system during future maintenance.
Here are the steps to follow to make the hydraulic connection:
a. Connect the ⅜” tube (Figure-3) to the water supply inlet (Figure-5)
b. The other end of the ⅜” tube should be connected to the pressure re-
ducer inlet (figure 10); to do so, you must remove the blue security clip
which is on the inlet of the pressure reducer and insert the tube fully.
Once you have introduced the ⅜” tube, replace the ⅜” plastic clip. (The
pressure reducer has a sticker with an arrow that indicates the way the

ref: MA-UF-0002-EN-V14.0-ATHENEA.pdf
6
water should flow, then the pressure reducer inlet will be the way the ar-
row is pointing)
c. Connect the ⅜” tube (Figure-3) to the pressure reducer outlet (Figure
10); to do so, you must remove the blue security clip which is on the out-
let of the pressure reducer and insert the tube fully. Once you have in-
troduced the ⅜” tube, replace the ⅜” plastic clip.
d. You must connect the other end of the ⅜” tube
to the inlet of the Ultrafiltration system (Figure-
1) where it’s marked “IN”, inserting it fully. Once
inserted, place the ⅜” security clip on it.
e. Screw the faucet adapter (figure 7) to the faucet plac-
ing the supplied O-Ring between the adapter and the
stud. Insert ⅜” tube through this adapter’s nut and ⅜”
sleeve then insert a ⅜” plastic insert (Figure-6) in that
end on the tube. Then you must insert that end in the
faucet’s adapt-er and tighten the nut with the help of a
wrench (Our reference: OI-0207-128, not supplied
with the system) or a spanner.
f. You must connect the other end of the ⅜” tube to
the ultrafiltration system outlet “FAUCET” where it’s
marked “FAUCET” (Inlet). To do so, you must insert
the ⅜” tube.

ref: MA-UF-0002-EN-V14.0-ATHENEA.pdf
7
Here is a diagram of how the ultrafiltration system should be installed.
5.- ULTRAFILTRATION SYSTEM START UP
a. Unscrew the back of the system, lift the lid
and pull out.
b. Make sure that all the connections are
connected properly and tightened.
c. Make sure that the arm of the WATER STOP
Antileak system is down like shown in the fig-
ure so that the water can enter the ultrafiltra-
tion system.
d. Open the water supply and then the ball
valve (figure 5) as shown. Make sure there
is no water leak. If there is, close the valve
and fix it.
e. Open the faucet (Figure 2) and let all of the air out from inside the ultra-
filtration system. Once a continual water flow comes out of the faucet,
let it run for 30 seconds and then close the faucet. If in the beginning,
the water runs black, don’t worry, this is normal, it’s caused by the resi-
due that the granulated carbon filter lets off. Drain this water. The water
will run clear not long after this.
f. Raise the arm on the WATER STOP An-
tileak system and place one of the pieces
of the absorbent material supplied with the
WATER STOP Antileak system. Keep the
other one safe as a spare part. Lower the
arm of the system so that water can enter
the ultrafiltration system.

ref: MA-UF-0002-EN-V14.0-ATHENEA.pdf
8
g. Insert and push to the system and screw
h. The system is now ready for use.
6.- INSTALLATION & MAINTENANCE
The installer should inform the family members of the following points of the ul-
trafiltration System:
a. Location of the water inlet, pressure reducer, faucet and the WA-
TER STOP Antileak system.
b. Maintaining the osmosis system. The recommended mainte-
nance of the ultrafiltra-tion system is in the table below. By not
following the maintenance as described in this manual, us-
ing original HIDRO-WATER S.L cartridges and by authorized
personnel that guarantees the quality of the water produced
and the correct operation of the osmosis system, the war-
ranty will be void.
Cartridge
type
Antibacterial
Sediments
cartridge
Carbon CTO
cartridge Ultrafiltration
membrane
Nanosilver
Carbon
cartridge
Stage
1
st
2
nd
3
rd
4
th
Reference
CA
-
02
18
-
03
CA
-
0218
-
05
CA
-
0218
-
04
ME
-
0218
-
06
Appearance
Replace*
6 - 9 month 6 - 9 months 1 – 2 years 6 – 9 months
Sanitation
Every time you change a cartridge, the membrane or a compo-
nent in contact with water or if you haven’t consumed water in
over a month, you must sanitise the system using the Sanitis-
ing kit (OI
-
0207
-
131).
Not supp
lied with the system.
*The life of the filters and membranes will vary depending on the quality of the water
supply, the usage and the amount of impurities it has.
Replace the cartridges in the given period to ensure the life of the membrane and the
quality of the water obtained.

ref: MA-UF-0002-EN-V14.0-ATHENEA.pdf
9
6.1.- Procedure for replacing cartridges and the membrane.
a. Close the water supply brass ball valve (Figure-5).
b. Open the faucet (figure 2) to relieve the pressure from inside the os-
mosis system.
c. To change any of the cartridges and/or membrane they must be
turned clock-wise and pulled downwards to remove it from its cap as
indicated in the follow-ing figure. This process must be carried out for
each of the cartridges that you want to replace.
d. Remove the cartridges/membrane from their original packaging.
Each car-tridge and/or membrane must be placed in the correspond-
ing position main-taining the correct order. To do so, you must insert
each cartridge in its cap and turn it anti-clockwise. This process must
be carried out for each of the car-tridges that you want to replace.

ref: MA-UF-0002-EN-V14.0-ATHENEA.pdf
10
e. Once you have replaced one of the cartridges/membrane with the
faucet (Figure-2) open the ball valve (Figure-5) at the water supply.
Let all of the air out from inside the ultrafiltration system. Once a con-
tinual water flow comes out of the faucet, let it run for 30 seconds
and then close the faucet. If in the beginning, the water runs black,
don’t worry, this is normal, it’s caused by the residue that the granu-
lated carbon filter lets off. Drain this water. The water will run clear
not long after this. Check for leaks, if there are any, close the valves
and fix them.
Precaution 1: If there is any water leak in any area of the tube connections, re-
move it and cut off 0.5cm. Then reconnect it. If the leak s produced on any thread,
unscrew the piece, apply more Teflon and screw it back on.
6.2. - Procedure for replacing the WATER STOP antileak absorbent
material
In the case of having to change the WATER STOP Antileak absorbent material;
you must do as follows:
d. Lower the arm on the WATER STOP Antileak system and it’s ready for use.
a. Raise the arm on the WATER STOP Antileak system, to cut off the water supply
(if there is a leak the arm will already be raised
b. Throw away the current absorbent material.esechar el material absorbente que
hay colocado.
c. Replace it with a new absorbent material

ref: MA-UF-0002-EN-V14.0-ATHENEA.pdf
11
d. Lower the arm on the WATER STOP Antileak system and it’s ready for use
7.- FAULTS, PROBABLE CAUSES AND POSSIBLE SOLUTIONS
SYMPTOM
PROBABLE CAUSE
SOLUTION
1. Zero/low production
a. No water supply.
b. Brass ball valve at entrance ful-
ly/partially closed.
c. Cartridges obstructed.
d. Membrane saturated.
e. Antileak system activated.
a. Wait until the water supply has been
restored.
b. Open the inlet valve fully.
c. Replace cartridges.
d. Replace membrane.
e. Check if the Antileak system has been
activated. If so, find the leak and fix it,
change the absorbent material and
lower the arm on the Antileak system.
2. Plastic or synthetic taste. a. Worn Nanosilver Carbon cartridge. a. Replace cartridge.
3. Chlorine taste and smell a. Worn cartridges. a. Change the cartridges.
4. Unpleasant taste and
smell a. Contamination.
a. Change the filters, membrane, post fil-
ter and sanitise.
5. White particles in the
water a. Air in the system
b. Excessive inlet pressure.
a. Wait for the air to pass as there’s no
urgent problem.
b. Check the pressure regulator.

ref: MA-UF-0002-EN-V14.0-ATHENEA.pdf
12
8.- RECAMBIOS EQUIPO DE ULTRAFILTRACIÓN
9.1.- Recambios Equipo de Ultrafiltración.
Nº
CÓDIGO
DESCRIPCIÓN
UDS
1
OI
-
0207
-
139
⅜” WATER STOP Antileak system.
1
2
OI-0207-141
⅜” Pressure reducer 40psi 1
3
OI
-
0210
-
03
¼” M x
⅜” T Brass ball valve
1
4
1/4" Elbow quick connection 3
5
OI
-
0230
-
09
⅜” M x
¼” F x
⅜” F Feed adapter
1
6
OI-0208-24 ⅜” tube faucet adapter 1
7
OI
-
0207
-
64
New Look
faucet
1
8
OI
-
0207
-
54
⅜” plastic insert
2
9
TU-0602-01 ⅜” Tube 1
10
ATHENEA
Ultrafiltration system support bracket
1
11
OI-0235-02 QC3 cartridge cups. 4
12
OI
-
0208
-
16
¼” M x
⅜” T Straight
2
13
OI
-
0208
-
04
¼” M x ¼” M Double Male connector
3
14
CA
-
0218
-
03
QC3 Antibacterial sediments cartridge
1
15
CA
-
0218
-
05
QC3 Carbon Block CTO cartridge
1
16
ME-0218-04
Ultrafiltration membrane 1
17
CA
-
0218
-
06
QC3 NANOSILVER Antibacterial cartridge
1
18
OI-0207-133
Absorbent material 2
19 3/8" Elbow quick connection fitting 2
20
1/4"
quick connector
2
21
ATHENEA system back part
22
ATHENEA
system front part

ref: MA-UF-0002-EN-V14.0-ATHENEA.pdf
13
1 2
3 5
4
6
7
8
9
10
11
12
11
11
11
13
14
15
16
17
18
19
20
21
22

ref: MA-UF-0002-EN-V14.0-ATHENEA.pdf
14
9.-MONITORING AND MAINTENANCE CONTROL
DATE: / /
SERVICE MADE NEXT
SERVICE
OBSERVATIONS
Sediments, GAC y CTO cart. change
/ /
Membrane change
.
/ /
Post filter change
/ /
Sanitization
/ /
Reparation
/ /
Name and signature of the authorised technician or distribu-
tor:
DATE: / /
SERVICE MADE NEXT
SERVICE
OBSERVATIONS
Sediments, GAC y CTO cart. change
/ /
Membrane change
.
/ /
Post filter change
/ /
Sanitization
/ /
Reparation
/ /
Name and signature of the authorised technician or distribu-
tor:
DATE: / /
SERVICE MADE NEXT
SERVICE
OBSERVATIONS
Sediments, GAC y CTO cart. change
/
/
Membrane change
.
/ /
Post filter change
/ /
Sanitization
/ /
Reparation
/ /
Name and signature of the authorised technician or distribu-
tor:
DATE
: / /
SERVICE MADE NEXT
SERVICE
OBSERVATIONS
Sediments, GAC y CTO cart. change
/ /
Membrane change
.
/ /
Post filter change
/ /
Sanitization
/ /
Reparation
/ /
Name and signature of the authorised technician or distribu-
tor:

ref: MA-UF-0002-EN-V14.0-ATHENEA.pdf
15
DATE: / /
SERVICE MADE NEXT
SERVICE
OBSERVATIONS
Sediments, GAC y CTO cart. change
/ /
Membrane change
. / /
Post filter change
/ /
Sanitization
/ /
Reparation
/ /
Name and signature of the authorised technician or distribu-
tor:
DATE: / /
SERVICE MADE NEXT
SERVICE
OBSERVATIONS
Sediments, GAC y CTO cart. change
/ /
Membrane change
.
/ /
Post filter change
/ /
Sanitization
/ /
Reparation
/ /
Name and signature of the authorised technician or distribu-
tor:
DATE: / /
SERVICE MADE NEXT
SERVICE
OBSERVATIONS
Sediments, GAC y CTO cart. change
/ /
Membrane change
.
/ /
Post filter change / /
Sanitization
/ /
Reparation
/ /
Name and signature of the authorised technician or distribu-
tor:
DATE: / /
SERVICE MADE NEXT
SERVICE
OBSERVATIONS
Sediments, GAC y CTO cart. change
/
/
Membrane change
.
/ /
Post filter change
/ /
Sanitization
/ /
Reparation
/ /
Name and signature of the authorised technician or distribu-
tor:

ref: MA-UF-0002-EN-V14.0-ATHENEA.pdf
16
Table of contents
Other Hidro-Water Water Filtration System manuals
Popular Water Filtration System manuals by other brands
FCI Watermakers
FCI Watermakers MAX-Q+ User manual & installation guide

Pentair
Pentair EVERPURE EZ-RO 200/2G Installation & operation guide

Aqua
Aqua Salt Evo instruction manual
A/DA
A/DA Nature Aquarium VUPPA II instructions
VGE
VGE Xclear IMMERSION UV-C 40W AMALGAM manual

Culligan
Culligan RVF-10 Installation and operation instructions
