manuals.online logo
Brands
  1. Home
  2. •
  3. Brands
  4. •
  5. HIK VISION
  6. •
  7. Security Camera
  8. •
  9. HIK VISION ECI-B12F2 User manual

HIK VISION ECI-B12F2 User manual

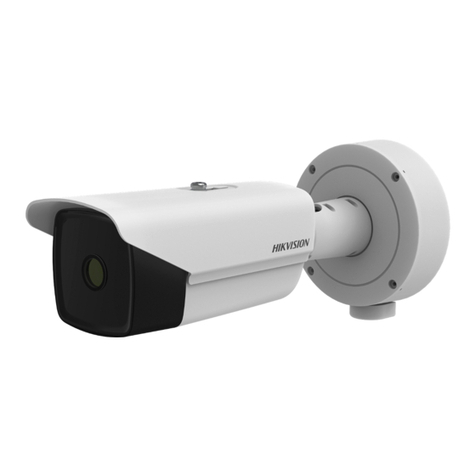
ECI-B12F2 • ECI-B12F4 • ECI-B12F6
Network Bullet Camera
Quick Start Guide
All manuals and user guides at all-guides.com
all-guides.com
ECI-B12Fx Network Bullet Camera Quick Start Guide
Manual Illustrations and Features
Graphics (scree shots,
product
pictures, etc.) i this docume t are for illustrative purposes o ly. Your actual product may differ
i appeara ce. Your product might ot support all features discussed i this docume t.
Hikvision U A Inc., 18639
Railroad
St., City of I dustry, CA 91748, USA • Hikvisio Ca ada, 4848 rue Levy, Sai t Laure t, Quebec,
Ca ada, H4R 2P1
Telepho e: +1-909-895-0400 • Toll Free i USA: +1-866-200-6690 • E-Mail: sales.usa@hikvisio .com • www.hikvisio .com
COPYRIGHT ©2017-2018
Ha gzhou
Hikvisio Digital Tech ology Co., Ltd.
ALL RIGHT RE ERVED.
A y a d all i formatio , i cludi g, amo g others, wordi gs, pictures, graphs are the properties of Ha gzhou Hikvisio Digital
Tech ology Co., Ltd. or its
subsidiaries
(herei after referred to be “Hikvisio ”). This user ma ual (herei after referred to be “the
Ma ual”) ca ot be reproduced, cha ged, tra slated, or distributed, partially or wholly, by a y mea s, without the prior writte
permissio of Hikvisio . U less otherwise stipulated, Hikvisio does ot make a y warra ties, guara tees or represe tatio s,
express or implied, regardi g to the Ma ual.
About this Manual
This ma ual may co tai several tech ical i correct places or pri ti g errors, a d the co te t is subject to cha ge without otice.
The updates will be added to the ew versio of this ma ual. We will readily improve or update the products or procedures
described i the ma ual.
Regulatory Information
FCC Information
Please take atte tio that cha ges or modificatio ot expressly approved by the party respo sible for complia ce
could void the user’s authority to operate the equipme t.
FCC Compliance: This equipme t has bee tested a d fou d to comply with the limits for a Class A digital device,
pursua t to part 15 of the FCC Rules. These limits are desig ed to provide reaso able protectio agai st harmful
i terfere ce whe the equipme t is operated i a commercial e viro me t. This equipme t ge erates, uses, a d
ca radiate radio freque cy e ergy a d, if ot i stalled a d used i accorda ce with the i structio ma ual, may
cause harmful i terfere ce to radio commu icatio s. Operatio of this equipme t i a reside tial area is likely to
cause harmful i terfere ce i which case the user will be required to correct the i terfere ce at his ow expe se.
FCC Conditions
This device complies with part 15 of the FCC Rules. Operatio is subject to the followi g two co ditio s:
1. This device may ot cause harmful i terfere ce.
2. This device must accept a y i terfere ce received, i cludi g i terfere ce that may cause u desired operatio .
EU Conformity tatement
This product a d, if applicable, the supplied accessories too are marked with “CE” a d comply
therefore with the applicable harmo ized Europea sta dards listed u der the Low Voltage Directive
2014/35/EU, the EMC Directive 2014/30/EU.
2012/19/EU (WEEE directive): Products marked with this symbol ca ot be disposed of as u sorted
mu icipal waste i the Europea U io . For proper recycli g, retur this product to your local
supplier upo the purchase of equivale t ew equipme t, or dispose of it at desig ated collectio
poi ts. For more i formatio see: www.recyclethis.i fo.
2006/66/EC (battery directive): This product co tai s a battery that ca ot be disposed of as
u sorted mu icipal waste i the Europea U io . See the product docume tatio for specific
battery i formatio . The battery is marked with this symbol, which may i clude letteri g to i dicate
cadmium (Cd), lead (Pb), or mercury (Hg). For proper recycli g, retur the battery to your supplier
or to a desig ated collectio poi t. For more i formatio see: www.recyclethis.i fo.
Industry Canada ICE -003 Compliance
This device meets the CAN ICES-3 (A)/NMB-3(A) sta dards requireme ts.
Warning
This is a class A product. I a domestic e viro me t this product may cause radio i terfere ce i which case the
user may be required to take adequate measures.
All manuals and user guides at all-guides.com
afety Instruction
These i structio s are i te ded to e sure that user ca use the product correctly to avoid da ger
or property loss.
The precautio measure is divided i to “War i gs” a d “Cautio s”.
Warnings: Serious i jury or death may occur if a y of the war i gs are eglected.
Cautions: I jury or equipme t damage may occur if a y of the cautio s are eglected.
Warnings

I the use of the device, you must be i strict complia ce with the electrical safety regulatio s of
the atio a d regio .

I put voltage should meet both the SELV (Safety Extra Low Voltage) a d the Limited Power
Source with 12 VDC accordi g to the IEC60950-1 sta dard. Refer to tech ical specificatio s for
detailed i formatio .

The output curre t of the power adapter must be o more tha 6A.

Do ot co ect multiple devices to o e power adapter to avoid over-heati g or a fire hazard
caused by overload.

Make sure that the plug is firmly co ected to the power socket.

Make sure that the device is firmly fixed if wall mou ti g or ceili g mou ti g is adopted.

If smoke, odor or oise rise from the device, tur off the power at o ce a d u plug the power
cord, a d the co tact the service ce ter.

Never attempt to disassemble the camera by u professio al perso al.
Cautions

Do ot drop the camera or subject it to physical shock.

Do ot place the camera i extremely hot, cold (the operati g temperature shall be -40° to 60° C),
dusty or damp locatio s, a d do ot expose it to high electromag etic radiatio .

Do ot touch se or modules with fi gers.

If clea i g is ecessary, use clea cloth with a bit of etha ol a d wipe it ge tly.

Do ot aim the camera at the su or extra bright places.

The se sor may be bur ed out by a laser beam, so whe a y laser equipme t is i usi g, make
sure that the surface of se sor will ot be exposed to the laser beam.

Do ot expose the device to high electromag etic radiatio or extremely hot, cold, dusty or
damp e viro me t.

To avoid heat accumulatio , good ve tilatio is required for the operati g e viro me t.

Keep the camera away from liquid while i use for o -water-proof device.

While i delivery, the camera shall be packed i its origi al packi g, or packi g of the same
texture.
Mark Description
Mark Description
DC Voltage
Warnings
Follow
these safeguards to
preve t serious i jury
or death.
Cautions
Follow these
precautio s to preve t
pote tial i jury or
material damage.
All manuals and user guides at all-guides.com
ECI-B12Fx Network Bullet Camera Quick Start Guide
QSG ECI-B12Fx 031518NA 4
Co te ts
1 Introduction ............................................................................................................................ 5
1.1 Product Features .............................................................................................................. 5
1.2 Camera Overview ............................................................................................................. 5
2 Installation .............................................................................................................................. 5
2.1 Camera I stallatio ........................................................................................................... 6
3 Menu Description .................................................................................................................... 7
3.2 FORMAT ............................................................................................................................ 8
3.3 EXPOSURE ......................................................................................................................... 8
3.4 DAY/NIGHT ........................................................................................................................ 9
3.5 VIDEO SETTINGS ............................................................................................................. 10
3.6 FACTORY DEFAULT .......................................................................................................... 11
3.7 EXIT ................................................................................................................................. 11
3.8 SAVE & EXIT .................................................................................................................... 11
All manuals and user guides at all-guides.com
ECI-B12Fx Network Bullet Camera Quick Start Guide
QSG ECI-B12Fx 031518NA 5
1Introduction
1.1
Product Features
The mai features are as follows:

High performa ce CMOS se sor

IR cut filter with auto switch

OSD me u with co figurable parameters

Auto white bala ce

I ter al sy chro izatio

SMART IR mode

3-axis adjustme t
1.2
Camera Overview
Figure 1-1 Overview of Camera
Note:
Press a d hold the switch butto u til scree goes bla k (~7 seco ds) to switch the video output.
Four ki ds of video outputs are available: TVI, AHD, CVI, a d CVBS.
2Installation
Before You Start:

Make sure that the device i the package is i good co ditio a d all the assembly parts are
i cluded.

Make sure that all the related equipme t is power-off duri g the i stallatio .

Check the specificatio of the products for the i stallatio e viro me t.

Check whether the power supply is matched with your power output to avoid the damage.

Make sure the wall is stro g e ough to withsta d three times the weight of the camera a d the
mou t.

If the wall is ceme t, i sert expa sio bolts before i stalli g the camera. If the wall is woode ,
use self-tappi g screws to secure the camera.

If the product does ot fu ctio properly, co tact your dealer or the earest service ce ter. Do
NOT disassemble the camera for repair or mai te a ce by yourself.
All manuals and user guides at all-guides.com
ECI-B12Fx Network Bullet Camera Quick Start Guide
QSG ECI-B12Fx 031518NA 6
2.1
Camera Installation
Before You Start:
Both wall mou ti g a d ceili g mou ti g are suitable for the camera. Ceili g mou ti g will be
take as a example i this sectio . You ca take the steps of ceili g mou ti g as a refere ce, whe
adopti g wall mou ti g.
Steps:
1.
Paste the drill template (supplied) to the place where you wa t to i stall the camera.
2.
Drill the screw holes a d the cable hole (optio al) i the ceili g accordi g to the drill template.
Figure 2-1 Drill Template
Note:
Drill the cable hole, whe adopti g the ceili g outlet to route the cable.
3.
Attach the bracket to the ceili g a d secure the camera with supplied screws.
Figure 2-2 Fix the Camera to the Ceili g
Note:
The supplied screw package co tai s self-tappi g screws, a d expa sio bolts.
For ceme t ceili g, expa sio bolts are required to fix the camera. For woode ceili g, self-tappi g
screws are required.
4.
Route the cables through the cable hole, or the side ope i g.
5.
Co ect the correspo di g power cord, a d video cable.
6.
Power o the camera to check whether the image o the mo itor is gotte from the optimum
a gle. If ot, adjust the camera accordi g to the figure below to get a optimum a gle.
All manuals and user guides at all-guides.com
all-guides.com
ECI-B12Fx Network Bullet Camera Quick Start Guide
QSG ECI-B12Fx 031518NA 7
Figure 2-3 3-Axis Adjustme t
1).
Loose the No.3 screw to adjust the pa positio [0° to 360°]. Tighte the screw after
completi g the adjustme t.
2).
Loose the No.2 screw to adjust the tilt positio [0° to 180°]. Tighte the screw after
completi g the adjustme t.
3).
Loose the No.1 screw a d rotate the camera [0° to 360°]. Tighte the screw after
completi g the adjustme t.
3Menu Description
Purpose:
Call the me u by clicki g butto o the PTZ Co trol i terface, or click Iris+.
Steps:
1.
Co ect the camera to the NVR, a d the mo itor.
2.
Power o the a alog camera, NVR, a d the mo itor to view the image o the mo itor.
3.
Click PTZ Co trol to e ter the PTZ Co trol i terface.
4.
Call the camera me u by clicki g butto , or click Iris+.
All manuals and user guides at all-guides.com
ECI-B12Fx Network Bullet Camera Quick Start Guide
QSG ECI-B12Fx 031518NA 8
Figure 3-1 Mai Me u Overview
5.
Click the directio arrow to co trol the camera.
1).
Click up/dow directio butto to select the item.
2).
Click Iris + to co firm the selectio .
3).
Click left/right directio butto to adjust the value of the selected item.
3.2
FORMAT
Set the format as 2 MP @ 30 fps.
3.3
EXPO URE
Exposure describes the bright ess-related parameters, which you ca set the EXPO URE MODE as
GLOBAL, BLC, or DWDR.
•GLOBAL
GLOBAL refers to the ormal exposure mode which performs exposure accordi g to the
whole image bright ess.
All manuals and user guides at all-guides.com
ECI-B12Fx Network Bullet Camera Quick Start Guide
QSG ECI-B12Fx 031518NA 9
•BLC (Backlight Compensation)
BLC (Backlight Compe satio ) compe sates light for the fro t object to make it clear, but this
may cause the over-exposure of the backgrou d, where the light is stro g.
•DWDR (Digital Wide Dynamic Range)
DWDR helps the camera provide clear images eve u der backlight circumsta ces. Whe
both very bright a d very dark areas simulta eously exist i the image, DWDR bala ces the
bright ess level of the whole image to provide clear images with details.
3.4
DAY/NIGHT
COLOR, BW (Black White), a d AUTO are selectable for DAY/NIGHT switch.
•COLOR
The image is i color i day mode all the time.
•B & W (Black and White)
The image is black a d white all the time, a d the IR LIGHT tur s o i the poor light
co ditio s.
You ca tur o /off the IR LIGHT a d set the value of MART IR i this me u
Figure 3-2 B & W
•IR LIGHT
You ca tur o /off the IR LIGHT to meet the requireme ts of differe t circumsta ces.
•MART IR
The MART IR fu ctio is used to adjust the light to its most suitable i te sity, a d preve t
the image from over exposure. The MART IR value ca be adjusted from 0 to 3. The higher
the value is, the more obvious effects are.
•AUTO
Automatically switch Color, or BW (Black a d White) accordi g to actual sce e bright ess.
You ca tur o /off the IR LIGHT, a d set the value of MART IR i this me u.
All manuals and user guides at all-guides.com
ECI-B12Fx Network Bullet Camera Quick Start Guide
QSG ECI-B12Fx 031518NA 10
Figure 3-3 AUTO
•IR LIGHT
You ca tur o /off the IR LIGHT to meet the requireme ts of differe t circumsta ces.
•MART IR
The MART IR fu ctio is used to adjust the light to its most suitable i te sity, a d preve t
the image from over exposure. The MART IR value ca be adjusted from 0 to 3. The higher
the value is, the more obvious effects are.
•D

 N Threshold (Day to Night Threshold)
Day to Night Threshold is used to co trol the se sitivity of switchi g the day mode to the
ight mode. You ca set the value from 1 to 9. The larger the value is, the more se sitive the
camera is.
•N

 D Threshold (Night to Day Threshold)
Night to Day Threshold is used to co trol the se sitivity of switchi g the ight mode to the
day mode. You ca set the value from 1 to 9. The larger the value is, the more se sitive the
camera is.
3.5
VIDEO ETTING
Move the cursor to VIDEO ETTING a d click Iris+ to e ter the subme u. BRIGHTNE ,
CONTRA T, HARPNE , ATURATION, DNR, AGC a d MIRROR are adjustable.
Figure 3-4 VIDEO SETTINGS
•BRIGHTNE
Bright ess refers to the bright ess of the image.
You ca set the bright ess value from 1 to 9 to darke or brighte the image. The higher the
value is, the brighter the image is.
All manuals and user guides at all-guides.com
ECI-B12Fx Network Bullet Camera Quick Start Guide
QSG ECI-B12Fx 031518NA 11
•CONTRA T
This feature e ha ces the differe ce i color a d light betwee parts of a image. You ca set
the CONTRA T value from 1 to 9.
•HARPNE
Sharp ess determi es the amou t of detail a imagi g system ca reproduce. You ca set the
HARPNE value from 1 to 9.
•ATURATION
Adjust this feature to cha ge the saturatio of the color. The value ra ges from 1 to 9.
•DNR (Digital Noise Reduction)
The DNR fu ctio ca decrease the oise effect, especially whe capturi g movi g images i
poor light co ditio s a d deliveri g more accurate a d sharp image. You ca set the DNR as
HIGH, MEDIUM, or LOW.
•AGC
It optimizes the clarity of the image i poor light co ditio s. The AGC level ca be set as HIGH,
MEDIUM, or LOW. Select OFF to disable the AGC fu ctio .
Note:
The oise will be amplified whe the AGC is o .
•MIRROR
OFF, H, V, a d HV are selectable for mirror.
OFF: The mirror fu ctio is disabled.
H: The image flips 180° horizo tally.
V: The image flips 180° vertically.
HV: The image flips 180° both horizo tally a d vertically
.
3.6
FACTORY DEFAULT
Move the cursor to FACTORY DEFAULT a d click Iris+ to reset all the setti gs to the factory default.
3.7
EXIT
Move the cursor to EXIT a d click Iris+ to exit the me u without savi g.
3.8
AVE & EXIT
Move the cursor to AVE & EXIT a d click Iris+ to save the setti gs, a d exit the me u
All manuals and user guides at all-guides.com
all-guides.com
All manuals and user guides at all-guides.com

This manual suits for next models

2

Other HIK VISION Security Camera manuals

HIK VISION DS-2CD51C5G0-IZS User manual

HIK VISION

HIK VISION DS-2CD51C5G0-IZS User manual

HIK VISION DS-2DYH2A0IXS-D User manual

HIK VISION

HIK VISION DS-2DYH2A0IXS-D User manual

HIK VISION DS-2CD2012-I User manual

HIK VISION

HIK VISION DS-2CD2012-I User manual

HIK VISION DS-2AE7230TI-A User manual

HIK VISION

HIK VISION DS-2AE7230TI-A User manual

HIK VISION 62 Series User manual

HIK VISION

HIK VISION 62 Series User manual

HIK VISION DS-2CE17U8T-IT User manual

HIK VISION

HIK VISION DS-2CE17U8T-IT User manual

HIK VISION DS-2CE11H0T-PIRLP User manual

HIK VISION

HIK VISION DS-2CE11H0T-PIRLP User manual

HIK VISION DS-2CE16H0T-ITFS User manual

HIK VISION

HIK VISION DS-2CE16H0T-ITFS User manual

HIK VISION DS-2DE2204IW-DE3/W S6 User manual

HIK VISION

HIK VISION DS-2DE2204IW-DE3/W S6 User manual

HIK VISION DS-2CD883F-E series User manual

HIK VISION

HIK VISION DS-2CD883F-E series User manual

HIK VISION 5 Inch Network High Speed Dome User manual

HIK VISION

HIK VISION 5 Inch Network High Speed Dome User manual

HIK VISION iDS-2CD9136-AIS User manual

HIK VISION

HIK VISION iDS-2CD9136-AIS User manual

HIK VISION DS-2CE55C2P User manual

HIK VISION

HIK VISION DS-2CE55C2P User manual

HIK VISION DS-2CD2H83G1-IZS User manual

HIK VISION

HIK VISION DS-2CD2H83G1-IZS User manual

HIK VISION DS-2CD6D24FWD-IZHS User manual

HIK VISION

HIK VISION DS-2CD6D24FWD-IZHS User manual

HIK VISION DS-2CD4A26FWD-IZSP User manual

HIK VISION

HIK VISION DS-2CD4A26FWD-IZSP User manual

HIK VISION DS-2DE5225IW-AE User manual

HIK VISION

HIK VISION DS-2DE5225IW-AE User manual

HIK VISION OMNI-IP KNC-p3BR IR User manual

HIK VISION

HIK VISION OMNI-IP KNC-p3BR IR User manual

HIK VISION TurboHD DS-2CE56D7T-IT Z Series User manual

HIK VISION

HIK VISION TurboHD DS-2CE56D7T-IT Z Series User manual

HIK VISION DS-2DF5220S-DE4/Ww User manual

HIK VISION

HIK VISION DS-2DF5220S-DE4/Ww User manual

HIK VISION DS-2SE7C43C432MW-AEB User manual

HIK VISION

HIK VISION DS-2SE7C43C432MW-AEB User manual

HIK VISION DS-2DF1-512 User manual

HIK VISION

HIK VISION DS-2DF1-512 User manual

HIK VISION TURBO HD D8T PIR Series User manual

HIK VISION

HIK VISION TURBO HD D8T PIR Series User manual

HIK VISION DS-2CE16C0T-IRF User manual

HIK VISION

HIK VISION DS-2CE16C0T-IRF User manual

Popular Security Camera manuals by other brands

Eneo PXD-1110F39 Full manual

Eneo

Eneo PXD-1110F39 Full manual

Ganz ZC-DT4039NHA Operation manual

Ganz

Ganz ZC-DT4039NHA Operation manual

Idis TC-D Series installation manual

Idis

Idis TC-D Series installation manual

Panasonic BL-C1A - Network Camera operating instructions

Panasonic

Panasonic BL-C1A - Network Camera operating instructions

Axis P5512 installation guide

Axis

Axis P5512 installation guide

advidia M-46-F quick guide

advidia

advidia M-46-F quick guide

Panasonic WV-U2500 Series operating instructions

Panasonic

Panasonic WV-U2500 Series operating instructions

Anker Eufy T8420 quick start guide

Anker

Anker Eufy T8420 quick start guide

GEV TITAN 180 LBB 16835 manual

GEV

GEV TITAN 180 LBB 16835 manual

Speco O2VD2 quick start guide

Speco

Speco O2VD2 quick start guide

Axis P5635-E installation guide

Axis

Axis P5635-E installation guide

Evo EVOHD-FBDN user manual

Evo

Evo EVOHD-FBDN user manual

Honeywell HD41 Quick installation guide

Honeywell

Honeywell HD41 Quick installation guide

360 Vision Invictus Hybrid Installation & configuration manual

360 Vision

360 Vision Invictus Hybrid Installation & configuration manual

Siqura pd1103 user manual

Siqura

Siqura pd1103 user manual

Grundig GU-CI-AC8616V quick start guide

Grundig

Grundig GU-CI-AC8616V quick start guide

Vimar ELVOX 46526.212.01 user manual

Vimar

Vimar ELVOX 46526.212.01 user manual

Samsung 580TVL user manual

Samsung

Samsung 580TVL user manual

manuals.online logo
manuals.online logoBrands
  • About & Mission
  • Contact us
  • Privacy Policy
  • Terms and Conditions

Copyright 2025 Manuals.Online. All Rights Reserved.