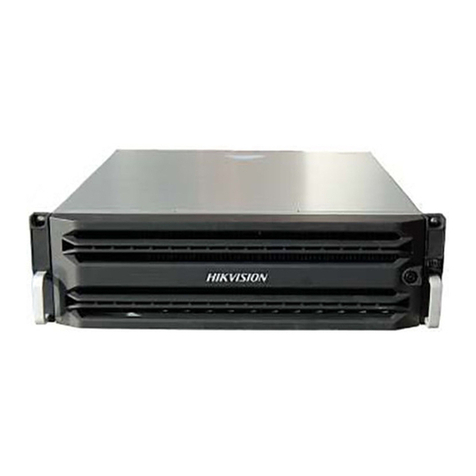
HIK VISION DS-AT1000S/160 User manual

DS-AT1000S Series Storage System
Quick Start Guide

DS-AT1000S Series Storage System Quick Start Guide
1
TABLE OF CONTENTS
Chapter 1 Working Environment and Installation ........................................................................5
1.1 Environment of Equipment Room............................................................................................5
1.1.1 Power Supply System......................................................................................................5
1.1.2 Temperature and Humidity of Equipment Room............................................................5
1.2 Installation and Initial Power-on..............................................................................................7
1.3 Notes for Installation................................................................................................................7
Chapter 2 Appearance and Installation .......................................................................................8
2.1 Device Appearance...................................................................................................................8
2.1.1 Chassis Overall View .......................................................................................................8
2.1.2 Front Panel ......................................................................................................................8
2.1.3 Description of Buttons in Front Panel.............................................................................9
2.1.4 Rear Panel .....................................................................................................................11
2.2 Install Accessories ..................................................................................................................13
2.2.1 Installation Requirement...............................................................................................13
2.2.2 Install HDD.....................................................................................................................14
2.3 Startup....................................................................................................................................16
2.4 Shutdown ...............................................................................................................................17
Chapter 3 Function Configuration .............................................................................................18
Chapter 4 Network...................................................................................................................19
4.1 Activate Storage System.........................................................................................................19
4.2 Configure Network Parameters..............................................................................................19
4.2.1 Modify Network Parameters.........................................................................................19
4.2.2 Modify IP Address of Bond Network Interface .............................................................21
Chapter 5 System Configuration................................................................................................ 22
5.1 One-Key Configuration...........................................................................................................22
5.2 Format Storage Space ............................................................................................................23
5.2.1 Activate Hybrid SAN Sub-System ..................................................................................23
5.2.2 Format Storage Space ...................................................................................................24
Chapter 6 Basic Configuration...................................................................................................25
6.1 Camera Management.............................................................................................................25
6.2 Configure Recording Schedule ...............................................................................................26
6.3 Live View ................................................................................................................................27
6.4 Playback..................................................................................................................................27

DS-AT1000S Series Storage System Quick Start Guide
2
Quick Start Guide
COPYRIGHT © 2019 Hangzhou Hikvision Digital Technology Co., Ltd.
ALL RIGHTS RESERVED.
Any and all information, including, among others, wordings, pictures, graphs are the properties of
Hangzhou Hikvision Digital Technology Co., Ltd. or its subsidiaries (hereinafter referred to be
“Hikvision”). This user manual (hereinafter referred to be “the Manual”) cannot be reproduced,
changed, translated, or distributed, partially or wholly, by any means, without the prior written
permission of Hikvision. Unless otherwise stipulated, Hikvision does not make any warranties,
guarantees or representations, express or implied, regarding to the Manual.
About this Manual
This Manual is applicable to DS-AT1000S Series Storage System.
The Manual includes instructions for using and managing the product. Pictures, charts, images and
all other information hereinafter are for description and explanation only. The information
contained in the Manual is subject to change, without notice, due to firmware updates or other
reasons. Please find the latest version in the company website
(http://overseas.hikvision.com/en/).
Please use this user manual under the guidance of professionals.
Trademarks Acknowledgement
and other Hikvision’s trademarks and logos are the properties of Hikvision in various
jurisdictions. Other trademarks and logos mentioned below are the properties of their respective
owners.
Legal Disclaimer
TO THE MAXIMUM EXTENT PERMITTED BY APPLICABLE LAW, THE PRODUCT DESCRIBED, WITH ITS
HARDWARE, SOFTWARE AND FIRMWARE, IS PROVIDED “AS IS”, WITH ALL FAULTS AND ERRORS,
AND HIKVISION MAKES NO WARRANTIES, EXPRESS OR IMPLIED, INCLUDING WITHOUT LIMITATION,
MERCHANTABILITY, SATISFACTORY QUALITY, FITNESS FOR A PARTICULAR PURPOSE, AND
NON-INFRINGEMENT OF THIRD PARTY. IN NO EVENT WILL HIKVISION, ITS DIRECTORS, OFFICERS,
EMPLOYEES, OR AGENTS BE LIABLE TO YOU FOR ANY SPECIAL, CONSEQUENTIAL, INCIDENTAL, OR
INDIRECT DAMAGES, INCLUDING, AMONG OTHERS, DAMAGES FOR LOSS OF BUSINESS PROFITS,
BUSINESS INTERRUPTION, OR LOSS OF DATA OR DOCUMENTATION, IN CONNECTION WITH THE
USE OF THIS PRODUCT, EVEN IF HIKVISION HAS BEEN ADVISED OF THE POSSIBILITY OF SUCH
DAMAGES.
REGARDING TO THE PRODUCT WITH INTERNET ACCESS, THE USE OF PRODUCT SHALL BE WHOLLY
AT YOUR OWN RISKS. HIKVISION SHALL NOT TAKE ANY RESPONSIBILITIES FOR ABNORMAL
OPERATION, PRIVACY LEAKAGE OR OTHER DAMAGES RESULTING FROM CYBER ATTACK, HACKER
ATTACK, VIRUS INSPECTION, OR OTHER INTERNET SECURITY RISKS; HOWEVER, HIKVISION WILL
PROVIDE TIMELY TECHNICAL SUPPORT IF REQUIRED.
SURVEILLANCE LAWS VARY BY JURISDICTION. PLEASE CHECK ALL RELEVANT LAWS IN YOUR
JURISDICTION BEFORE USING THIS PRODUCT IN ORDER TO ENSURE THAT YOUR USE CONFORMS
THE APPLICABLE LAW. HIKVISION SHALL NOT BE LIABLE IN THE EVENT THAT THIS PRODUCT IS
USED WITH ILLEGITIMATE PURPOSES.
IN THE EVENT OF ANY CONFLICTS BETWEEN THIS MANUAL AND THE APPLICABLE LAW, THE LATER
PREVAILS.
DS-AT1000S Series Storage System Quick Start Guide
3
Regulatory Information
FCC Information
FCC compliance: This equipment has been tested and found to comply with the limits for a Class A
digital device, pursuant to part 15 of the FCC Rules. These limits are designed to provide
reasonable protection against harmful interference when the equipment is operated in a
commercial environment. This equipment generates, uses, and can radiate radio frequency energy
and, if not installed and used in accordance with the instruction manual, may cause harmful
interference to radio communications. Operation of this equipment in a residential area is likely to
cause harmful interference in which case the user will be required to correct the interference at
his own expense.
The device is advised to note that as a seller or a business user (Class A) Devices and intended for
use outside the Home area.
FCC Conditions
This device complies with part 15 of the FCC Rules. Operation is subject to the following two
conditions:
1. This device may not cause harmful interference.
2. This device must accept any interference received, including interference that may cause
undesired operation.
EU Conformity Statement
This product and - if applicable - the supplied accessories too are marked with "CE" and
comply therefore with the applicable harmonized European standards listed under the
EMC Directive 2014/30/EU, the RoHS Directive 2011/65/EU, the LVD Directive 2014/35/EU.
2012/19/EU (WEEE directive): Products marked with this symbol cannot be disposed of
as unsorted municipal waste in the European Union. For proper recycling, return this
product to your local supplier upon the purchase of equivalent new equipment, or
dispose of it at designated collection points. For more information see: www.recyclethis.info
2006/66/EC (battery directive): This product contains a battery that cannot be disposed
of as unsorted municipal waste in the European Union. See the product documentation
for specific battery information. The battery is marked with this symbol, which may
include lettering to indicate cadmium (Cd), lead (Pb), or mercury (Hg). For proper recycling, return
the battery to your supplier or to a designated collection point. For more information see:
www.recyclethis.info
Industry Canada ICES-003 Compliance
This device meets the CAN ICES-3 (A)/NMB-3(A) standards requirements.

DS-AT1000S Series Storage System Quick Start Guide
4
Applicable Models
This manual is applicable to the models listed in the following table.
Series
Model
DS-AT1000S series
DS-AT1000S/160
DS-AT1000S/240
DS-AT1000S/300
DS-AT1000S/320
DS-AT1000S/360
DS-AT1000S/440
DS-AT1000S/480
Symbol Conventions
The symbols that may be found in this document are defined as follows.
Symbol
Description
Provides additional information to emphasize or supplement
important points of the main text.
Indicates a potentially hazardous situation, which if not avoided,
could result in equipment damage, data loss, performance
degradation, or unexpected results.
Indicates a hazard with a high level of risk, which if not avoided, will
result in death or serious injury.

DS-AT1000S Series Storage System Quick Start Guide
5
Chapter 1 Working Environment and
Installation
Devices described in this manual should be installed in the standard equipment room.
1.1 Environment of Equipment Room
1.1.1 Power Supply System
The storage system is sensitive to the change of a voltage, and an excessively high or low voltage,
or a sudden change of the voltage may delete the data in the memory or even cause the damage
of the components. To avoid of such damage, you must ensure the power supply is stable and
grounded. You are recommended to use the UPS, or the multiple power supply if permitted.
The voltage should be 220V ± 4%, the sudden change should be 220V ± 15%, and frequency
should be 50Hz ± 0.5Hz.
Make the neutral line and GND line connections correct, and the voltage between them must
be less than 1 V.
Grounding for AC power supply system: ensure the GND line is properly connected. The
grounding for the chassis is recommended.
Grounding for DC power supply system: the chassis must be properly grounded.
Connect all power cords before applying power to the redundant power supply module.
1.1.2 Temperature and Humidity of Equipment Room
Item
Requirement
Working temperature
5 °C to 40 °C (41 °F to 104 °F)
temperature equipment room
21 °C ± 25 °C (69.8 °F ± 77 °F)
Storage temperatue
-40 °C to +70 °C (-40 °F to +158 °F)
Temperature change rate
< 5 °C/h (non-condensing)
Working humidity
20% RH to 80% RH
Storage humidity
5% RH to 95% RH
Location
Equipment room should be dust-free, and away from harmful
gas, and inflammable and explosive objects. Environment
with electromagnetic interference, strong virbation, noise,
and unstable voltage is also not recommended.

DS-AT1000S Series Storage System Quick Start Guide
6
Construction
The area of the equipment room should meet the
requirements of equipment installation and capacity
expansion. And the ground can bear product loading. The
rooting facilities should be well designed and ready.
Air conditioner
Install an air conditioner which supports power off restart
function in the machine room. The installation position of air
conditioning should ensure no air will blow to the equipment
directly.
Ventilation and heat
dissipation
To guarantee the equipments can be well ventilated, the
distance between the cabinet and the wall shall not be less
than 100 cm, and the distance between two cabinets shall
not be less than 120 cm. It is recommended to reserver 1U
space between two equipments. Ensure aire can effectively
convect between the cabinet and the equipment room.
Dust-free
For the equipment room locating near the dust source (coal
mine, rural road, farmland, etc.), the windows and doors
should be able to keep out the wind and sand.
Transportation
Pack the equipment into the package. Do not transport via
open truck or open warehouse. And do not transport the
equipment with inflammable, explosive, and corrosive goods.
Protect the equipment from rain, dust, and damage.
Particulate pollutant
≥0.5 μm. Dust in static air should be less than 18,000 in each
litre.
Corrosive gas concentration
The corrosion rate of copper test plate must be lower than
300 Åc in each month. (According to the requirements of G1
level on corrosive gas in ANSId/ISAe-71.04-1985 standard)
Floor bearing capability
Floor load-bearing capability requirement is 600 kg/m2. The
height from the floor to the ceiling should be larger than
2.7M. The required load-bearing capacity for the rack is 10 KG
multiply by device chassis size. E.g., a 4U equipment requires
40 KG bearing capability.
Vertical and horizontal
vibration acceleration on floor
surface
When the equipment is halted, acceleration value should not
be larger than 0.5m/S2.
Grounding
Ensure that each equipment is grounded. Serial grounding is
not allowd. The resistance between the equipment shell and
earth must be less than 4 Ω.
Åis a length unit. 1 Å = 1/10,000,000,000 m

DS-AT1000S Series Storage System Quick Start Guide
7
1.2 Installation and Initial Power-on
The device shall be placed on the fixed flat surface. Tilting surface is not allowed.
You can use the standard plate in the industrial cabinet or use the guide rail (not provided) to
install the device to the rack. It is recommended to use the bolts to fix the device to the rack
through the mounting screw holes on the rack.
Connect all the power cords of the device to the power socket and wait for 12 hours before
starting up. The temperature of the device and the equipment room must be consistent to
prevent the damage caused by a huge temperature difference.
If the device has been transported and stored for more than 10 days; perform the previous
operation and then start up and run the device for 30 minutes without the hard disks. And
then you shut down the device, insert the hard disks and start the device again.
1.3 Notes for Installation
The device is a high-precision equipment. Please keep stable and gentle when moving it.
Installation and running environment must meet standards. Take regular investigations and
records for the equipment room, or apply a remote monitoring for the working status of the
device.
Do not unplug the power cord when the device is running.
In case of alarm beeper produced during the system running, please take immediate check and
solution.

DS-AT1000S Series Storage System Quick Start Guide
8
Chapter 2 Appearance and Installation
2.1 Device Appearance
The system adopts rack-mounted chassis which provides LED indicators for the system status.
2.1.1 Chassis Overall View
Figure 2-1 Overall View of DS-AT1000S/360, DS-AT1000S/440, and DS-AT1000S/480
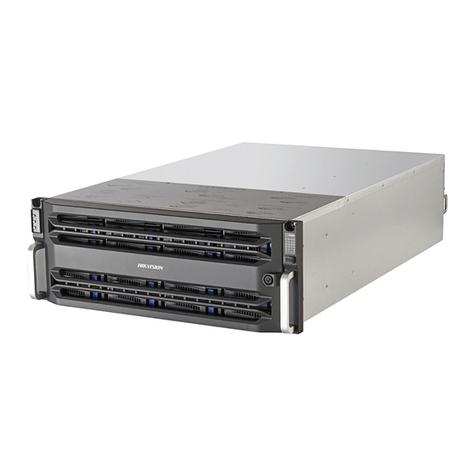
Figure 2-2 Overall View of DS-AT1000S/160, DS-AT1000S/240, DS-AT1000S/300, and DS-AT1000S/320
2.1.2 Front Panel
The disk slots view of the device is shown below.
Hard disks of 3.5 inches are supported. As shown above, slot order obeys the principle of left to
right and bottom to top. The HDDs in bottom floor, from left to right, are HDD ①~④. The HDDs
in second floor, from left to right, are HDD ⑤~⑧. And so on.

DS-AT1000S Series Storage System Quick Start Guide
9
Figure 2-3 Front Panel of DS-AT1000S/360, DS-AT1000S/440, and DS-AT1000S/480
Figure 2-4 Front Panel of DS-AT1000S/160, DS-AT1000S/240, DS-AT1000S/300, and DS-AT1000S/320
2.1.3 Description of Buttons in Front Panel
DS-AT1000S/360, DS-AT1000S/440, and DS-AT1000S/480
Figure 2-5 Front Panel Buttons
Figure 2-6 Button Description
Button
Name
Description
Power switch and indicator
When the system is off, press the button to turn
on it.
When the system is running, hold the button for
at least 4s and not more than 15s to turn off the

DS-AT1000S Series Storage System Quick Start Guide
10
DS-AT1000S/160, DS-AT1000S/240, DS-AT1000S/300, and DS-AT1000S/320
Figure 2-7 Front Panel Buttons
Figure 2-8 Button Description
system.
The indicator shows green when the system is
running.
Positioning button and
indicator
Press this button or click Positioning on GUI to
trigger locating function. Press the button again
to disable locating function.
The indicator flashes in blue when locating
function is triggered.
Mute button and alarm
indicator
When an alarm is triggered, the indicator flashes in
red and buzzer beeps. Press the button to stop
beeping.
Power indicator for controller A
When controller A is connected and is running, the
indicator is green.
Power indicator for controller B
When controller B is connected and is running, the
indicator is green.
Fault indicator for controller A
When a fault occurs in controller A, the indicator
flashes in red.
When controller A does not exit, the indicator is
unlit.
Fault indicator for controller B
When a fault occurs in controller B, the indicator
flashes in red.
When controller B does not exit, the indicator is
unlit.
Button
Name
Description

DS-AT1000S Series Storage System Quick Start Guide
11
2.1.4 Rear Panel
DS-AT1000S/360, DS-AT1000S/440, and DS-AT1000S/480
Figure 2-9 Rear Panel
Power switch and indicator
When the system is off, press the button to turn
on it.
When the system is running, hold the button for
at least 4s and not more than 15s to turn off the
system.
The indicator shows green when the system is
running.
Positioning button and
indicator
Press this button or click Positioning on GUI to
trigger locating function. Press the button again
to disable locating function.
The indicator flashes in blue when locating
function is triggered.
Mute button and alarm
indicator
When an alarm is triggered, the indicator flashes in
red and buzzer beeps. Press the button to stop
beeping.

DS-AT1000S Series Storage System Quick Start Guide
12
Table 2-1 Description
No.
Name
No.
Name
1
Power module 1
8
SAS interface
2
COM interface
9
Data network interface 3
3
Two USB interfaces
10
Management network
interface
4
Two USB interfaces
11
Power module 2
5
Data network interface 1
12
IPMI
6
Data network interface 2
13
Data network interface 4
7
VGA interface
DS-AT1000S/160, DS-AT1000S/240, DS-AT1000S/300, and DS-AT1000S/320
Figure 2-10 Rear Panel

DS-AT1000S Series Storage System Quick Start Guide
13
Table 2-2 Description
No.
Name
No.
Name
1
Power module 1
9
HDMI interface 2
2
HDMI interface 1
10
USB interface 2
3
USB interface 1
11
Data LAN 2
4
Data LAN 1
12
Management LAN
5
Data LAN 3
13
EXP interface 2
6
EXP interface 1
14
RS-232 interface
7
RS-485 interface
15
Fan module
8
Power module 2
2.2 Install Accessories
2.2.1 Installation Requirement
Before installation, please check whether following objects are in the package.
Storage system
Power cord
Gigabit Ethernet cable
Delivered CD
Screw package
The following accessories are optional or user-provided:
Gigabit Ethernet switch
Rack guide rail
Following the installation requirements to install the storage system. Before powering on your
storage system, please check the following hardware connection:
Connect the power cord to 220 VAC power supply.
Use the delivered Ethernet cable to connect all data network interfaces to a gigabit network
switch.
Serial port of the storage system, if any, is mainly designed for debugging. You are
recommended to use it with the help of our technical support.

DS-AT1000S Series Storage System Quick Start Guide
14
2.2.2 Install HDD
Selecting HDD Model
It is recommended to adopt the certificated professional HDD models so as to ensure the stable
running of the system and the reliable data storage. You are recommended to use the HDD in
recommended HDD list. Please contact our technical support for the recommended HDD list.
In order to avoid damages during transportation, it is recommended to package and transport the
hard disks separately with the chassis of network storage system.
Installing HDD
Follow the steps below to install HDDs.
Step 1 Remove the front panel cover.
1) Unlock the front panel cover with delivered key.
2) Hold the cover and pull it out till it gets out of the control of the lock.
3) Move the cover to right to remove it from front panel.
Step 2 Press the spring lock of the HDD on the left, drag the handle and then pull out the dummy
HDD from the chassis along the guide rail.
Step 3 (Optional) Remove the baffle, if any, from the dummy HDD.
Baffle
Figure 2-11 Remove Baffle
Step 4 Use four screws to secure the HDD (with the PCB side downward) to the bracket. In order to
ensure the HDD pin holds the line with the rear of the plate, mount screws to the specific
screw hole as shown.

DS-AT1000S Series Storage System Quick Start Guide
15
Figure 2-12 Splitting HDD Plate
Figure 2-13 Secure HDD
Step 5 Insert the HDD bracket (with the PCB side towards the left of the chassis) to the chassis and
push it along the guide apparatus to the bottom. Then, press the securing handle to ensure
the bracket has been seated into position and lock it.
Step 6 Repeat the operating steps above till all HDDs have been installed.
Indicators in Dummy HDD
Two indicators are provided.
When the HDD is normal, the blue indicator is on.
When the HDD is unavailable, the red indicator is on.
When the HDD is in positioning or detecting status, the red indicator flashes.

DS-AT1000S Series Storage System Quick Start Guide
16
Figure 2-14 Indicators in Dummy HDD
Precautions during HDD Installation
When you plug or unplug the hard disks, please take the following precautions:
When the HDD is running, the maximum vibration is can suffer is 0.25 Gs. While when it is idle,
the maximum vibration is 3.0 Gs.
Please use the provided screws to fix the four edges of the dummy HDD.
Make sure the HDD mounting bracket is steadily plugged into the chassis along the slot.
When you unplug the hard disk, unplug it about 3cm away from the chassis and then make it
stay about 30 seconds on the slot guide before totally unplug it from the chassis. Since the
discs of the hard disk are still spinning at a high speed just after powering off, unplugging the
hard disk immediately will damage the discs.
The system supports HDD hot swapping, yet the data storage safety is not ensured.
Please avoid frequent plugging/unplugging of the hard disks during the system running so as
to maintain long service life of the hard disks.
Take regular check and examine of the working status of the hard disks every two months, or
configure the system with auto check and examine task.
Please avoid unplugging a hard disk when it is writing or reading data so as to prevent data loss.
2.3 Startup
Obey the following rules to operate startup and shutdown:
Step 1 Connect all the power cords to the redundancy power supply module before applying
power.
Step 2 Press the power button on the device. It may take 5 to 10 minutes to finish the startup
process. After startup, storage system will send out beep sound.

DS-AT1000S Series Storage System Quick Start Guide
17
Check the connection between components if device cannot start up normally.
Do not press the power button after startup, or device will be forced to shut down and may
course the data loss.
2.4 Shutdown
Step 1 Log in the storage system via Internet Explore. For details, refer to 4.1 Activate Storage
System.
Step 2 Go to Device > Device Overview.
Figure 2-15 More Operations
Step 3 Click More Operations.
Step 4 Click Device Restart or Device Shutdown as your desire.

DS-AT1000S Series Storage System Quick Start Guide
18
Chapter 3 Function Configuration
Step 1 Configure network parameters. For details, refer to 4.2 Configure Network Parameters.
Step 2 Operate quick configuration. For details, refer to 5.1 One-Key Configuration.
Step 3 Format storage space. For details, refer to 5.2 Format Storage Space.
Step 4 Configure Hybrid SAN parameters. For details, refer to Chapter 6 Basic Configuration.

DS-AT1000S Series Storage System Quick Start Guide
19
Chapter 4 Network
You are recommended to connect all the network interfaces to the Internet.
4.1 Activate Storage System
Purpose
For the first-time access, you need to activate the storage system by setting an admin password.
No operation is allowed before activation. You can only use Internet Explorer 8.0 and above to visit
storage system.
Step 1 Use an Ethernet cable to connect your computer and the management network interface of
storage system.
Step 2 Set your computer IP address. Ensure it is in the same network segment with the storage
system.
Default IP address of management network interface is 10.254.254.254.
Step 3 Visit https://10.254.254.254:2004 in web browser to access the storage system.
Step 4 Create password for storage system and confirm it.
STRONG PASSWORD RECOMMENDED–We highly recommend you create a strong password of
your own choosing (using a minimum of 8 characters, including upper case letters, lower case
letters, numbers, and special characters) in order to increase the security of your product. And we
recommend you reset your password regularly, especially in the high security system, resetting the
password monthly or weekly can better protect your product.
Step 5 Click Enter to activate the storage system.
4.2 Configure Network Parameters
4.2.1 Modify Network Parameters
Step 1 Go to Device > Information > Modify Network.
This manual suits for next models
7
Table of contents
Other HIK VISION Storage manuals

HIK VISION
HIK VISION DS-A81 Series User manual

HIK VISION
HIK VISION DS-A81 Series User guide

HIK VISION
HIK VISION DS-A81024S/192 User manual

HIK VISION
HIK VISION 81 Series User guide

HIK VISION
HIK VISION DS-A80 Series User manual

HIK VISION
HIK VISION DS-AT1000S Series User manual

HIK VISION
HIK VISION HS-AFS-H100I Series User manual

HIK VISION
HIK VISION DS-81 Series User manual