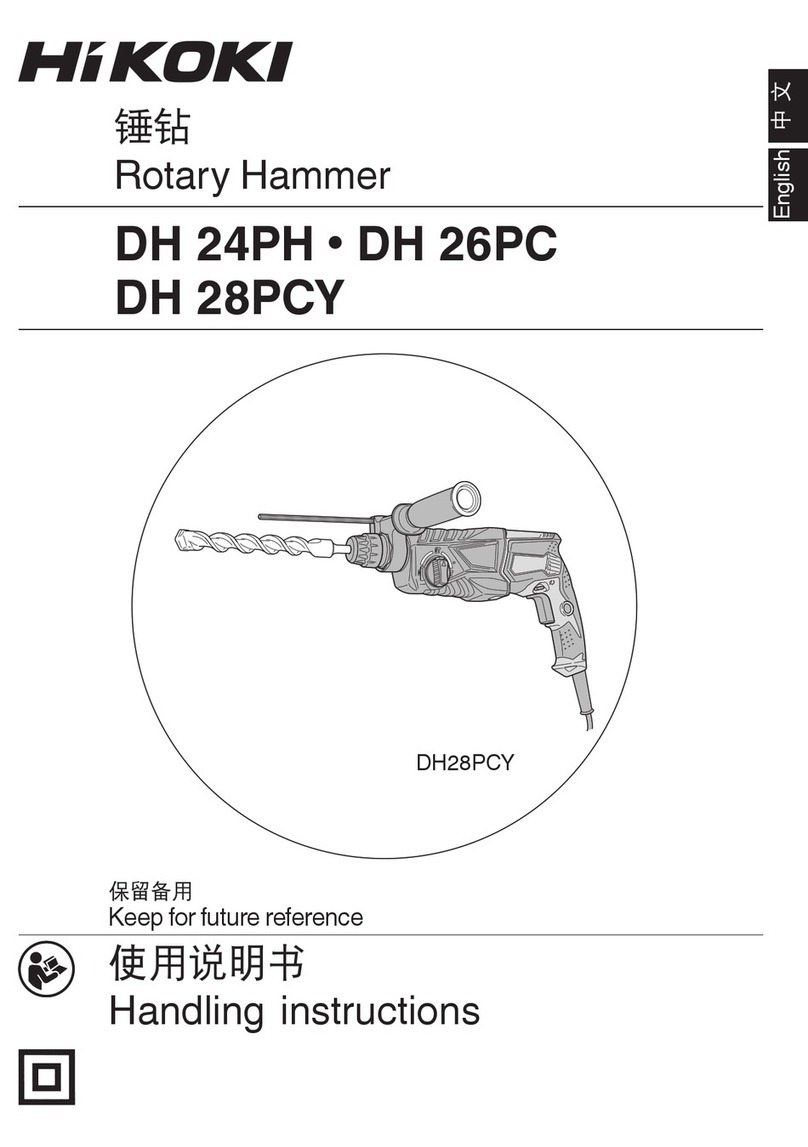
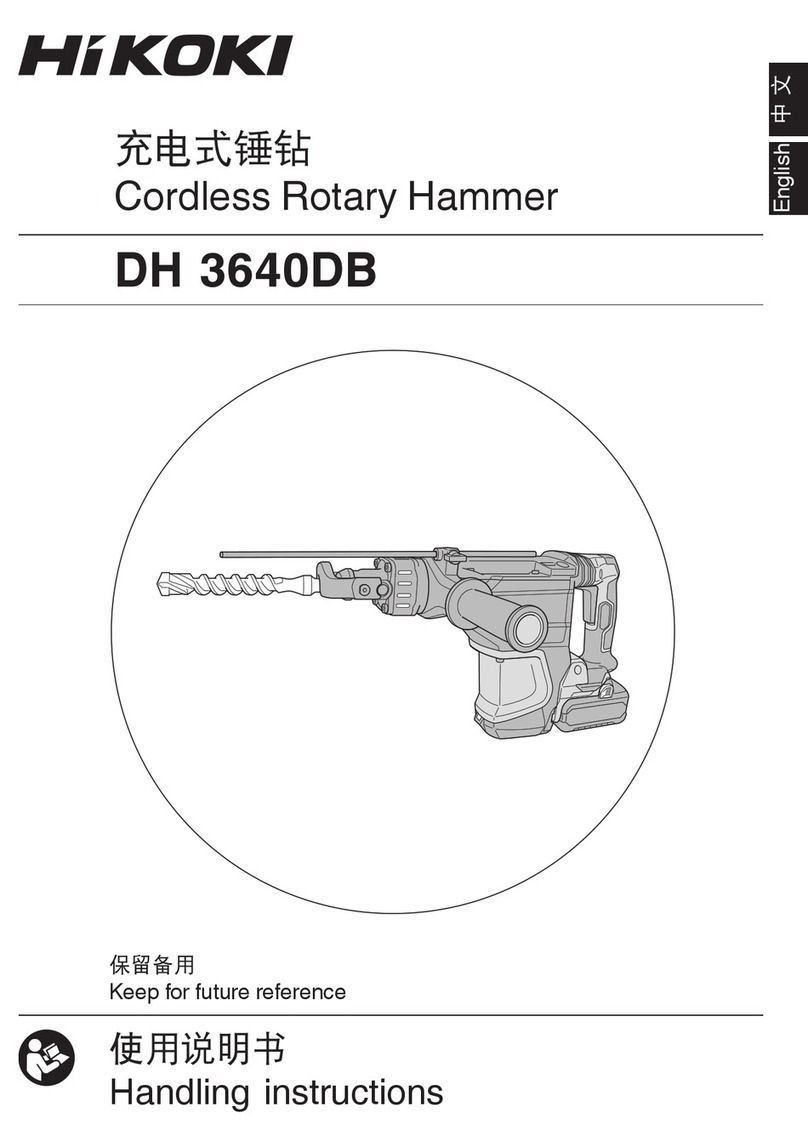
HIKOKI DH 28PBY User manual

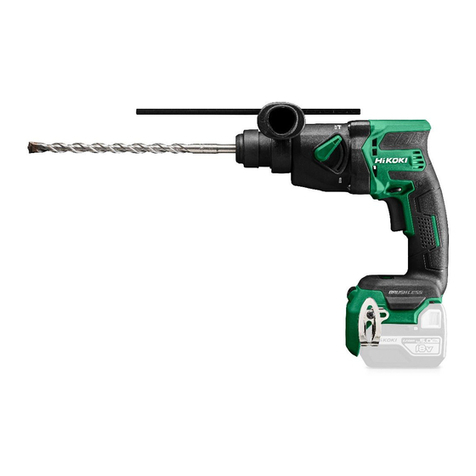
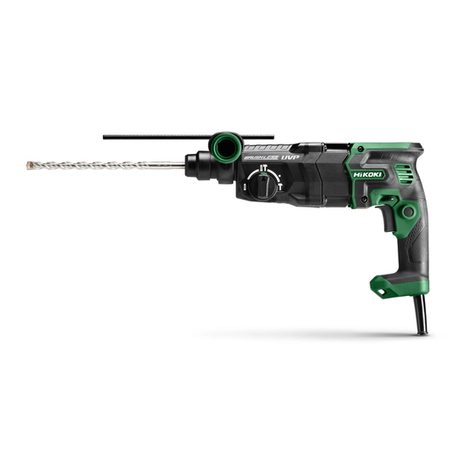
Rotary Hammer
手提電動鎚鑽
햄어드릴
Máy khoan búa
สวานเจาะกระแทกโรตารี่
Martil putar
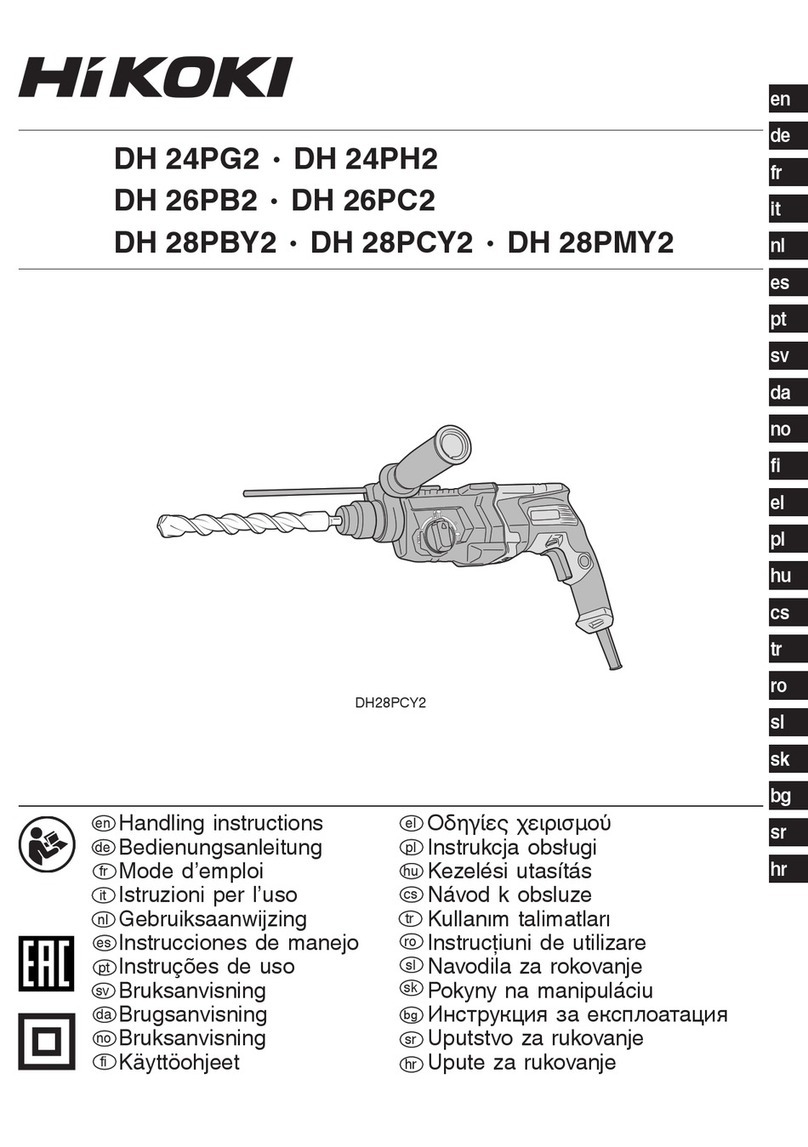
DH 24PG •DH 26PB •DH 28PBY
Read through carefully and understand these instructions before use.
使用前務請詳加閱讀。
#⒢ᴮ⒚ᰅ#⯙Ⓑ㷎#⯄ේ#ሧ⫔⮃#▵⹐㭛#ᚖ#ⱶ㩬⮃#␚⫔㭗⚣⚑⩁1
Đọc kỹvà hiểu rõ các hướng dẫn này trước khi sửdụng.
โปรดอานโดยละเอียดและทําความเขาใจกอนใชงาน
Bacalah dengan cermat dan pahami petunjuk ini sebelum menggunakan perkakas.
Handling instructions
使用說明書
㋽༦#⒢ᴮ⒚
Hướng dẫn sửdụng
คูมือการใชงาน
Petunjuk pemakaian
DH28PBY
000BookDH24PGAsia.indb1000BookDH24PGAsia.indb1 2019/01/1110:13:102019/01/1110:13:10

2
12
34
56
78
12
8
7
3
4
4
5
4
6
9
89
000BookDH24PGAsia.indb2000BookDH24PGAsia.indb2 2019/01/1110:13:102019/01/1110:13:10

3
910
11 12
13 14
15 16
34
0
#
@
!
4
3
$
*
4
)
&
(
^
3
*
%
1
2
q
w
q
e
t
y
r
000BookDH24PGAsia.indb3000BookDH24PGAsia.indb3 2019/01/1110:13:112019/01/1110:13:11

4
17 18
w
000BookDH24PGAsia.indb4000BookDH24PGAsia.indb4 2019/01/1110:13:112019/01/1110:13:11

5
English 中國語 㭛⧄ Tiếng Việt
1Drill bit 鑽頭 ᛓ᱅#Ⅷ㡤 Đầu khoan
2Part of SDS-plus shank SDS-plus 長柄部 VGV0㬁ᩆ♑#㗏⮛#⯃₊ Bộphận chuôi SDS chữ
thập
3Front cap 前帽 㫹ᩊ㡤#㏊ Nắp trước
4Grip 夾卡 ༔ᱏ Kẹp giữ
5Dust cap 防塵杯 ᔜ♑㡤#㐪 Cốc bụi
6Dust collector (B) 集塵器(B) ⹔པ#+E, Bộthu bụi (B)
7Push button 按鈕 㩜⚑#ὰ㡨 Nút ấn
8Change lever 選擇桿 ⱝ㱸#ᩣὰ Cần chuyển đổi
9Push button 按鈕 㩜⚑#ὰ㡨 Nút ấn
0Drill chuck 鑽頭夾盤 ᛓ᱅#ㆄ Đầu cặp mũi khoan
!Chuck adapter 夾盤附加器 ㆄ#⧄ᓎ㚭 Đầu tiếp hợp đầu cặp mũi
khoan
@Chuck adapter (D) 夾盤附加器(D) ㆄ#⧄ᓎ㚭#+G, Đầu tiếp hợp đầu cặp mũi
khoan (D)
#Bit 螺絲鑽頭 Ⅷ㡤 Mũi khoan
$Socket 夾緊器 ┗㑉 Khớp nối
%Side handle 側柄 ␚⮻ᛓ#㭻ᛛ Tay nắm phụ
^Depth gauge 深度計 ⮻#ൺ⮻⹐ Thước đo độ sâu
&Mounting hole 安裝孔 ⯯#ᳱ Lỗgắn
*Taper shank adapter 錐柄附加器 㛊⮻㥂#㗏#⧄ᓎ㚭 Đầu tiếp hợp chuôi côn
(Cotter 製銷 㒕㚭 Chốt giữ
)Rest 台座 ⹐⹐ᒼ Trụđỡ
qCore bit 取心鑽具 㒕⧄#Ⅷ㡤 Mũi khoan lõi
wCore bit shank 取心鑽柄 㒕⧄#Ⅷ㡤#㗏 Chuôi mũi khoan lõi
eThread 螺紋 ሇ␚␞ Ren vít
rCenter pin 中間銷 Ⓕ㚭#㬽 Chốt định tâm
tGuide plate 導板 ೝ⮻ᛓ#㬁ᩣ⮻㡤 Tấm dẫn hướng
yCore bit tip 取心鑽具尖端 㒕⧄#Ⅷ㡤#㢶 Đầu mũi khoan lõi
000BookDH24PGAsia.indb5000BookDH24PGAsia.indb5 2019/01/1110:13:112019/01/1110:13:11

6
ไทย Bahasa Indonesia
1หัวสวาน Mata bor
2สวนของดามสวานแบบ SDS-
plus
Bagian dari shank SDS-
plus
3ครอบหนา Tutup depan
4ตัวจับ Grip
5ครอบกันฝุน Tutup debu
6ชุดเก็บฝุน (B) Pengumpul debu (B)
7ปุมกด Tombol tekan
8คันเปลี่ยนจังหวะ Tuas pengganti
9ปุมกด Tombol tekan
0ล็อกสวาน Cengkam bor
!ตัวปรับล็อก Adaptor cengkam
@ตัวปรับล็อก (D) Adaptor cengkam (D)
#หัวสวาน Mata bor
$แหวน Soket
%มือจับขาง Handel sisi
^บรรทัดวัด Pengukur kedalaman
&รูยึด Lubang pemasangan
*ตัวปรับเทเปอร Adaptor shank lancip
(ลิ่ม Pasak
)แทน Sandaran
qจานเจียรเพชรคอนกรีต Mata bor inti
wเพลาจานเจียรเพชรคอนกรีต Shank mata bor inti
eเกลียว Ulir
rเดือย Pin tengah
tแผนราง Plat pemandu
yปลายจานเจียรเพชรคอนกรีต Ujung mata bor inti
000BookDH24PGAsia.indb6000BookDH24PGAsia.indb6 2019/01/1110:13:112019/01/1110:13:11

English
7
GENERAL SAFETY RULES
WARNING!
Read all instructions
Failure to follow all instructions listed below may result in
electric shock, fire and/or serious injury.
The term “power tool” in all of the warnings listed below
refers to your mains operated (corded) power tool or battery
operated (cordless) power tool.
SAVE THESE INSTRUCTIONS
1) Work area
a) Keep work area clean and well lit.
Cluttered and dark areas invite accidents.
b) Do not operate power tools in explosive
atmospheres, such as in the presence of
flammable liquids, gases or dust.
Power tools create sparks which may ignite the dust
of fumes.
c) Keep children and bystanders away while
operating a power tool.
Distractions can cause you to lose control.
2) Electrical safety
a) Power tool plugs must match the outlet.
Never modify the plug in any way.
Do not use any adapter plugs with earthed
(grounded) power tools.
Unmodified plugs and matching outlets will reduce
risk of electric shock.
b) Avoid body contact with earthed or grounded
surfaces such as pipes, radiators, ranges and
refrigerators.
There is an increased risk of electric shock if your
body is earthed or grounded.
c) Do not expose power tools to rain or wet
conditions.
Water entering a power tool will increase the risk of
electric shock.
d) Do not abuse the cord. Never use the cord for
carrying, pulling or unplugging the power tool.
Keep cord away from heat, oil, sharp edges or
moving parts.
Damaged or entangled cords increase the risk of
electric shock.
e) When operating a power tool outdoors, use an
extension cord suitable for outdoor use.
Use of a cord suitable for outdoor use reduces the
risk of electric shock.
f) If operating a power tool in a damp location
is unavoidable, use a residual current device
(RCD) protected supply.
Use of an RCD reduces the risk of electric shock.
3) Personal safety
a) Stay alert, watch what you are doing and use
common sense when operating a power tool.
Do not use a power tool while you are tired
or under the influence of drugs, alcohol or
medication.
A moment of inattention while operating power tools
may result in serious personal injury.
b) Use personal protective equipment. Always
wear eye protection.
Protective equipment such as dust mask, non-skid
safety shoes, hard hat, or hearing protection used for
appropriate conditions will reduce personal injuries.
c) Prevent unintentional starting. Ensure the
switch is in the offposition before connecting to
power source and/or battery pack, picking up or
carrying the tool.
Carrying power tools with your finger on the switch or
energising power tools that have the switch on invites
accidents.
d) Remove any adjusting key or wrench before
turning the power tool on.
A wrench or a key left attached to a rotating part of the
power tool may result in personal injury.
e) Do not overreach. Keep proper footing and
balance at all times.
This enables better control of the power tool in
unexpected situations.
f) Dress properly. Do not wear loose clothing or
jewellery. Keep your hair, clothing and gloves
away from moving parts.
Loose clothes, jewellery or long hair can be caught in
moving parts.
g) If devices are provided for the connection of
dust extraction and collection facilities, ensure
these are connected and properly used.
Use of these devices can reduce dust related
hazards.
4) Power tool use and care
a) Do not force the power tool. Use the correct
power tool for your application.
The correct power tool will do the job better and safer
at the rate for which it was designed.
b) Do not use the power tool if the switch does not
turn it on and off.
Any power tool that cannot be controlled with the
switch is dangerous and must be repaired.
c) Disconnect the plug from the power source
before making any adjustments, changing
accessories, or storing power tools.
Such preventive safety measures reduce the risk of
starting the power tool accidentally.
d) Store idle power tools out of the reach of children
and do not allow persons unfamiliar with the
power tool or these instructions to operate the
power tool.
Power tools are dangerous in the hands of untrained
users.
e) Maintain power tools. Check for misalignment or
binding of moving parts, breakage of parts and
any other condition that may affect the power
tools’ operation.
If damaged, have the power tool repaired before
use.
Many accidents are caused by poorly maintained
power tools.
f) Keep cutting tools sharp and clean.
Properly maintained cutting tools with sharp cutting
edges are less likely to bind and are easier to control.
g) Use the power tool, accessories and tool bits
etc., in accordance with these instructions and
in the manner intended for the particular type
of power tool, taking into account the working
conditions and the work to be performed.
Use of the power tool for operations different from
intended could result in a hazardous situation.
5) Service
a) Have your power tool serviced by a qualified
repair person using only identical replacement
parts.
This will ensure that the safety of the power tool is
maintained.
PRECAUTION
Keep children and infirm persons away.
When not in use, tools should be stored out of reach of
children and infirm persons.
000BookDH24PGAsia.indb7000BookDH24PGAsia.indb7 2019/01/1110:13:112019/01/1110:13:11
English
8
ROTARY HAMMER SAFETY WARNINGS
1. Wear ear protectors.
Exposure to noise can cause hearing loss.
2. Use auxiliary handle(s), if supplied with the tool.
Loss of control can cause personal injury.
3. Hold power tool by insulated gripping surfaces,
when performing an operation where the cutting
accessory may contact hidden wiring or its own
cord. Cutting accessory contacting a “live” wire may
make exposed metal parts of the power tool “live” and
could give the operator an electric shock.
4. Do not touch the bit during or immediately after operation.
The bit becomes very hot during operation and could
cause serious burns.
5. Before starting to break, chip or drill into a wall, floor or
ceiling, thoroughly confirm that such items as electric
cables or conduits are not buried inside.
6. Always hold the body handle and side handle of the
power tool firmly. Otherwise the counterforce produced
may result in inaccurate and even dangerous operation.
7. Wear a dust mask.
Do not inhale the harmful dusts generated in drilling or
chiseling operation. The dust can endanger the health of
yourself and bystanders.
SPECIFICATIONS
Model DH24PG DH26PB DH28PBY
Voltage (by areas)* (110 V, 115 V, 120 V, 127 V, 220 V, 230 V, 240 V)
Power input* 730 W 830 W 850 W
No-load speed 0 – 1050 /min 0 – 1100 /min
Full-load speed rate 0 – 3950 /min 0 – 4300 /min
Capacity: concrete
steel
wood
3.4 – 24 mm
13 mm
32 mm
3.4 – 26 mm
13 mm
32 mm
3.4 – 28 mm
13 mm
32 mm
Weight (without cord) 2.7 kg 2.8 kg 2.9 kg
* Be sure to check the nameplate on product as it is subject to change by areas.
STANDARD ACCESSORIES
(1) Plastic case...................................................................1
(2) Side handle...................................................................1
(3) Depth gauge .................................................................1
Standard accessories are subject to change without notice.
000BookDH24PGAsia.indb8000BookDH24PGAsia.indb8 2019/01/1110:13:112019/01/1110:13:11
English
9
+
++
OPTIONAL ACCESSORIES (sold separately)
Drill bit
●
Drilling holes in concrete or tile
Taper shank
adapter
Cotter
Guide plate Center pin Core bit
Core bit shank
●Large hole boring
●Anchor setting
Anchor setting adapter
●Bolt placing operation with
Chemical Anchor
Chemical anchor adapter
Chuck
adapter
Drill chuck
(13 VLRB-D)
Special
screw
●Demolishing operation
Dust cup
Dust collector (B)
Rotation only Rotation + Hammering
●Drilling anchor holes
●Driving screws
●Drilling in steel or wood
+Driver bit –Driver bit
Drill bit for steel Drill bit for
wood
Hexagon socket
Bull point
(Square type)
Bull point
(Round type)
Drill bit (Taper shank)
Tool Adapters
Use on jobs facing upwards
000BookDH24PGAsia.indb9000BookDH24PGAsia.indb9 2019/01/1110:13:112019/01/1110:13:11
English
10
●Drilling holes in concrete or tile
Drill bit (slender shaft)
Outer dia. Overall length Effective length
3.4 mm 90 mm 45 mm
3.5 mm
SDS-plus Drill bit
Outer dia. Overall length Effective length
4.0 mm 110 mm 49 mm
5.0 mm 110 mm 49 mm
160 mm 99 mm
5.5 mm 110 mm 50 mm
6.0 mm 110 mm 50 mm
160 mm 100 mm
6.4 mm 160 mm 100 mm
6.5 mm 160 mm 100 mm
7.0 mm 160 mm 100 mm
7.5 mm 160 mm 100 mm
8.0 mm 160 mm 100 mm
8.5 mm 160 mm 100 mm
9.0 mm 160 mm 100 mm
9.5 mm 160 mm 100 mm
10.0 mm 160 mm 100 mm
260 mm 200 mm
10.5 mm 160 mm 100 mm
260 mm 200 mm
11.0 mm 160 mm 100 mm
12.0 mm 160 mm 88 mm
260 mm 187 mm
12.5 mm 160 mm 88 mm
260 mm 187 mm
12.7 mm 160 mm 88 mm
260 mm 187 mm
13.0 mm 160 mm 87 mm
14.0 mm 160 mm 87 mm
14.3 mm 160 mm 87 mm
260 mm 186 mm
14.5 mm 160 mm 87 mm
260 mm 186 mm
15.0 mm 160 mm 85 mm
16.0 mm 160 mm 85 mm
260 mm 186 mm
16.5 mm 160 mm 85 mm
17.0 mm 160 mm 85 mm
260 mm 185 mm
17.5 mm 160 mm 90 mm
260 mm 185 mm
18.0 mm 160 mm 85 mm
19.0 mm 260 mm 185 mm
20.0 mm 260 mm 175 mm
22.0 mm 260 mm 175 mm
24.0 mm 250 mm 173 mm
25.0 mm 450 mm 375 mm
●Large hole boring
Core bit
Outer dia. Center pin Core bit shank
Overall length
25 mm* Not applicable
105 mm
300 mm
29 mm*
32 mm
(A)35 mm
38 mm
45 mm (B) 300 mm
50 mm
* Without guide plate
●Anchor setting
Anchor setting adapter
Anchor size
W 1/4"
W 5/16"
W 3/8"
W 1/2"
W 5/8"
●Drilling anchor holes
Taper shank adapter
Taper mode
Morse taper No. 1
Morse taper No. 2
A-Taper
B-Taper
Optional accessories are subject to change without notice.
000BookDH24PGAsia.indb10000BookDH24PGAsia.indb10 2019/01/1110:13:112019/01/1110:13:11
English
11
APPLICATIONS
Rotation and hammering function
○Drilling anchor holes
○Drilling holes in concrete
○Drilling holes in tile
Rotation only function
○Drilling in steel or wood
(with optional accessories)
○Tightening machine screws, wood screws
(with optional accessories)
PRIOR TO OPERATION
1. Power source
Ensure that the power source to be utilized conforms
to the power requirements specified on the product
nameplate.
2. Power switch
Ensure that the power switch is in the OFF position. If
the plug is connected to a power receptacle while the
power switch is in the ON position, the power tool will
start operating immediately, which could cause a serious
accident.
3. Extension cord
When the work area is removed from the power source,
use an extension cord of sufficient thickness and rated
capacity. The extension cord should be kept as short as
practicable.
4. Mounting the drill bit (Fig. 1)
CAUTION
To prevent accidents, make sure to turn the switch off
and disconnect the plug from the receptacle.
NOTE
When using tools such as bull points, drill bits, etc.,
make sure to use the genuine parts designated by our
company.
(1) Clean the shank portion of the drill bit.
(2) Insert the drill bit in a twisting manner into the tool holder
until it latches itself (Fig. 1).
(3) Check the latching by pulling on the drill bit.
(4) To remove the drill bit, fully pull the grip in the direction of
the arrow and pull out the drill bit (Fig. 2).
5. Installation of dust cup or dust collector (B)
(Optional accessories) (Fig. 3, Fig. 4)
When using a rotary hammer for upward drilling
operations attach a dust cup or dust collector (B) to
collect dust or particles for easy operation.
○Installing the dust cup
Use the dust cup by attaching to the drill bit as shown in
Fig. 3.
When using a bit which has big diameter, enlarge the
center hole of the dust cup with this rotary hammer.
○Installing dust collector (B)
When using dust collector (B), insert dust collector (B)
from the tip of the bit by aligning it to the groove on the
grip (Fig. 4).
CAUTION
○The dust cup and dust collector (B) are for exclusive use
of concrete drilling work. Do not use them for wood or
metal drilling work.
○Insert dust collector (B) completely into the chuck part of
the main unit.
○When turning the rotary hammer on while dust collector
(B) is detached from a concrete surface, dust collector
(B) will rotate together with the drill bit. Make sure to turn
on the switch after pressing the dust cup on the concrete
surface. (When using dust collector (B) attached to
a drill bit that has more than 190 mm of overall length,
dust collector (B) cannot touch the concrete surface and
will rotate. Therefore please use dust collector (B) by
attaching to drill bits which have 166 mm, 160 mm, and
110 mm overall length.)
○Dump particles after every two or three holes when
drilling.
○Please replace the drill bit after removing dust collector
(B).
6. Selecting the driver bit
Screw heads or bits will be damaged unless a bit
appropriate for the screw diameter is employed to drive
in the screws.
7. Confirm the direction of bit rotation (Fig. 5)
The bit rotates clockwise (viewed from the rear side) by
pushing the R-side of the push button.
The L-side of the push button is pushed to turn the bit
counterclockwise.
HOW TO USE
CAUTION
To prevent accidents, make sure to turn the switch off
and disconnect the plug from the receptacle when the
drill bits and other various parts are installed or removed.
The power switch should also be turned offduring a work
break and after work.
1. Switch operation
The rotation speed of the drill bit can be controlled
steplessly by varying the amount that the trigger switch
is pulled. Speed is low when the trigger switch is pulled
slightly and increases as the switch is pulled more.
Continuous operation may be attained by pulling the
trigger switch and depressing the stopper. To turn the
switch OFF, pull the trigger switch again to disengage
the stopper, and release the trigger switch to its original
position.
However, the switch trigger can only be pulled in halfway
during reverse and rotates at half the speed of forward
operation.
The switch stopper is unusable during reverse.
2. Rotation + hammering
This rotary hammer can be set to rotation and hammering
mode by pressing the push button and turning the change
lever to the mark (Fig. 6).
(1) Mount the drill bit.
(2) Pull the trigger switch after applying the drill bit tip to the
drilling position (Fig. 7).
(3) Pushing the rotary hammer forcibly is not necessary at
all. Pushing slightly so that drill dust comes out gradually
is sufficient.
CAUTION
When the drill bit touches construction iron bar, the bit
will stop immediately and the rotary hammer will react to
revolve. Therefore grip the side handle and handle tightly
as shown in Fig. 7.
3. Rotation only
This rotary hammer can be set to rotation only mode by
pressing the push button and turning the change lever to
the mark (Fig. 8).
To drill wood or metal material using the drill chuck
and chuck adapter (optional accessories), proceed as
follows.
Installing drill chuck and chuck adapter. (Fig. 9)
(1) Attach the drill chuck to the chuck adapter.
(2) The part of the SDS-plus shank is the same as the drill
bit. Therefore, refer to the item of “Mounting the drill bit”
for attaching it.
000BookDH24PGAsia.indb11000BookDH24PGAsia.indb11 2019/01/1110:13:112019/01/1110:13:11
English
12
CAUTION
○Application of force more than necessary will not only
expedite the work, but will deteriorate the tip edge of the
drill bit and reduce the service life of the rotary hammer in
addition.
○Drill bits may snap offwhile withdrawing the rotary
hammer from the drilled hole. For withdrawing, it is
important to use a pushing motion.
○Do not attempt to drill anchor holes or holes in concrete
with the machine set in the rotation only function.
○Do not attempt to use the rotary hammer in the rotation
and striking function with the drill chuck and chuck
adapter attached. This would seriously shorten the
service life of every component of the machine.
4. When driving machine screws (Fig. 10)
First, insert the bit into the socket in the end of chuck
adapter (D).
Next, mount chuck adapter (D) on the main unit using
procedures described in 4 (1), (2), (3), put the tip of the
bit in the slots in the head of the screw, grasp the main
unit and tighten the screw.
CAUTION
○Exercise care not to excessively prolong driving time,
otherwise, the screws may be damaged by excessive
force.
○Apply the rotary hammer perpendicularly to the screw
head when driving the screw; otherwise, the screw head
or bit will be damaged, or driving force will not be fully
transferred to the screw.
○Do not attempt to use the rotary hammer in the rotation
and striking function with the chuck adapter and bit
attached.
5. When driving wood screws (Fig. 10)
(1) Selecting a suitable driver bit
Employ plus-head screws, if possible, since the driver bit
easily slips offthe heads of minus-head screws.
(2) Driving in wood screws.
○Prior to driving in wood screws, make pilot holes suitable
for them in the wooden board. Apply the bit to the screw
head grooves and gently drive the screws into the holes.
○After rotating the rotary hammer at low speed for a while
until the wood screw is partly driven into the wood,
squeeze the trigger more strongly to obtain the optimum
driving force.
CAUTION
Exercise care in preparing a pilot hole suitable for
the wood screw taking the hardness of the wood into
consideration. Should the hole be excessively small or
shallow, requiring much power to drive the screw into
it, the thread of the wood screw may sometimes be
damaged.
6. Using depth gauge (Fig. 11)
(1) Loosen the knob on the side handle, and insert the depth
gauge into the mounting hole on the side handle.
(2) Adjust the depth gauge position according to the depth of
the hole and thighten the knob securely.
7. How to use the drill bit (taper shank) and the taper
shank adapter
(1) Mount the taper shank adapter to the rotary hammer
(Fig. 12).
(2) Mount the drill bit (taper shank) to the taper shank
adapter (Fig. 12).
(3) Turn the switch ON, and drill a hole in prescribed depth.
(4) To remove the drill bit (taper shank), insert the cotter into
the slot of the taper shank adapter and strike the head of
the cotter with a hammer supporting on a rests (Fig. 13).
HOW TO USE THE CORE BIT
(FOR LIGHT LOAD)
When boring penetrating large holes use the core bit (for light
loads). At that time use with the center pin and the core bit
shank provided as optional accessories.
1. Mounting
CAUTION
Be sure to turn power OFF and disconnect the plug from
the receptacle.
(1) Mount the core bit to the core bit shank(Fig. 14).
Lubricate the thread of the core bit shank to facilitate
disassembly.
(2) Mount the core bit to the rotary hammer (Fig. 15).
(3) Insert the center pin into the guide plate until it stops.
(4) Engage the guide plate with the core bit, and turn the
guide plate to the left or the right so that it does not fall
even if it faces downward (Fig. 16).
2. How to bore (Fig. 17)
(1) Connect the plug to the power source.
(2) A spring is installed in the center pin.
Push it lightly to the wall or the floor straight.
Connect the core bit tip flush to the surface and start
operating.
(3) When boring about 5 mm in depth the position of the hole
will be established. Bore after that removing the center
pin and the guide plate from core bit.
(4) Application of excessive force will not only expedite
the work, but will deteriorate the tip edge of the drill bit,
resulting in reduced service life of the rotary hammer.
CAUTION
When removing the center pin and the guide plate,
turn OFF the switch and disconnect the plug from the
receptacle.
3. Dismounting (Fig. 18)
Remove the core bit shank from the rotary hammer and
strike the head of the core bit shank strongly two or three
times with a hammer holding the core bit, then the thread
becomes loose and the core bit can be removed.
LUBRICATION
Low viscosity grease is applied to this rotary hammer so that
it can be used for a long period without replacing the grease.
Replace the grease whenever you change the carbon brush
to maintain the service life.
Further use of the rotary hammer with lock offgrease will
cause the machine to seize up reduce the service life.
CAUTION
A special grease is used with this machine, therefore,
the normal performance of the machine may be badly
affected by use of other grease. Please be sure to let
one of our service agents undertake replacement of the
grease.
MAINTENANCE AND INSPECTION
1. Inspecting the drill bits
Since use of a dull tool will cause motor malfunctioning
and degraded efficiency, replace the drill bit with new
ones or resharpen them without delay when abrasion is
noted.
2. Inspecting the mounting screws
Regularly inspect all mounting screws and ensure that
they are properly tightened. Should any of the screws be
loose, retighten them immediately. Failure to do so could
result in serious hazard.
000BookDH24PGAsia.indb12000BookDH24PGAsia.indb12 2019/01/1110:13:112019/01/1110:13:11
English
13
3. Maintenance of the motor
The motor unit winding is the very ”heart” of the power
tool. Exercise due care to ensure the winding does not
become damaged and/or wet with oil or water.
4. Inspecting the carbon brushes
For your continued safety and electrical shock protection,
carbon brush inspection and replacement on this tool
should ONLY be performed by a HiKOKI Authorized
Service Center.
5. Replacing supply cord
If the supply cord of Tool is damaged, the Tool must be
returned to a HiKOKI Authorized Service Center for the
cord to be replaced.
6. Service parts list
CAUTION
Repair, modification and inspection of HiKOKI Power
Tools must be carried out by an HiKOKI Authorized
Service Center.
This Parts List will be helpful if presented with the tool to
the HiKOKI Authorized Service Center when requesting
repair or other maintenance.
In the operation and maintenance of power tools, the
safety regulations and standards prescribed in each
country must be observed.
MODIFICATIONS
HiKOKI Power Tools are constantly being improved
and modified to incorporate the latest technological
advancements.
Accordingly, some parts may be changed without prior
notice.
NOTE
Due to HiKOKI’s continuing program of research and
development, the specifications herein are subject to
change without prior notice.
000BookDH24PGAsia.indb13000BookDH24PGAsia.indb13 2019/01/1110:13:112019/01/1110:13:11
中國語
14
一般安全規則
警告!
閱讀所有說明,未遵守下列之說明可能導致電擊、火
災及/或嚴重傷害
「電動工具」一詞在下列警告中,關係到電源操作
(有線)之電動工具或電池操作(無線)之電動工
具。
記住這些說明
1) 工作場所
a) 保持工作場所清潔及明亮。
雜亂及昏暗區域易發生意外。
b) 勿在易產生爆炸之環境中操作,譬如有易燃液
體、瓦斯或粉塵存在之處。
電動工具產生火花會引燃粉塵或煙氣。
c)
當操作電動工具時,保持兒童及過往人員遠離。
分神會讓你失去控制。
2) 電氣安全
a) 電動工具插頭必須與插座配合,絕不可以任何
方法修改插頭,且不得使用任何轉接插頭於有
接地之電動工具。
不修改插頭及所結合之插座可減少電擊。
b) 避免身體接觸到接地面諸如管子、散熱器、爐
灶及冰箱。
如果你的身體接地或搭地,會增加電擊的危險。
c) 勿讓電動工具淋雨或曝露在潮濕的環境下。
電動工具進水會增加電繫的危險。
d) 勿濫用電源線。絕勿使用電源線去纏繞、拖拉
電動工具或拔插頭,保持電源線遠離熱氣、油
氣、尖角或可動零件。
損壞或纏繞的電源線會增加電繫之危險。
e) 電動工具在室外操作時要使用一適合室外用的
延長線。
使用合適之室外用延長線會減少電擊的危險。
f) 若無法避免在潮濕地區操作電動工具,請使用
以殘餘電流裝置 (RCD) 保護的電源。
使用 RCD 可降低觸電危險。
3) 人員安全
a) 保持機警,注意你正在做什麼,並運用普通常
識操作電動工具。
當你感到疲勞或受藥品、酒精或醫療影響時,
勿操作電動工具。
操作中瞬間的不注意可能造成人員嚴重的傷害。
b) 使用個人防護裝備,經常配戴安全眼鏡。
配戴防塵口罩、防滑安全鞋、硬帽等防護裝
備,或在適當情況下使用聽覺防護,可減少人
員傷害。
c) 防止意外啟動。在連接電源及或電池組、拿
起或攜帶工具前,請確認開關是在「off」(關
閉)的位置。
以手指放在開關握持電動工具,或在電動工具
的開關於“on”的狀況下插上插頭,都會導致
意外發生。
d) 在將電動工具啟動前,先卸下任何調整用鑰匙
或扳手。
扳手或鑰匙遺留在電動工具的轉動部位時,可
能導致人員傷害。
e)
身體勿過度伸張,任何時間要保持站穩及平衡。
以便在不預期的狀態下,能對電動工具有較好
的控制。
f) 衣著要合宜,別穿太鬆的衣服或戴首飾。
保持你的頭髮、衣服及手套遠離轉動部位。
寬鬆的衣服、手飾及長髮會被捲入轉動部位。
g) 如果裝置要用於粉塵抽取及集塵設施,要確保
其連接及正當使用。
使用此類裝置能減少與粉塵有關之危害。
4) 電動工具之使用及注意事項
a) 勿強力使用電動工具,使用正確之電動工具為
你所需。
正確使用電動工具會依其設計條件使工作做得
更好更安全。
b) 如果開關不能轉至開及關的位置,勿使用電動
工具。
任何電動工具不能被開關所控制是危險的,必
須要修理。
c) 在做任何調整、更換配件或收存電動工具時,
要將插頭與電源分開,且/或將電池從電動工
具中取出。
此種預防安全措施可減少意外開啟電動機之危
險。
d) 收存停用之電動工具,遠離兒童,且不容許不
熟悉電動工具或未瞭解操作電動工具說明書的
人操作電動工具。
在未受過訓練的人手裡,電動工具極為危險。
e) 保養電動工具,檢核是否有可動零件錯誤的結
合或卡住、零件破裂及可能影響電動工具操作
的任何其他情形。
電動工具如果損壞,在使用前要修好-許多意
外皆肇因於不良的保養。
f) 保持切割工具銳利清潔。
適當的保養切割工具,保持銳利之切削鋒口,
可減少卡住並容易控制。
g) 按照說明書使用電動工具、配件及刀具等,使
用特殊型式之電動工具時要考量工作條件及所
執行之工作。
使用電動工具未如預期用途之操作時,會導致
危害。
000BookDH24PGAsia.indb14000BookDH24PGAsia.indb14 2019/01/1110:13:112019/01/1110:13:11
中國語
15
5) 維修
a) 讓你的電動工具由合格修理人員僅使用相同的
維修零件更換。
如此可確保電動工具的安全得以維持。
注意事項:
不可讓孩童和體弱人士靠近工作場所。
應將不使用的工具存放在孩童和體弱人士伸手不及的
地方。
手提電動鎚鑽安全注意事項
1. 佩戴護耳罩。
噪音會導致聽力喪失。
2. 若工具有提供輔助手柄,請使用此手柄。
失去控制,可能會造成人身傷害。
3. 進行切割配件可能接觸到暗線或工具纜線的\操作
時,請握著電動工具的絕緣手柄表面。「通電」
電線的切割配件可能使電動工具的金屬零件「通
電」,而造成操作人員觸電。
4. 作業直後的鑽頭仍處在高熱狀態下,切不可摸
觸,以免灼傷。
5. 纘盤牆壁,天花板,地板時,應先確認有無理設
電纜或電管道類。
6. 使用手提電動鎚鑽時,應牢牢握住工具的操作柄
和側柄。否則,所產生的反作用力會將孔鑽歪,
甚至會造成危險。
7. 佩戴防塵口罩
不要吸入在鑽鑿操作過程中產生的有害粉塵。粉
塵會危機到自身和旁觀者的身體健康。
規 格
型式 DH24PG DH26PB DH28PBY
電壓(按地區)* (110V, 115V, 120V, 127V, 220V, 230V, 240V)
輸入功率* 730 W 830 W 850 W
無負荷速度 0-1050 轉/分 0-1100 轉/分
滿載衝擊率 0-3950 次/分 0-4300 次/分
能力: 混凝土
金 屬
木 材
3.4-24 mm
13 mm
32 mm
3.4-26 mm
13 mm
32 mm
3.4-28 mm
13 mm
32 mm
重量(不含線纜) 2.7 kg 2.8 kg 2.9 kg
* 當須改變地區時應檢查產品上的銘牌。
標 準 附 件
(1) 塑料盒 .............................................................. 1
(2) 側柄 .................................................................. 1
(3) 深度計 .............................................................. 1
標準附件可能不預先通告而徑予更改。
000BookDH24PGAsia.indb15000BookDH24PGAsia.indb15 2019/01/1110:13:122019/01/1110:13:12

中國語
16
+
++
選購附件(分開銷售)
鑽頭
● 鑽鑿混凝土或瓷磚
錐柄附加器 製銷
導板 中間銷 取心鑽具 取心鑽柄
● 大孔鑽開
● 錨栓裝定
錨栓裝定附加器
● 化學錨釘鑽釘作業
化學錨釘附加器
夾盤
附加器
鑽頭夾盤
(13 VLRB-D)
特種
螺絲
● 粉碎工作
防塵杯 集塵器(B)
僅限旋鑽 旋鑽 + 錘擊
● 鑽鑿錨栓孔
● 旋螺絲
● 鑽孔鋼材或木材
螺絲鑽頭 螺絲鑽頭
鋼材鑽頭 木材鑽頭
六角套筒
尖鑽
(方形)
尖鑽
(圓型)
鑽頭(錐柄)
工具 附加器
於頂上作業使用
000BookDH24PGAsia.indb16000BookDH24PGAsia.indb16 2019/01/1110:13:122019/01/1110:13:12

中國語
17
● 鑽鑿混凝土或瓷磚
鑽頭(細長柄)
外徑 總長 有效長度
3.4 mm 90 mm 45 mm
3.5 mm
SDS-plus 鑽頭
外徑 總長 有效長度
4.0 mm 110 mm 49 mm
5.0 mm 110 mm 49 mm
160 mm 99 mm
5.5 mm 110 mm 50 mm
6.0 mm 110 mm 50 mm
160 mm 100 mm
6.4 mm 160 mm 100 mm
6.5 mm 160 mm 100 mm
7.0 mm 160 mm 100 mm
7.5 mm 160 mm 100 mm
8.0 mm 160 mm 100 mm
8.5 mm 160 mm 100 mm
9.0 mm 160 mm 100 mm
9.5 mm 160 mm 100 mm
10.0 mm 160 mm 100 mm
260 mm 200 mm
10.5 mm 160 mm 100 mm
260 mm 200 mm
11.0 mm 160 mm 100 mm
12.0 mm 160 mm 88 mm
260 mm 187 mm
12.5 mm 160 mm 88 mm
260 mm 187 mm
12.7 mm 160 mm 88 mm
260 mm 187 mm
13.0 mm 160 mm 87 mm
14.0 mm 160 mm 87 mm
14.3 mm 160 mm 87 mm
260 mm 186 mm
14.5 mm 160 mm 87 mm
260 mm 186 mm
15.0 mm 160 mm 85 mm
16.0 mm 160 mm 85 mm
260 mm 186 mm
16.5 mm 160 mm 85 mm
17.0 mm 160 mm 85 mm
260 mm 185 mm
17.5 mm 160 mm 90 mm
260 mm 185 mm
18.0 mm 160 mm 85 mm
19.0 mm 260 mm 185 mm
20.0 mm 260 mm 175 mm
22.0 mm 260 mm 175 mm
24.0 mm 250 mm 173 mm
25.0 mm 450 mm 375 mm
● 大徑搪孔
核心鑽頭
外徑 中心銷 核心鑽頭柄
全長
25 mm* 不適用
105 mm
300 mm
29 mm*
32 mm
(A)35 mm
38 mm
45 mm (B) 300 mm
50 mm
* 不含導板
● 錨栓裝定
錨栓裝定附加器
錨栓尺寸
W 1/4"
W 5/16"
W 3/8"
W 1/2"
W 5/8"
● 鑽鑿錨栓孔
錐柄附加器
錐度模式
1號莫式錐度
2號莫式錐度
A號-錐度
B號-錐度
選購附件可能不預先通告而徑予更改。
000BookDH24PGAsia.indb17000BookDH24PGAsia.indb17 2019/01/1110:13:122019/01/1110:13:12

中國語
18
用 途
旋鑽與錘擊
○ 鑽開錨栓孔
○ 對混凝土鑽孔
○ 對瓷磚鑽孔
單純旋鑽
○ 對鋼材或木材鑽孔
(與選購附件匹配使用)
○ 旋緊機器螺絲、木螺絲
(與選購附件匹配使用)
作 業 之 前
1. 電源
確認所使用的電源與工具銘牌上標示的規格是否
相符。
2. 電源開關
確認電源開關是否切斷。若電源開關接通,則插
頭插入電源插座時電動工具將出其不意地立刻轉
動,從而招致嚴重事故。
3. 延伸線纜
若作業場所移到離開電源的地點,應使用容量足
夠、鎧裝合適的延伸線纜,並且要盡可能地短
些。
4. 安裝鑽頭(圖 1)
注意
為避免意外事故,請務必關閉開關並拔下電源插
頭。
註
當使用尖鑽、鑽頭等工具時,請務必使用本公司原
裝配件。
(1) 清潔鑽頭柄。
(2)
旋轉鑽頭將其插入鑽頭夾盤直至插鎖插緊。(圖 1)
(3) 拉鑽頭以檢查是否完全插緊。
(4) 卸下鑽頭時,首先請按箭頭所示方向將夾卡完全
拉出,然後將鑽頭從夾卡拉出。 (圖 2)
5.
安裝集塵杯和集塵器 (B)(選購附件)(圖 3、圖 4)
使用手提電動鎚鑽進行頭上工作時,請裝上集塵
杯和集塵器(B),以減少灰塵的掉下便於操作。
○ 集塵杯的安裝方法
請按照圖 3 所示方法,將集塵杯裝在鑽頭上使用。
使用粗徑鑽頭時,請用主機將集塵杯的中心孔開
大。
○ 集塵器(B)的安裝方法
使用集塵器(B)時,請將集塵器(B)與夾卡上的筒套對準
後,將集塵器(B)從鑽頭的頂端插進鑽頭(圖 4)。
注意
○ 集塵杯和集塵器(B)是專門用於混凝土的鑽孔,
請勿用於金屬、木材的鑽孔。
○ 請將集塵器(B)完全插入主機的夾盤部。
○ 當集塵器(B)與混凝土表面有一段距離的狀態
下,打開手提電動鎚鑽開關進行工作時,集塵
器(B)會跟鑽頭同時旋轉。因此,請務必將集塵
杯緊壓在混凝土面上後再打開開關進行鑽孔工
作。(如將集塵器(B)用於全長 190 mm 以上
的鑽頭時,集塵器(B)便無法貼緊混凝土面而旋
轉。因此,請將集塵器(B)與全長 166 mm, 160
mm, 110 mm 的鑽頭配套使用。)
○ 每鑽2∼3個孔後,請將粉塵丟掉。
○ 更換鑽頭時,請卸下集塵(B)以後再進行。
6. 選擇旋螺絲鑽頭
為了避免螺絲頭或鑽頭被損壞,旋螺絲時一定要
用與螺絲直徑相配的鑽頭。
7. 確認鑽頭的旋轉方向(圖 5)
按下按鈕右側時,鑽頭按順時針方向旋轉(從後部
看)。按下按鈕左側時,鑽頭按逆時針方向旋轉。
使 用 方 法
注意
在進行鑽頭及各種零部件的安裝、拆卸,中斷作業
時及作業之後,為防止發生意外事故,請務必關閉
開關,從插座拔出插頭。
1. 開關的操作
鑽頭尖的轉速可以靠改變觸發開關拉動量來控
制。輕拉觸發開關,轉速低;稍用力拉開關,轉
速高。拉動觸發開關後再按下停止銷的話,便可
進行連續作業。若想關掉觸發開關,請再次拉動
觸發開關,以使停止銷鬆開並使觸發開關回到其
起始位置。
然而,倒轉時只能將觸發開關拉出一半,旋轉速
度為正常旋轉時的約一半。
另外,倒轉時不能使用開關止動器。
2. 旋鑽+錘擊
按壓按鈕將選擇桿逆時針方向轉到標有“ ”
記號的位置時,手提電動鎚鑽就能以“旋鑽+錘
擊”的模式進行工作。(圖 6)
(1) 安裝鑽頭。
(2) 將鑽具尖端放到鑽孔位置,然後拉動觸發開關。
(圖 7)
(3) 使用手提電動鎚錘作業不需要用力推壓。祇要稍
加按壓,讓鑽碎的粉塵徐徐排出即可。
000BookDH24PGAsia.indb18000BookDH24PGAsia.indb18 2019/01/1110:13:122019/01/1110:13:12

中國語
19
注意
當鑽頭碰到建築物的鋼節時將立即停止轉動。但手
提電動鎚鑽隨即反應而轉動(如圖 7)這時候,必
需握緊側柄和手柄。
3. 僅限旋鑽
按壓按鈕將選擇桿順時針方向轉到標有“ ” 號
的位置,手提電動鎚鑽就進行單純旋鑽。(圖
8)
用配備的鑽頭夾盤和夾盤附加器木材或金屬時,
按下列程序操作。
安裝鑽頭夾盤和夾盤附加器:(圖 9)
(1) 將鑽頭夾盤裝配在夾盤附件上。
(2) SDS-plus 長柄部與鑽頭相同。因此裝配 SDS-plus
長柄時,請參照“安裝鑽頭”處的說明。
注意
○ 過分用力不僅無助於作業,而且會損壞鑽頭的
刃尖,縮短手提電動鎚鑽的壽命。
○ 從鑽孔中抽出手提電動鎚鑽時鑽頭可能會折
斷,所以抽出時必須小心。
○ 不要在單旋轉鑽的功能下用手提電動鎚鑽鑽錨
孔或在混凝土上鑽孔。
○ 裝有鑽頭夾盤和夾盤附加器時,不要在旋轉加
錘擊的功能下使用手提電動鎚鑽,這會嚴重鑽
頭短縮機器各個部件的壽命。
4. 在旋機械螺絲時(圖 10)
首先,把鑽頭插入夾盤附加器(D)端部的夾緊器中。
然後,按 4(1),(2),(3)中所描述的步驟
把夾盤附加器(D)裝在主部件上,鑽頭的刃尖放入螺
絲頭部的槽內,抓緊主部件,旋緊螺絲。
注意
○ 注意不要過分加長旋螺絲的時間,否則,過大
的力會損壞螺絲。
○ 旋螺絲時,手提電動鎚鑽要垂直對準螺絲頭,
否則,螺絲頭或鑽頭會被損壞,或者旋轉力不
能被完全傳給螺絲。
○ 裝有鑽頭和夾盤附加器時,不要在旋轉加錘擊
的功能下使用錘鑽。
5. 在旋木螺絲時(圖 10)
(1) 選擇適當的鑽頭
如果可能的話盡量使用十字頭螺絲,因為鑽頭很
容易滑出一字頭螺絲的槽。
(2) 旋進木螺絲
○ 在旋進木螺絲之前,在木板上開適當的先導孔,
然後把鑽頭放入螺絲頭部的槽內,緩緩地將螺絲
旋進孔內。
○ 低速轉動手提電動鎚鑽一會兒直到木螺絲被旋進
木板一部分,然後更緊地握住觸發開關以便得到
最佳旋轉力。
注意
在為木螺絲準備先導孔時特別注意木板的硬度。如
果孔極小或極淺,用較大的力旋螺絲進孔的話,有
時會損壞木螺絲的螺紋。
6. 使用深度計(圖 11)
(1) 旋松側柄的圓頭螺絲,把深度計插進側柄上的安
裝孔。
(2) 按孔深調節深度計的位置,然後旋緊圓頭螺栓。
7. 鑽頭(錐柄)和錐柄附加器的使用
(1) 把錐柄附加器安裝於手提電動鎚鑽上(圖 12)。
(2) 把鑽頭(錘柄)安裝於錘柄附加器上(圖 12)。
(3) 接通開關,按預定深度,鑽開一個孔口。
(4) 拆卸鑽頭(錐柄)時,可將製銷插入錐柄附加器
的縫隙,把鑽頭放在台座上,用錐子敲打製銷頭
部(圖 13)。
怎麼樣使用取心鑽具(輕載用)
鏜穿大孔時,可使用取心鑽具(輕載用)進行作
業。這時候,必需使用選購件的中間銷和取心鑽
柄。
1. 安裝
注意
應先確認電源開關是否切斷,插頭有無從電源插座
拆除。
(1) 把取心鑽具安裝於取心鑽柄(圖 14)。潤滑取心
鑽柄的螺紋,可使拆解更加容易。
(2) 把取心鑽柄安裝於手提電動鎚鑽(圖 15)。
(3) 把中間銷插入於導板上直到受擋阻為止。
(4) 把導板和取心鑽具拼裝起來,往右向或左向轉動
導板,直到朝下也不掉落(圖 16)。
2. 怎麼樣進行鑽孔(圖 17)
(1) 把插頭接於電源插座。
(2) 中間銷裡裝有彈簧。垂直推壓於牆壁或地板,使
取心鑽具尖端成為與之全面接觸的狀態,然後開
動鑽機。
(3) 鑽到大約 5 mm 深度,鑽孔位置即可確定。這時
候,可從取心鑽具拆下中間銷和導板。
(4) 過分用力不僅無助於作業,而且會損壞鑽頭的刀
尖,縮短手提電動鎚鑽的壽命。
注意
拆除中間銷和導板時,應先切斷開關,並從電源插
座拆下插頭。
3. 拆卸(圖 18)
亦可從手提電動鎚鑽拆下取心鑽柄,然後拿穩取
心鑽具,用錘子強力錘擊取心鑽柄二至三次,讓
螺紋部鬆開,把取心鑽具拆下。
000BookDH24PGAsia.indb19000BookDH24PGAsia.indb19 2019/01/1110:13:122019/01/1110:13:12

中國語
20
潤 滑
此一手提電動鎚鑽應使用低粘度滑脂。這樣,可長時
間使用而無需更換滑脂。每次替換碳刷後,亦請更換
滑脂以維持使用壽命。
如果在滑脂缺少的狀態下繼續使用,手提電動鎚鑽就
會卡住,並因而縮短使用壽命。
注意
此手提電動鎚鑽使用指定的滑脂,因此使用其他滑
脂可能會對機器性能帶來不利影響。請一定讓服務
站為你更換滑脂。
維 護 和 檢 查
1. 檢查鑽頭
由於使用磨損後的鑽頭會使馬達工作失常,並會
降低效率。所以一旦發現鑽頭磨損,應立即用新
的鑽頭或者磨鋒利的鑽頭進行更換。
2. 檢查安裝螺釘
要經常檢查安裝螺釘是否緊固妥善。若發現螺釘
鬆了,應立即重新扭緊,否則會導致嚴重的事
故。
3. 電動機的維護
電動機繞線是電動工具的“心臟部”。應仔細檢
查有無損傷,是否被油液或水沾濕。
4. 檢查碳刷
為了保證長期安全操作和防止觸電,必須僅由經
授權的HiKOKI維修中心檢查和更換碳刷。
5. 更換電源線
如果工具的電源線破損,必須將工具送回HiKOKI
授權的服務中心來更換電源線。
6. 維修部件目錄
注意
HiKOKI電動工具的修理、維護和檢查必須由HiKOKI
所認可的維修中心進行。
當尋求修理或其他維護時,將本部件目錄與工具
一起提交給HiKOKI所認可的維修中心會對您有所
幫助。
在操作和維護電動工具中,必須遵守各國的安全
規則和標准規定。
改進
HiKOKI電動工具隨時都在進行改進以適應最新的技
術進步。
因此,有些部件可能未預先通知而進行改進。
註
為求改進,本手冊所載規格可能不預先通告而徑
予更改。
000BookDH24PGAsia.indb20000BookDH24PGAsia.indb20 2019/01/1110:13:122019/01/1110:13:12
This manual suits for next models
2
Table of contents
Languages:
Other HIKOKI Rotary Hammer manuals

HIKOKI
HIKOKI DH 28PEC User manual

HIKOKI
HIKOKI DH 26PMC User manual

HIKOKI
HIKOKI DH 45MA User manual

HIKOKI
HIKOKI DH3628DC User manual

HIKOKI
HIKOKI DH 28PD User manual

HIKOKI
HIKOKI DH 28PEC User manual

HIKOKI
HIKOKI DH 24PG2 User manual

HIKOKI
HIKOKI DH 40MEY User manual

HIKOKI
HIKOKI DH 28PC User manual

HIKOKI
HIKOKI DH 18DPA User manual

HIKOKI
HIKOKI W 6VM User manual

HIKOKI
HIKOKI DH 52MEY User manual

HIKOKI
HIKOKI DH 24PX2 User manual

HIKOKI
HIKOKI DH 1826DC User manual

HIKOKI
HIKOKI DH 36DMA User manual

HIKOKI
HIKOKI DH 52MA User manual

HIKOKI
HIKOKI DH 36DPE User manual

HIKOKI
HIKOKI DH 45ME User manual

HIKOKI
HIKOKI DH 40MEY User manual

HIKOKI
HIKOKI DH18DPB User manual