Hinkle Chair Company 204 User manual
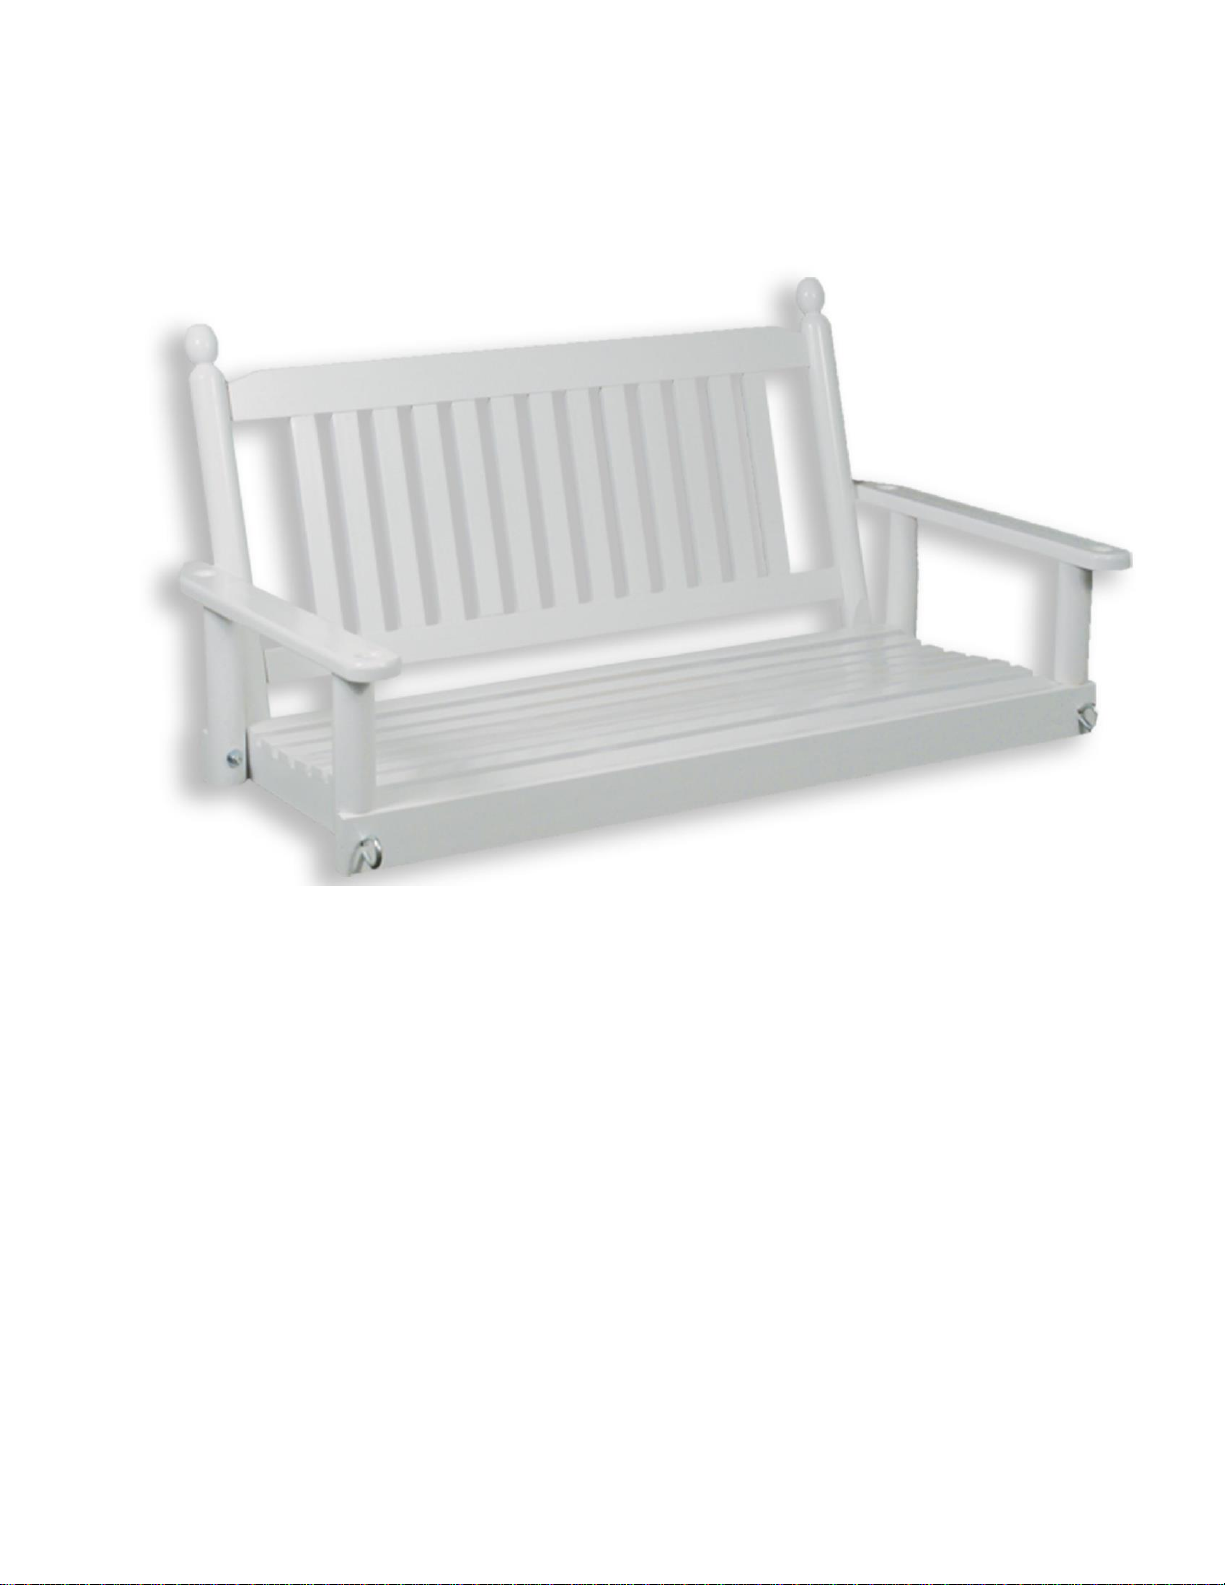
#204 PORCH SWING ASSEMBLY
INSTRUCTIONS
Thank you for purchasing a quality porch swing. The product you have purchased
requires some assembly. This item has been carefully inspected before packing to
ensure its adherence to our strict Quality Control Standards. Proper assembly will
ensure not only your safety, but many years of enjoyable use of this quality product.
We STRONGLY suggest that you familiarize yourself with these instructions prior
to assembling this product. It’s up to you to follow carefully EACH STEP of the
assembly process. For your safety, DO NOT SKIP any step indicated in these
instructions. Use all the hardware provided as indicated. Be sure to tighten all
fasteners securely. The manufacturer will not be responsible for any damage or
injury that results from improper assembly of the swing. If you have any questions
regarding the assembly of this swing, feel free to contact us using the customer
service (800) 251-3025.

**Attention/Stop**
Please read before assembling this product!
Every effort has been made to provide you with a ready-to-assemble
product that has the same quality as our fully assembled furniture. In the
unlikely event that there are incorrect or missing parts or that parts become
damaged during shipping, following the instructions below will protect
you (The Customer) from accepting responsibility for a product that is
damaged or incomplete.
1st) Inspect all parts for any imperfection that might have occurred
during shipping.
2nd) If there is damaged or missing parts the chair must be returned in the
original packaging before any credit can be issued. In the case of
damaged parts, individual parts will be sent as replacements.
3rd) When you have determined that all parts are available and
undamaged, and that all parts and assemblies fit properly, proceed with
all steps
This product is intended for a covered porch or indoors. This product
should be cleaned weekly as you would with any other wooden furniture
product. If at any time during these steps, assistance is needed, please
contact Customer Service (800) 251-3025
2
SWING ASSEMBLY INSTRUCTIONS
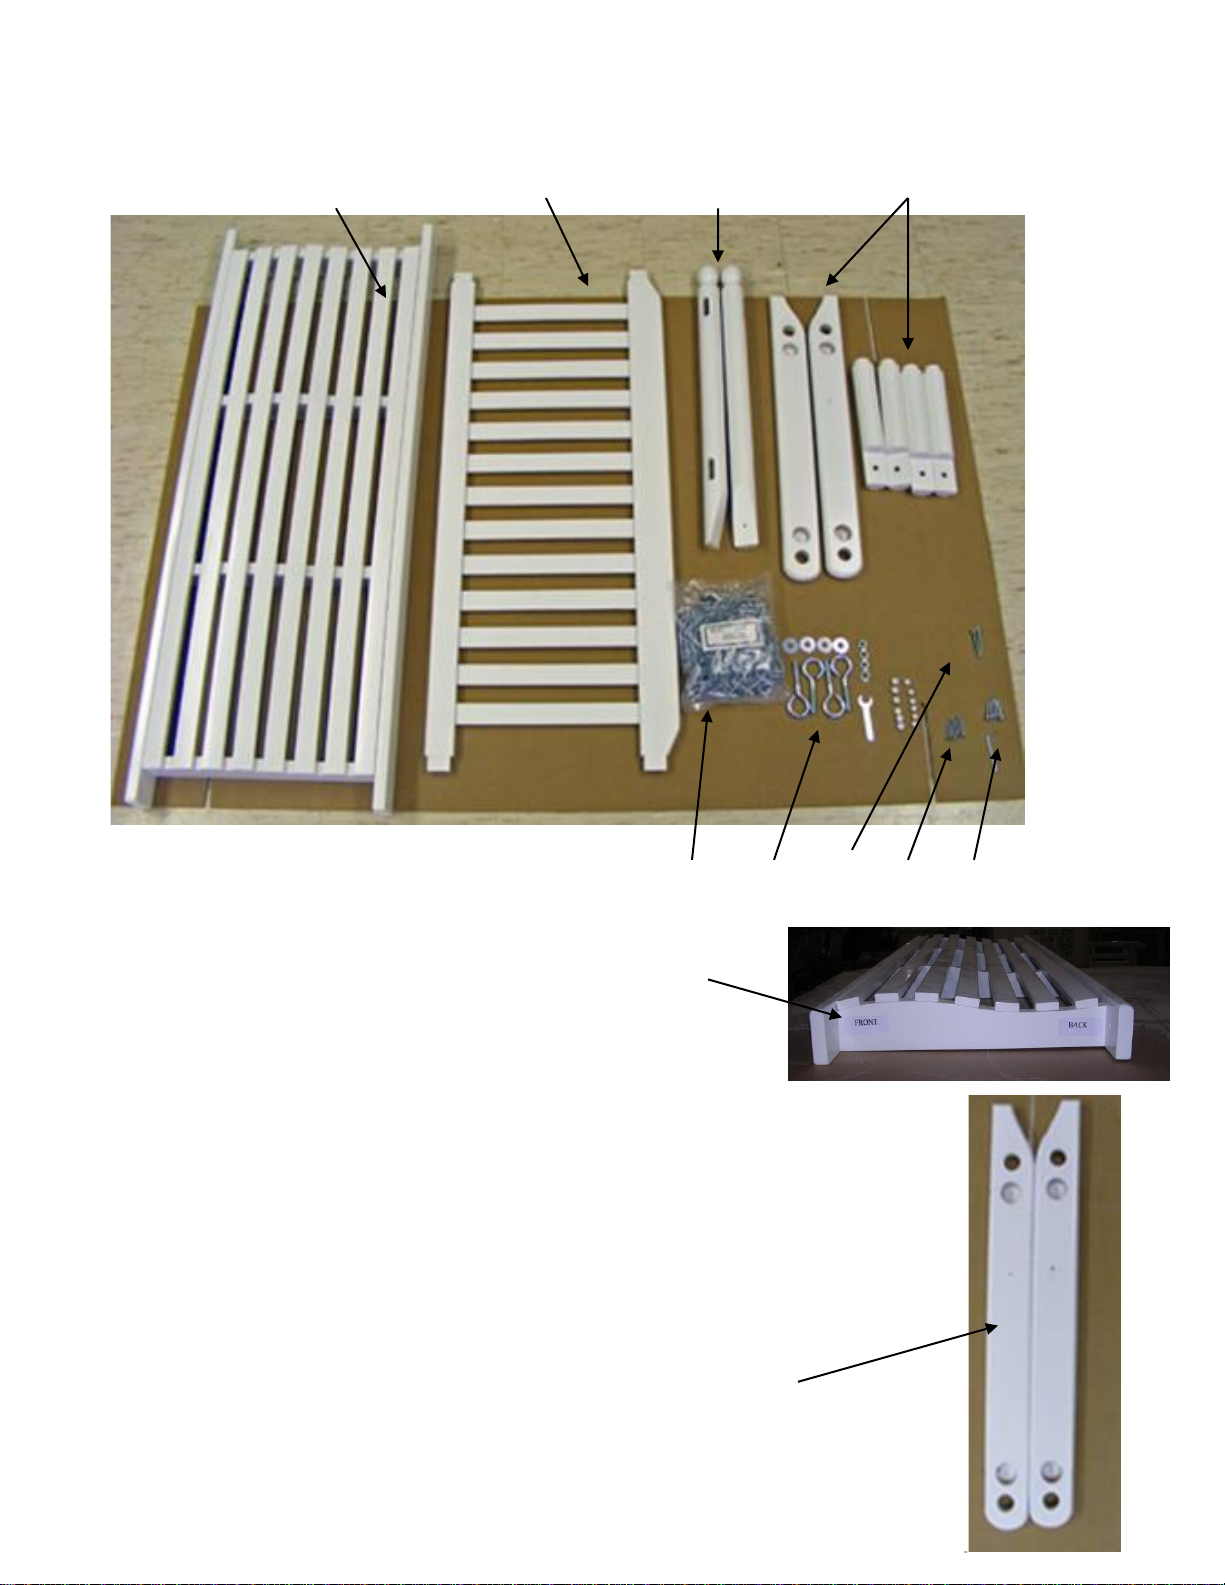
A B B-L/B-R C
G D E F H
Parts Included:
1 - Swing Seat (A) A
1 - Swing Back (B)
2- Swing Back Posts (B-L/B-R)
2 - Swing Arms and Posts (C)
4 - Eye Bolts Washers and Nuts (D)
12- Buttons 6-Large 4-Small
2 - Arm Bolts and Wrench(E)
6 - Back Screws and Arm Screws (F)
1 - Chain Assembly (G)
4- Back Bolts w/Wrench(H)
Tools Required For Assembly
(not included)Screwdriver
* ARMS MARKED LEFT AND RIGHT
3
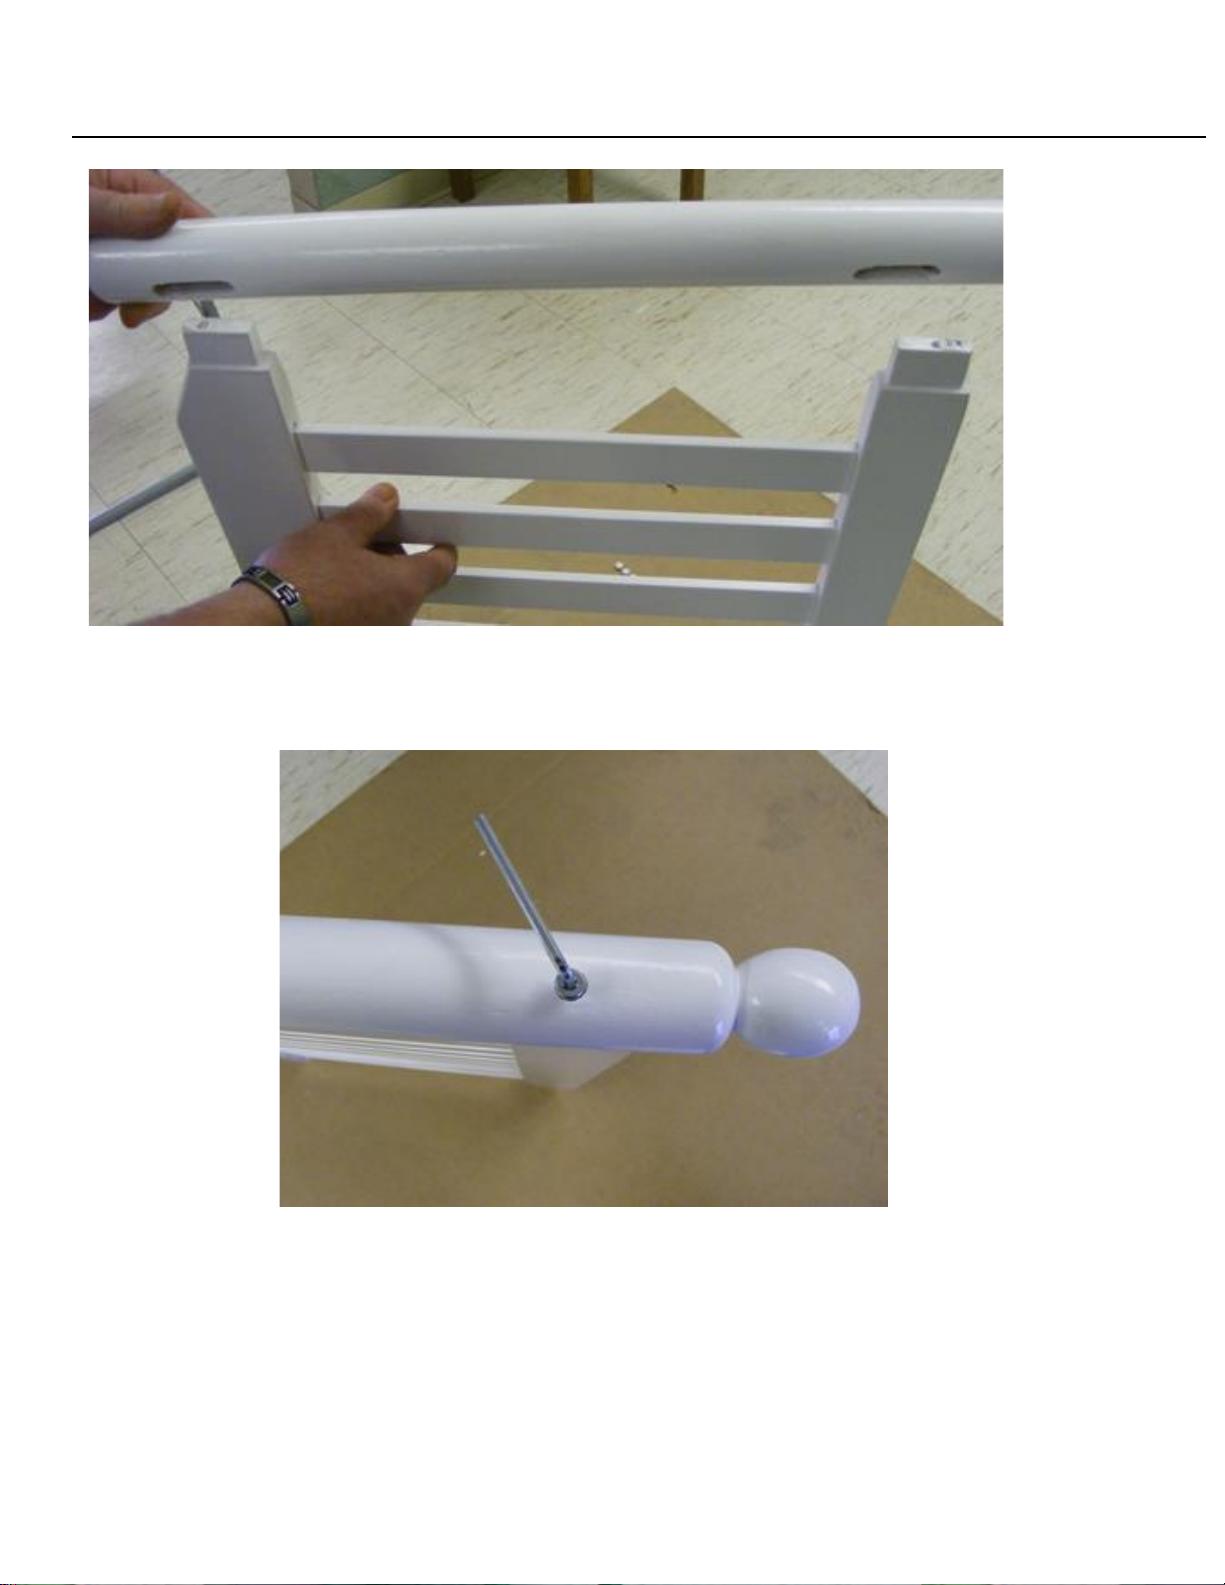
STEP 1:
Line up the top of the post with the tenons on the swing back. Press down
firmly. Tap with hammer to fully seat.
Place screw in top pre-drilled hole. Tighten with the wrench provided.
4
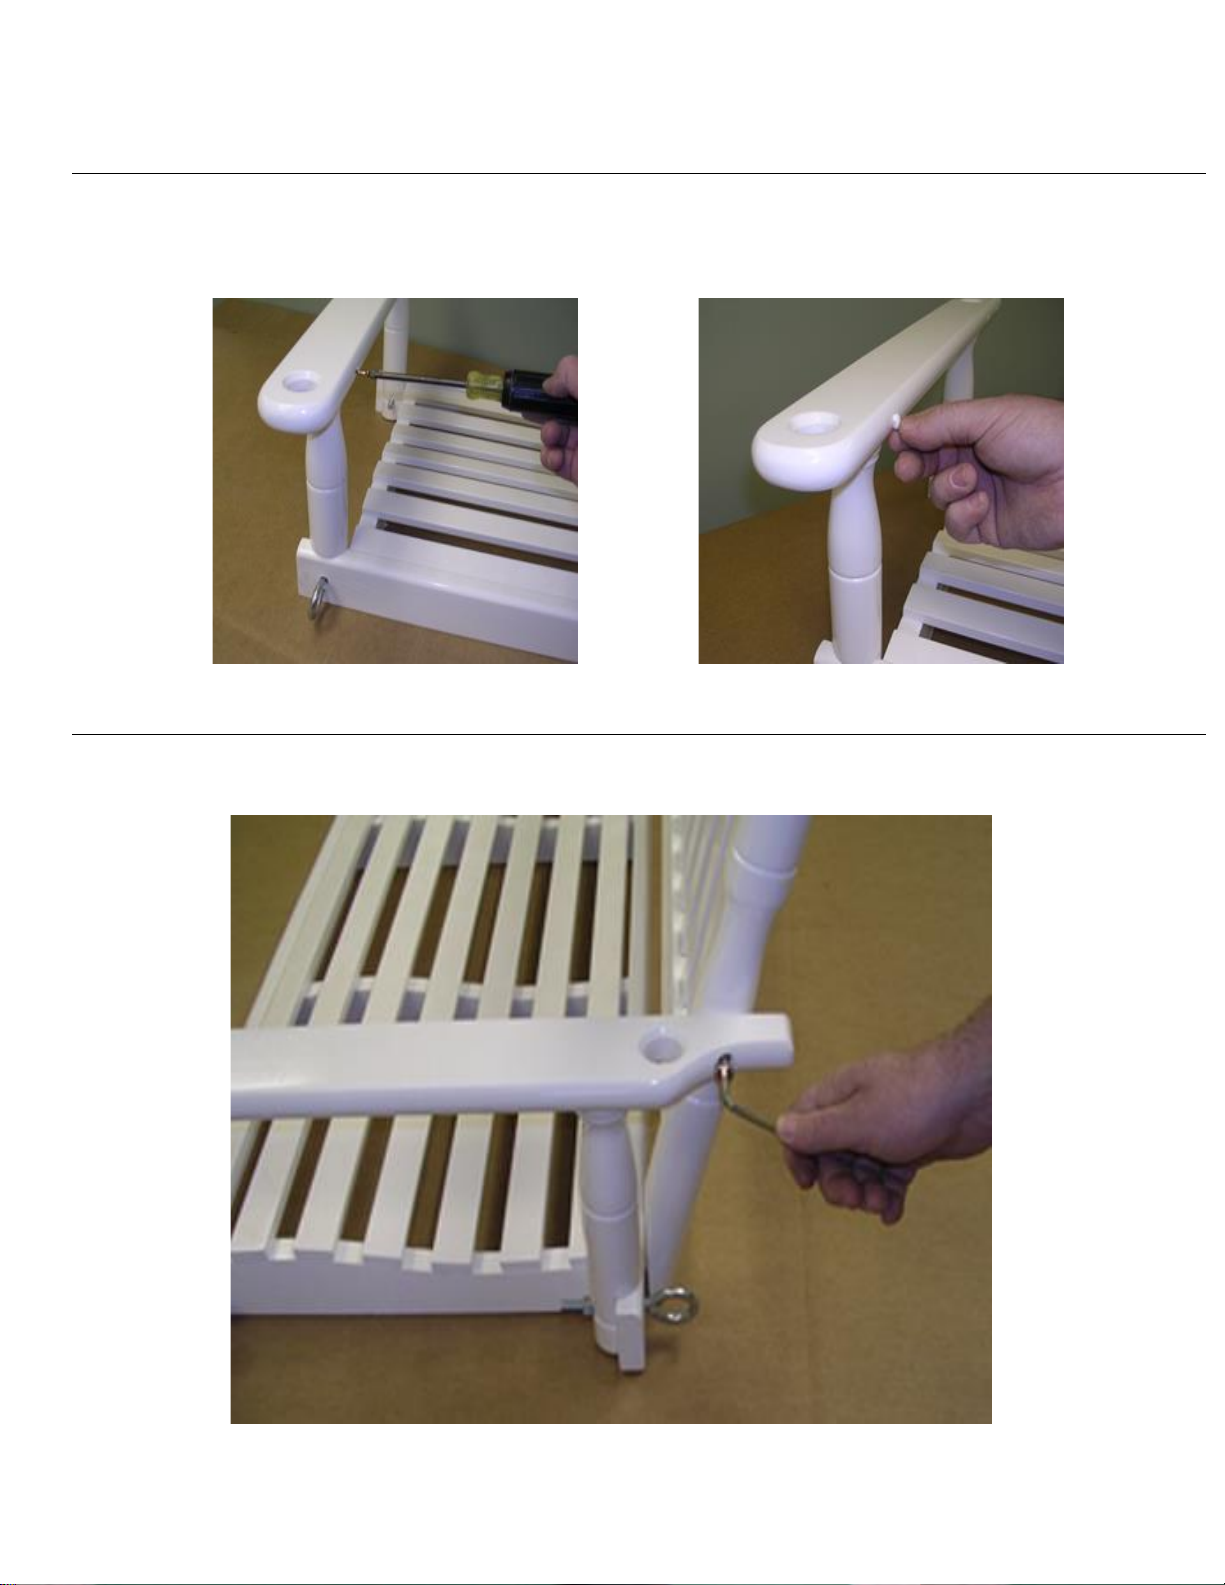
STEP 1:
Repeat for bottom pre-drilled hole. Flip the back over and repeat for other
side. Install buttons at the end of assembly.
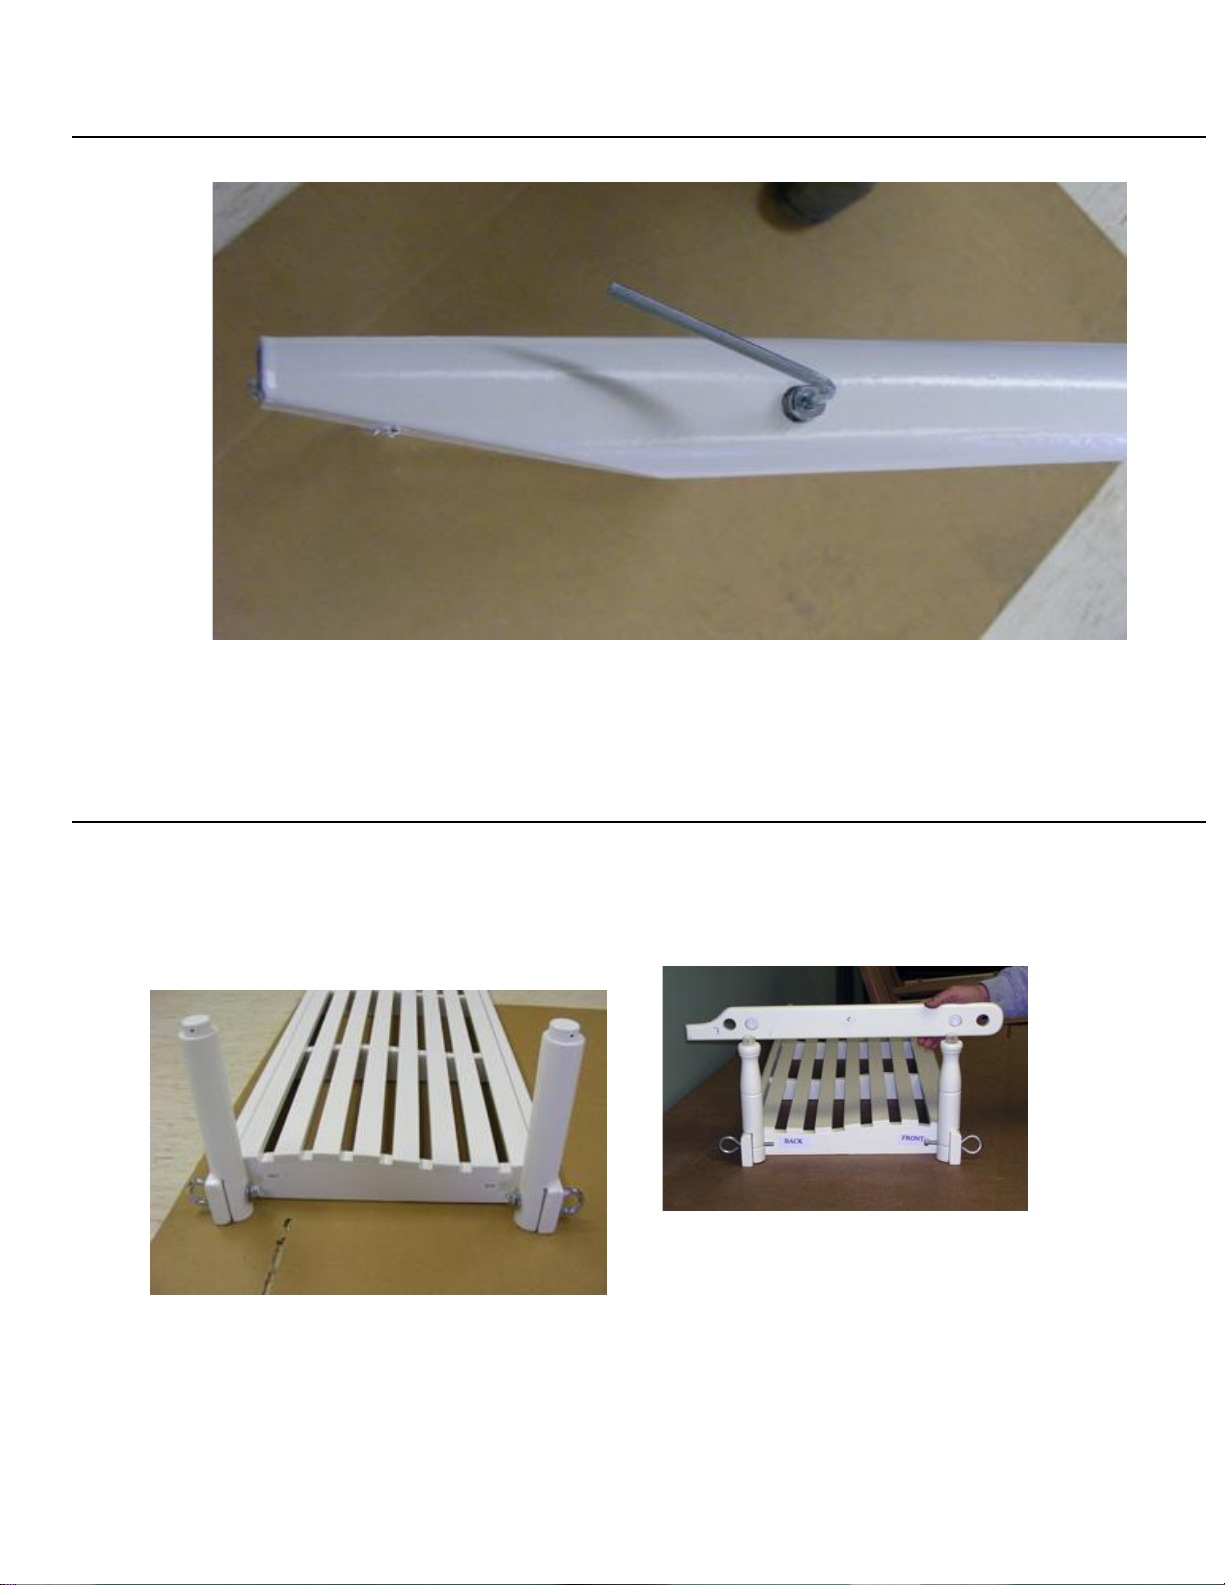
STEP2:
Lay Swing on the shipping box during assembly to protect it from
scratching. Attach swing posts (C) to swing seat (A) using eyebolts nuts and
washers(D). Complete this for both left and right sides. Place arm on top of
posts as in the picture below.
5
STEP 2:
Attach the swing arm to swing posts (C) using screws (F) provided. Place
small button in hole in arm to cover the screw. Complete this for both left
and right sides.
STEP 3:
Attach swing back (B) to swing arms (C) using arm bolts (E). Complete this
for both sides.
6
STEP 4:
Attach swing back (B) to swing seat (A) using back screws (F). Complete
this for both sides. Push buttons in the holes to cover the head of the screw.
STEP 5:
Run swing chain (G) through the holes in the swing arm (C) and connect to
the eye bolt (D) below. Complete this on all four corners of the swing.
Your swing is now ready to hang on the hooks provided.
7

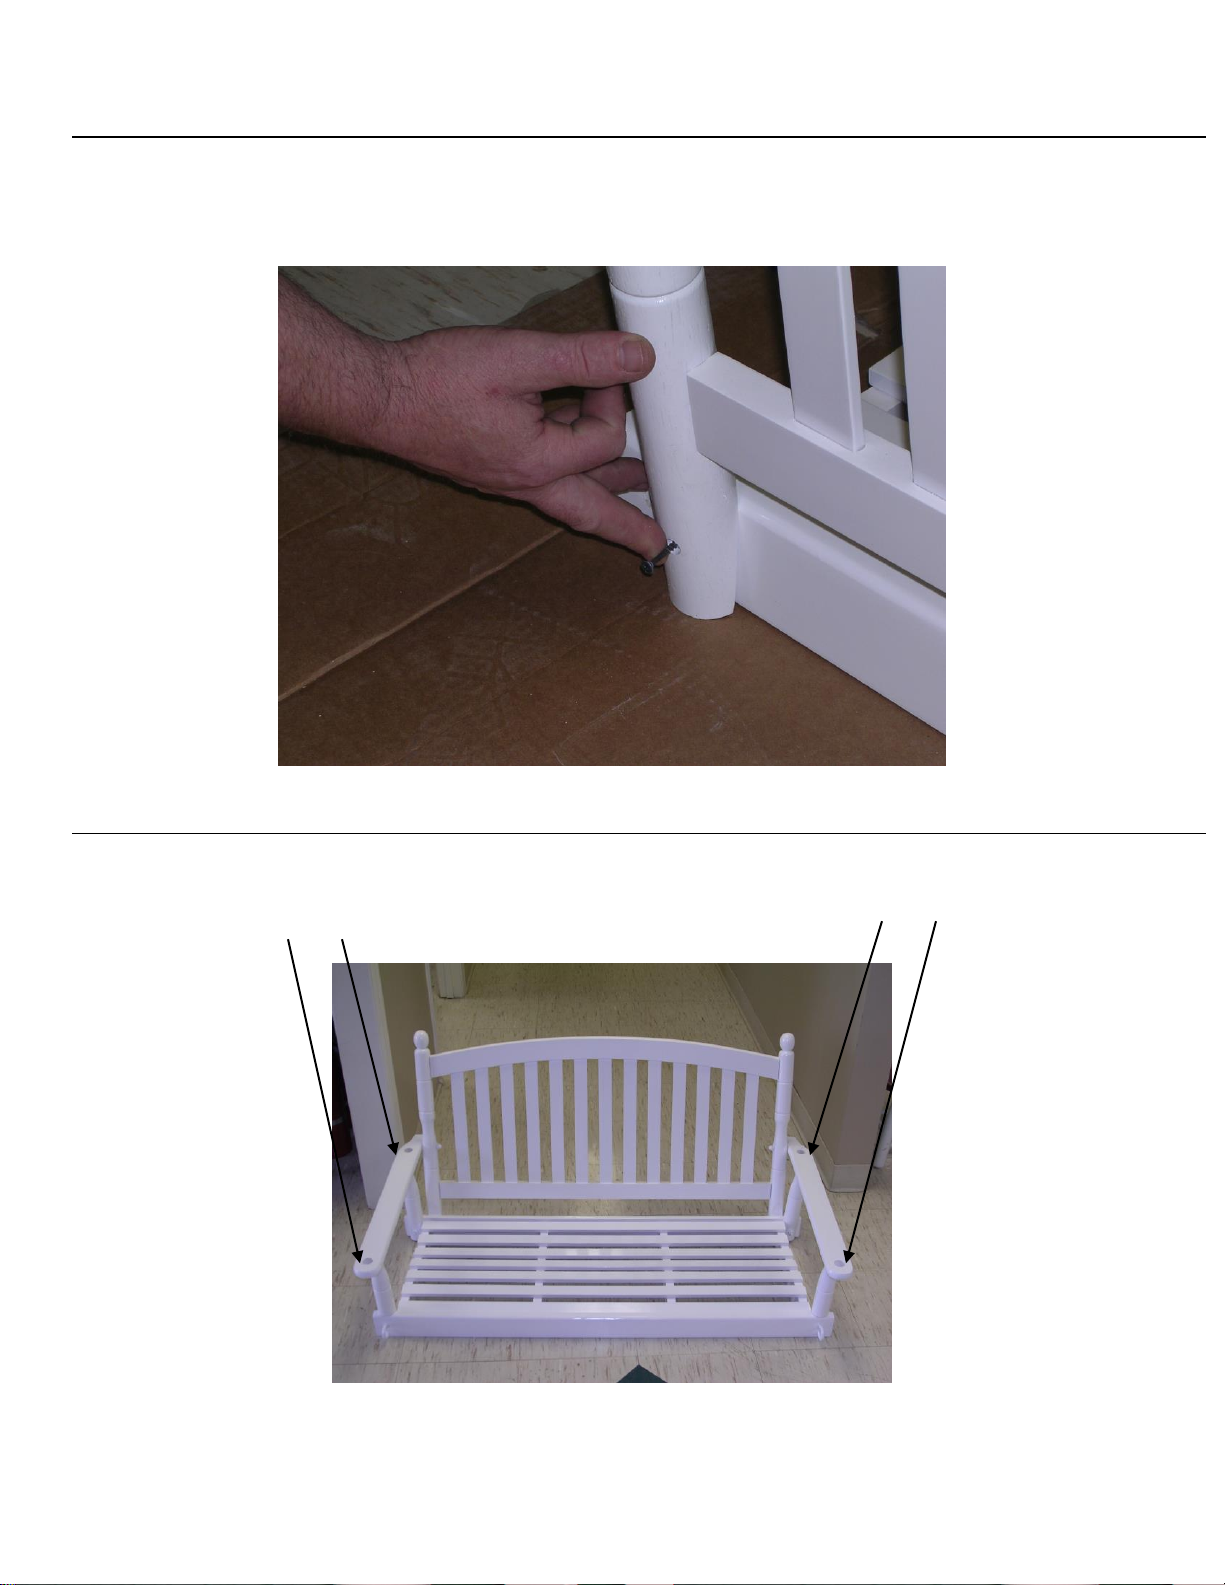
STEP 6:
To attach swing hooks (included in Chain Assembly pack) (G) to anchor
point were swing is to be suspended; first you must drill a 3/16” pilot hole.
This will make installation of the hooks much easier and will also help you
determine if the material is solid and able to handle the weight of the swing.
STEP 6:
Place hook into pilot hole in the anchor point. Begin turning clockwise and
hook will thread in. Notice the correct way (left) to thread in the hook.
Using pliers or long screwdrivers as depicted (right) is wrong. This can
bend the lower hook, damage the nylon washer, and weaken or break the
hook at the base of the threads.
CORRECT WRONG!
NOTE: PLACE HOOKS IN MATERIAL CAPABLE OF HANDLING THE
LOAD YOU WILL BE PLACING ON THE SWING.
8

CARE TIPS
LISTED BELOW ARE SOME TIPS TO HELP KEEP YOUR
FURNITURE LOOKING NEW.
To preserve the finish on stained or pure white
furniture it is highly recommended that they either be
placed indoors or in a protected environment such as
a covered porch. In any case the finish will last
longer and look better if kept out of direct sunlight
and blowing rain. The finish on this furniture will last
for a lifetime if used indoors. This furniture is not
intended to be used in an unprotected environment.
The sun and rain will weather the varnish finish if
left out in the elements over time (6 months to one
year depending on the climate). Our furniture
products need the same attention as any other solid
wood furniture and monthly cleaning with any
quality household furniture polish will keep your
furniture looking new for many years to come. If
your climate has high humidity, even if you follow the
recommended cleaning intervals above, you may have
problems with mold or mildew. To remove the mold
and mildew dilute one ounce of bleach into sixteen
ounces of water and apply with a soft cloth. More
than one application may be necessary. Allow to dry
and apply furniture polish to protect the finish.
9


