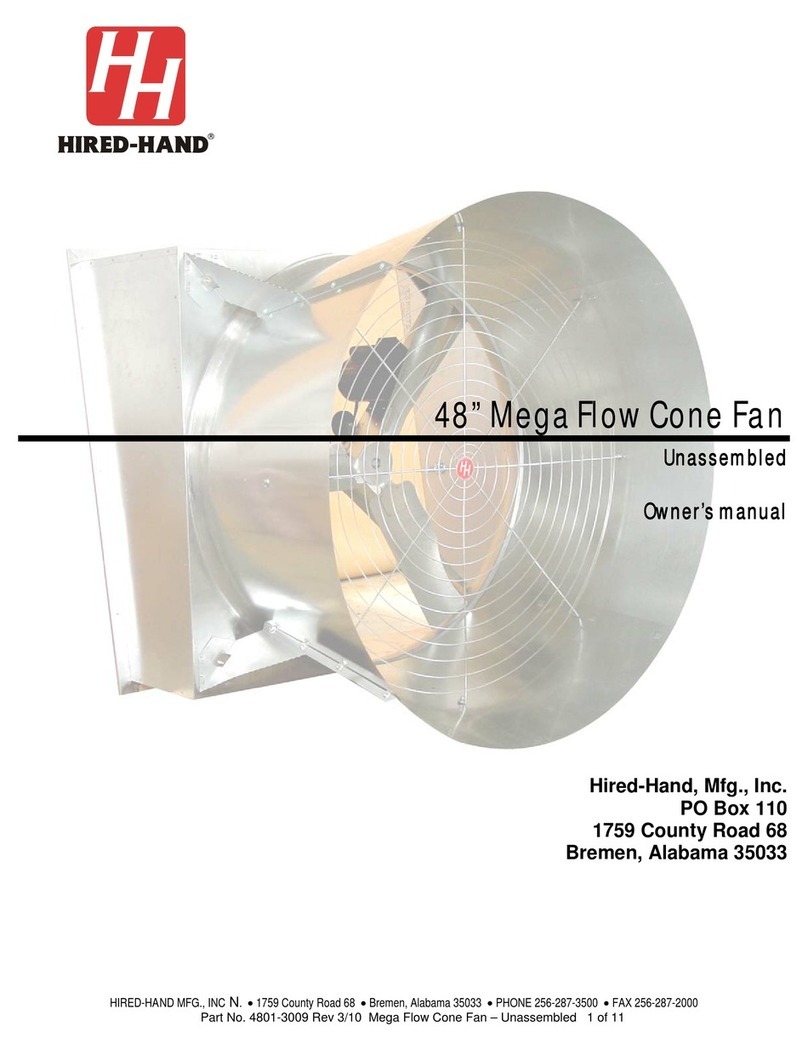
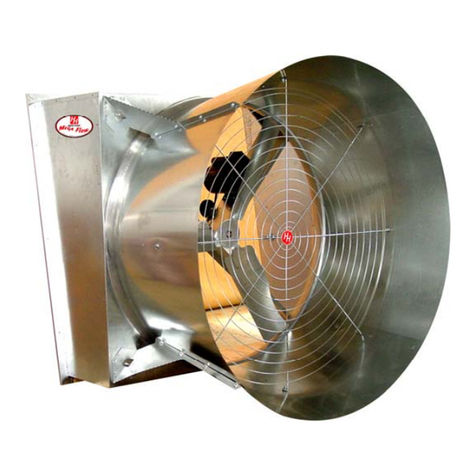
HIRED-HAND Mega-Flow Butterfly User manual

Part No. 4801-5327 Rev 6/07 Owners Manual Mega-Flow Butterfly Cone Fan - Unassembled
Mega-FlowButterflyConeFan
Unassembled
Owner’sManual
Hired-Hand, Mfg., Inc.
PO Box 140
1733 County Road 68
Bremen, Alabama 35033

Part No. 4801-5327 Rev 6/07 Mega-Flow Butterfly Cone - Unassembled Page 2 of 12
1. Warnings
Warning!
Disconnect All Power Sources Before Installing This Equipment. Failure To Disconnect Power Source
Can Result In Property Damage, Serious Injury Or Death!
Warning!
Dangerous Rotating Machinery! Keep Hands, Clothing, Etc. Clear When Operating!
Do Not Operate Without All Guards And Covers In Place!
Warning!
All Wiring Should Be In Accordance with National Electrical Codes Or Other Local Codes.
Warning!
The Installer Is Responsible For Complying With All Relevant Regulations, Such As National Wiring
Regulations And Accident Prevention Regulations. Particular Attention Must Be Given To The Cross-
sectional Areas Of Conductors, The Selection Of Fuses Or Other Protection, And Protective
Earth/Ground Connections!
Warning!
The Voltages In The Power Cables And Certain Parts Of The Drive Can Result In Death. Whenever The
Drive Has Been Used It Must Be Isolated And Disconnected For 5 Minutes Before Any Work Commences
Danger!
Only Qualified Electrical Personnel Familiar With The Construction And Operation Of This Equipment And
The Hazards Involved Should Install, Adjust, And/Or Service This Equipment. Read And Understand
This Manual In Its Entirety Before Proceeding. Failure To Observe This Precaution Could Result In
Severe Bodily Injury Or Death!
!
!
!
!
!
!
!
!
!

Part No. 4801-5327 Rev 6/07 Mega-Flow Butterfly Cone - Unassembled Page 3 of 12
2. Limited Warranty
All products are warranted to be free from defects in material and workmanship for a
period of one (1) year from the date of purchase if installed and used in strict accordance
with the installation instructions. Liability is limited to the sale price of any products
proved to be defective or, at manufacturer’s option, to the replacement of such products
upon their return. No products are to be returned to the manufacturer, until there is an
inspection and/or a return-goods authorization (RGA) number is issued.
All complaints should be directed first to the authorized distributor who sold the product. If
satisfaction is not obtained or the name of the distributor is not known, write the
manufacturer that appears below, directed to the attention of Customer Service Manager.
This limited warranty is expressly in lieu of any and all representations and warranties
expressed or implied, including any implied warranty of merchantability or fitness for a
particular purpose. The remedy set forth in this limited warranty shall be the exclusive
remedy available to any person. No person has authority to bind the manufacturer to any
representation or warranty other than this limited warranty. The manufacturer shall not
be liable for any consequential damages resulting from the use of our products or caused
by any defect, failure or malfunction of our products. (Some areas do not allow the
exclusion or limitation of incidental or consequential damages, so the above limitation or
exclusion may not apply to you).
This warranty gives you specific legal rights and you may also have other rights that vary
from area to area.
Warrantor: Hired-Hand Mfg., Inc.
PO Box 140
1751 County Road 68
Bremen, Alabama 35033
Phone 256-287-7000

Part No. 4801-5327 Rev 6/07 Mega-Flow Butterfly Cone - Unassembled Page 4 of 12
3. Table of Contents
Section Description Page
1. Warnings..................................................................................................................................................2
2. Limited Warranty......................................................................................................................................3
3. Table of Contents.....................................................................................................................................4
4. Butterfly Fan Mounting Instructions..........................................................................................................4
5. Assemble Fan ..........................................................................................................................................4
6. Assemble Cone........................................................................................................................................8
4. Butterfly Fan Mounting Instructions
5. Assemble Fan
TOOLS REQUIRED
Ratchet Torque wrench Flat head screwdriver
6" (152 mm) Ratchet extension 5/32" (4 mm) Allen head socket Pop rivet gun
9/16" (14 mm) socket 1/8" (3 mm) Allen head socket 9/16" (14 mm) open end box end wrench
7/16" (11 mm) socket Rubber mallet 7/16" (11 mm) open end box end wrench
1/2" (13 mm) socket 2' (61 cm) scale or carpenter's square Needle nose pliers
Electric or cordless drill 3/8" (10 mm) Socket -12pt. star Thread Locking Compound (LOCKTITE®)
3/8" (10 mm) Socket head bit
Diagram 1 – Framing Diagram
See Fan Spacing
Dimensions in
Diagram 2 Below
INTAKE
SIDE
EXHAUST
ORIFICE
SIDE
Width
Rough Opening
Height
Diagram 2 – Fan Spacing with Cone
Fan Housing Cone
Center-to-Center
Spacing
Fan Size Spacing
52" 68.0" (172.7 cm)
Fan Size Fan Model Width Height
52" Mega Flow Butterfly (56.50” 143.51 cm) (56.50” 143.51 cm)

Part No. 4801-5327 Rev 6/07 Mega-Flow Butterfly Cone - Unassembled Page 5 of 12
Warning!
Do Not Connect Electrical Power Until Assembly Is Complete
Always Double Check Power Sources!
1. Refer to Figure 1. Assemble the Pillow Block Bearings (1016-
0100) to the Pillow Bearing Mount (0404-5104) with four Cap
Screws (1004-3054), Flat Washers (1003-1462) and Lock Nuts
(1001-1457) as shown.
2. Refer to Figure 2. Assemble the Top and Bottom Vertical
Mounting Braces (0404-7587), the Bearing Pillow Assembly
from Step One and the Motor Mounting Bracket (0404-3700) to
the two Vertical Members (0404-8284). Secure with 3/8" x 16 x
1 Bolts (1002-2374) and 3/8" x 1 Lock Nuts (1001-1457).
3. Install the Sheave Idler Assembly (Belt Tensioner) (1011-9005)
using Screw (1004-1426). See Step 13 for adjusting.
4. Install the Pulley Shaft (6403-2110)
into the Bearing Pillow Assembly.
5. Refer to Figure 2. Insert the
Key Shear (1019-2417) into
the Shaft (6403-2110). Slide
Prop Pulley (1011-5000) onto
shaft until Pulley is flush with
the end of the shaft.
MAKE SURE SET SCREW
SIDE OF PULLEY IS
TOWARD SHAFT. Put 2-3
drops of Thread locking
compound on the pulley set
screw. Tighten set screw of
pulley. Recommended torque
is 110 in. lbs.
Flat Washer
3/8” X 1
(1003-1462).
CAP Screw
3/8” x 16 x 1 1/2”
(1004-3054)
Bearing
Pillow
(1016-0100)
Lock Nut
3/8” x 1
(1001-1457)
Pillow Bearing
Mount
(0404
-
5104)
Top Vertical Mounting Bracket
(0404-7587)
Bearing Pillow
Assembly Key Shear
(1019-2417)
Lock Nut 3/8”
(1001-1457)
Motor Mounting
Bracket
(0404-3700)
Shaft Coated
1 x 7 5/8
(6403-2110)
Bolt
3/8 x 16 x1
(1002-2374)
Sheave Idler
Assembly
(1011-9005)
Screw
3/8 x 16 x 1
(1004-1426)
Bolt
3/8 x 16 x1
(1002-2374)
Lock Nut 3/8”
(1001-1457)
Vertical Member
(0404-8284)
Figure 2 – Internal Fan Assembly
Bottom Vertical Mounting Bracket
(0404-7587).
Figure 1 – Bearing Pillow Assembly
!
Sheave 10.4 Fenner
(1011-5000)

Part No. 4801-5327 Rev 6/07 Mega-Flow Butterfly Cone - Unassembled Page 6 of 12
Detail A
2.5"
1.5"
4.25"
2.612"
6. Insert shaft assembly into the bearing pillows as shown in Detail A. Slide shaft assembly into bearings to a distance of
1.5" (3.81 cm) between the flange on the bearing pillow and the pulley as shown in Detail A. Lightly tighten the lock
screws on the bearing pillows.
7. Refer to Figure 3. Assemble the Side Panels (0404-8300 and 0404-7553), the Top Panel (0404-7552) and the Bottom
Panel (0404-7551) to the Straight Orifice (0404-8256) using 32 Fan Screws (1004-8030).
8. Refer to Figure 3. Attach the Internal Fan Assembly
to the Butterfly Cabinet using Bolt (1002-2374) and
Lock Nuts (1001-1457). Attach the Cone Support
Bracket (6403-3160) to the top Panel with the same
bolts on the Internal Fan Assembly.
9. Attach the two Tension Latches (1040-0105) to the
right and left side panels with rivets. Refer to Figure 3.
10. Refer to Figure 3. Attach the three Blade Prop
(6403-5017) using Key Shear (1019-2417). Align
the Discharge tip of the blade with the edge of the
orifice. See Details A and B.
Straight Orifice
(0404-8256)
Figure 3 – Butterfly Fan Assembly
Detail B
Align Fan Blade
with edge of orifice.
3 Blade Prop
(6403-5017)
Lock Nut
3/8 x 16
(1001-1457)
Bolt
3/8" x 16 x 1
(1002-2374)
Internal Fan
Assembly
from Step 4
RH Side Panel
(0404-7553)
Fan Screws
14x1/2 PH
(1004-8030)
Top Panel
(0404-7552)
Bottom Panel
(0404-7551)
LH Side Panel
(0404-8300)
Cone Support Bracket
(6403-3160)
Tension Latch
(1040-0105)
Rivet
(1005-5006)
Motor
Belt
(1022-3107)
Key Shear
(1019-2417)
Prop Spider
(Blades not Shown)
Shaft Flush with Inside of
Hub
Shaft Flush with Plastic
Pulley Hub

Part No. 4801-5327 Rev 6/07 Mega-Flow Butterfly Cone - Unassembled Page 7 of 12
Figure 5 – Install Belt
Belt
Tensioner
Straight Edge
Fan Pulley
11. Refer to Detail A. Put 2-3 drops of thread locking compound on the
prop set screw. Use a 12 point socket to tighten the prop set screw.
Recommended torque of set screw is 110 in. lbs.
12. See Figure 3. Install the Motor using four 5/16" carriage bolts (1002-
2373) and four lock nuts (1001-1735). Tighten bolts securely. NOTE:
The motor pulley will be tightened in Step 14.
13. See Figure 4. Adjust the Belt Tensioner so the third mark on the
tensioner is in line with the vertical center of the post.
14. Align the Pulleys using a straight edge as shown in Figure 5. After the
pulleys are aligned, install belt (1022-3107) onto motor pulley, tension
pulley, and prop pulley. Recommended torque of the lock screws on the
Bearing Pillows are 65 in.-lbs. min, and 83 in.-lbs. max. After aligning
the pulley, tighten the Motor Pulley.
15. Carefully lift fan into wall.
16. Securely attach fan to wall with screws (1004-1386).
Figure 4 - Install Tensioner
Align third mark
with center o
f
post.
CAUTION!
Fan Is Heavy!
Do Not Attempt To Lift Fan Without Sufficient Workers And Equipment.

Part No. 4801-5327 Rev 6/07 Mega-Flow Butterfly Cone - Unassembled Page 8 of 12
Arrange panels for assembly with pilot
hole on each panel facing upward.
Install #14 x1/2"
sm screw
Install #14 x1/2" sm screw
Pilot hole faces upward
Pull flanges
together to
align mounting
holes
Mounting
hole for
wire guard
Joints
Slot for mounting
top of cone to fan
housing
6. Assemble Cone
17A. Arrange panels contacting as shown in Figure 6. NOTE: The pilot hole pointing upward. Refer to Figure 6 Inset B.
17B. For each panel, slide panels together. See Figure 6 Inset A.
17C. Align holes of flanges. See Figure 6 Inset A. Install sheet metal screws as shown in Insets B and C.
WARNING!
During Cone Installation Be Sure That Fan Motor Is Not Plugged Into Any Power Source.
Always Double Check Power Sources.
!
Packing List For One (1) Cone/Inlet Kit
Part Number Description Quantity Part Number Description Quantity
0404-8253 Cone Sections 4 6403-7606 Door Stop Rod 1
6403-3150 Butterfly Damper Assy. 1 1001-1446 ¼" x20 Nuts 4
0404-1424 3/8"-16 x 1-1/4” Cap Screws 7 1004-9045 #14 x ½ screws 4
1001-1457 3/8"-16 Nuts 7 1004-6013 ¼"-20 x 1" Screws 4
6403-0147 PVC Coated Cone Guard 1 1003-6027 3/8" Washers 10
6450-7100 Inlet Wire Screen 1 0404-8252 Cone Bracket 4
0404-8254 Inlet Top/Bottom 2 1005-1464 Rivets 12
0404-8255 Inlet Sides 2 6403-3160 Cone Support Bracket 1
Fi
g
ure 6 - Assembl
y
& Installation of Cone
Inset A
Inset C
Inset B
Mounting holes for
Damper Ring
Tools Required
7/16 in. (11 mm) Wrench 9/16 in. (14 mm) Socket ½”socket Cordless drill Ratchet
9/16 in. (14 mm) Wrench 3/8”, 5/16”, 7/16” Nut Driver 7/16 in. (11 mm) Socket Rubber Mallet Marker or Scribe
Phillips head screwdriver 3/8”, 5/16”, 7/16” Nut Driver 7/16 in. (11 mm) Socket Rubber Mallet Marker or Scribe

Part No. 4801-5327 Rev 6/07 Mega-Flow Butterfly Cone - Unassembled Page 9 of 12
Top and Bottom bolts are
inserted from inside the
cone.
Mounting
Brackets
Pilot hole
at top
outside o
f
cone
Cone attaches to the Cone
Support Bracket (6403-
3160) over the Pim screw
18. To complete the last flange connection, roll the cone panels so
the small end is on the floor. See Figure 6. IMPORTANT! The
four pilot holes should be at the top end on the outside of the
cone.
19. Mount cone to fan. Bend the mounting
brackets back slightly to help clear the area
of the cone edges. Hang the centered slot
in the small end of the cone over the Pim
screw mounted on the Fan housing. See
Figure 8. Screw can be fastened with ¼"-
20 lock nut, if necessary (not included).
20. Align the cone over the remainder of the fan
housing. Using four 1/4"-20 Truss Head
Phillips bolts and 1/4-20 lock nuts, insert the
bolts from the inside of the cone. See Figure
9.
21. Mount the Damper Ring. Ring is mounted in the holes closest to the
orifice on the top and farthest away from the orifice in the bottom. Use
¼-20x1" bolts, nuts and washers (provided) to attach ring to cone.
Washers go on outside of cone. See Figures 10 and 11.
Figure 9 - Mount Cone onto Fan
Figure 10 - Mount the Ring Assembly
CAUTION: Fan Ring
must be plumb and
level in order for
doors to operate
properly.
NOTE: Lower cone ring
fits into outer hole.
NOTE:
Fan Not Shown For
Clarity.
Figure 8 - Install Cone Mounting Brackets
Figure 11 - Side View of Cone
Slanting the
ring allows
gravity to
assists the
doors to
shut.
NOTE: Check the ring mounting from
the side of the fan. The ring is slanted
to allow the force of gravity to assist in
closing the butterfly doors.
NOTE: Inner hole
will be capped in a
later ste
p
.
Figure 7 - Assembled Cone
Upper cone ring fits into
inner hole.

Part No. 4801-5327 Rev 6/07 Mega-Flow Butterfly Cone - Unassembled Page 10 of 12
NOTE: The top portion of the
Door Stop Rod fits into the
same mounting hole as top
fan guard eyelet.
Figure 13 - Installation of Door Stop –
Side View
Figure 12 - Install Fan Guard and Door Stop
Orifice-End
(Fan not
shown for
clarity.)
Fan Guard
Door Stop
Figure 14C
Hole in Guard for 1Hp 1Ph Motor
Figure 14B
Hole in Guard for 1.5Hp 1Ph Motor
Figure 14A
Hole in Guard for 1.0Hp 3Ph Motor
22. Install the Door Stop as shown by attaching the bottom
bolt in the cone. See Figures 12 and 13.
23. Install the Outside Fan Guard using four 3/8x1x20
bolts and nuts. See Figures 12 and 13.
24. Verify the power rating of the drive motor in the Fan. The wire
guard is shipped with a cut-out for a 1.0 Hp 3Ph motor. The cut-
outs for this motor is shown in Figure 14A. If you are using a
1.5 Hp 1Ph Motor, cut the hole as shown in Figure 14B. If you
are using a 1.0 Hp 1Ph Motor, cut the hole as shown in Figure
14C.
3/8-16 x 1-1/4”
Bolt
Fan Guard
Doo
r
3/8-16 x 1-1/4” Bolt
3/8-16 Nut
3/8 Washers
3/8-16 Nut
3/8 Washers
12
Sections 11
Sections
2 Sections
5
Sections
Cut hole fo
r
motor
12
Sections 12
Sect
i
o
n
s
2 Sections
4
Sections
Cut hole fo
r
motor
12
Sections 12
Sections
2 Sections
4
Sections
Cut hole fo
r
moto
r
Cut these
wires half
way up.

Part No. 4801-5327 Rev 6/07 Mega-Flow Butterfly Cone - Unassembled Page 11 of 12
INSIDE
OUTSIDE
BOTTOM INSIDE
25. Assemble the Inlet Frame using 12 rivets (1005-1464).
See Figure 15. Place the Screen Guard into the opening
and bend the 12 tabs over the screen wire. See Detail A.
26. Install the Fan Inlet Frame with Wire Guard by
lifting the bottom into the slot at the bottom of
the fan housing. The Wire Guard has a cut
opening hole for the motor. Use two spring
latches on either side of the fan housing to
secure the Inlet Frame. See Figure 15.
27. There are two unused holes in the bottom of the
cone. For reference refer back to Figure 10. Place a
3/8” bolt and nut in these holes to prevent light from
passing through. See Figure 16.
28. There are two pre cut drain holes in the bottom of the fan
housing in either corner and one in the bottom center of
the cone. These may be opened if necessary. See Figure
16.
29. Affix labels to fan as shown in Figure 17.
30. Connect power to fan and verify proper operation.
31. Fan and Cone installation complete.
Figure 15 - Install Fan Inlet Frame
Fill
unused
holes in
cone
Water
Drain
Holes
Wire Guard
opening fo
r
moto
r
Figure 16 – Fill Unused Holes in Cone
Figure 17 - Affix Labels
Warning Hand
(4501-1116)
Danger Hand
(4501-2622)
Made in USA
(4501-2957)
Danger Head
(4501-2620)
MEGAFLOW
(4501-6084)
Bearing
Maintenance
(4501-6128)
Rotary
Tensioner
(4501-6129)
Patent Pending –Large
(4501-5046) Place on
damper door

Mega-Flow Butterfly Cone Fan - Unassembled
Table of contents
Other HIRED-HAND Fan manuals
HIRED-HAND
HIRED-HAND Econo-Flow User manual
HIRED-HAND
HIRED-HAND MEGA-FLOW MF-24O-D-S-SE Series User manual

HIRED-HAND
HIRED-HAND Econo-Flow Instruction Manual

HIRED-HAND
HIRED-HAND Econo-Flow User manual

HIRED-HAND
HIRED-HAND Funnel Flow 36 User manual

HIRED-HAND
HIRED-HAND MEGA-FLOW CONE FAN User manual

HIRED-HAND
HIRED-HAND Econo-Flow User manual

HIRED-HAND
HIRED-HAND Mega-Flow MF-24O-D-S-SE Series User manual

HIRED-HAND
HIRED-HAND Mega Flow Slantwall User manual
HIRED-HAND
HIRED-HAND Mega Flow Slantwall User manual