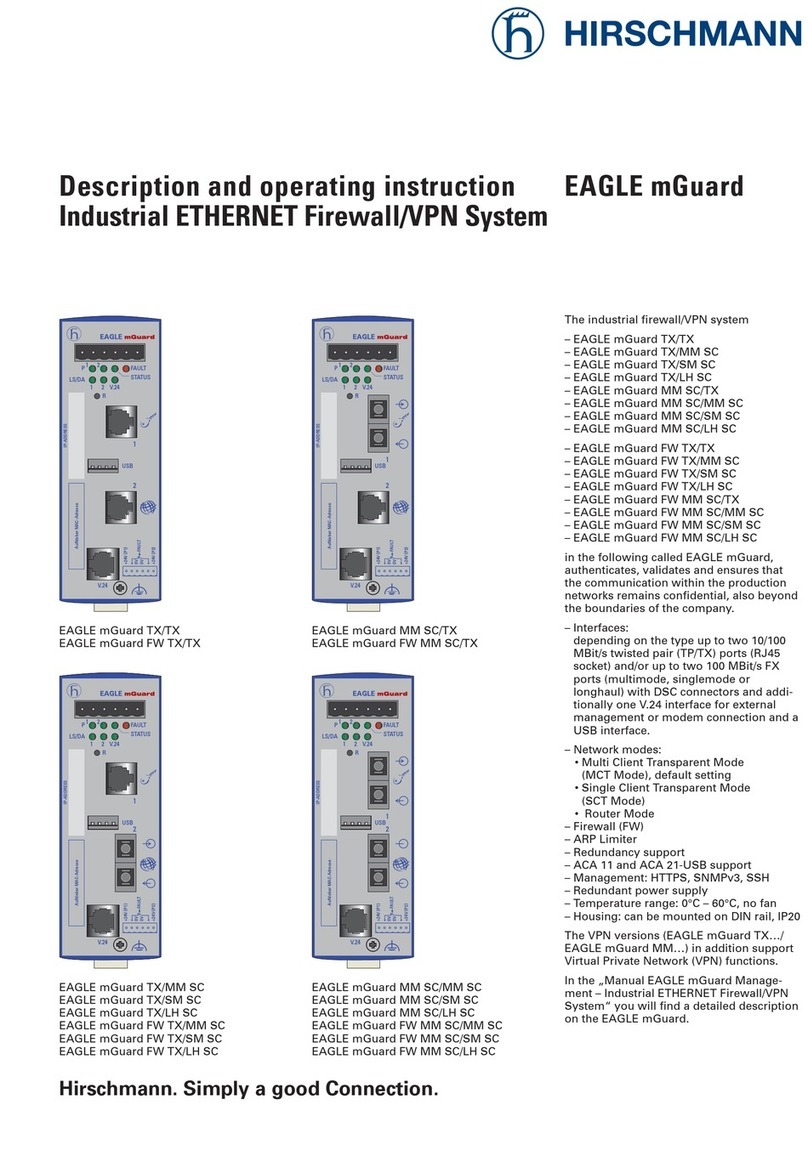
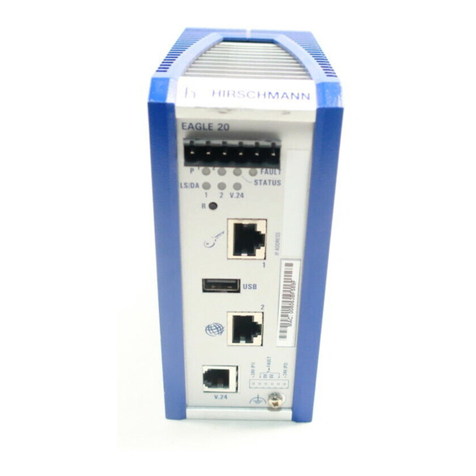
Hirschmann EAGLE 20 TX/TX User manual

EAGLE 20
Release
09
04/2012
Technical Support
https://hirschmann-support.belden.eu.com
User Manual
Installation
Industrial ETHERNET Firewall
EAGLE 20
EAGLE 20 TX/TX EAGLE 20 TX/MM
EAGLE 20 TX/SM
EAGLE 20 MM/TX EAGLE 20 MM/MM
1
P21 FAULT
LS/DA
21
k
STATUS
V.24
IP-ADDRESS
V.24
R
EAGLE 20
USB
+24V (P1)
FAULT
+24V (P2)
0V
0V
g
2
Aufkleber MAC-Adresse
1
P21 FAULT
LS/DA
21
k
STATUS
V.24
IP-ADDRESS
V.24
R
EAGLE 20
USB
+24V (P1)
FAULT
+24V (P2)
0V
0V
g
2
Aufkleber MAC-Adresse
1
P21 FAULT
LS/DA
21
k
STATUS
V.24
IP-ADDRESS
V.24
R
EAGLE 20
USB
+24V (P1)
FAULT
+24V (P2)
0V
0V
g
2
Aufkleber MAC-Adresse
1
P21 FAULT
LS/DA
21
k
STATUS
V.24
IP-ADDRESS
V.24
R
EAGLE 20
USB
+24V (P1)
FAULT
+24V (P2)
0V
0V
g
2
Aufkleber MAC-Adresse

The naming of copyrighted trademarks in this manual, even when not specially indicated, should
not be taken to mean that these names may be considered as free in the sense of the trademark
and tradename protection law and hence that they may be freely used by anyone.
© 2012 Hirschmann Automation and Control GmbH
Manuals and software are protected by copyright. All rights reserved. The copying, reproduction,
translation, conversion into any electronic medium or machine scannable form is not permitted,
either in whole or in part. An exception is the preparation of a backup copy of the software for
your own use. For devices with embedded software, the end-user license agreement on the
enclosed CD applies.
The performance features described here are binding only if they have been expressly agreed
when the contract was made. This document was produced by Hirschmann Automation and
Control GmbH according to the best of the company's knowledge. Hirschmann reserves the right
to change the contents of this document without prior notice. Hirschmann can give no guarantee
in respect of the correctness or accuracy of the information in this document.
Hirschmann can accept no responsibility for damages, resulting from the use of the network
components or the associated operating software. In addition, we refer to the conditions of use
specified in the license contract.
You can get the latest version of this manual on the Internet at the Hirschmann product site
(www.hirschmann.com).
Printed in Germany
Hirschmann Automation and Control GmbH
Stuttgarter Str. 45-51
72654 Neckartenzlingen
Germany
Tel.: +49 1805 141538
039 715-001-09-0412 – 20.4.12

EAGLE 20
Release
09
04/2012 3
Contents
Safety instructions 4
About this manual 10
Key 10
1 Device description 11
1.1 General device description 11
1.2 Description of the device variants 13
1.2.1 Device variants with 2 TX ports 14
1.2.2 Device variants with 1 TX port and 1 FX port 14
1.2.3 Device variants with 1 FX port and 1 TX port 15
1.2.4 Device variants with 2 FX ports 15
2 Assembly and start-up 16
2.1 Installing the device 16
2.1.1 Overview of installation 16
2.1.2 Unpacking and checking 16
2.1.3 Terminal block for supply voltage and signal contact 17
2.1.4 Connecting the terminal block, start-up procedure 18
2.1.5 Installing the device on the DIN rail, grounding 18
2.1.6 Connecting the data lines 19
2.1.7 Connection to the network 21
2.2 Display elements 21
2.3 Controls 23
2.4 Basic set-up 23
2.5 Configuration 24
2.5.1 Firewall and VPN functions 24
2.5.2 Operating modes 25
2.5.3 Start configuration 27
2.6 Maintenance 28
2.7 Disassembly 29
3 Technical data 30
A Further Support 35

4EAGLE 20
Release
09
04/2012
Safety instructions
Important Information
Notice: Read these instructions carefully, and look at the equipment to
become familiar with the device before trying to install, operate, or
maintain it. The following special messages may appear throughout this
documentation or on the equipment to warn of potential hazards or to call
attention to information that clarifies or simplifies a procedure.
The addition of this symbol to a Danger or Warning safety label
indicates that an electrical hazard exists, which will result in
personal injury if the instructions are not followed.
This is the safety alert symbol. It is used to alert you to potential
personal injury hazards. Obey all safety messages that follow
this symbol to avoid possible injury or death.
Note: Contains important information on the product, on how to manage
the product, or on the respective section of the documentation to which
your special attention is being drawn.
DANGER
DANGER indicates an imminently hazardous situation which, if not
avoided, will result in death or serious injury.
WARNING
WARNING indicates a potentially hazardous situation which, if not avoided,
can result in death or serious injury.
CAUTION
CAUTION indicates a potentially hazardous situation which, if not avoided,
can result in minor or moderate injury.

EAGLE 20
Release
09
04/2012 5
Certified usage
The device may only be employed for the purposes described in the
catalog and technical description, and only in conjunction with external
devices and components recommended or
approved by the manufacturer. The product can only be operated cor-
rectly and safely if it is transported, stored, installed and assembled pro-
perly and correctly. Furthermore, it must be operated and serviced
carefully.
Password security note
This device is a security product. For your own security, change the
password during the first startup procedure.
Supply voltage
For safety reasons the devices have been designed to operate at low
voltages. Thus, they may only be connected to the supply voltage
connections and to the signal contact with SELV circuits with the voltage
restrictions in accordance with IEC/EN 60950-1.
The supply voltage is electrically isolated from the housing.
Use undamaged parts.
Relevant for North America:
The device may only be connected to a supply voltage of class 2 that
fulfills the requirements of the National Electrical Code, Table 11(b). If
the voltage is being supplied redundantly (two different voltage
sources), the combined supply voltages must fulfill the requirements of
the National Electrical Code, Table 11(b).
Relevant for North America: For use in Class 2 circuits.
Only use copper wire/conductors of class 1, 140/167 °F (60/75 °C) or
167 °F (75 °C).
Shielding ground
The shielding ground of the connectable twisted pairs lines is connected
to the front panel as a conductor.
Beware of possible short circuits when connecting a cable section with
conductive shielding braiding.

6EAGLE 20
Release
09
04/2012
Housing
Only technicians authorized by the manufacturer are permitted to open
the housing.
The device housing is grounded by means of the separate ground screw.
(see fig. 1).
Make sure that the electrical installation meets local or nationally
applicable safety regulations.
The device must be installed in the vertical position (see fig. 8).
Install the device in a fire protected shell according to EN 60950-1.
Environment
The device may only be operated at the specified surrounding air
temperature (temperature of the surrounding air at a distance of up to
5 cm (1.97 in) from the device) and relative air humidity specified in the
technical data.
Install the device in a location where the climatic threshold values
specified in the technical data will be observed.
Use the device only in an environment within the pollution degree
specified in the technical data.
DANGER
HAZARD OF ELECTRIC SHOCK
Never insert sharp objects (small screwdrivers, wires, etc.) into the inside of
the product.
Failure to follow these instructions will result in death, serious injury,
or equipment damage.
CAUTION
EQUIPMENT OVERHEATING
When installing the device, make sure any ventilation slots remain free.
Maintain a clearance of at least 10 cm (3.94 in).
Failure to follow these instructions can result in injury or equipment
damage.

EAGLE 20
Release
09
04/2012 7
Qualification requirements for personnel
Qualified personnel as understood in this manual and the warning signs,
are persons who are familiar with the setup, assembly, startup, and
operation of this product and are appropriately qualified for their job. This
includes, for example, those persons who have been:
trained or directed or authorized to switch on and off, to ground and to
label power circuits and devices or systems in accordance with current
safety engineering standards;
trained or directed in the care and use of appropriate safety equipment
in accordance with the current standards of safety engineering;
trained in providing first aid.
General safety instructions
Electricity is used to operate this equipment. Comply with every detail of
the safety requirements specified in the operating instructions regarding
the voltages to apply (see page 5).
Non-observance of these safety instructions can therefore cause material
damage and/or injuries.
Only appropriately qualified personnel should work on this device or in
its vicinity. These personnel must be thoroughly familiar with the
warnings and maintenance procedures in accordance with this
operating manual.
The proper and safe operation of this device depends on proper
handling during transport, proper storage and assembly, and
conscientious operation and maintenance procedures.
Never start operation with damaged components.
Only use the devices in accordance with this manual. In particular,
observe the warnings and safety-related information.
Any work that may be required on the electrical installation may only
be carried out by personnel trained for this purpose.
Note: LED or LASER components in compliance with IEC 60825-1
(2007):
CLASS 1 LASER PRODUCT
CLASS 1 LED PRODUCT
Light is emitted from the optical connections or from the ends of the
connected optical fibers that are connected to the optical connections.
LIGHT EMITTING DIODE CLASS 2 M, wave length 650 nm, power
<2 mW in accordance with DIN EN 60825-1:2003-10.
LIGHT EMITTING DIODE CLASS 1 - CLASS 1 LED PRODUCT

8EAGLE 20
Release
09
04/2012
National and international safety regulations
Make sure that the electrical installation meets local or nationally
applicable safety regulations.
CE marking
The devices comply with the regulations contained in the following
European directive(s):
2004/108/EC
Directive of the European Parliament and the council for standardizing
the regulations of member states with regard to electromagnetic
compatibility.
In accordance with the above-named EU directive(s), the EU conformity
declaration will be at the disposal of the relevant authorities at the
following address:
Hirschmann Automation and Control GmbH
Stuttgarter Str. 45-51
72654 Neckartenzlingen
Tel.: +49 1805 141538
The product can be used in the industrial sector.
Interference immunity: EN 61000-6-2:2005
Emitted interference: EN 55022:2010
Warning! This is a class A device. This device can cause interference in
living areas, and in this case the operator may be required to take
appropriate measures.
Note: The assembly guidelines provided in these instructions must be
strictly adhered to in order to observe the EMC threshold values.
FCC note:
This device complies with part 15 of FCC rules. Operation is subject to the
following two conditions : (1) This device may not cause harmful
interference; (2) this device must accept any interference received,
including interference that may cause undesired operation.
WARNING
EYE DAMAGE DUE TO LASER LIGHT
Do not look into the beam or view the beam directly with optical instruments
(magnifying glasses, microscope) at a distance of less than 100 mm
(3.94 in).
Failure to follow these instructions can result in death, serious injury,
or equipment damage.

EAGLE 20
Release
09
04/2012 9
Appropriate testing has established that this device fulfills the
requirements of a class A digital device in line with part 15 of the FCC
regulations.
These requirements are designed to provide sufficient protection against
interference when the device is being used in a business environment.
The device creates and uses high frequencies and can radiate same, and
if it is not installed and used in accordance with this operating manual, it
can cause radio transmission interference. The use of this device in a
living area can also cause interference, and in this case the user is
obliged to cover the costs of removing the interference.
Recycling note
After usage, this product must be disposed of properly as electronic
waste, in accordance with the current disposal regulations of your county,
state and country.

10 EAGLE 20
Release
09
04/2012
About this manual
The “Installation” user manual contains a device description, safety
instructions, a description of the display, and the other information that you
need to install the device.
The following manuals are available as PDF files on the CD-ROM supplied:
Installation user manual
Configuration user manual
Web-based Interface reference guide
Command Line Interface user manual
Key
The symbols used in this manual have the following meanings:
Listing
Workstep
Subheading
INTERNAL port
EXTERNAL port

EAGLE 20
Release
09
04/2012 11
1 Device description
1.1 General device description
The industrial Firewall/VPN system
EAGLE 20 TX/TX
EAGLE 20 TX/MM
EAGLE 20 TX/SM
EAGLE 20 MM/TX
EAGLE 20 MM/MM
subsequently referred to as EAGLE 20, helps provide for the authentication,
security and confidentiality of communication within production networks, but
also beyond company boundaries.
The EAGLE 20 has the following interfaces:
depending on the type, up to two 10/100 Mbit/s twisted pair (TP/TX) ports
(RJ45 socket) and/or
depending on the type, up to two 100 Mbit/s FX ports (multimode or
singlemode) with DSC connections and
additionally a V.24 input for external management or a modem connection
and
a USB interface.
The EAGLE 20 supports the following network modes:
Transparent Mode
Router Mode
PPPoE Mode
The Industrial ETHERNET Firewall is used everywhere that security-
sensitive network cells require a connection from the internal network into an
external network. The Industrial ETHERNET Firewall is the link between the
internal network and the external network from which unauthorized accesses
are to be expected. In its function as a link, the Industrial ETHERNET Firewall
helps protect the internal network from undesired data traffic along the
connection to the external network.
Typical uses are:
Helping protect individual production cells in a flat company network
Helping protect individual production cells in a routed company network
Coupling identical production cells to a company network
Connecting a production cell with the office network via a public network
Helping provide protected service access
Separation of machine common parts

12 EAGLE 20
Release
09
04/2012
Figure 1: Overview of interfaces, display and operating elements on the EAGLE 20
1 - 6-pin terminal block, pluggable
2 - LED display elements
3 - Reset button
4 - IP address field
5 - Port 1: Depending on device model,
TX (RJ45 connector) and/or FX (DSC connector)
6 - USB connection
7 - Port 2: Depending on device model,
TX (RJ45 connector) and/or FX (DSC connector)
8 - MAC address field
9 - V.24 interface: external management and modem
10 - Grounding screw
The devices are designed for the special requirements of industrial
automation. They meet the relevant industry standards, provide high
operational reliability, even under extreme conditions, and also long-term
reliability and flexibility. The devices operate without fans and have a
redundant voltage supply. The devices are quickly mounted by snapping
them onto a DIN rail, which also automatically contacts the function ground.
The devices provide you with a large range of features:
Firewall (FW)
Virtual Private Network (VPN) functions
ARP Limiter
Redundancy support
ACA 21-USB support
1
P21 FAULT
LS/DA
21
k
STATUS
V.24
IP-ADDRESS
V.24
R
EAGLE 20
USB
+24V (P1)
FAULT
+24V (P2)
0V
0V
g
2
Aufkleber MAC-Adresse
1
2
3
4
5
6
7
8
9
10

EAGLE 20
Release
09
04/2012 13
Management: HTTPS, SNMPv1, SNMPv2, SNMPv3, SSH, V.24
Redundant power supply
Temperature range: 0°C – 60°C, without fan
Housing: mountable on DIN rail, IP20
1.2 Description of the device variants
These devices can be managed. They have the following properties:
Voltage range: 12 to 48 V DC or 24 V AC
Temperature range: +32 °F to +140 °F (0 °C to +60 °C)
The device conforms to the specifications of standard
ISO/IEC 8802-3u 100BASE-TX
ISO/IEC 8802-3 100BASE-FX
The device contains the function units, such as: Firewall/VPN function,
Management function, voltage connection, management connection (V.24),
operation element (reset button).
Interfaces
Device Port 1 (INTERNAL) Port 2 (EXTERNAL)
TX MM SM TX MM SM
EAGLE20TX/TX X ——X ——
EAGLE20TX/MMX ———X —
EAGLE20TX/SM X ————X
EAGLE20MM/TX—X —X ——
EAGLE20MM/MM—X ——X —
Table 1: Interfaces of the EAGLE 20 types
TX = Twisted pair 100BASE-TX
MM = F/O multimode 100BASE-FX
SM = F/O singlemode 100BASE-FX

14 EAGLE 20
Release
09
04/2012
1.2.1 Device variants with 2 TX ports
Figure 2: Interfaces of the EAGLE 20 TX/TX
1 - Port 1 (INTERNAL port): 100BASE-TX, RJ45 connector,
Autonegotiaton, autopolarity, autocrossing
2 - Port 2 (EXTERNAL port): 100BASE-TX, RJ45 connector,
Autonegotiaton, autopolarity, autocrossing
1.2.2 Device variants with 1 TX port and 1 FX port
Figure 3: Interfaces of the EAGLE 20 TX/MM and EAGLE 20 TX/SM
1 - Port 1 (INTERNAL port): 100BASE-TX, RJ45 connector,
Autonegotiaton, autopolarity, autocrossing
2 - Port 2 (EXTERNAL port): 100BASE-FX, DSC connector,
Multimode (EAGLE 20 TX/MM) or singlemode (EAGLE 20 TX/SM)
1
P21 FAULT
LS/DA
21
k
STATUS
V.24
IP-ADDRESS
V.24
R
EAGLE 20
USB
+24V (P1)
FAULT
+24V (P2)
0V
0V
g
2
Aufkleber MAC-Adresse
1
2
1
P21 FAULT
LS/DA
21
k
STATUS
V.24
IP-ADDRESS
V.24
R
EAGLE 20
USB
+24V (P1)
FAULT
+24V (P2)
0V
0V
g
2
Aufkleber MAC-Adresse
1
2

EAGLE 20
Release
09
04/2012 15
1.2.3 Device variants with 1 FX port and 1 TX port
Figure 4: Interfaces of the EAGLE 20 MM/TX
1 - Port 1 (INTERNAL port): 100BASE-FX, DSC connector, Multimode
2 - Port 2 (EXTERNAL port): 100BASE-TX, RJ45 connector,
Autonegotiaton, autopolarity, autocrossing
1.2.4 Device variants with 2 FX ports
Figure 5: Interfaces of the EAGLE 20 MM/MM
1 - Port 1 (INTERNAL port): 100BASE-FX, DSC connector, Multimode
2 - Port 2 (EXTERNAL port): 100BASE-FX, DSC connector, Multimode
1
P21 FAULT
LS/DA
21
k
STATUS
V.24
IP-ADDRESS
V.24
R
EAGLE 20
USB
+24V (P1)
FAULT
+24V (P2)
0V
0V
g
2
Aufkleber MAC-Adresse
1
2
1
P21 FAULT
LS/DA
21
k
STATUS
V.24
IP-ADDRESS
V.24
R
EAGLE 20
USB
+24V (P1)
FAULT
+24V (P2)
0V
0V
g
2
Aufkleber MAC-Adresse
1
2

16 EAGLE 20
Release
09
04/2012
2 Assembly and start-up
2.1 Installing the device
Before installing and starting up the device, note the safety instructions (see
page 5 onwards).
2.1.1 Overview of installation
Two or more devices configured with the same IP address can cause
unpredictable operation of your network.
The devices have been developed for practical application in a harsh
industrial environment.
On delivery, the device is ready for operation.
The following steps should be performed to install and configure a EAGLE 20
Industrial ETHERNET Firewall product:
Unpacking and checking
Connect the terminal block for voltage supply and signal
contact and connect the supply voltage
Install the terminal block, start-up procedure
Install the device on the DIN rail, grounding
Connect the data lines
2.1.2 Unpacking and checking
Check that the contents of the package are complete (see page 33
“Scope of delivery”).
Check the individual parts for transport damage.
WARNING
UNINTENDED EQUIPMENT OPERATION
Establish and maintain a process for assigning unique IP addresses to all
devices on the network.
Failure to follow these instructions can result in death, serious injury,
or equipment damage.

EAGLE 20
Release
09
04/2012 17
2.1.3 Terminal block for supply voltage and signal contact
The supply voltage and the signal contact are connected via a 6-pin terminal
block with a snap lock.
Supply voltage
Redundant power supplies can be used. Both inputs are uncoupled.
There is no distributed load. With redundant supply, the power supply unit
supplies the device only with the higher output voltage. The supply
voltage is electrically isolated from the housing.
You can choose between DC or AC voltage when connecting the supply
voltage. You use the +24 V and 0 V pins to connect the AC voltage (fig. 6
and fig. 7).
Note: With non-redundant supply of the main voltage, the device reports
a loss of power. You can avert this message by applying the supply
voltage via both inputs, or by changing the configuration in the
Management.
Figure 6: Pin assignment of the 6-pin terminal block, DC connection
DANGER
HAZARD OF ELECTRIC SHOCK OR BURN
When the module is operated with direct plug-in power units, use only:
– SELV supply units that comply with IEC 60950/EN 60950 and
– (in USA and Canada) Class 2 power units that comply with applicable
national or regional electrical codes
Connect the ground wire to the PE terminal (where applicable) before you
establish any further connections. When you remove connections,
disconnect the ground wire last.
Failure to follow these instructions will result in death, serious injury,
or equipment damage.
FAULT
12 ... 48 V DC12 ... 48 V DC
+24V(P1) 0V 0V +24V(P2)
+-
-+

18 EAGLE 20
Release
09
04/2012
Figure 7: Pin assignment of the 6-pin terminal block, AC connection
Signal contacts
The signal contact (“FAULT”, for pin assignment see fig. 6 and fig. 7)
is used for the remote monitoring of the device to enable remote
diagnostics. You can specify the type of function monitoring in the
Management.
You can also use the Management to set the signal contact manually
and thus control external devices.
A break in contact is used to report the following conditions via the
potential-free signal contact (relay contact, closed circuit):
The detected inoperability of at least one of the two voltage supplies
(voltage supply 1 or 2 is below the threshold value).
A continuous detected error in the device (internal supply voltage).
The detected error of the link status of at least one port. The report of
the link status can be masked by the Management for each port. In the
default state, link status monitoring is deactivated.
The temperature of the device is outside the range specified in the
threshold values.
The removal of the ACA.
2.1.4 Connecting the terminal block, start-up procedure
Pull the terminal block off the device and connect the voltage supply lines
and the signal lines.
Startup procedure
Mount the terminal block for the voltage supply and signal contact on
the front of the device by snapping the lock into place.
Connecting the voltage supply via the terminal block starts the operation
of the device.
2.1.5 Installing the device on the DIN rail, grounding
Mount the device on a 35 mm DIN rail in accordance with DIN EN 60175.
Attach the upper snap-in guide of the device into the DIN rail and press it
down against the DIN rail until it snaps into place.
FAULT
G
24 V AC
G
24 V AC
+24V(P1) 0V 0V +24V(P2)

EAGLE 20
Release
09
04/2012 19
Note: The shielding ground of the industrial connectable twisted pair lines is
connected to the front panel as a conductor.
Figure 8: Mounting on the DIN rail
Grounding
The device housing is grounded by means of the separate ground screw.
(see fig. 1).
2.1.6 Connecting the data lines
10/100 Mbit/s twisted pair connection
These connections are RJ45 sockets.
10/100 Mbit/s TP ports enable the connection of terminal devices or
independent network segments according to the IEEE 802.3 10BASE-T/
100BASE-TX standard.
These ports support:
Autonegotiation
Autopolarity
Autocrossing (if autonegotiation is activated)
100 Mbit/s half-duplex mode, 100 Mbit/s full duplex mode
10 Mbit/s half-duplex mode, 10 Mbit/s full duplex mode
State on delivery: autonegotiation activated.
The socket housing is electrically connected to the front panel.

20 EAGLE 20
Release
09
04/2012
100 Mbit/s F/O connection
These connections are DSC connectors.
100 MBit/s F/O ports enable the connection of terminal devices or
independent network segments in compliance with the IEEE 802.3
100BASE-FX standard.
These ports support:
Full or half duplex mode
State on delivery: full duplex FDX
Note: Make sure that the SM ports are only connected with SM ports, and
MM ports only with MM ports.
Note: LED or LASER components in compliance with IEC 60825-1
(2007):
CLASS 1 LASER PRODUCT
CLASS 1 LED PRODUCT
Light is emitted from the optical connections or from the ends of the
connected optical fibers that are connected to the optical connections.
LIGHT EMITTING DIODE CLASS 2 M, wave length 650 nm, power
<2 mW in accordance with DIN EN 60825-1:2003-10.
LIGHT EMITTING DIODE CLASS 1 - CLASS 1 LED PRODUCT
Figure Pin Function
1+2 One line pair: receiver path
3+6 One line pair: sender path
4,5,7,8 Not used
Table 2: Pin assignment of a TP/TX interface in MDI-X mode, RJ45 socket
WARNING
EYE DAMAGE DUE TO LASER LIGHT
Do not look into the beam or view the beam directly with optical instruments
(magnifying glasses, microscope) at a distance of less than 100 mm
(3.94 in).
Failure to follow these instructions can result in death, serious injury,
or equipment damage.
8
7
6
5
4
3
2
1
This manual suits for next models
5
Table of contents
Other Hirschmann Firewall manuals
Popular Firewall manuals by other brands
Cisco
Cisco S190 quick start guide

Fortinet
Fortinet FortiGate-60 series install guide

PaloAlto Networks
PaloAlto Networks PA-415 quick start guide

Cisco
Cisco Firepower 1100 Series Hardware installation guide

8e6 Technologies
8e6 Technologies appliance watchdog user guide

ADTRAN
ADTRAN NetVanta 2730 Getting started guide

Fortinet
Fortinet FortiScan-1000C install guide

Fortinet
Fortinet FortiGate FortiGate-800 install guide

NETGEAR
NETGEAR FVG318 - ProSafe 802.11g Wireless VPN Firewall 8... Reference manual

D-Link
D-Link DFL-1100 - Security Appliance manual

Fortinet
Fortinet FortiAnalyzer-4000A quick start guide

pfSense
pfSense FW-7551 installation guide