1
HAS-K252
Wall mount unit for LCD projectors
Model name HAS-K252 User’s Manual
The following symbols are used in this manual to help you use this product safely and correctly, and to prevent injury
to yourself and others or damage to property. Read through the safety instructions below so you can operate the
product correctly.
WARNING This symbol indicates information that, if ignored, could result in serious personal injury
or even death due to incorrect handling.
CAUTION This symbol indicates information that, if ignored, could result in personal injury or
physical damage due to incorrect handling.
Indicates a prohibited action.
This symbol is accompanied by text indicating an action that must not be taken.
Indicates a mandatory action.
This symbol is accompanied by text indicating an action that must be taken.
Table of Contents
Safety Symbols
Thank you for purchasing a wall mount unit specially designed for Hitachi LCD projectors.
Be sure to read this manual and the User’s Manual supplied with the LCD projector before use so you will know
how to install it properly. After you have nished reading these documents, put them away in a safe place for future
reference.
Disclaimer ................................................ 1
Table of Contents..................................... 1
Safety Symbols........................................ 1
Outline and Relevant Models.................. 2
Installation Precautions .......................... 2
Tools needed for installation .................. 2
To the customer ....................................... 3
To service personnel ............................... 3
Routine Inspections ................................ 3
Contents of this package ........................ 4
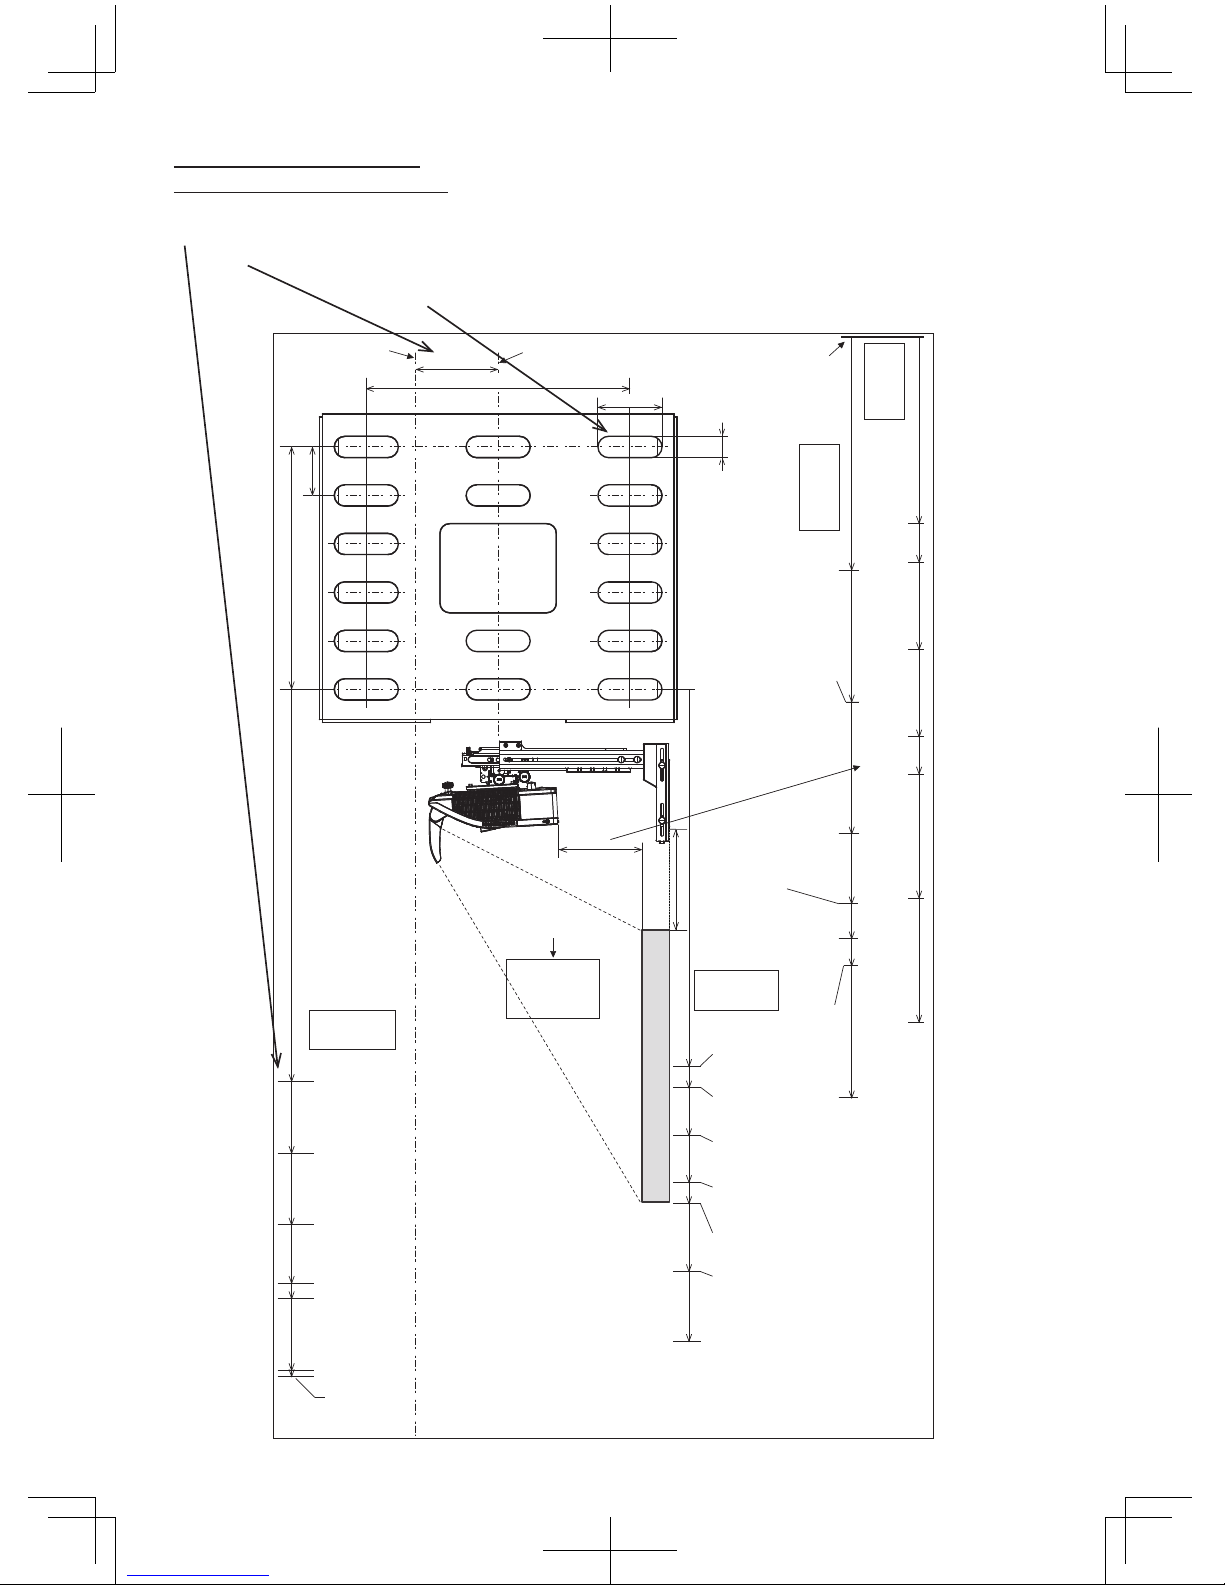
Installation procedure ............................. 5
1Removing shipping screws....................... 5
2Removing base bracket (O) ...................... 6
3Attaching the base bracket (O)
to the wall ............................................. 7
Screen sizes when used with Hitachi
Star Board ............................................ 9
4Attaching the arm (M)..............................12
5Securing arm (M) using screws ...............12
6Attaching bracket (B) ...............................12
7Attaching LCD projector ..........................13
8Connecting cables...................................13
Adjustments............................................14
9Displaying image for making
adjustments .........................................14
0Image adjustments ..................................15
Installing exterior parts..........................18
!Procedure for installing exterior parts .....18
Adjustment precautions........................ 21
Adjustment specications .................... 22
●The content of this manual and the specications of the product it describes are subject to
change without prior notice.
●Note that Hitachi will accept no liability whatsoever for injuries and damages arising from
incorrect use or handling that exceeds normal operating limits.
Disclaimer