Hitachi BD-S5500 User manual

Operating Instructions
ãĚŅĂĘĎàēĄĠéņæēú
ãĚŅĂĘĎàēĄĠéņæēú
Front Loading Washer Dryer
ĝãĄĘĥĎæêĒàýņē ĎûýņēþēČúņē
Model
Model
ĄęŅú
ĄęŅú
ãĐãĐýåěöúĘħğĈĚĐâìĚĨĐğåĆĚħĐèìĔâÿňĕ ĐýÿňĕĀĕĎüňĕđėøĕëė
ğüĄõĎŅēúãĚŅĂĘĎúĖĦğõăĆđĝĎĖăõ ĝÿĘĥĎĠČņĞúŅĠçĈŅēĠéņæēúĝãĄĘĥĎæġõņĎăŅēæĝČĂēđċĂ
ġþĆ÷ğâĦýýĔøĆĆĔýþĆēâĔü åĜŇĄĚĐâĕĆĢëňèĕüãĔĨüāĚĨüòĕü åĬĕĠüēüĬĕĢüâĕĆøė÷øĔĨè ĠĈē
ĆĕąâĕĆâĕĆøĆĊéčĐýâĕĆøė÷øĔĨè (ğĐâčĕĆâĕĆąĚüąĔüâĕĆøė÷øĔĨè) ģĊňĐňĕèĐėèĢü
Đüĕåø
Đüĕåø
Please read the “Safety Precautions” carefully to ensure
proper use of the machine.
(P. 12 to 16)
(P. 12 to 16)
BD-S5500
ġþĆ÷ĐŇĕü
ġþĆ÷ĐŇĕü
“ãňĐåĊĆĆēĊĔèğāĚħĐåĊĕĄþĈĐ÷ăĔą”
ġ÷ąĈēğĐĘą÷
ġ÷ąĈēğĐĘą÷
ğāĚħĐĢĎňĠüŇĢéĊŇĕĢëňğåĆĚħĐè
ģ÷ňĐąŇĕèğĎĄĕēčĄ
ģ÷ňĐąŇĕèğĎĄĕēčĄ
(
(
Čúņē
Čúņē
116
116
÷ėæ
÷ėæ
120)
120)
English ġøă
Thank you for purchasing the Hitachi Front Loading
Washer Dryer.
Washer Dryer.
Please read this manual carefully to ensure proper
operation of the machine.
Be sure to keep this manual along with the Warranty
Card, the Basic Operation Guide, the Installation
Instructions, and the Installation Check Sheet for Front
Loading Washer Dryer (Installation Confirmation Sheet)
for future reference.
Hitachi Appliances, Inc.
Hitachi Atago Bldg., 15-12, Nishi Shimbashi 2-chome,
Minato-ku, Tokyo 105-8410 Japan
3-N7481-1B M3(C)

209
ãňĐĄĜĈéĬĕğāĕē ġøă
àĪēĆĒæġĀøĖĥĠéņ 13 W (50 ùęè 60 Hz) àĄđĞċġĀ 0.8 A DC
ĞĄæõĒúġĀ 24 V DC ĎĒöĄēàēĄċĚûúĪĦē 15 ĈėøĆøŇĐüĕúĘ
áņĎĂĚĆçĪēĝÿēđ
öĒĈĝãĄĘĥĎæ
üŊŏĂČĂęúĝĈĖăú (āēăĠúöĒĈĝãĄĘĥĎæ)
ĄęŅú BD-S5500
àĪēĆĒæġĀ 220 - 240 V / 50 Hz
ãĈēĂçęĠúàēĄêĒàüàöĕ
10.5 ââ. (åĊĕĄéěčĜèčě÷ãĐèÿňĕĠĎňèúĘħìĔâ)
ãĈēĂçęáĎæàēĄüŊōúĞČņæüàöĕ
ãĈēĂçęáĎæàēĄĎûĞČņæüàöĕ 7.0 ââ. (åĊĕĄéěčĜèčě÷ãĐèÿňĕĠĎňèúĘħìĔâ)
ãĈēĂçęúĪĦēüàöĕ 35 ĈėøĆ (ĢüĆēĎĊŇĕèġþĆĠâĆĄìĔâ [FUZZY] (ĐĔøġüĄĔøė))
üĄĕĂēôúĪĦēøĖĥĠéņüàöĕ 94 ĈėøĆ (ĢüĆēĎĊŇĕèġþĆĠâĆĄìĔâ [FUZZY] (ĐĔøġüĄĔøė))
àĪēĆĒæġĀøĖĥĠéņ ìĔâ: 500 W ĐýĠĎňè: 1,350 W
éúĕõáĎæĝãĄĘĥĎæêĒàýņē ëüė÷ùĔèìĔâ
ĞĄæõĒúúĪĦēáĎæàŇĎàúĪĦē 0.03 ùęè 0.8 Mpa (0.3 ùęè 8 kgf / cm2)
áúēõöĒĈĝãĄĘĥĎæ 630 × 715 × 1,050 ĄĄ. (âĊňĕè×Ĉęâ×čĜè)
úĪĦēČúĒà þĆēĄĕö 83 ââ.
2
Features The main features of your front loading washer dryer and tips for good washing and
drying results are described below. Please read them before using your machine.
Remove germs*1and prevent mold growth*2in each washing
Auto Self Clean
Wash away dirt by high-speed rotation
showers
Dirt (e.g., sebum stain, soap scum, germs, mold
spores) adhered to the invisible parts of the
machine, such as the outer side of the drum, is
washed away automatically.
Dirt-resistant drain hose
Concept image
Front cover of outer tub
16 points of showers
Drum
Outer tub
Hidden dirt inside the hose
ÚAfter approx. 800 loads of
laundry using a Hitachi washer
dryer (Hitachi research data)
“Flat inner wall hose” for smooth discharge of drain water and dirt
We have adopted the “Flat inner wall hose”, which has a smooth
inner surface with no pleats and contains an antibacterial agent*3.
Drain water and dirt are less likely to remain inside the hose
(except in some part of the internal piping).
Dirt inside the drain hose Conventional hose Flat inner wall hose
• Test institution: Kitasato Research Center for
Environmental Science
• Test method: Measurement of the reduction
rate of bacteria smeared on
plates that are attached to the
outer tub and drum
• Means for bacteria removal:
Use of the Auto Self Clean function
• Test objects: Outer tub and drum
• Test result: Bacteria reduction rate: 99%
• The test was conducted on the BD-S7500
(base model of the BD-S5500 for Japan)
in Japan, using water, soiled laundry and
detergent of Japan.
• Test institution: Kitasato Research Center for
Environmental Science
• Test method: Confirmation of the inhibitory
effect of mold growth on
medium plates that are
attached to the outer tub and
drum
• Means for preventing mold growth:
Use of the Auto Self Clean function
• Test objects: Outer tub and drum
• Test result: Mold reduction rate: 99%
• The test was conducted on the BD-S7500
(base model of the BD-S5500 for Japan)
in Japan, using water, soiled laundry and
detergent of Japan.
• Test institution: BOKEN QUALITY
EVALUATION INSTITUTE
• Test method: JIS Z 2801 (Film adhesion
method)
• Means for antibacterial finish:
Blending an antibacterial agent into resin
material
• Test object: Drain hose
• Test result: Antibacterial activity value: 2.0
or greater (considered to be
antibacterial when this value is
2.0 or greater)
• The test was conducted on the BD-S7500
(base model of the BD-S5500 for Japan) in
Japan.
*1 *2 *3

3
Features English
“3D Sensor Control Wash”
High cleaning power
Laundry spreads out in the wide
drum for beat washing
Laundry spreads out and is distributed
evenly inside the wide drum so that
every item is beaten well and washed
effectively.
Wide circulation shower
Three sensors control washing
Detergent water prepared by dissolving detergent at the 2-way circulation pump is sprayed from the
top of the wide drum with a jet flow. Since a large amount of detergent water is sprayed evenly over
laundry, laundry is deeply cleaned.
To maximize the beat washing effect, the drum rotation speed is adjusted according to the type and
load size of laundry that are detected by the sensors. The amount of water is also adjusted.
Wide
circulation
shower
2-way
circulation
pump
Smooth finish allows you to wear clothes directly out of the drum
Wind Iron
Moreover,
Energy saving
High-speed airflow smoothes out wrinkles and saves time for ironing
“Heater-less Power Save Drying” dries clothes without using the heater
Clothes move freely in the wide drum while drying.
A high-speed airflow generated by the Jet Fan Motor blows onto clothes to smooth out wrinkles.
When the [POWER SAVE] or [POWER SAVE STATIC DRY] program is selected, the Heat Recycle
Drying, which reuses the heat generated by operations as warm air during drying, and the
[WIND IRON] function are used to dry clothes without using the heater. This will save electricity.

4
Enabled Disabled
‘WASH’ (lit) (unlit)
‘DRY’ (lit) (unlit)
zSet the <AUTO SELF CLEAN> operations before you start operation. You cannot set the
<AUTO SELF CLEAN> operations once the machine starts running.
zWhen no rinsing is set, the <AUTO SELF CLEAN> function is automatically disabled.
zThe <AUTO SELF CLEAN> function is disabled at the factory.
zYou can enable and disable the <AUTO SELF CLEAN> operations. (For how to set the operations, see (P.75)
.)
(Whether each operation is enabled or disabled is saved when you press the <START> button. However, the
setting of ‘DRY’ operation will not be saved.)
zThe <AUTO SELF CLEAN> setting is indicated by the following indicators.
About the AUTO SELF CLEAN Function
We recommend using the <AUTO SELF CLEAN> function whenever you wash laundry so that dirt
adhered to the invisible parts of the drum is washed away to keep the drum clean always.
Setting the <AUTO SELF CLEAN> operations
‘WASH’ operation*1
For washing the drum
‘DRY’ operation*2
For drying the drum
Available Not available Available Not available
WASH DRY
WASH DRY
<<WASH>>
operations
FUZZY
Wash only
Wash + spin
Spin only
WASH DRY <<WASH>>
operations
FUZZY
Wash only
Rinse only
Wash + rinse
1 TIME RINSE 1 TIME RINSE
SPEEDY
HEAVY SPEEDY
FAVORITE HEAVY
SOFT*3FAVORITE
WASH DRY <<WASH DRY>>
operations
FUZZY
1 TIME RINSE *1 Consumption of tap water will increase by about 9 L, as the ‘WASH’ operation is
performed during the final rinse cycle. The rinsing time will be about 8 minutes
longer.
*2 The ‘DRY’ operation continues for 30 minutes to dry the drum.
*3 When the [SOFT] program is selected, only the ‘WASH’ operation can be set.
SPEEDY
HEAVY
FAVORITE
SILENT
POWER SAVE
Operations during the final rinse cycle
About the <AUTO SELF CLEAN> 'DRY' operation
Regular rinse Rinse with the <AUTO SELF CLEAN> 'WASH' operation
zDepending on the type and degree of dirt, some dirt may not be washed with the <AUTO SELF CLEAN>
function.
zIf the machine is seldom used, some dirt may not be washed with the <AUTO SELF CLEAN> function.
zTo clean the drum more completely, we recommend using the [TUB CLEAN] program along with the
<AUTO SELF CLEAN> function.
zBe sure to remove laundry before running the <AUTO SELF CLEAN> 'DRY' operation.
Rinse while rotating
the drum.
1. Rinse while
rotating the
drum.
2. Drain water. 3. Rotate the drum
while spraying and
draining water.
4. Rotate the drum at
high speed with water
remaining in the drum.
5. Air passes through
the drain hose while
rotating the drum.
After spinning is finished, open
the door and remove laundry.
(The <START> button blinks.)
Close the door and
press the <START>
button.
Warm airflow
High-speed rotation
Automatically stops in 30 minutes.

5
About the AUTO SELF CLEAN Function / Preparation English
Reasons for abnormal drainage
zIs the drain hose elevated more
than 10 cm above the ground?
zIs the drain hose firmly attached
to the drain outlet?
(Installation
Instructions)
The drain hose must not be elevated
more than 10 cm when going over a
threshold and its total length must be
2 m or less.
10 cm or less
2 m or less
Reasons for water leakage
zAre you using Hitachi’s new one-touch joint (supplied) for the
connection to the tap? (P.8)
zIs the connection to the tap loose?
zIs the union nut firmly connected to the machine?
(Installation Instructions)
zAre there any signs of degradation or rust formed on the
gasket of the tap or the metal parts?
Preparation
If you have any problems with the installation, contact your dealer or the service technician that
performed installation.
Checking the installation
If problems occur during use,
see (P.83 to 102).
Reasons for stopping and abnormal
sounds and vibration during the spin
cycle
zIs the machine installation level?
zIs the air bubble in the spirit level inside the
circle? (Installation Instructions)
ÚView the spirit level from above directly.
Circle
Air
bubble

6
CONTENTS
zFeatures...................................................................................................................................................................................... 2
zAbout the AUTO SELF CLEAN Function .................................................................................................................................. 4
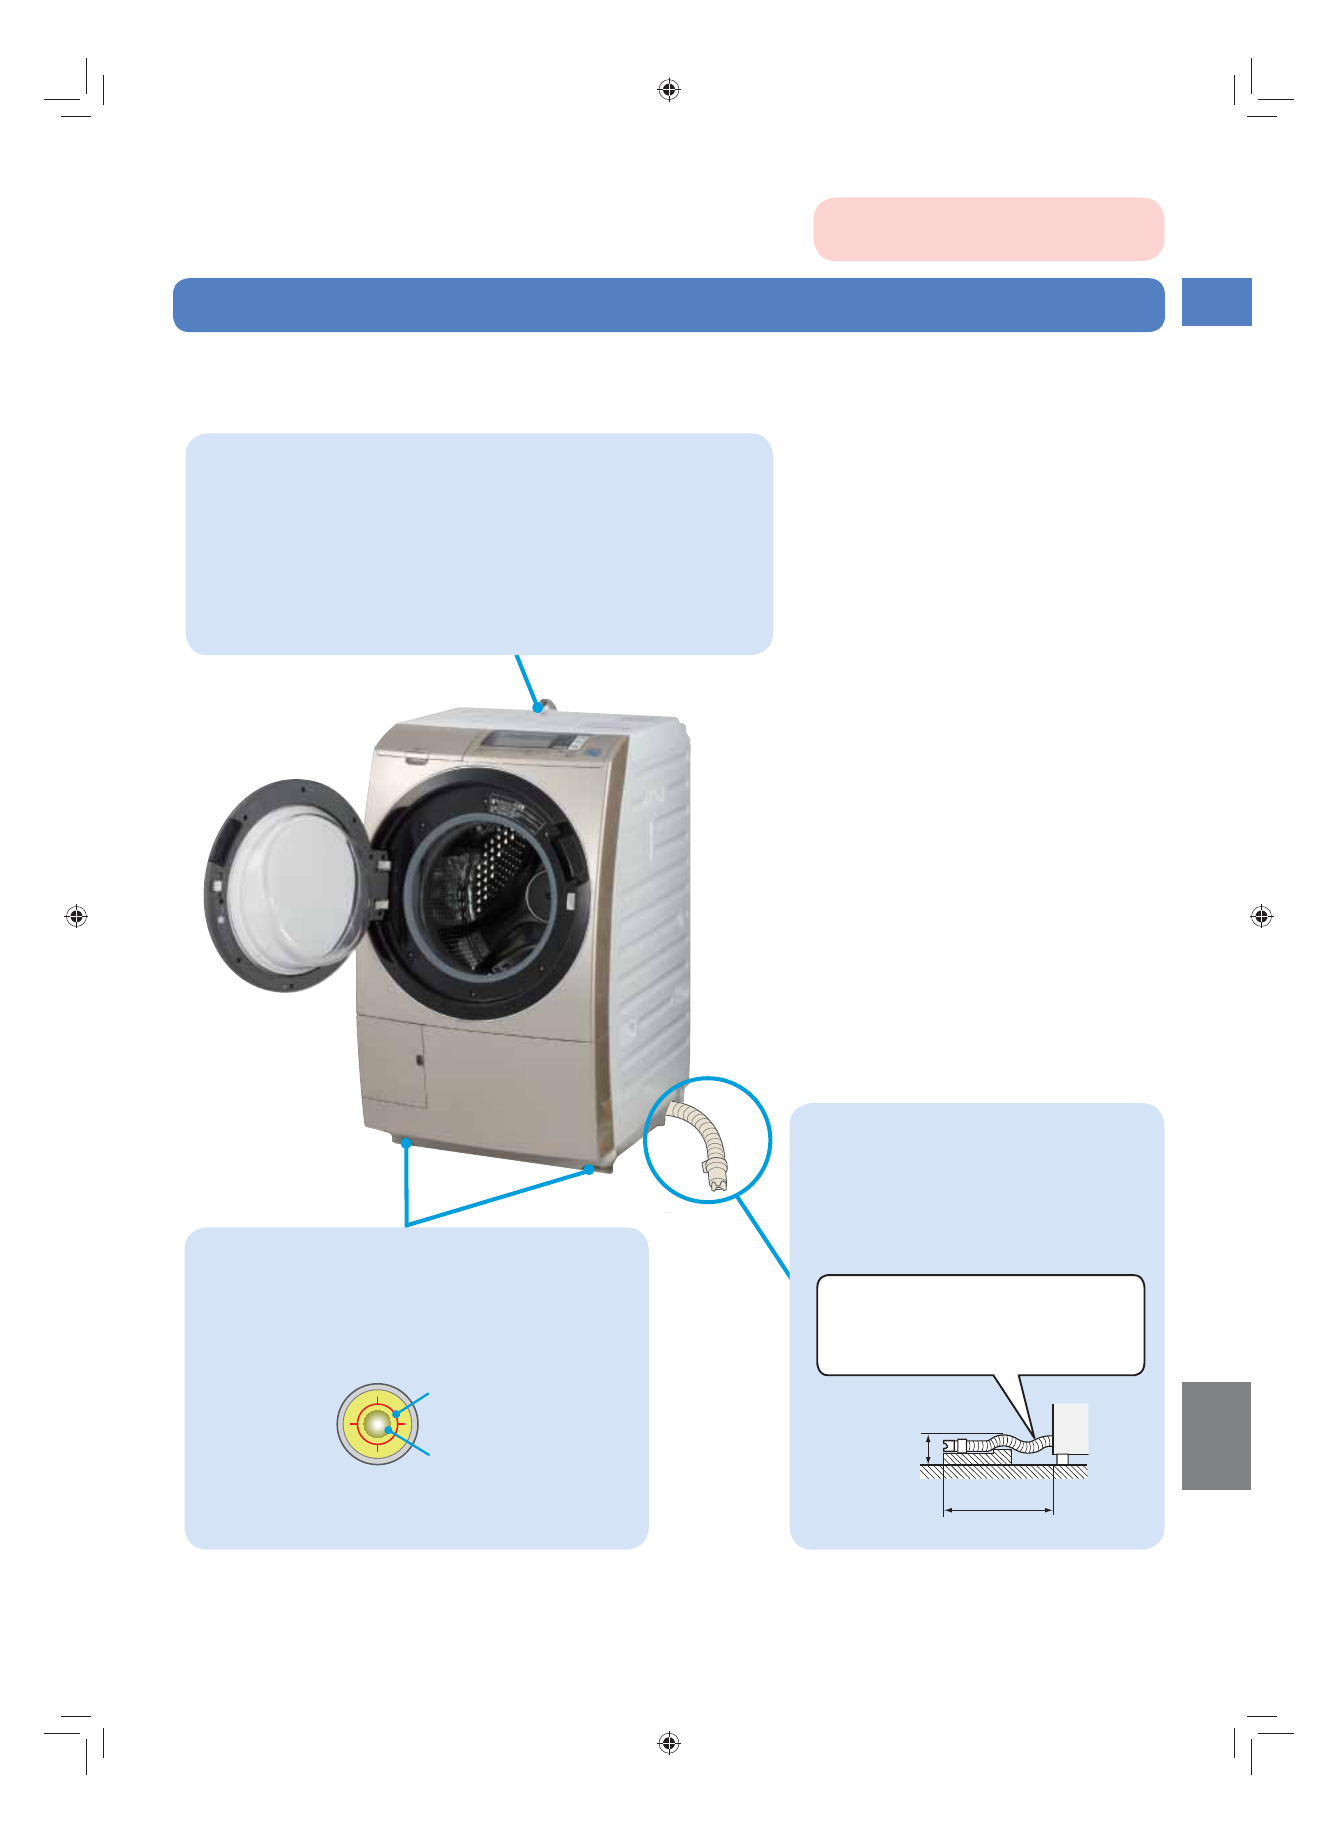
zPreparation................................................................................................................................................................................. 5
· Checking the installation ............................................................................................................................................................ 5
zParts and Accessories .............................................................................................................................................................. 8
zControl Panel Functions.......................................................................................................................................................... 10
zSafety Precautions .................................................................................................................................................................. 12
zUsage Precautions .................................................................................................................................................................. 17
zBefore You Start Washing ....................................................................................................................................................... 18
· Do not wash or dry the following items .................................................................................................................................... 18
· Do not dry the following items.................................................................................................................................................. 18
zWashing and Drying Programs............................................................................................................................................... 19
zTips for Good Washing Results .............................................................................................................................................. 20
zTips for Good Drying Results.................................................................................................................................................. 24
zAbout the WIND IRON Operation ........................................................................................................................................... 26
· To reduce wrinkles................................................................................................................................................................... 26
· Examples of finished laundry ................................................................................................................................................... 27
zAdding Detergent and Softener..............................................................................................................................................28
· Wash load detection and detergent indicators ......................................................................................................................... 28
· Recommended amounts of detergent, softener, and bleach ................................................................................................... 29
· How to open and close the detergent case lid.........................................................................................................................30
· How to add detergent, bleach, and softener............................................................................................................................30
· Using laundry starch ................................................................................................................................................................ 32
zOpening and Closing the Door ...............................................................................................................................................33
· How to open and close the door.............................................................................................................................................. 33
· Opening the door during operation.......................................................................................................................................... 33
· Releasing the door lock ........................................................................................................................................................... 34
· About the DOOR LOCK (manually locking the door) ................................................................................................................ 35
· Preventing the door from being closed .................................................................................................................................... 35
Before Use
How to Use the Machine
zWashing ....................................................................................................................................................................................36
· Selecting the right program...................................................................................................................................................... 36
· How to start ............................................................................................................................................................................. 37
zWashing & Drying ....................................................................................................................................................................38
· Selecting the right program...................................................................................................................................................... 38
· How to start ............................................................................................................................................................................. 39
zDrying ....................................................................................................................................................................................... 40
· Selecting the right program...................................................................................................................................................... 40
· How to start ............................................................................................................................................................................. 41
zBLANKET Program (<<WASH>>, <<WASH DRY>>, <<DRY>>)............................................................................................. 42
· Preparation .............................................................................................................................................................................. 42
· How to install or remove the washing cap (<<WASH>> operations only) ................................................................................. 43
· How to start ............................................................................................................................................................................. 45
zDELICATE Program (<<WASH>>)............................................................................................................................................ 46
· Preparation .............................................................................................................................................................................. 46
· Preparing the laundry............................................................................................................................................................... 47
· After washing is completed...................................................................................................................................................... 48
· How to start ............................................................................................................................................................................. 49
zUsing the DEODORANT Program...........................................................................................................................................50
· Items that can be cleaned in the DEODORANT program......................................................................................................... 50
· How to start ............................................................................................................................................................................. 51
zUsing the TUB CLEAN / TUB DRY Program .......................................................................................................................... 52
· Selecting the right program...................................................................................................................................................... 52
· About the TUB CLEAN program.............................................................................................................................................. 52
· About the TUB DRY program .................................................................................................................................................. 52
· How to start ............................................................................................................................................................................. 53
zPOWER SAVE STATIC DRY Program (<<DRY>>)...................................................................................................................54
· Items that can be dried ............................................................................................................................................................ 54
· After drying is completed ......................................................................................................................................................... 54
· How to start ............................................................................................................................................................................. 55

7
English
Frequently encountered problems (P.85)
zUsing the STEAM IRON Function ........................................................................................................................................... 56
· Selecting the right program...................................................................................................................................................... 56
· About the STEAM IRON function............................................................................................................................................. 56
· Items that can be smoothed using the STEAM IRON function................................................................................................. 56
· How to start ............................................................................................................................................................................. 57
zCreating Your Own Program ................................................................................................................................................... 58
· Selecting the right program...................................................................................................................................................... 58
· How to change the program settings....................................................................................................................................... 58
· How to start ............................................................................................................................................................................. 59
zPartial Operation of the FUZZY Program...............................................................................................................................60
· How to start .............................................................................................................................................................................60
zUsing the DELAY START Function.......................................................................................................................................... 62
· How to change the delay time ................................................................................................................................................. 62
· How to start .............................................................................................................................................................................63
zFull Auto Operation and Changeable Settings ...................................................................................................................... 64
zOther Settings .......................................................................................................................................................................... 68
· Changing or disabling the operation start/finish sounds ..........................................................................................................68
· Disabling the 10-minute warning sound...................................................................................................................................68
· Reducing wrinkles after the spin cycle or spinning harder ....................................................................................................... 69
· Reducing uneven or over-dry drying results............................................................................................................................. 69
· Settings that can be changed via the <DELAY START> button................................................................................................ 70
· Turning off the backlight of the control panel ........................................................................................................................... 70
· Reducing vibration and noise during <<WASH DRY>> operations........................................................................................... 71
· Reducing vibration and noise during spin or speeding up startup ........................................................................................... 71
· Using the HOT WASH function to remove stubborn stains ...................................................................................................... 72
· Disabling the Tangle-Free Finish function after spin operations................................................................................................ 73
· Maintaining softness after drying operations (Fluffy Clothes) ................................................................................................... 73
· Changing the dehumidification mode ...................................................................................................................................... 74
· Discharging the residual water in the drain hose during the AUTO SELF CLEAN operation ..................................................... 74
· Enabling and disabling the AUTO SELF CLEAN function ......................................................................................................... 75
zMaintenance............................................................................................................................................................................. 76
· Lint filter ................................................................................................................................................................................... 76
· Dry filter ................................................................................................................................................................................... 78
· Dry filter port............................................................................................................................................................................ 79
· Detergent case lid.................................................................................................................................................................... 80
· Detergent case ........................................................................................................................................................................ 80
· Main body and drum ............................................................................................................................................................... 81
· Water tap, one-touch joint, and water supply hose .................................................................................................................. 81
· Water supply inlet .................................................................................................................................................................... 82
· Drain outlet .............................................................................................................................................................................. 82
zTroubleshooting ....................................................................................................................................................................... 83
· Error codes in the remaining time indicator.............................................................................................................................. 83
· Frequently encountered problems ........................................................................................................................................... 85
· Unusual sounds ....................................................................................................................................................................... 86
· Problems with particular parts of the machine ......................................................................................................................... 86
· Problems during operations..................................................................................................................................................... 92
· Problems in the control panel ................................................................................................................................................. 96
· Problems with washing results................................................................................................................................................. 98
zMiscellaneous ........................................................................................................................................................................ 103
· Draining the water before a move (or to prevent freezing)....................................................................................................... 103
· If the machine freezes ............................................................................................................................................................ 103
zOptional Accessories ............................................................................................................................................................ 104
zSpecifications ........................................................................................................................................................................ 105
Maintenance
Troubleshooting

8
The numbers in parentheses (P. XX) indicate pages for reference.
Parts and Accessories
(1 piece) (1 piece)
(4 pieces)
(1 each)
6mm
3mm
Supplied accessories (refer to the Installation Instructions)
Used when connecting to the
tap
Used when connecting the drain hose
to the drain outlet
Used for leveling
the machine
One-
touch
joint
Water supply
hose
(approx. 1.5 m)
Drain hose connection kit (Installation Instructions) Foot caps
(for adjusting height)
Double-faced tapes
Hose piece Hose hook L-Pipe Adhesive
(2 pieces)
Detergent case (P.30, 80)
Detergent case lid handle
Softener inlet (right side)
Liquid detergent/liquid bleach inlet (center)
Cap
Powder detergent/powder bleach inlet (left side)
Drum
Lifter
ÚMoving liquid can be heard when the drum is rotated.
This is the liquid inside the 4-Ply Liquid Load Balancer
that acts as a balance during the spin cycle. This is
not residual water that has been left in the drum.
4-Ply Liquid Load Balancer
Lint filter (P.76, 77)
Filter
Filter lid
Rubber seal
Knob

9
Parts and Accessories English
(1 piece)
Used when cleaning
the dry filter port
Used when cleaning
the dry filter
Used to cover the
holes after the
transport bolts are
removed
Used when installing
or removing transport
bolts
Used to secure the
drum during
transport
or installation
Used for determining
whether the machine
is level
Suction nozzle
(P.79)
Cleaning brush
(P.79)
Cover caps
(Installation
Instructions)
Spanner for
removing the
transport bolts
(Installation
Instructions)
Transport bolts
(Installation
Instructions)
Spirit level
(Installation
Instructions)
(2 pieces) (1 piece) (2 pieces) (1 piece)(1 piece)
<POWER> buttons
Power plug
Power cord
Drain hose supports
(holes)
(on left and right sides)
Door bellows
Drain hose
(Installation
Instructions)
Water supply inlet (P.82)
Control panel
Door stopper
Adjustable foot
(Installation Instructions)
(You can adjust the height of the right front foot.)
Door
Dry filter (P.78)
Filters
Handle
Door handle

10
Control Panel Functions
Buttons that function differently when held for 3 seconds after turning on the power
Turn the Tangle-Free Finish function on or off. (P.73) Turn the Fluffy Clothes function on or off. (P.73)
Change the operation start/finish sound. (P.68) Turn the pre-finish sound on or off. (P.68)
Remaining time, amount of
detergent, delay time, and error
code indicators (P.28, 62)
Indicates the amount of detergent and the
remaining time after operation starts.
Displays the delay time with each press
of the <DELAY START> button.
zAfter the delayed operation starts, only
[DELAY] is displayed.
Blow hot air onto
laundry to activate the
detergent for more
complete cleaning.
z[HOT WASH] is
displayed when this
function is set,
and blinks
during the operation.
zThis function cannot be
used in the [BLANKET],
[DELICATE] and
[TUB CLEAN] programs,
and <<DRY>>
operations.
Using the HOT WASH
function (P.72)
Operation status indicators (indicate the current operation)
LOAD SENSING zWeighing laundry. BALANCING
CLOTHES
zUntangle operation in progress to
correct concentration of laundry on
one side.
ADDING
DETERGENT
zDissolving detergent. REVIEWING
TIME
zReviewing the remaining time during
drying.
DRAINING zDraining water. TUB COOLING zCooling the inside of the drum.
REMOVING
FOAM
zRemoving excess foam. (After
draining water, water for removing
foam is injected from the front side
of the drum for up to 15 minutes.)
WIND IRON zAppears when a program that
includes the [WIND IRON] operation
is selected. Blinks during the
[WIND IRON] operation.
PAUSE zPausing. FLUFFY
CLOTHES
zContinuing drum rotation to maintain
softness of laundry after drying.
Adjust the spin speed
or level of drying to
one of three levels:
[EXTRA], [REGULAR],
or [MILD].
zThe factory default
setting is [REGULAR].
Adjusting the spin
speed and level of
drying (P.69)
Change the combination or
settings of <WASH>, <RINSE>,
<SPIN>, and <DRY> cycles.
zPress the <PAUSE> button after the
machine starts to change the settings.
The settings cannot be changed after
the <WASH> cycle finishes, or when
only the <WASH> cycle is operated.
zThe settings cannot be changed
for some programs.
Changing the cycle settings
(P.59, 64, 65)
Press the
<STEAM IRON>
button to steam
out wrinkles of
clothes.
z[STEAM IRON]
is displayed
when this
function is set.
Using the
STEAM IRON
function (P.56)
Detergent indicator (P.28)
Indicates the recommended amount of
detergent to use.

11
Control Panel Functions English
xTurn the backlight auto-off function on or off.
xAdjust the spin speed during the dry cycle of
<<WASH DRY>> operations.
xAdjust the spin startup conditions.
(P.70,
P.71)
Change the dehumidification mode (Air/
Water Cooling). (P.74)
Turn the residual water discharge function
during the <AUTO SELF CLEAN> operation
on or off.
(P.74)
Set or release the [DOOR LOCK]. (P.35)
Caution indicators (P.33, 34, 76 to 79)
zLights or blinks when the door is locked.
HIGH TEMP zLights or blinks when the inside of the drum is hot.
DRY FILTER zBlinks when the dry filter is clogged or after every 20 times the <<WASH DRY>> and <<DRY>> are
operated.
LINT FILTER zBlinks when the lint filter is not attached properly or clogged, or after every 30 times the <<WASH>>
and <<WASH DRY>> are operated.
OVERLOADED zBlinks when the laundry load is too large to dry.
Setting the
DOOR LOCK
(P.35)
Prevent children
from opening
the door.
zThe
indicator and
[DOOR LOCK]
appear when
this is set.
Set the machine to finish
operation 3 to 12 hours
later in 1-hour increments.
zDelay timing cannot be set
for some programs.
zThe [BLANKET], [DELICATE]
and [TUB CLEAN] programs,
and all <<DRY>> operations
cannot be delayed.
Using the DELAY
START function
(P.62, 63)
Using the AUTO SELF CLEAN function
(P.4, 75)
Wash away dirt adhered to the invisible parts
of the machine, such as the outer side of the
drum, automatically.
After washing laundry, you can start drying
operation to dry the drum.
zThis function is disabled at the factory.
zThis function cannot be used in the [BLANKET],
[DELICATE] and [TUB CLEAN] programs, and all
<<DRY>> operations.
Select a program (P.36 to 59)
The selectable programs light in turn with each press of
the <<WASH>>, <<WASH DRY>>, or <<DRY>> button.
zThe selectable programs differ for each of the <<WASH>>,
<<WASH DRY>>, and <<DRY>> operations.
Power buttons (P.83)
Turn the power on or off.
zIf you turn the power on and do not start operation within 10
minutes, the power will turn off automatically.
zThe power turns off automatically after operation is finished.
(Auto Power Off)
START/PAUSE button (P.33, 34)
Start or pause an operation.
zIf you press the <PAUSE> button during drying, you cannot
open the door until the inside of the drum has cooled.
zMake sure that the door is closed before pressing the button.
Failure to do so may result in malfunction of the machine.

12
Safety Precautions
To prevent injuries to yourself and others or damage to property, please read the following
precautions thoroughly. In addition, read the notes in this manual carefully to ensure proper use of the
machine.
The following symbols indicate the severity of injury or damage in cases where the machine is
used improperly.
Indicates that death or serious
injury may occur. Indicates WARNING or CAUTION
information.
Indicates a prohibited action.
Indicates an action that must be
performed.
Indicates that minor injuries or
damage to property may occur.
Meanings of listed precautions
WARNING
CAUTION
Symbol examples
Power plug and power cord
zUse a dedicated 220-240VAC outlet with a capacity of 10 A or higher.
Sharing an outlet with other appliances may cause the outlet to overheat and result in fire.
zWipe off any dust that accumulates on the blades of the power plug or the contact
surfaces.
Failure to do so may result in fire.
zHold the body of the power plug firmly when disconnecting the plug.
Failure to do so may cause electrical shock or short circuits and result in fire.
zIf the power cord is damaged, it must only be replaced by the authorized service agent
or repairing shops appointed by the manufacturer in order to avoid a hazard.
zIf the machine does not operate, emits smoke or unusual odors, or otherwise
operates abnormally, disconnect the power cord immediately and consult a service
representative to request inspection or repair.
Failure to do so may cause electrical shock, electrical leakage, or short circuits, and result in fire.
zDisconnect the power plug when performing maintenance on the machine or when not
using the machine for prolonged periods.
Failure to do so may result in electrical shock or injuries.
zDo not connect or disconnect the power plug with wet hands.
Doing so may result in electrical shock.
zDo not use power cords or power plugs that are damaged or loose power outlets.
Doing so may result in electrical shock, short circuits, or fire.
zDo not scratch, modify, forcibly bend, pull, twist, place heavy objects on, pinch, or
otherwise damage the power cord.
A damaged power cord may result in fire.
zDo not overload the power outlet by using a splitter, for example.
Doing so may result in fire.
zDo not use an extension cord.
Doing so may cause overheating and result in fire.
WARNING

13
Safety Precautions English
Installation
zDo not install the machine in damp locations, such as a bathroom, or in locations
exposed to rain.
Doing so may cause electrical shock or electrical leakage and result in fire.
zDo not install the machine on a wheeled platform or other unstable surface.
Doing so may cause the machine to move or fall over by vibration during operations.
zCarpet does not obstruct the openings for washing machines with ventilation openings
in the base.
Laundry and detergent
zDo not dry clothes to which vegetable oil, animal oil, machine oil, dry-cleaning oil,
cosmetic oil (massage oil, beauty treatment oil, etc.), benzene, thinner, gasoline,
or resin (cellulose) has adhered, or clothes made of polypropylene fiber, even after
washing. In addition, do not dry items that contain sponge-like materials.
Doing so may cause natural combustion of the oil and materials.
zDo not add excessive amount of detergent.
Use the recommended amounts of detergent, referring to the detergent indicator. Failure to do so may
cause excessive foaming and malfunction of the machine, and result in leakage of water and foam
from the machine or drain outlet and electrical shock.
During and after operation
zDo not insert your hand into the laundry until the drum stops spinning completely.
Your hand may get caught in the laundry and injuries may result, even during gentle spinning. In
particular, keep children away during operation.
zNever stop a tumble dryer before the end of the drying cycle unless all items are
quickly removed and spread out so that the heat is dissipated.
When near the machine
zKeep flammable materials away from the drum.
(Flammable materials include kerosene, gasoline, benzene, thinner, alcohol, and
laundry on which such substances have adhered.)
Failure to do so may result in fire.
zKeep candles, incense, cigarettes, and other sources of fire away from the machine.
Failure to do so may result in fire.
zChildren should be supervised to ensure that they do not play with the appliance.
zDo not allow children to enter the drum. Do not allow children to operate the machine.
Children may get trapped inside the drum and asphyxiate, or get burned, shocked, or otherwise
injured.
WARNING

14
Safety Precautions (continued)
Miscellaneous
zRemove the door before disposing the machine.
Children may get trapped in the machine. Loosen the screws and remove the door.
zKeep the supplied spirit level and plastic packaging away from children.
Children may accidentally swallow the spirit level or place the packaging on their head and asphyxiate.
zThe appliance is not to be used by persons (including children) with reduced physical,
sensory or mental capabilities, or lack of experience and knowledge, unless they have
been given supervision or instruction.
zDo not dismantle, repair, or modify the machine.
Doing so may result in electrical shock, fire, or injuries. (Consult a service representative.)
zDo not splash water directly onto the machine when performing maintenance.
Doing so may result in electrical shock or short circuits.
zDo not wash laundry on which volatile solvents (gasoline, benzene, thinner, kerosene,
etc.) or sodium hydroxide have adhered.
Doing so may result in fire.
zKeep your hands away from the door hinge when closing the door.
Fingers may get caught between the machine and door and result in injuries.
Laundry
zDo not wash, rinse, spin, or dry waterproof mats, sheets or clothes, bath mats, hard
and thick items such as doormats, carpets or fabrics that do not allow water to pass
through.
The laundry may be damaged, or the machine may malfunction during the spin cycle and cause
injuries.
Fishing wear, ski wear, raincoats, sleeping bags, sauna suits, wetsuits, windbreakers, disposable diapers, bicycle,
motorcycle, or car covers, carpets, waterproof mats or sheets, bath mats, and other hard and thick items.
Examples
CAUTION
WARNING

15
Safety Precautions English
Before, after, and during operation
zTurn on the tap and make sure there is no leakage before washing and drying.
Loose screws may result in water leakage and unexpected damage. The metal fixtures and gasket of
the tap can deteriorate and rust over long periods of use, resulting in leaks.
zTurn off the tap when not in use.
This can prevent unexpected water leakage.
zCheck for leaks after tap connection whenever the machine is installed or moved.
This can prevent unexpected water leakage.
zOpen and close the door gently.
Failure to do so may result in injuries, damage to surrounding walls, or malfunction of the machine.
zCheck and ensure that lint and other particles are not attached to the surface of the
door bellows before operating the machine.
Such particles may interfere with the sealing of the door and result in water leakage.
zDo not attempt to open the door by force when it is locked. (P.33 to 35)
Doing so may damage the door and lock, or result in injuries or malfunction of the machine.
zMake sure the lint filter is properly attached before operation, and do not remove it
during operation.
Improper attachment or removal will result in water leakage.
zDo not apply excessive pressure to the door bellows when loading or unloading
laundry.
Doing so may warp the door bellows and result in water leakage.
zDo not open the detergent case lid during operation.
Doing so may result in steam or water leakage.
zDo not remove the dry filter during drying operations.
Doing so may result in steam or water leakage or burns.
zDo not place your hands and feet under the machine during operation.
Doing so may result in injuries.
zDo not touch the metallic parts of the drum or door, the top right portion of the
machine, or the laundry (zippers, metallic buttons, etc.) during or after drying
operations.
Doing so may result in burns.
CAUTION

16
Miscellaneous
zClose fasteners (e.g., zippers) on laundry before operation.
Failure to do so may result in malfunction of the machine or water leakage.
zIf any liquid detergent, bleach, or softener remains on any plastic parts on the exterior
of the machine, wipe it off immediately with a soft, damp cloth.
Failure to do so may cause rust and deterioration of the machine parts and result in injuries.
zAfter a water outage occurs or after you disconnect and reconnect the water supply
hose, turn off the tap, press the <START> button, and ensure that the detergent
indicator lights before turning on the tap slowly.
(Do this after long periods of disuse as well.)
Air may have accumulated in the water supply hose or plumbing fixtures, and the pressurized air may
cause malfunction of the machine, water leakage, or injuries when released.
zInstall the machine in the way that you can access the drain outlet for cleaning.
Clogged drain outlets will result in improper drainage and water leakage. If you remove the drain hose
from the drain outlet hole, make sure that it is reinserted securely into the drainage pipe.
zClean the lint filter and drain outlet regularly (i.e., once a month).
Washing laundry that produces a lot of lint or laundry on which hair or pet fur is attached will clog the
lint filter and drain outlet quickly, and result in improper draining and water leakage.
zRemove the detergent case and clean the case regularly (i.e., once a week).
Accumulation of liquid detergent, softener, or bleach may cause malfunction of the machine and result
in injuries.
zDo not use hot water from a water heater.
Doing so may result in malfunction of the machine, water leakage, or improper drying operation.
zDo not jam laundry when closing the door.
Doing so may result in malfunction of the machine, water leakage, or improper drying operation.
zDo not climb on top of the machine or place heavy objects on it.
Doing so may result in malfunction of the machine or water leakage.
zDo not apply excessive pressure to the door or its hinges.
Doing so may result in malfunction of the machine or water leakage.
zDo not use water that is 50°C (122°F) or higher in temperature.
Doing so may result in malfunction of the machine, water leakage, or improper drying operation.
zDo not use the washing cap (optional) in the [SOFT] and [TUB CLEAN] programs
of the <<WASH>> operations, and <<WASH DRY>>, <<DRY>> and <STEAM IRON>
operations.
The heat may cause the washing cap to warp and fly out of the drum, resulting in injuries or
malfunction of the machine.
zDo not hang a rag on the door bellows.
Doing so may deform the door bellows, resulting in water leakage.
Safety Precautions (continued)
CAUTION

17
Usage Precautions English
Do not disconnect the power plug during
operation.
zDoing so may result in malfunction. Pause
the operation or turn the power off before
disconnecting the power plug.
Do not use the machine near televisions or
radios.
zDoing so may result in interference in the
television screen and television and radio
noise.
Do not overload the machine with laundry.
zOverflowing laundry may result in damage to
the laundry, door bellows, and plastic parts.
zDoing so may prolong washing time or
produce uneven washing and drying results.
When washing larger loads, separate
underwear, handkerchiefs, and smaller
items into a mesh laundry bag.
zSmaller items may collect near the door
bellows during operation, resulting in
insufficient washing and drying.
zWe recommend using the optional washing
cap (MO-F103). (P.104)
Do not use the washing cap in the
[SOFT] and [TUB CLEAN] programs and
the <<WASH DRY>>, <<DRY>>, and
<STEAM IRON> operations.
Mesh laundry
bag
Washing cap
Do not overfill mesh laundry bags.
zFull bags may cause increased noise and
vibration.
zFull bags may not dry sufficiently in the spin
cycle.
zPut only lightweight items in the bag (e.g.,
lingerie and small items).
Do not use washing accessories.
zAccessories such as washing balls and filters
may warp and be damaged by heat, which
may result in damage to the laundry and
malfunction of the machine.
Ensure sufficient ventilation during drying
operations.
zDoing so ensures efficient drying of the
laundry.
zInsufficient ventilation during winter or low
room temperatures may result in condensation
on windows and walls.
Usage Precautions

18
Before You Start Washing
Do not wash or dry the following items
Do not dry the following items
z
Be sure to check the washing
instructions and guides.
To prevent shrinking, deformation, discoloration, changes in texture, etc.
zLeather, fur, feathers, and items that
include these
zRayon, cuprammonium, and their
mixtures
xSuch items may shrink, deform, or discolor.
zSilk items
xSuch items may shrink, deform, or discolor.
zKimonos and their accessories
zItems with coating, resin finishing, or
embossing
zVelvet and other pile fabrics
zNeckties, suits, and coats
xSuch items may shrink or deform.
Ú The [DEODORANT] program can be
used. (P.50)
zShoes
Ú The [POWER SAVE STATIC DRY] program can be
used. (P.54)
zItems labeled or , items without washing
instructions, and items without material labels
zBlankets and rugs made with 100% wool or pile
of 10 mm or more
zItems that use highly twisted threads (hard-
twist yarn) (wool, crape, etc.)
To prevent injuries and malfunctions from abnormal spinning vibration
zWaterproof items (P.14)
x
Such items tend to gravitate to one side, resulting in
malfunction of the machine and damage to the laundry.
zMats with rubber lining underneath or long or
thick mats (doormats, floor mats, rugs, etc.)
xSuch items tend to gravitate to one side, resulting in
malfunction of the machine.
zCarpets
xSuch items tend to gravitate to one side, resulting in
malfunction of the machine.
zItems that are covered in pet fur
xSuch items may clog the drain outlet.
zWashing accessories (washing balls, filters,
etc.)
zPillows, cushions, etc.
To prevent shrinking, wrinkling, discoloration, changes in texture, etc.
zItems made of rubber, polyurethane plastic, etc.
xFollow the cleaning instructions on the product.
zToys, dolls, and items that include polyurethane
sponge material
ÚThe [POWER SAVE STATIC DRY] program can be used. (P.54)
zItems that shrink easily
zItems with cotton stuffing, such as futons,
comforters, etc.
zTights and items that are decorated with lace or
embroidery (synthetic fibers, micro fibers, etc.)
zWool, other animal hair, and their mixtures
ÚThe [POWER SAVE STATIC DRY] program can be used. (P.54)
zDeep colored prints
zDo not dry clothes to which vegetable oil, animal
oil, machine oil, dry-cleaning oil, cosmetic oil
(massage oil, beauty treatment oil, etc.), benzene,
thinner, gasoline, or resin (cellulose) has adhered,
or clothes made of polypropylene fiber, even
after washing. In addition, do not dry items that
contain sponge-like materials.
xDoing so may cause natural combustion of the oil and materials.
Do not dry items with the following washing
instructions:
Dry cleaning is possible
Hang drying is recommended
Light wringing is recommended
Do not wring
Low-temperature ironing is recommended
Do not iron
Labels that prohibit tumble drying, etc.
ÚThe [POWER SAVE STATIC DRY] program can be
used. (P.54)
To prevent dry filter clogging and other malfunctions
zStarched clothes

19
Washing and Drying Programs English
Washing and Drying Programs
Desired operation
Recommended program
Normal laundry
xUnderwear, pajamas, etc. FUZZY
(P.36, 38, 40)
Operation in which laundry is rinsed only once
Use a special detergent for single rinse.
xShirts, pajamas, etc.
1 TIME RINSE
(P.36, 38)
Fast washing of lightly soiled laundry
xHandkerchiefs, aprons, etc. SPEEDY
(P.36, 38)
Heavily soiled or thick laundry
xSweatshirts, socks, etc. HEAVY
(P.36, 38, 40)
Customized operation
xShirts, etc. FAVORITE
(P.58)
Maintaining soft textures after wash
xHand towels, bath towels, etc. SOFT
(P.36)
Washing and drying blankets, etc.
x
Acrylic blankets, comforters, bed pads,
curtains, etc.
BLANKET
(P.42 to 45)
Washing clothes with “hand wash
only” labels
xSkirts, sweaters, etc.
DELICATE
(P.46 to 49)
Silent operation
xPajamas, underwear, etc. SILENT
(P.38, 40)
Removing odors and germs
xSuits, stuffed toys, etc. DEODORANT
(P.50, 51)
Power-saving operation
xPajamas, underwear, etc. POWER SAVE
(P.38, 40)
Drying clothes with dry-clean labels,
shoes, etc.
xSweaters, shoes, etc.
POWER SAVE
STATIC DRY
(P.54, 55)
Smoothing out wrinkles of dry clothes
xCasual shirts, blouses, etc. STEAM IRON
(P.56, 57)
Table of contents
Other Hitachi Washer Dryer manuals