manuals.online logo
Brands
  1. Home
  2. •
  3. Brands
  4. •
  5. Hobbytech
  6. •
  7. Motorized Toy Car
  8. •
  9. Hobbytech STR8-MB User manual

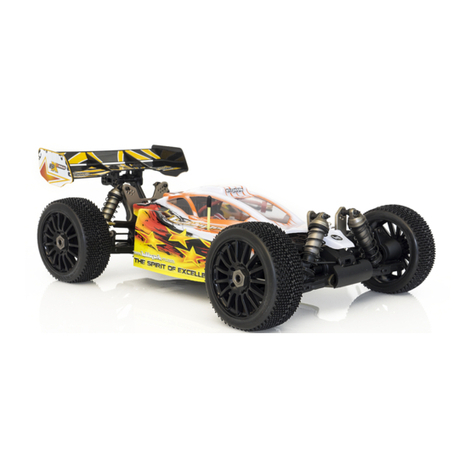
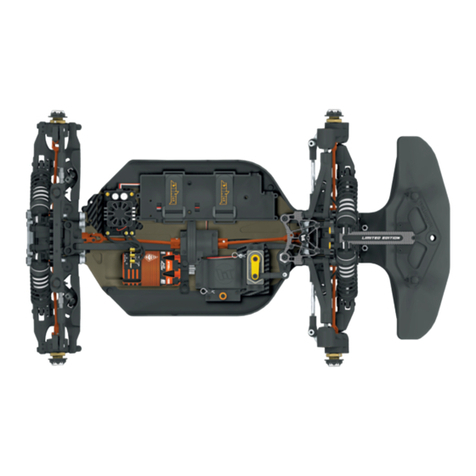
Hobbytech STR8-MB User manual

aa88Y
We ssPR*='ft-
't,,,.'.,.,
&r"
a-
ttTzt t)E-
Pre/|sa/ F"t//'s
INSTRUCTION
MANUAL
ft Themost
powerful
1/1
8
you
everseen.
Poweredwith
abrus(hless
motorand30AmpE5(
thk
<ar
gives
impresive
rpeedand
''' runningtime,
profesionally
designed,
strongand
dunble
functionalityeasyto
drive
onallsurfaces.
Mouldedtubchassis-MiniBigBoreshorkoilfrled-Wheels&tires:fiontand
rearwide
Driveshafu:Aluminium
dogbonesddveshafts
-ftptundhinge
pins
-differential
with
diffballs
steelturnbu*les
- full
ballbearing
-
Aluminium
centrc
shaft
driven
system
-PaintedbuggyorTruggy
body
- high
down
for(ewing
-
Scale:
1:18
Power:Electric-Type:()ffRoad
-length:258mm
-Width:
l77mm
-Weight
6339
-Wheelbase:
177mm
-
InternalGea]Ratio:
2.5:1
-Driye:4WD
shäftddve
-Full
readytorun
-l.skgSteeringservo
-l4TmotorGear
-FULLSAtLBEARING
-HIGHD0Wil
F0RCEWIt'|6
{ )tepluspuissantl/lSdumarch6,livrdave(sonmoteurbrushlessetsonrontroleur30AmpceminiBuggyouTruggyesr
- hyperpuisant,saconceptionprufessionnelleluiconföreunerdsistan(eetunef0ndionnalit6surtoustyp€sdetellain.
(hässis
baignokemoul6
- miniamortisseun
gros
volume
- pneur
ayantetaniöreläryes
- (ardans
aväntetanilreen
aluminium
- axesdetrianglessdcurisds
- diffdrentielsäbilles*biellettesenacier-entiäfementmontdsulroulements
-
systömede
transmissioncentrale
parcardans
- Gnosserie
prdpeinte,
E(helle:ll8- Propulsion:dlefiique-Type:toutterrain
-Longueur:258mm
-largeür:177mm
-Poids:633
g -
ffilif,fiirlBsirl;i.'s,!fl:'-
ffi
Empattement177mm
-Rapportde
tnnsmi$ion:2,5:1
-
Tnnsmission:4x4
-Entiäremam
prät
ä
roulei:Micoservode
dircdion.1,5Ig
- Pig-nonmoteur14Dmb
-ftaqeur220V,
-Entiä]emmtsurfoulements
-Amortisseur
gmr
volume
-
Ailemn
<
high
downforcer \
.ruruur.hsbbutech--re.com
lmDortant:Thisradiosvstemhavea charoinooluo
iniludinointhetransmitterto charoebatte-rie5direttlv
with
aTr?Rxcharger
(no
providedwith
thiskit).
lmoortant:Cetteradiodisoose
d'une
Drise
decharoe
ä l'arriöredel'6metteur
voirsoermettant
decharqei
directementdesbafteriesä l'äided'uncharqeur
-
sp6cifique
(non
fourniaveccekit)
Items
requiredforoperation
8pcs.AABatteriesforthetransmitter
El6ments
necessaires
Dour
lefonctionnement
8pcs.piles
AApour
l'6m6tteur
Neverrunwith
same
FREQUENCY
than
yours
Ne
jamais
utiliser
votremodöle
avecun
autreutilisateurayantlamemefrequence,
t':
o+,1
O Poweron/ offswitch
OTEnsmifterahtenna -T6nsmit thefrequenry
O Ledindicator-lt rhowsthe pMr ofthebanery
lD Steringtrim- Preciselycontroltheneutral
positio
ofthestering seryo
OThrottl€y'brake
trim- PreciselycontroltheneüEI
oosition ofThronle/brake serc
@ Reverseswitch
-usedto changetheseilo diffiion
OThrcftle/bEke trigger
-Tocontbl thronleandb6*e5
O steringwheel
-contrclthe directionrlghtorleft
O Bätery cover- Insertthe bätery - be(arefull, whs
you pffthe bafteryto respectthe-+way
@ Trigerlocker
switch
-you .an lockthetrigerintul
thDftle setlng
-formorcseniitiveacceleFtion
OAM crystal-lB give
thefrequency
oftrasmiter
andreceiver
@cha19in9
plug
O Inftrrupreur
Marche/A.r€t
leAntenne de
transmission
O Ledd'ihdication-Pourvisualiserl'dtatdevosbafienes
O Trimdedirection
-Pourle169lagle
pKis duneut€ de
voffe 5eilo de dir<tion
OTrim duGazlFrein-
Pourlerdglagle
pr€cisdu
neutGde
rctre5eryodegay'frcin
|o Eouton d' inversiondu sensde rotation dessercs
O"Gachene"decontroleGazetFreins
O"volant" decontrolededi@tiondroiteetgauche
OCapotde prctection
d6 bafieries-Aftentionä
rcspecterlesensdes
polaritds
du.antleur
miseenplaca
@ Bouton
dep6itionnementdu neutredela
gachefte
-llaugmenteoudiminuela
sensibilitddela
ga(heft
OQuaTEAM -lldonnelafdquencedevotre enlemble
emission/ r€ceotion
lDPrise
decharqe
CAUTION
/ATTENTION
Toavoid
serious
personal
injury
andproperty
damage,operateallremotelycontrolledmodels
ina responsive
manner
asout-linedbelow.
R/Ccarmodelscanexceed
speedsof40km/h
(25mph),
andcannotbestopped
quickly.
1-NeverrunR/Cmodelson thestreet
orhighways,as it couldcauseor contribute
to serious
trafiicaccidents.
2- NeverrunanFyCmodelnear
people
oranimals,noruse
people
oranimalsasobstacles
whenoperationRyC
vehicles.
3- Toavoidinjuryto persons
oranimals,anddamageto property,
neverruna FyCmodelina confinedor crowed
4- RunningFVCmodels
intofurnitureorotherinanimateobjectswillcausedamageto theobjectsandthe RyC
models.
Afind'6vitertoutdommageädes
personnes
ouä desbiens,utilisezlemodöleradio-command6demaniöre
responsablecomme
d6critci-aprös.Lesmodölesradiocommandes
peuvent
afteindre
desvitessessup6rieuresä
40km/h
(25mph)
etnepeuvent
s'arreterinstantan6ment,
pensez-y
!
1-Ne
jamais
conduirelemodöleradio-command6surlesroutes
etdanslesruescaril
pourrait
causerdes
accidenls
qui
causeraientde
graves
dommages.
2-Ne
pas
rouler
prös
depersonnes
oud'animaux.Ne
pas
utiliserles
personnes
ouanimauxcommeobstacles.
3-Pour6viterloutdommageaux
personnes
etanimaux,
ne
pas
conduiredansunendroitbruyant
ou
trop
exigu.
4- Piloterle modöleradio-command6ä l'int6rieur
entredesobjetsstatiques
peutcauserdesdommagesauxobjets
et
aumodöle
radio-command6.
CAUTION
DURINGOPERATIONS
/ PRECAUTIONS
A OBSERVERPENDANTL'UTILISATION
When
theR/Cmodelis inoperation,
dotnottouch
anyof itsmoving
parts,
suchasdriveshafts,wheels,asthe
rotating
parts
€n causeserious
injury.
1-Thevehiclemotor
gets
veryhot
during
runningandcouldcauseburnsiftouched.
2-Makesurethat
noone
else
isusingthesamefrequencyas
yours
in
your
running
area.Using
thesame
frequencyatthesametime,
whetherisdriving,flyingor sailing,cancauselossof controlofthe R/Cmodels,
resulting
inseriousaccidents.
3-Properlyconnect
plugs.
Toprevent
electricalshock
and/ordamagetotheproduct
resulting
froma short-circuit;
insulateconnectionswithheatshrink
tubing
or
electricaltape.
Beforerunning
vehicle,checkthatbatterywiringandplugs
arenotso loose
astodragontheground.
Properly
secure
cablesusingelectricaltapeor nylontie-wraps.
4- Stiffrotationofgears,
shafts,
joints
andwheelscanburnoutthemotor.lt'srecommended
to check
properjoint
and
shaftrotationbyusingone
1,5V
drycell
during
assembly
ofthemodel.
A wornmotor
willoverheatandresultina shortrunningtime.Replaceawornoutmotor
assoonas possible.
5- R/Cmodels
willrun
outofcontrolwheneitherthe receiveror transmitterbattery
voltage
dropsoff.Stop
the
vehicleimmediately
whenthecarstarls
toshow
downto prevent
itfromrunningoutof control.
Lorsque
lemodöleFyCestenmarche,netouchez
iamais
lesparties
en mouvement
(transmission,
roues,engrena-
ges...)
1-
Quand
lemodöleroule,sonmoteurfonctionnecontinuellementetilchauffe.llpeut
atteindre
unetemp6rature
6levde.Neletouchez
pascarvousrisqueriezdevousbrüler.FaitesAttention!
2-Assurez-vous
quepersonne
n'utiliselameme
frequence
que
vous.
Siune
personne
utiliselamöme
que
vous,
vousrisquezde perdre
lecontröle
devotremodöleetcauserdesaccidents.
3-Preservez
touslesfilsdesfrottementsetdespiöces
en rotation.Veillez
ä cequelesconnecteurs
soientbien
enfich6s
et securisez-lesavecla gaine
thermoretractable
oude labandeadhesived'isolation.
Fixez
lescäbles
au
chässisavec
des
colliers
ennylon.Reparezimm6diatementlesfilsetlesconnectionsendommag6s,
4- Lemoteurrisqued'efe endommag6sitouteslespiöces
en mouvementnetournent
paslibrement:roues,axes
detransmission,
pignonerie...Le
moteurrisquedechauffer
plusque
lanormale,ilconsommera
plus
d'6nergieet
diminuera
I'autonomiedeI'accu.ll estimportantdev6rifierr6guliörement
quetoutescespiöces
et le moteursont
en bon
6tat,danslecascontraire,changezjes imm6diatement.
5-SiI'accudevienttropfaible
pour
alimenterler6cepteur,vousperdrez
le contröledumodöle.
Arretez
lemodäle
quand
il
commence
ä ralentir
pour
6viterde
perdre
Iecontröle.
SAFEW PRECAUTIONS/
CONSIGNES
DESECURITE
Followtheoutlined
rulesforsaferadio
control
ooeration
Avoidrunningthecar
in
crowed
areaandnearsmall
children.
Makesurethatnooneelse
isusingthesame
frequencyin
your
runningarea.
Usingthesame
frequencyatthe
sametimecan
causeseriousaccidents,
whetherit'sdriving,flying
orsailing.
Avoidrunning
instanding
waterandrain.lf FVCunit,motor,orbattery
getwet,cleananddrythroughlyina dry
shadedarea.
FUCoperating
procedures
1-Makesurethetransmittercontrolsandtrimsarein neutral.Switch
ontransmitter.
2-Switch
on receiver.
3- Inspecl
operationusingtransmitter
beforerunning.
4-Adluststeering
servoandtrimsothatthe modelrunsstraight
withtransmitter
in neutral.
5- Reversesequencetoshutdownafterrunning.
6- Makesuretodisconnecvremove
allbatteries.
7-Completely
removesand,mud,dirtetc
8-Store
thecarandbatteries
separatelywhennot use
Respecterlesrögles
defonctionnement
de la radiosuivantes
:
Neoasfaire
fonctionnerlemodöleaumilieu
d'enfantsoude
lafoule
Vörifier
quepersonne
d'autren'utilise
lamämefröquence
danslemömesecteur
carcela
pourraitprovoquer
de
s6rieux
incidents,
Ne
pas
roulerdansl'eauousous
lapluie.
Sile
moteur,ledispositif6lectrique
oul'accumulateur
estmouill6,
s6chez-le
imm6diatement.
Ordrede
fonctionnementfondamentaldu
modölesans
fil
1-Allumez
l'ömetteuraprösavoir
misletrimde
gaz
ä la
position
neutre.
2- Branchez
le contactdu röcepteur.
3-Avant
defairefonctionner,
assurezvousdubonfonctionnementdes2 voiesdevotreÖmetteur
4-R6glerletrimdu
volant,agissezsurle
curseur
pour
que
la
voiture
puisse
avancer
droit.
5-Aprösavoirarröt6deconduire,
arrötezlerecepteuret ensuitela radiocommande.
6-Debrancheztouslesaccumulateurs.
7-Ala
findechaque
fonctionnement,nettoyezI'ensemble
dela
voiture.
SETTINGUP
THEMODEUREGLAGES
Togreatly
enhance
theoverall
performance
ofyourcar,it'snecessary
totunethevehicletothetrack(and
its
surfaceconditions)
onwhich
youwillberacing.
Makeadjustments
refeningtotheinstructionmanual,
keepingin
mind
that"balance'
isthekey
word.
'l-llres
'l-ires
havea great
influenceon theperformance
ofyourcar,
andarenormally
thefirstcomponents
tuned.Select
theright
tiresforthetrack
youareracingon.
2-Toe-inandToe-out
Adjusting
thecartoe-ina little,by pointing
thewheelinwards,
provides
thecarwithgoodstraight
runningand
moderate
steeringcharacteristics.
Toe-out,whichpoint
thewheelsoutwards,
gives
sharpandcrisp
steering.
Take
carenotto overdo.
3-Camberangle
Whiletakingthecorners,the carisforced
to gooutwards,
causinginstability,
Theareaofcontact
oneachtireis
determined
bythecamberangle,andtherefore
thetractionofthetirescanbemade
greater
orlesser
byadjust-
mentof camber
angle.
Toincreasetractionduring
cornering,adjust
camberangle
negative,andreduce
traction,
adjust
forposilive
camber.
4-Groundclearance
andsuspension
droD
Groundclearance
and/orreboundstroke
hasa great
effect
onstabilityduring
cornering,
acceleration,andbraking.
Groundclearance
canbeadjustedbyalteringdamper
springtensionandstiffness.
5-Gearratio
Proper
gearratioshould
bedeterminedbytheavailableoutput
power
ofthemotor;
typeof battery;
trackcondition
andlayoutlt should
bealsonotedthatrunning
thecarona goodgripsurface
suggestsuseofpiniongear 1teeth
smaller,inordertoeffectivelyusealloftheavailable
battery
power.
Pouraugmenterlesperformances
delavoiture,ilestnecessaire
der6glerlavoitureenfonction
de lasurfaceetdu
trac6
ducircuitsurlequelvousroulerez.
Faiteslesr6glages
envousref6rantauxinstructionsde ce manuel.
Gardezä I'esprit
que<l'6quilibre
>estle maitremot,
1-Pneus:
Le
pneu
a une
grande
influencesurles
performances
dela
voiture
etsontnormalement
les
premiers
composants
qu'il
fautmodifierenfonction
du
circuit,
S6lectionnezlesbons
pneuspour
le
circuit
oü
vous
roulerezenfonctionde
lasurfaceeUoudesconditionsatmosph6riques.
2-Pincementetouverture:
R6glerlavoiture
avecun
peu
depincementprocure
unmeilleurmaintien
ducapenlignedroitemaisdiminuele
rayondebraquage.
L'ouverture
procure
unedirection
plus
marqudeet
plus
incisiveelle
permet
detourner
plus
court.Exag6rerles
modificationsr6duiralesfacult6sdelavoiture.
3-Carrossage
positif
& n6gatif
Lorsque
la
voiture
tournedansunvirage,ellesubitlaforcecentrifuge
qui
lapousse
äl'ext6rieurduvirage,
cela
provoque
uneperte
d'adh6rence
etdestabilit6.Lasurfacedecontact
de chaque
pneu
aveclesolestd6termin6e
par
I'angle
decarrossage,Latractiondes
pneuspeut
Cheaugmentöeou
diminu6eenmodifiantlecarrossage.
Pour
augmenterI'adherencedansles
virages
ilfautaugmenter
lecarrossagendgatif.Pourr6duire
l'adh6rence
augmentezlecarrossage
positif.
4- Gardeausol & d6battementde la suspension
Lagarde
ausolet le d6battementdessuspensions
ontuneffetdirectsurlastabilit6envirage,
acc6l6ration,
freinage,Lagarde
ausolpeut
6treajustöeen modifiantla tensiondesressortsdesamortisseurs.
5-Rapportdetransmission
Lebonrapportde
transmissionestdöterminö
par
lapuissance
dumoteur
+letyped'accu
+lesconditionsdu
circuit,llestä noter
que
rouler
suruncircuitavecunebonneadh6rence
suggöred'utiliserun
pignon
1dents
plus
petites
afind'utiliser
toutelacapacit6deI'accu.
Th€ sit doesn\ opente
Dischdged or dÄmg€d Try b chdge lhe balbry or
Iry b rephce ir wiih !d
Wmng wiring Re-do $ring ecording li th€
Damaged €lecronic Request rhe manufäctus ro
prcvide a seryicc, or reple
The E.S.C tsnpera0ß
prolection circuit ffi It w6 opmt€d due to
exc$sive ming or tuuble
h lh€ driving systm. Cool it
for about 15 mn bcforc
The uit doesn't opmt€
snoothly
Ahomd anEnna tbr th€
tmsmiftr/ rcceivq Expad lhe anEnna of the
receiver to the muimum,
ed shd up that of the
tusmib a high 6
In@m€tly ssmbled ga R€ssmble them ecordint
Tffiiftr baftry is flat or Kepleemml ol hnsml&r
fte model wiü lhe me
li€qwncy is trtrby MOVe and dnve I at ilotntr
pl&e, or drive it aftet
diwion with orher peßon
usins the sme ft€oüscv
Le modöle ne fonctiome pa
Accu e.hqd ou ddfectueu Cbarger l'accu et 6sayer ou
lmDber Dar un nouvet accu
Le mEur est ddommage RemPleer P& uo nouvetu
tlecdoues€st inex&t Rebmche. en sürvmt les
Le vanaEü de vile$e est Dmede. une 6srshe
techiqu€ mmFtent€ €roü
L€ c,rcuit de Prot€ction
ümique du rdpbEur de
vitsse €ledrcnique a €t6
Il a ete,activ€ en Eisn d'u
fonctioüem€trt €xc6sii ou
d'ud pbblöme prcvenet du
sFdm€ de pilokge. hissz-
le rctuidir flviron ljm
Pmblan€ d'antenne &
depteu e/ou d'önetbur Deployer enf örmen!
I'anldne de l'€meceur.
Positioms I'mr€me du
dceFil le plu häut
L EsemblaS€ de la
hßmissiotr et des pdies
L.s accB de l'tuefteu sont cbse. les accs dr
ll y a un mdale qui utilise la
m€me fdqerce tu un Roule! tus un aute fltuit,
Chger de ftSsce,
Rouler dEmstivemmt av€c
la peßonne qü a la n€m€
I Transmitter
Emetteur I Transmitterantenna
Antenned'emetteur
I Bcdvs
Antenna
pps
Tubed'antenne
de
Sx"AA"Alkaline
batteriesfor
transmitter(Not
included)
I a@usAAou oiles R6 Dourla radiG
@mmande (non inclus)
Inorderto
fullyshowthesuperbr
perfomance
of
this
producl,Suggest
the
high
pefofmance
that
you
useour@mpany7.2v1400mAhNi-MH
rechargebale
baüery.
Donotusebatterycwithdi[x3r*".
f\ 'oji\ uamass
'a*),, ..6
'""":-tP ffi
! ' " ,L&" Battery
withdamaged@ver
-rffi
Dansle
butd'obtenirunemeilleuE
perbrmance,
nous
vous
suggerons
devoussquiperdenotEpack
d'accumulateurs
rechargeablesLiPO7,4V1800mAh
Ne Dasutllis des balbries abim6ss
dans la wituE et la €diHommande
INCLUDED
ELEMENTSINCLUS
I
7.2V1200mAhRechargeableBattery
Packaccumulaterusde7.2V1200mAh
n
\\
Il
It
J{
--it 'r --l
-i\ \").]-;''
\ -\ ä:-?Ä::*
Charger
-U
OPTION TOOL
OUTILSNECESSAIRES
I Hex-agonal screwdriver
Toumevis hexagonal (allen)
I crosswrench
(small)
Cl6encroix n
II
|HH
L!-}+ l]
@
I Antennainstallation
Mise
enDlace
deI'antenne >Screwinto ------7
f€base Y
Vi$er dans
Ia base
TransmitEr
antenna
Antenne
d'emetteur
E LoadingBatteries
lnstallationdesbatteries
O. Remove the battery lid
RetirerleGpotdesbatteries
r2-:.
Load I AA-size Alkaline
Balteries as shown in the
illustrion.Caution:
install
batterieswith correct
polarity.
Replacethelidas shown.
Remettrele€pot commeindiqu6
Youcanusethecharging
plug
includedon
thetransmiter.
Vous
pouvez
utiliserlaprise
dechargeinlcus
Installerlesbatteriesselonlesensci-contre.
Attentionaux
polarit6s.
E Installing
batlery
Installationdupack
7.2V
surl'emetteur.
E oooy
CarGserie
Remove the protective film beiore instalingthe stickers
on the body.
Retirer le film de orotection avant d'installerles
autocollants,
Caution:
install
batterieswith
correcl
polarity
Attentionauxpolaritös
avantdebrancher
ffi;F;*tffir E
Thisasemblyinstructionshave
been
mainlymadetoshow
you
howtoassemblealltheupgEdes
you
canassembleon
your
STRSMB
the
treadlock
isonly
using
whenassemblyaluminium
parts
!!!Never
put
threadlockfor
plasticparts
assembly.
Cettenoticed'assemblage
est
ddstinde
principalement
älafixaliondes
piöces
optionnellesdisponibles
pour
votreSTRBlilB.L'utilisationdu
freinfiletestexclusivement
räseru6älafixationdes
piöces
enaluminium.Sivousrempla€zdes
piöcos
snplastique,
n'utilisezjamaisdefEinfilet!!!
Sm:fi:r.mJm
!*"--€
&
,+',
T7
m
When
you
doasembbletheupg€de
parts
on
your
STRBl\48
please
beawaretoapplythrmdlocktoprevent
lostscrewsduringrunning.
Pleasedonotovertightenthescrews
onaluminium
parts.
Bmuse you
alreadyapplysuitabletreadlocksonitelse
you
willnotbeableto
unscrewwhen
you
wanttochange
orEpla@
aluminium
parts
dueb wearouts.
Quand
vousassembleztoutesles
piäes optionnellesenaluminiumduMini
Buggy
1/18e,
prenezgarde
äappliqu€rdu
freinfilet
pour
ne
pasperdre
les
vis
durant
I'utilisation.Attentionänepas
tropserrerles
vis
aux
piöces
enaluminiumloß deI'assemblagecar
vous
ava dejä
appliqu6dufEin
filet
pour
les
bloquer.Vousrencontrerezalofs
peut€tre
desdifrcult6s
pour
öteIles
piöees
ouleschanger
This
assemblyinstructionshavebeenmainly
made
loshow
you
hw toassemblealltheupgrades
you
canassembleon
your
STRBMBthe
treadlockisonlyusingwhenassemblyaluminium
parts
!!!Never
put
threadlockfor
plasticparts
assembly.
Cettenoticed'assemblageestd6stinde
principalement
älafixationdes
piöces
optionnellesdisponibles
pour
votre
STRS
MB.L'utilisationdu
freinfiletestexclusivementreserveä lafixationdes
piö@s
enaluminium.Sivousrempla@zdes
piöces
en
plastique,
n'utilisez
jamais
defreinfilet!!l
snMwl
smM49
srRMMos I
'J;&
ä4r;:
When you do a$embble $e upgrade parts on your STRB MB please be aware to apply thread lock to prevent lost screws during running.
Pleasedonot
over
tighten
thescrewsonaluminium
parts.
Because
you
alreadyapplysuitabletreadlocksonitelse
you
will
notbeableio
unscrew
when
you
want
tocfunge
orreplacealuminium
parts
dugtowear
outs.
Ouand
vousassembleztoutesles
pidces
optionnellesenaluminiumduMiniBuggy1/18e,
prenezgarde
äappliquerdufreinlilet
pour
ne
pasperdE
les
visdurantl'utilisation.
Attention
äne
pas
trcpserrerlesvisaux
pidces
enaluminiumloß deI'assemblagecar
vousavez
d6jäappliqu6
dufcin
filet
pour
lesbloquer.Vous
Enconferez
alors
peul€tre
desdifücult6s
pour
öterles
piöces
ouleschanger
Hxrffim"**,llm**dohh'@üßK
mfil",'*m*'
6 fr$,Tr,':"*'*
10
1
J
1
J
1
I
1
I
*a&r
ffi-'
","*r"rlfftu"
n;;t7'tü
y6*.,i1 "v
1
I
'äF,
snMuT r{ , /t
*%€R
,aG\
-,((l@
(mW F
\w @_*,*,
\E
,,\.**"*,.-.,
't-eM
Y,ffi@
wtr.
\\s- srRM4e
'u3
Thisassemblyinslructionshavebeenmainly
madetoshow
you
howtoassembleallthe
upg€des
you
canassembleon
your
STRBMBthe
tread
lockisonlyusing
whenasemblyaluminium
parts
!!lNever
put
lhreadlockfor
plastic
parts
assembly.
Cettenotie d'assemblageest
d6stin6e
principalement
äla
fixationdes
piäces
optionnelles
disponibles
pour
votreSTRSMB.L'utilisation
du
freinfilet
est
exclusivement
rgserv6ä lafixation
des
piöces
enaluminium.Sivousremplacez
des
piöces
en
plastique,
n'utiliseziamais
defreinfitetlll
When you do assembble the upgrade parts on your STR8 MB please be awa€ to apply thread l@k to prevont lo6t screws during running.
Pleasedonotovertightenthe
screwsonaluminium
pads.
Because
you
alreadyapplysuitabletread
locksonitelse
you
willnotbeableto
unscrewwhen
you
wanttochangeorreplace
aluminium
parts
duetowear
ouß.
Ouand
vousassembleztoutesles
piä@s
optionnellesenaluminiumduMiniBuggy1/18e,
prenezgarde
äappliquerdufreinfilet
pour
ne
pasperdre
lesvisdurantl'utilisation,Attentionä ne
pas
tropsererlesvisaux
piäces
enaluminiumlorsdel'asemblage€r vousavezd6jäappliqu6dufrein
filet
pour
lesbloquel Vousrencontrerez
aloFpeut€tEdesdifücult6s
pour
öterles
piöces
ouleschanger.
B m*F*"*r,ll;:r"'gi:"-5,**
*'* 6 iis.il:i*
m
*' 6 frfä"'*""'*
A
/'>, !,1
**(@54
W_@
@Äg ffi
ffi-',..*-
-&r
f)
H
g
:
^rO)
,gN
///
l{ ffi)
B:"
H
Ril N-PEö
/#t fl
q-ry'F$
I U''q
'J'<'l:- *"'*u
\5
Thisassembly
instructionshave
beenmainlymadetoshow
you
howtoassembleall
theupgrades
you
canassemble
on
your
STRSMB
the
tEadlockisonlyusingwhen
assemblyaluminium
parts
l!!Never
put
threadlockiDr
plasticparts
assembly.
Cette
noti@d'assemblage
estdestin6e
principalement
älafixationdes
piä@s
optionnellesdisponibles
pour
votF STR8
MB.L'utilisationdu
frein
flet estexclusivement
r6serv6äla
fixationdes
piöces
en
aluminium.Si
vous
remplacez
des
piöces
enplastique,
n'utilisez
jamais
defrein
filet!!!
,-#rm\
@,n.
w@@
H
ffi
''y-ky*-",-"*,
...-rRM@ \{,;r
iP ^' /l\, Ä\ H
(QW-***"
*%N
w r@-"*" 1ti.@
*f""f
."S..::l:.o6--
,s
O____, *LY:
P6*fu*@
When you do assembble the upgrade parts on your STRS MB please be aware to apply thread lock to pEvent lost screws during running.
Pleasedonotovertighbnthe
scEwsonaluminium
parts,
Be€useyou
alEadyapply
suitabletßad locksonitelse
you
will
notbe
ableto
unscrew
when
you
wanttochangeorreplacealuminium
parts
dueto
wear
outs,
Quand
rcusassemblez
toutesles
piöces
optionnelles
enaluminiumduMiniBuggy
1/18e,
pFnezgarde
äappliquerdufroinfilet
pour
ne
pasperdra
les
visdurantl'utilisation.Attention
äne
pas
tDpsenerles
visaux
piä@s
enaluminium
lorsdeI'assemblage
€r vousavEzd6iäappliqu6
dufrein
filet
pour
lesbloquer.VousrencontErez
alo6 peut"Ctre
d$ difücultes
pour
6terles
piöces
ouleschanger.
6mnff'"t*y.nxffi'g;:'"':J***"*6 il#ffi:lm*' 6 iis.;:,*"*'*
12
GJ
oiil \r \
i-zä.^
Iüc B
ß-ro"*--z , ':'ffi)
M-.,
\i:i.::J
W*:ii@ I
f,j
j
€r,].qr
Thisa$embly
instruetionshavebeenmainlymadetoshow
you
howtoassemblealltheupgrades
you
€n assembleon
your
STRSMBthe
tread
lock
isonlyusingwhenassemblyaluminium
parß
!!lNever
put
threadlockbr plasticparts
assembly.
Cefte
noticed'assemblageestd6stin6e
principalemenl
älafixationdes
piöes optionnellesdisponibles
pour
votreSTRBMB.L'utilisationdu
freinfilet
estexclusivementr6serv6älafixationdes
piöces
enaluminium.Sivousrcmplacezdes
pidces
en
plastique,
n'utilisezjamaisdefreinfilet!!!
- STRMMT STRM*2 -
-l(";
wi4
%
e,
ldäNUnpFm'sbmrd I
lonsu,bbil$ |
When
you
doassembbletheupgrade
parts
on
your
STRSMB
please
beawaEtoapplythreadlocktoprevent
lostscrewsdudngrunning.
Please
donotovertightenthescrews
on
aluminium
partrs.
Because
you
already
applysuitabletreadlocksonitels you
willnotbeableto
unscrew
when
you
wanttochangeorreplacealuminium
parts
due
to
wearouts
Quand
vousassembleztoutes
les
piöces
optionnellesenaluminiumduMiniBuggy1/18e,
prenez
garde
äappliquerdufEinfilet
pour
ne
pasperdre
les
visdurantl'utilisation,Atientionäne
pas
tDpsrrer lesvisaux
piöces
enaluminiumlorsdel'assemblage€r vousavezdäjäappliqu6dufrein
filel
pour
les
bloquer.Vousren@ntrerezalors
peut-gte
desdifücult6s
pour
öterles
piäces
ouleschanger.
mffiil:['f.xf.Y,ilxs:gr;", ff*l"il*:H*6 fi#,';Lt"*'*
w4&e
STRMB-O1O
Pin2x11mm
Axe de sauveseruo2x11mm
?\
STRM&014
Diff.outdriveset
Noix
desortiedediff.
STRMB-OO1
Servosaver
Bras
gauche
desauveseryo
STRMB-OO5
Steeringdrag link
Barrede direction
STRMB-OO2
Servosaver
plastic
set
Set
plastique
de
sauve
seruo
STRMB-OO7
Servosaverbushing
Baguedesauve
servo
STRMB-011
Seryosaverfull
set
Setcompletdesauveservo
STRMB.O15
Diff.
gear35 T
Couronnede diff35 dents
STRMB{19
Difi.spring
Ressortdedifferentiel
STRMB.O24
Washer
Rondelledecalage
STRMB-OO3
Ballstud2.5x5mm
Boules2.5x5mm
STRMB-016
Difi.Balls2-37mm
Billesde difi.
STRMB-OO4
Sockedsteppedscrew
Vis
debanededirection
STRMB-026
Mainchassis
plate
Chessis
principal
STRMB-OO8
Servosaverspring
Ressortdesauveservo
sTRt\ilB-012
Servomount
Supportdesauveservo
STRMB.O09
Trustwasher11x8.2x0.2mm
Rondelledesauveservo
STRMB.O13
D internalwasher
Plateaude dif. ä billes
STRMB-017
Washer
5x2x0.8mm
Rondelle
5x2x0.8mm
&@
STRMB-01
8
Thrustbearing
Balls
1.6mm
Billesdebut6eäbilles
STRMB.O23
Dogbonespringcup
Bouchondenoixdediff.
^
Aal
A( t%
{J-Yrr LJ
(*/ v
STRMB-021 STRMB.O22
Aluminiumdiif.cup cover Ball bearin2x8x2.5mm
Cerclagede noixde difi. Roulement2xBx2.5mm
STRMB.O25
Completydifi.set
,5 Differentielcomplel
Sh'
@tr,${$
!ryr
rru
,#€ w. .'jr
.ffi. w.&
wst{s
STRMB.O27
Gear cover
Sabotde protection
muronne
STRMB.O32
Maindriveshaft
with
pin
Cardancentralavec
axes
STRMB-038
Secondfloorolank
Renfort
suoerieurdechassis
STRMB-042
FrcntBumper
Pare
chocavant
STRMB-047
Stub
axle
Axedercue
STRMB-052
Steering
tierod
Bielette
dedirection
W**
STRMB.O28
GearBoxcase
Celluleavant
ouarriöre
STRMB-033
Ballbearing
12x8x3.5mm
Roulement
12x8x3.5mm
STRMB.O39
Frontand
rear
shocks
tower
SuDDort
amortisseursAVAR
STRIVIB{44
Reararm
mount
Caledepincement
aniere
STRMB-049
Dog
Bone
Cardansavantrsouarrieres
STRM8453
Steeringknuckles
Fus6ede direction
STRMB-O3O
Silktoothscrew
Plotde fixationd'accus
STRMB.O50
Socket
screw2.5x16.4mm
Visd'axede traingle
STRMB-031
Spur
gear
607
Couronnecentrale
60dentrs
STRMB.O51
Dog Bonespring
Ressortde calagede cardan
STRMB-056
Shocks
shaft
Tigesd'amortisseurs
MWd
STRMB-034 STRMB-036
Inputbevel
gear
14T Ballstud
Pignon
d'attaque14Dents Boules
STRMB-O4O STRMB.O41
Frontandrearsuspension
arm Socketstopped
screw
Triangledesuspension
AVAR Axe
de
triangle
STRMB-045 STRMB-046
Front
C-hub
rightandleft Steeringblock
Etriersavants Fus6e
avant
TI e6
"# dddd
{1 W
STRMB.O55
Shockspiston
Pistond'amortisseurs
16
s{p
o\wk
fp w@
?ts
STRMB-057
Shocksbodies
Corpsd'amortisseurs
STRM8-061
Shocksball
cap4x1.55
Chapedetige d'amortisseur
STRMB-065
Shockssprings
Ressortsd'amortisseur
STRMB-058
ShocksO{ing
Jointsd'amortisseurs
STRMB.O62
Shockcap 13x10
Bouchonsuperieur
amortisseur
w%e
GG
STRMB-059
Stopple3.4x2.1mm
Guidedetige
d'amortisseur
sTRtvlB-067
Completyshockset
Amortisseurs
complets
STRMB-073
Motor
mount
plate
Platinedefixation
motorinf.
STRMB-O60
Shock bodyseal cap 8x5.2
Bouchoninferieur
d'amortisseur
ww
&sw
STRMB.O63 STRMB.O64
Shocksupper ballmp Shocksbladders
ChaDesuperieure
d'amortisseur Membraned'amortisseur
STRMB-O70
lvlotor
piniongear
16
T
Pignonmoteur16dents
##dB \{sK}}t
STRMB-078
Ballstud
Boules
*F
\,\"*
STRI\48-075
Washer
6x4x0.6mm
Rondelles
tü&e
STRMB-081
Wheelnuts
Ecrousde roues
STRMB.O66
Lowerspringperch
Maintieninfierieurde ressort
STRMB-072
Motormount
Supportmoteur
STRMB.O74
Stubaxles
pin
6.5x1.5
Axe6.5x1.5
mm
STRMB-069
Upperspringscrewadjusler
Molette
de169lage
wwww
STRMB.O7g STRMB.OSO
Mini
pin
turesfullset Tyreswashers
Pneusmini
oicots
montes Rondelles
deroues
STRMB.O82 STRMB.O88
Cell Batterybrace Wing mount
Platine
supportd'accus __Supportd'aileron
'17
STRMB-089
White
wing
Aileron
blanc
o
ttts @ää trf
wwffi
dd
4P4e *.*sstttrtSl
IillttIrIl,tI
lllllo,ß
r
g
rr..
ttlll**i**;Ett && *$x
STRMB-093
FrontC-Hubscrew
Visd'etriers
porte
fusäes
STRMB-094
STR8MB
Completyscrewset
KitvisseriecomDlet
STRMB-094
Bodymount
Supportdecarrosserie
HT501370
Body
pin
Clips
sp6cial1/18
x10
cA401 c4402 HSB.KITAM HSB-MB
AMTransmitter/receiversat SteeringSeruo
KitemetteurreceoteurAM Servo
dedirection
Buggyprintedbody BLUE Buggyprinted
body ORANGE
caroserie buggypeinte Carroserie
buggy peinte
ffi
xT18.5500.81
130
S
motorbrushless
Moteurbrushless
1/'18
xT7.21200PL
7.2V 1200mAh
Battery
Accusspecial1/1I
@
*.
Notes
*W 1, .@\ *^'u*..
,6i** o, 1 e''-, a€- '.\
w \rnffi ^6.-" \---'
p
W\K
NW
,fr]
@@
@
.\. *3* W-
'\ W ,@(a'
n&. t\ Y\\
&*g.,r'
t\. K-\ä
t;r,:;,_,'\ \" W
4..
,c.
STRMB€OO1
SINMB€O05
Aluminium
Ear toein plate
Calle
depincement
anniäre
enaluminium.
srRM&s002
Carbon
fiber ahaBsis
plate Carbon
fiber battet1tray
Chassis
princiFal
encarbone platine
d'accusencarbone
STRMB€OO3
Aluminium
batterypost
Colonet?€desupport d'accus
enaluminium.
STRMB€O19
AluminiumEar ehub
Etniere
portefus6e8arriäre en
aluminium.
STRMB€OO4
Aluminium
ventilatedmotor mount
SupportmoteuPenaluminium
venti16.
vrffi
STNMESOO6
F& F suspension
am holder
Suppsfüd'axes
detniangle
AVlAn enaluminium.
STPMB€O07
Aluminium
gearholder
Suppofüdecoumnne
ppale.
en
aluminium.
srHMs€o08
F& Rlorer arm set in aluminium
Trianglw inf6rieur
avantet arriöre
enaluminium.
STRMBSOO9
Fnontaluminium
shocktowen
Supportd'amoftisseuravant
enaluminium.
STRMB€o13
Aluminium
seruo6aEr holdar
Supportde6awe seruo
an
aluminium.
STRM&SO17
Ste€ring seruo univeEal plastic
adapt€r.
AdaptätEur dE sEruo univoEsl,
STRMB€O2'I
FNnt and rean C1/D.
Candan€ homocindüiques avant
€t arriöre.
STRMB€O1O
Rear
aluminiumshoEk
tower
Supportd'amortisseur
anriCre
enaluminium.
sTRMB-SiO14
AluminiumssNa sawn arm Isft
BnaadeEawHeNo gauche
en
aluminium.
STRMB€O1B
Aluminiumfrcnt c+rub
EirieE port+fus6esavanten
aluminium.
xT 't
8.5500.8L
Racingbnushless
moton
Moteur brushlesa
comp6tition.
STRMB.SOl't
Aluminiumseruo
mountplate
SupportdeseM enaluminium.
STRMB€O12
Aluminium
gearcowr
Sabotdeprotactionenaluminium.
STRMB€O16
STRMB€O20
Aluminiumlrcnt steening
knuckles
Pontafuseeäavantenaluminium.
@u
sTnMB-So't5
Aluminium
seruosaverarm right Aluminium
steedngplate
Brasdesauvmeruo droit En Bare desauveserc eni
aluminium.
b
ep Sw
xTsx1.8MG XTLP1.8,/2S20SC
Mgtal
gean
steering
seruo 7,4V.25eOC18OOmAh.
O,1lsecond
-1,8K9.
-
ggn BattarieLipo7,4V'
2OE1
Seruo de dineqtion pignion m€tal.
w
W
w#d

Other Hobbytech Motorized Toy Car manuals

Hobbytech 4WD CRX18 FLAT CAGE User manual

Hobbytech

Hobbytech 4WD CRX18 FLAT CAGE User manual

Hobbytech Spirit User manual

Hobbytech

Hobbytech Spirit User manual

Hobbytech SPIRIT NXTE RR 2020 User manual

Hobbytech

Hobbytech SPIRIT NXTE RR 2020 User manual

Hobbytech CRX RTR SURVIVAL User manual

Hobbytech

Hobbytech CRX RTR SURVIVAL User manual

Hobbytech SPIRIT NXT GP User manual

Hobbytech

Hobbytech SPIRIT NXT GP User manual

Hobbytech CRX 18 User manual

Hobbytech

Hobbytech CRX 18 User manual

Hobbytech BXR.S2 KIT VERSION User manual

Hobbytech

Hobbytech BXR.S2 KIT VERSION User manual

Hobbytech EP X2 Buggy User manual

Hobbytech

Hobbytech EP X2 Buggy User manual

Hobbytech LC70 User manual

Hobbytech

Hobbytech LC70 User manual

Hobbytech BXR.S2 RTR User manual

Hobbytech

Hobbytech BXR.S2 RTR User manual

Hobbytech Spirit NXT Evo 4S User manual

Hobbytech

Hobbytech Spirit NXT Evo 4S User manual

Hobbytech SPIRIT EVO RTR User manual

Hobbytech

Hobbytech SPIRIT EVO RTR User manual

Hobbytech Revolt bx-10 User manual

Hobbytech

Hobbytech Revolt bx-10 User manual

Hobbytech NXT XR User manual

Hobbytech

Hobbytech NXT XR User manual

Hobbytech Rogue Terra User manual

Hobbytech

Hobbytech Rogue Terra User manual

Hobbytech SPIRIT NXTE RR21 GT User manual

Hobbytech

Hobbytech SPIRIT NXTE RR21 GT User manual

Hobbytech REVOLT BX-10 3.0 User manual

Hobbytech

Hobbytech REVOLT BX-10 3.0 User manual

Hobbytech Spirit EP User manual

Hobbytech

Hobbytech Spirit EP User manual

Hobbytech Survolt BX10 2.0 Sport User manual

Hobbytech

Hobbytech Survolt BX10 2.0 Sport User manual

Hobbytech NXTE SPIRIT RR21 User manual

Hobbytech

Hobbytech NXTE SPIRIT RR21 User manual

Hobbytech epX2Buggy User manual

Hobbytech

Hobbytech epX2Buggy User manual

Hobbytech 6WD CRX18 FLAT CAGE User manual

Hobbytech

Hobbytech 6WD CRX18 FLAT CAGE User manual

Hobbytech BX8SL Runner User manual

Hobbytech

Hobbytech BX8SL Runner User manual

Hobbytech WILD SURVIVAL CRX User manual

Hobbytech

Hobbytech WILD SURVIVAL CRX User manual

Popular Motorized Toy Car manuals by other brands

Toro MB TX 2500 Operator's manual

Toro

Toro MB TX 2500 Operator's manual

Jamara 402117 instructions

Jamara

Jamara 402117 instructions

Kyosho Inferno MP9e TKI instruction manual

Kyosho

Kyosho Inferno MP9e TKI instruction manual

Rollplay W458AC-F Owner's manual and assembly instructions

Rollplay

Rollplay W458AC-F Owner's manual and assembly instructions

Xray X12 instruction manual

Xray

Xray X12 instruction manual

Hasbro My Little Pony Twilight sparkle user manual

Hasbro

Hasbro My Little Pony Twilight sparkle user manual

FMA Direct SCKOK1250-15C-1P2S instructions

FMA Direct

FMA Direct SCKOK1250-15C-1P2S instructions

Amewi GB261H manual

Amewi

Amewi GB261H manual

THUNDER TIGER PHOENIX BX RTR - parts catalog

THUNDER TIGER

THUNDER TIGER PHOENIX BX RTR - parts catalog

Awesomatix A800 instruction manual

Awesomatix

Awesomatix A800 instruction manual

Kyosho MINI-Z Racer MR-015 RM Type instruction sheet

Kyosho

Kyosho MINI-Z Racer MR-015 RM Type instruction sheet

DICKIE SPIELZEUG RC Desert Runner operating instructions

DICKIE SPIELZEUG

DICKIE SPIELZEUG RC Desert Runner operating instructions

ACME A2033T FLASH instruction manual

ACME

ACME A2033T FLASH instruction manual

Tekno RC EB48.2 manual

Tekno RC

Tekno RC EB48.2 manual

Associated Electrics Rival MT10 Manual & catalog

Associated Electrics

Associated Electrics Rival MT10 Manual & catalog

Famosa FEBER Disney Princess Roadster manual

Famosa

Famosa FEBER Disney Princess Roadster manual

Amewi FR16 manual

Amewi

Amewi FR16 manual

Jiajia JJ298 instruction manual

Jiajia

Jiajia JJ298 instruction manual

manuals.online logo
manuals.online logoBrands
  • About & Mission
  • Contact us
  • Privacy Policy
  • Terms and Conditions

Copyright 2025 Manuals.Online. All Rights Reserved.