Hobie MAX RACE User manual

1
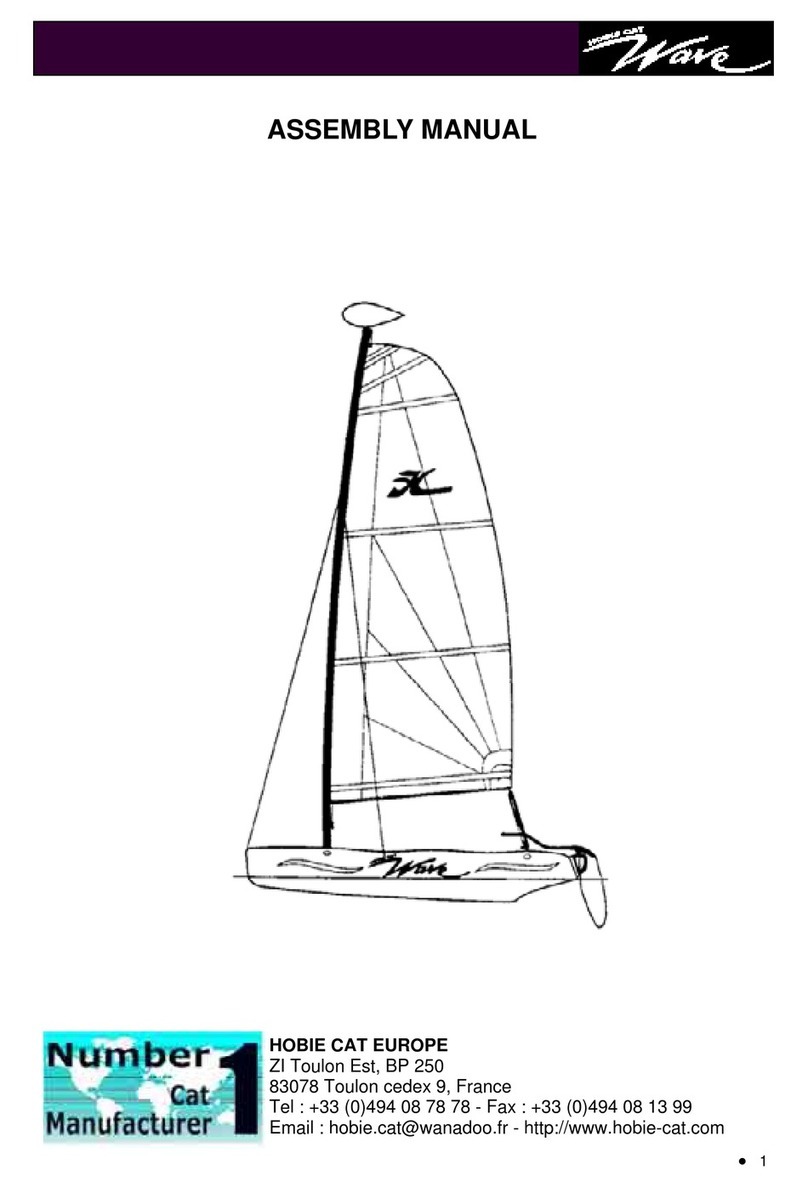
ASSEMBLY MANUAL
Last up-date : January 2005
HOBIE MAX RACE

2
Necessary tools
⇒
2 spanners nr 17
⇒
1 pair of niversal pliers
It is advisable to be at least two people to
assemble the Hobie Max
List of the parts
LIST OF THE PARTS
⇒ 2 hulls
⇒ 1 front crossbar with self-tacking jib
tracak
⇒ 1 rear crossbar (trampoline lacing
posts)
⇒ 1 Mast
⇒ 1 Boom
⇒ 1 one-piece trampoline with vectra
line + fibreglas rod
⇒ 1 part bag (wires)
⇒ 1 rigging bag
⇒ 1 ropes bag
⇒ 2 Rudder assemblies
⇒ 1 Tiller crossbar
⇒ 1 Tiller extension
⇒ 1 mainsail + battens (7)
⇒ 1 jib
⇒ 1 trumpet spi kit (composed of one
asymmetrical spinnaker, one
polyester trumpet, one spi bag, one
rigging kit + ropes)
CAUTION - DANGER
ALUMINIUM MAST - STAY AWAY
OF ELECTRICAL WIRES
TABLE OF CONTENT
List of the parts..............................2
Hull assembly................................5
Trampoline.................................6-7
Rudders, tiller and tiller extension.8
Preparation of the mast.................9
Spreader .....................................10
Mast assembly............................11
Stepping the mast.......................12
Trapezes.....................................13
Boom...........................................14
Mainsail.......................................15
Cunningham................................16
Jib................................................17
Jib self tacking system ...............18
Jib car control..............................19
Mainsheet...............................20-21
Spinnaker kit ...............................22

3
List of the parts
1 2 3 4
5 6
1
2
3 4 5
6
7
8
9
WIRES :
1. Shrouds
2. Bridles
3. Forestay + pigtail
4. Trapeze cable crew
5. Trapeze cable skipper
6. Rigid forestay
7. Kit trapeze handles skipper
8. Kit trapeze handles crew
9. Spreader wires
ROPES :
All ropes are labelled with ref.
number and name. Please check
carefully before using.
1. Mainsheet
2. Righting lline
3. Cunningham line (red)
4. Jib halyard
5. Jib line
6. Rotation line
Trumpet spi kit
1. Spinnaker sheet
2. Spinnaker halyard
3. Tack line
4. Pole fixation line
5. Trampoline rig
6. Trumpet screw
7. Single block for spi head
8. Sister block
9. Shackle 4 mm
10.& 11 2 pole blocks + 2 plastic springs + 2
shackles 6 mm.
1 2 3
4
5
6
7
8 9
10 11

4
List of the parts
Rigging bag
All pieces are labelled with name and reference number. Please carefully check the labels.
1. Spreader bars
2. Stay adjuster
3. Cunningham cam cleat (at tge mast base)
4. Heart block
5. Hull plugs
6. Shroud anchor bars and stay adjusters
7. Mainsheet fourfold block
8. Mainsheet threefold block
9. Silicone
10. Stop balls and hull screw caps
11. Shackles
12. Gooseneck vertex with pin and split ring
1
2
3
4
5
6
7
8
9 10
11
12

5
Fix the pole to the middle of the front crossbar
Hull Assembly
Position the hulls in parallel with the
inner sides fa-cing the ground.Lift
the right hull. One person straddles
the hull tohold it in place. The other
person applies the siliconesealant
(for waterproofing) around the screw
holes.
1
Take the front crossbar (with
dolphin striker). Place itin its
support so that the trampoline
track faces therear of the boat.
Insert the two bolts. Pass
yourhand through the inspection
port to position the nutsand
washers onto the screws photo).
2
Fasten loosely.
Apply silicone sealant around the screw holes at
theback of the hulls. Place the rear crossbar on the
rightside. Insert the bolts, washers and nuts as
shownfor the front crossbar. Do the same thing for
the leftside.Once the frame has been mounted,
tighten all thebolts fully and then install the lock nuts.
3
and place the other end on the
ground.
It is advisable to check the fastening of the
4
Do not forget to put the plugs before sailing. On
land take the plugs off to drain the water.

6
Unfold the trampoline. Note that the trampoline has side tension lines that are already pre-threaded.
Insert the front edge of the trampoline into the track at the left, rear side of the front crossbar. Continue
feeding the trampoline into the track and position it in the center. line up the grommet in the center of the
trampoline with the dolphin striker post to ensure it is centered.
Take one of the side tensioning lines and pass the line
through the pad-eye that is fixed to the front crossbar.
Then tie with a bowline knot the line onto the grommet of
the trampoline near where the rope exits the trampoline.
Repeat this step at the opposite side front corner.
Trampoline
1
2
Move to the rear of the trampoline. Very closely to where
the side tensioning line exits the rear of the trampoline tie
a loop. ensure you pull the side tensioning line firmly as to
tie the loop as closely to the trampoline where the rope
exits as possible. Tie a bowline or a similar loop in the
line which will be used for a 4:1 purchase of the side
tensioning lines. Repeat this step for the opposite side
rear corner.
Now take the tale of the side
tensioning line and pass the
rope through the pad-eye
mounted on the rear cross beam
closest to where the line exits
the trampoline. Then pass the
line back through the loop tied in
step3. Again go through the
pad-eye on the beam and back
through the loop. This will
provide a 4:1 purchase. Pull the
line slightly as to take some tension for the sides but do not
completely tension at this stage. Repeat this step for the opposite
side rear corner. Ensure that the trampoline is still centered.
3
4

7
Trampoline
Again, take the side tensioning line and very
firmly pull the line. Once as tight as possible tie
off the line with an adequate knot. Repeat this
for the opposite side rear corner.
7
NB : It is important that the trampoline be strongly tightened.
Check the tension on a regular basis.
Find the trampoline rod and insert it
into the rear of the trampoline.
Commence lacing the rear of the
trampoline. The lacing line starts at the
left, rear lacing button on the rear
crossbar. Lace the rear of the
trampoline as tightly as possible as per
the photographs and diagrams
supplied. Continue across the rear
crossbar and tie off securely when
Début
5
6
Now, once the side tension line has
been tied off, using the long tail, pass it
back through the grommet at the rear
corner of the trampoline near where the side
tensioning line exits the trampoline. Then pass
the line through the pad-eye on the rear
crossbar. Again pass the tail through the
grommet on the trampoline and pull the line
firmly. Once the sides of the trampoline have
been further tightened, tie off the line and hide
the tail under the trampoline. Repeat this step
for the opposite side rear corner.
8

8
RUDDER
Identify the right rudder from the left rudder (green
sticker = right ; red sticker = left) As shown on the
picture, align the holes of the rudder castings onto
the gudgeons.
1
Rudder assembly Tiller bar
& Tiller extension
Insert the pin that is linked to the lower gudgeon in
order to ensure the rudders. This pin will avoid the
rudders to jump out of the gudgeons in case of
capsizing.
2
TILLER BAR
Take the tiller crossbar and insert the right
side into the right rudder arm and the left side
into the left rudder arm.
3
TILLER EXTENSION
Take the yoke connection of the tiller extension and fix
it into the middle of the tiller crossbar .
Then fix the tiller head into the yoke
connection as shown on the picture.
4
5

9
Mast set-up
Place the mast onto two supports (eg: two pieces of
polystyrene).
Unroll all the cables and fix them using a shackle to
the lower hole on the mast tang as shown on the
drawing.
1
NOTA : The spectra wires of the crew trapeze are
knotted on the shroud wires and the spectra wires of
the skipper’ trapeze are inserted directly in the
shackle pin.
2
Link the big stay adjuster to the forestay.
3
IMPORTANT : Do not forget to attach the jib
halyard rope to the small single block at the
end of the pigtail. Tie off the two ends of the
jib halyard near the base of the mast.
4
Spinnaker kit :
Attach the halyard block to the shackle on the upper part
of the mast. Insert the spi halyard in the block sheave as
shown on the picture.
5
1- Shrouds
2 - Crew trapeze
3 - Skipper trapeze
4 - Forestay and pigtail
1
2
3
4

10
Spreader bars
Slide the diamond Wires into the corresponding slots at
the end of the spreaders. Ensure the black plastic roller
is above the spreader arm. It may be necessary to
release tension from the diamond wire turnbuckle
adjuster near the base of the mast. Secure the
diamond wire with the thin wire supplied. Pass the wire
through the small hole near the spreader tip, bend the
wire and on one side of the spreader turn the wire
around the thicker diamond wires two or three times.
Do the same for the other side of the spreader. Cut off
the excess thin wire ensuring it is bent neatly onto the
diamond wires as to prevent the wire from tearing the
sails. Once secured, tape over the spreader tips to
further ensure there are no sharp edges.
Unroll the diamond wires.
Attach the joint end of the
diamond wires onto the
turnbuckle adjuster near the
base of the mast (level with the
security sticker) using the pin
and split ring.
Take the loose ends of the
diamond wires and hold tight to
adjust to the same length, using
the turnbuckle adjuster which is
located on the lower section of
one of the wires. Once they are
the same length, attach the two
wires to the shield plaes
situated on each side of the
mast under the mast tang.
3
1
Assemble the spreaders on the
centre of the mast. The spreader
root attaches to the front of the mast
section onto the one-piece stainless
steel strap. The spreader rake
adjuster barrel attaches on each
side to the individual fittings on both
sides of the mast nearer the sail
track. To adjust the spreader rake,
adjust the length of the barrel (by
winding in or out) and measure from
the wire positions at the tips of each
spreader.
Caution : do not try to adjust
spreader rake while diamond wires
are tensioned. Only adjust under no
diamond wire tension and screwing
the barrel by hand.
2

11
Attach the bridle wires to the bow tangs.
Mast preparation
Lay the mast on top of the boat with the sail track to
the bottom and the mast base toward the bows.
Place padding under the mast to prevent scratching.
1
Lay the shroud wires and trapeze wires down each
side of the mast. Secure the trapeze wires
temporarily near the base of the mast.
2
Ensure that the shroud anchor pins are sealed, tight
and pointing at 90° to the centreline of the hull. Attach
the twist toggles and the spi halyard blocks to the
anchor pins using the 6-mm bow shackles provided in
the spi kit. Attach the stay adjusters to the twist
toggles with the clevis pins and rings.
Attach both shrouds into the top hole of the respective
stay adjusters. This is only a temporary position for
raising the mast.
3
4

12
Link the bottom of the rigid forestay to the
spi pole. Fix the
spectra bridles
as shown on
the picture above.
Once the mast is secured, remove the pin from
the base of the
mast which can
Place the mast foot on the mast base
and place the pin in it. This prevents
the mast from leaving its base when
lifted. Check that the wires are not
tangled.
1
Stepping the mast
Then, with one person on the trampoline, the second person lifts the mast
by the top and moves down the mast until the person on the trampoline
can take the mast on their shoulder. Then this person pushes his feet
against the rear crossbar and pushes the mast forward with the weight of his body.
2
The second person
goes in front of the boat
and right the mast in
pulling on the trapeze
wires. Once the mast is
upright, link the rigid
forestay and the two
bridles to the stay
adjuster that is at the
end of the forestay as
shown on the picture.
5
now turn freely.
Fix the cunningham
6
blocks on each side of the base of the mast.
The first time you raise the mast, it is advisable to have
CAUTION - DANGER - ALUMINIUM
MAST - STAY AWAY OF
ELECTRICAL WIRES
4
3

13
Trapeze
Release the trapeze wires from the base of the mast. The crew’s trapeze has the clamcleat swaged to
the wire. Ensure that the crews trapeze wire is positioned in front of the shroud.
1
Attach the trapeze handles and kits to the
trapeze wires.
Pass the trapeze shock cords underneath the
trampoline and up through the grommets at the
side of the trampoline. Attach to the trapeze
system as shown in the photographs.
2
CREW / EQUIPIER SKIPPER
Rope lock assembly
1 2
3 4

14
Boom
Tie one end of the rotation line to the front of the clamcleat on top of the boom. Pass the other end of the line
through the end of the rotation arm on the mast. Take the line back through the clamcleat and fit a plastic ball
stopper at the end.
3
Slide the outboard end of the boom through
the webbing loop attached to the clew of the
mainsail. Connect the shackle on the boom
outhaul line to the grommet in the clew of
the mainsail.
1
Connect the boom to the mast using the
hinge vertex, clevis pin and split ring.
2

15
Grand-voile
Always point your Hobie directly into the wind before you raise the mainsail.
Unfold the mainsail onto the trampoline and insert each batten into its respective pocket. The battens are
numbered (from 1 to 7) the smallest (N ° 1) goes at the top of the sail and the longest (N° 7) at the bottom of
the sail. Attach the batten end caps with the batten lines as shown on the photos.
1
Undo the main halyard rope which is rolled around the mast.
Pass one end through the hole in the mainsail head plate and
stop with a 8 figure knot.
2
Go onto the trampoline. Feed the luff of the mainsail
into the opening of the mast track ensuring that the
hook is on one side of the mast and the halyard rope
on the other side. Raise the mainsail by pulling the
halyard and feeding the sail until it reaches the top.
When the sail is all the way up, turn the mast slightly
to the left in order to hook on the mainsail. Insert the
bottom end of the luff into the base of the mast track.
Roll up the halyard rope and place it into the pocket
on the trampoline at the foot of the mast.
3

16
Take the righting line from the rope bag. Attach it to the dolphin striker post under the front crossbar (photo).
Pass it under the trampoline through the grommet at the base of the mast. Fold up the end of the line and stow
it in the trampoline pocket at the base of the mast.
Cunningham & Righting line
1
2
Attach the cunningham blocks (with the hooks) into the
grommet of the mainsail tack. Take the cunningham
line and feed as follows : (NB : the line must go through
the inside of the rotation arm).
- Start from the cunningha block ont the left side of the
mast. Feed the rope into the cleat around the sheave
- push the cord up through the first sheave of the left block
from back to front
- take the rope back down, thread it through the left sheave
at the base of the mast from front to back
- take it up through the second sheave of the left block from
back to front
- take it back down and through the single block,
- take it back up into the first sheave of the right hand block
from front to back
- take it back down through the sheave at the right of the
mast base from back to front
- take it up through the second sheave in the right block
from front to back
- finally thread the line through the cunningham block and
in the cleat.

17
Using the supplied bow shackle
connect the tack to the bottom
of the rigid forestay
Jib
Cleat the halyard as shown above.
Unroll the jib and open the zipper on the luff.
Shackle the jib head to the jib halyard. Then position the jib and the halyard
line against the forestay. Close the zipper as the sail is raised, ensuring that
the halyard line remains inside the zipper.
1
2
3
Attach the jib block to the tack point of the sail.
See following page to assemble the self-tacking
jib system.
4

18
Jib sheet (self tacking system)
Take the white
spectra rope
and to one end
tie on to the top
of the middle
size block.
Now take the yellow thicker sheet rope and starting from one
swivel cam cleat on the front crossbar pass the rope under the
thinner white spectra rope through the middle size pulley (2)
and back to the other side
swivelling cam cleat (also on the
front crossbar).
Once the jib is hoisted, attach the
carbo block (5) with shackle to the
jib clew and use the yellow sheet
rope to trim.
Firstly, attach the smallest pulley supplied in the kit to
the spinnaker pole centre pad eye (also where the
centre supports attach for the spinnaker pole). Attach
this pulley with one of the shackles supplied.
1
Lead the other
end of this rope
through the
smaller pulley that
was shackled to
the spinnaker pole
in step 1.
2
then back to the
carbo pulley
attached to the
traveller car on the
self-tacking track.
3
This spectra then passes
through the other carbo
block (also supplied in kit
which attaches with shackle to the
jib clew) and then ties off to the
carbo block mounted on the
traveller car. Tie a bowline knot
through the hole in the middle of
4
5
6
Further Suggestions
⇒ To furl the jib you will need to untie the knot on the traveller car for the jib and tie the sheet off to the jib
clew block. Otherwise the jib will not furl completely.
⇒ As the track is mounted on the front section of the beam you may find that the hole you use on the jib
clew board may now have to become one of the lower, more forward holes. Also it may be necessary to
tack the jib at a lower position on the forestay adjuster.
⇒ The spinnaker halyard system still works exactly the same as the standard Hobie Tiger original system
however it has moved to a more outboard position on the beam.

19
Self-Tacker traveller car control
To adjust the limit of the jib traveller car simply pull or
release the thin line and replace in the cleat once set.
It is recommended the car be situated over or slightly
inside the traveller post as shown in the photographs
for ‘round the buoy’ type racing.
Situated directly above the eye-let is a small black
cleat. The rope also passes through the black cleat
and once through tie a figure eight knot at the end.
This prevents the rope from falling through the cleat.
The line then passes under the
front cross beam and through
an eyelet just to the left of the
center of the trampoline.
The line then passes through
the plastic pad-eye that is fixed
to the spinnaker pole near the
base. This line passes from the
front to back through the pad-
eye.
Take the 3mm piece of line and tie it onto
the center of the jib traveller car.
1
2
3
4
5

20
Mainsheet system
Shackle the mainsheet
ratchet block to the top of
the main traveller car.
Thread the tail of the main sheet through the swivel cleat assy
on the rear beam, through the sheaves on the traveller car, down
through the eyestrap on the rear of the beam and tie a figure «8»
knot in the end.
Your mainsheet system has been pre-assembled for
you by your Hobie dealer. If not, see the following
page for assembly instructions.
1
Shackle the boom
block to the boom
block hanger.
2
3
4
Table of contents
Other Hobie Boat manuals

Hobie
Hobie 17 User manual

Hobie
Hobie Mirage Inflatables User manual

Hobie
Hobie Getaway User manual

Hobie
Hobie WILD CAT User manual

Hobie
Hobie 14 User manual

Hobie
Hobie Quest 13 User manual

Hobie
Hobie HOBIE MAUI User manual

Hobie
Hobie catsy User manual

Hobie
Hobie Mirage Pro Angler User manual

Hobie
Hobie Mirage Drive Assembly instructions

Hobie
Hobie Mirage Drive User manual

Hobie
Hobie Mirage Tandem Island User manual

Hobie
Hobie SPORT CRUISER 21 User manual

Hobie
Hobie WILD CAT User manual

Hobie
Hobie 18 SX User manual

Hobie
Hobie Mirage Pro Angler User manual

Hobie
Hobie Mirage Outback User manual
Hobie
Hobie PACIFIC 18 Operating manual

Hobie
Hobie Wave User manual

Hobie
Hobie Float Cat Manual