Hobie Getaway User manual

CAUTION / SAFETY TIPS
•Watch for overhead power lines. Never rig,
trailer or sail the boat near overhead power lines.
Contact with a power line could be fatal.
•Sail to your experience. Do not try to do more
than you can. Do not take the Getaway out in the
surf and do not head out for the ocean unless you
are a real professional.
•Wear a life jacket. Wearing life vests while sailing
is important for everyone. Due to the large number
of novice sailors that have purchased the Getaway,
it is even more important to review this safety
issue. Wearing a life vest is a smart thing to do.
Also, a sailboat could sail away by itself if a person
were to fall overboard. The best advice to a sailor
is to stay with the boat. If they happen to fall
overboard, or when righting the boat, they should
hold onto the boat and not let it get away.
•Learn the right-of-way rules and when in
doubt, give way to others.
•When trailering the Getaway be sure to tie the
boat and all the loose parts to the trailer in a
secure manner. Stop and check the tie downs
often.
•Hobie Cat does not recommend leaving the
Getaway in the water on a mooring. Accelerated
wear to the boat and rigging will be experienced.
Damage to the hull material is possible. Limitation
of the mast rotation and tensioning of the rigging
are required to lessen this wear. Inspect rigging
often and tape rigging rings and shackles to prevent
loosening.
For your nearest HOBIE dealer
or
for help and information call:
1 (800) HOBIE - 49
HOBIE CAT
4925 Oceanside Blvd.
Oceanside, CA. 92056
Phone (760) 758-9100 Fax (760) 758-1841
Assembly
Manual

WELCOME TO THE
HOBIE WAY OF LIFE
Congratulations on the purchase of your new HOBIE Getaway and welcome to the HOBIE® sailing family. The HOBIE
Getaway cannot be outgrown. It can be sailed by children up through senior citizens. A single adult can sail it at top
performance - and a crew of four can cruise in comfort.
We offer this manual as a guide to increased safety and enjoyment of your new boat. The purpose of this publication is to
provide easy, simple and accurate instructions on how to get your Getaway ready for the water. Please read them carefully
and familiarize yourself with the boat and all of the parts spread before you.
Whether you are a new sailor or a veteran of many years, we recommend that you read this thoroughly before your first sail
and TRY IT OUR WAY FIRST! If you are new to sailing, this manual alone is not intended to teach you how to sail. There are
many excellent books, videos and courses on the safe handling of small sailboats. We suggest that you contact your local
sailboat dealer, college or Coast Guard Auxiliary for recommendations.
Watch for overhead wires whenever you are rigging, launching, sailing or trailering with the mast up. CONTACT OF THE
MAST WITH POWER LINES COULD BE FATAL! Be certain that the rigging area and the area that you will be sailing in are
free of overhead power lines. Report any such power lines to your local power authority and sail elsewhere.
We take pride in presenting the Getaway to you and hope that you'll take as much pride in owning her.
Fair winds and good sailing!
17
TRAILERING
CAUTION: Boat and mast should be securely attached to
trailer with adequate tie-down straps. Failure to do so could
cause extensive damage or serious injury!
LOADING YOUR TRAILER
The weight of the boat, equipment and additional gear should
never exceed the manufacturer's rated weight capacity. Proper
distribution of the load is of vital importance. Too much weight
on the hitch will cause "tail dragging" of the towing vehicle,
impairing steering and raising headlights into the eyes of
oncoming traffic. Too little or negative weight on the hitch, and
the trailer will sway or "fishtail". The solution to proper
distribution is often adjusting movable gear. A more
permanent solution is to shift the axle position before taking
your boat to water the very first time.
TOWING
Extra caution is necessary when towing any trailer. The
heavier the rig, the more time required to accelerate, pass,
and stop. For this reason, the maximum speed for vehicles
with trailers is less than without a trailer in most states. A long
rig requires a larger turning radius. Curbs and obstructions
should be given wide clearance. Most boats on trailers
obstruct the rear view of the driver. When this happens, an
additional rear view mirror on the right side of the towing
vehicle is required by law.
The trailer boatman should be familiar with traffic and highway
laws relating to the towing of trailers. Towing a Hobie has
particular hazards that should be mentioned. A Hobie is very
wide. Obstacles should be given plenty of room when you are
passing them. Tie down straps or lashings should be of
sufficient size and diameter and placed on all four corners.
The mast support on a trailer is subject to a lot of side-to-side
motion and consequently may fatigue where it is welded to the
trailer. All this can be reduced by tying a line from each bow to
the mast support. This will stiffen the rig up and prolong the life
of the trailer.
LAUNCHING AND RETRIEVING
Prepare boat for launching at the top of the ramp or parking
facility. Remove all tie-down straps, check boat plugs and
fasten boat painter. Do not release winch line until the boat is
in the water. Back trailer to the left if possible; backing left
gives better launching visibility. Avoid dunking wheel bearings
wherever possible. Never leave the towing vehicle unattended
on the ramp with only the parking brake set. If vehicle must be
left while on the ramp, set transmission in "park" or first gear,
in addition to setting the parking brake. In retrieving your boat,
make sure that the boat is properly placed on the trailer. Pull
trailer up steadily to prevent spinning the wheels.
MAINTENANCE
Lights: Most state laws require two red taillights on the rear
that may be combined with the stop and turn signals. Vehicles
over 80 inches in width require clearance lights. If lights are
dunked, waterproof light fixtures should be used. If water is
allowed to enter, the lamp may crack and short out the entire
system. Water also promotes contact corrosion. Always carry
spare lamps. The wire coupling to the towing vehicle should
be high enough to stay dry. Never rely on the trailer hitch for
ground connection. Four-pole connectors should be used.
The mast should not extend over three feet behind the rear
light assembly.
Wheels: Tires should ALWAYS be inflated to manufacturer's
recommended pressure. Always carry a spare wheel and a
jack that fit the boat trailer. If wheel bearings are always
dunked, waterproof bearings and caps should be considered.
If water is allowed into the hub, lubricating grease will float
away and bearings will burn out or seize, causing damage and
a safety hazard. Waterproofed bearings should be inspected
prior to each boating season, others more often. Special care
should be given when traveling on unimproved roadways with
small diameter wheels.
If a spare wheel is not available, a spare wheel bearing set
should be taken on long trips in case the grease seal has been
broken.
FRAME AND ROLLERS
Rust should not be allowed to accumulate. Remove rust and
repaint with anti-rust paint. Some trailers offer galvanized
coating to prevent rust. Rollers should roll freely and should
not have checks, breaks or flat spots.
TOWING VEHICLE
Most vehicles are limited in towing capacity. Towing heavy
loads places extra demands on the engine, transmission,
brakes and other systems vital to the vehicle. Towing
"packages" are available through most auto dealers and
should be considered for heavy boats.
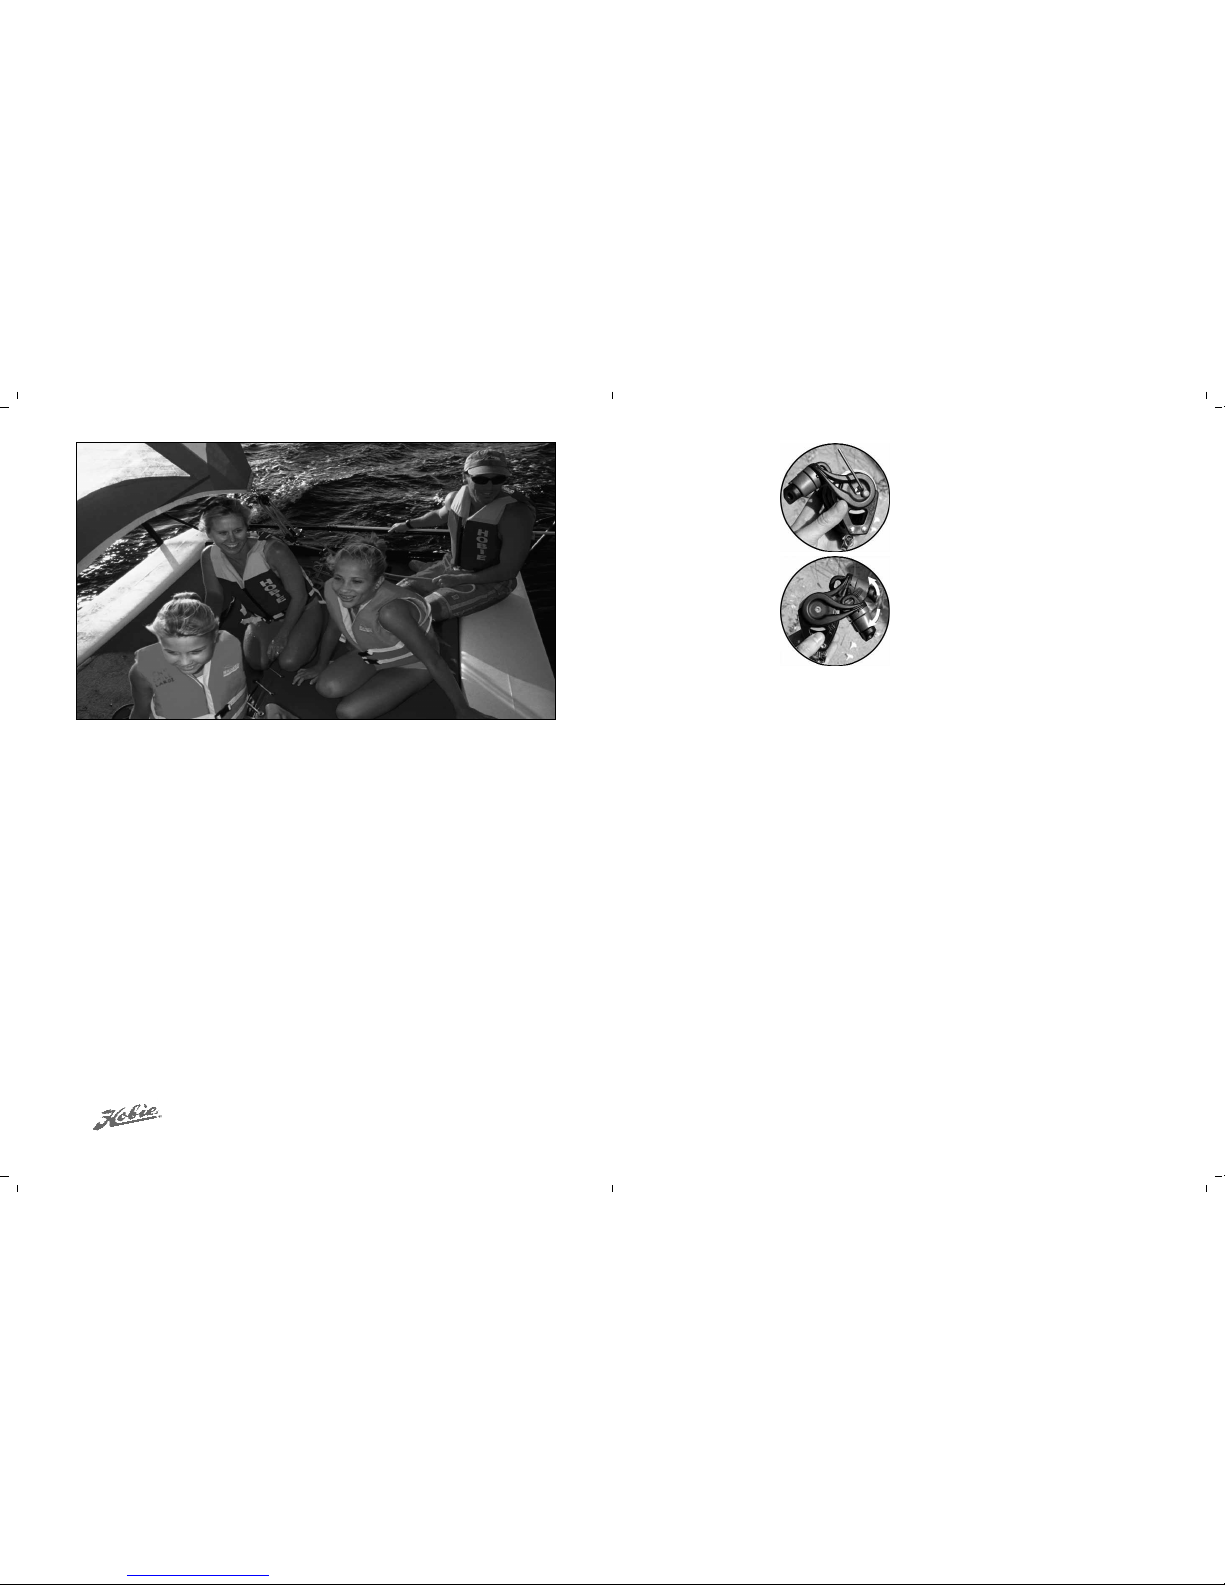
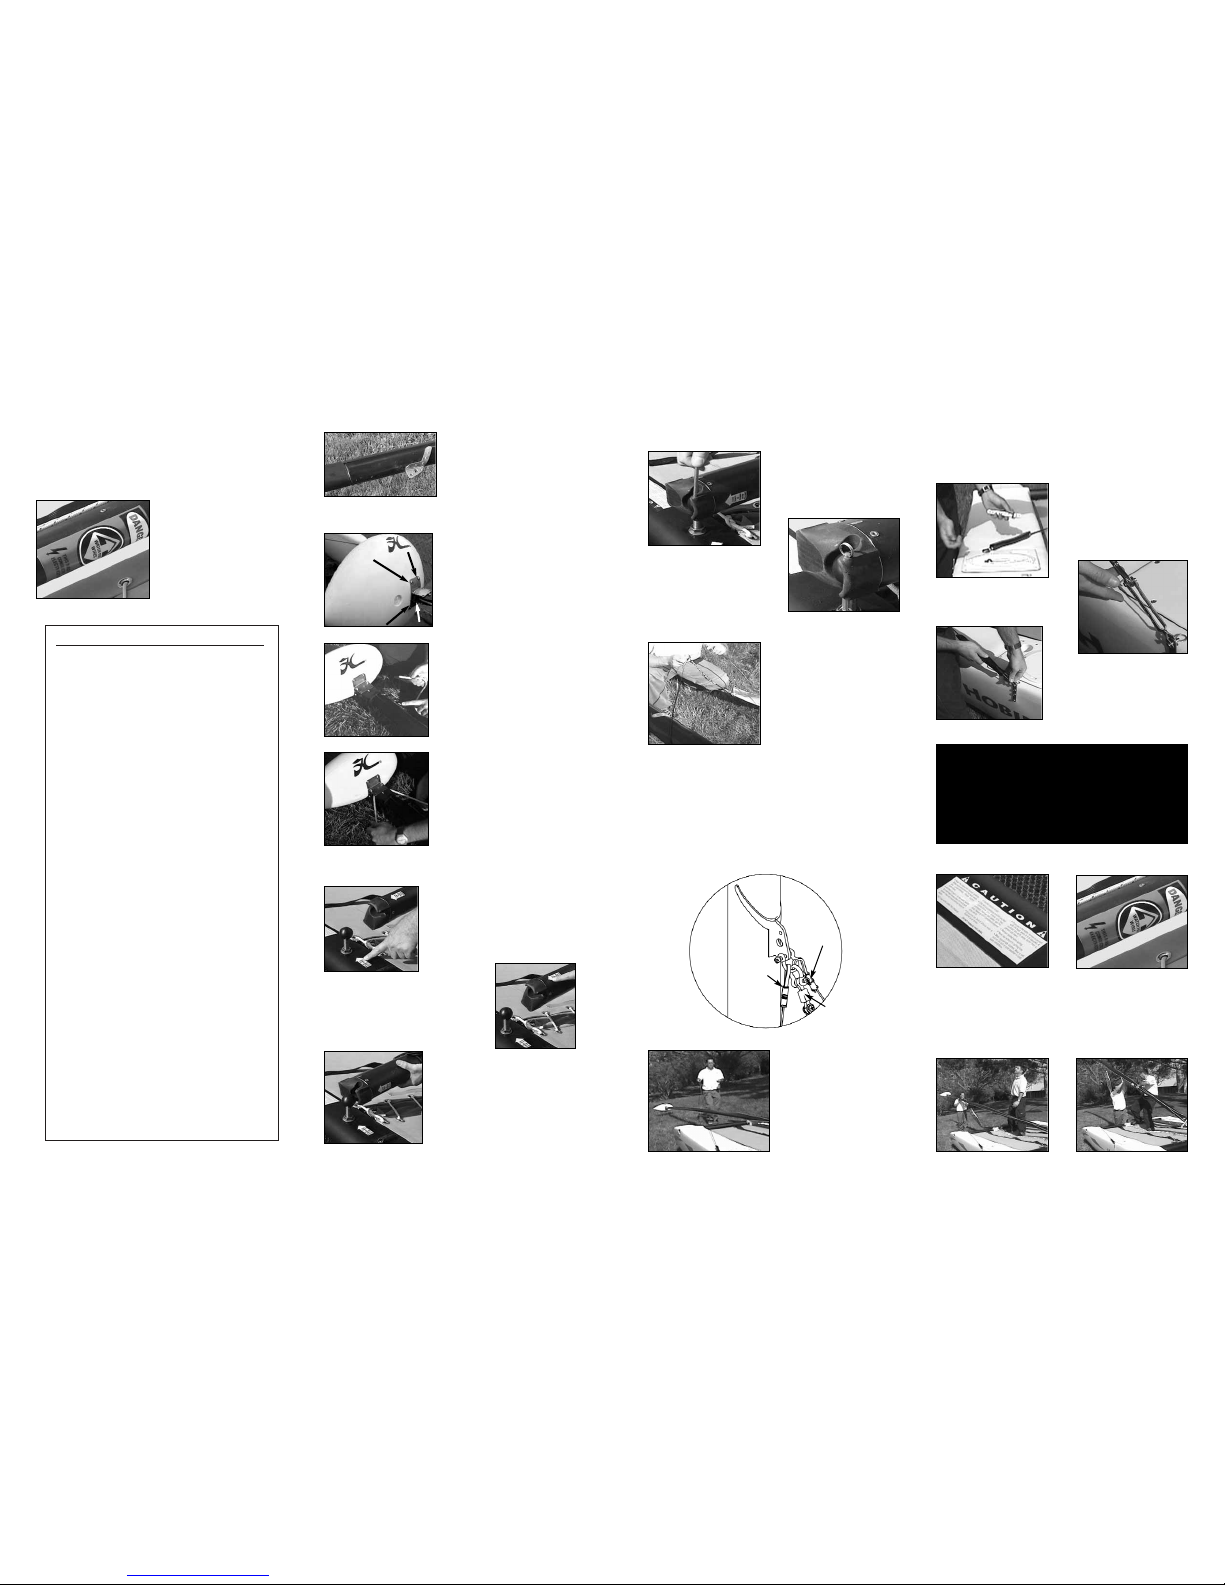
1. Use the small Allen wrench
provided in your rig kit and
loosen the small hex head
screws on each side of the
block. You will only need to
loosen each bolt 1-1/2 turns.
2. With the screws loosened,
the cleat arm should be free to
move. Adjust the cleat to the
best angle and tighten the
screws back up on each side.

16
DOCKING
Docking the Getaway properly will prevent damage. Always
dock and rig on the leeward side of a dock (the side the wind
reaches last). Come in slowly and always be aware of the
wind direction so you can properly de-power the boat when
needed. The stronger the wind the more difficult the docking
will be. Until you feel confident, you may want to practice with
a friend who will remain on the dock and help slow you down if
necessary.
BEACH LANDINGS
Landing on a beach is simple. The idea is to reach the beach
in the point of sail nearest straight into the wind as possible.
This will assure that you can properly de-power the sail once
beached.
Approaching a beach when the wind is blowing from the beach
out towards the water will require some planning so that you
maintain power. Turn into shore just before the hulls or
rudders touch bottom. Plan so the final tack towards the
location you choose to land is the tack that is nearest straight
into the wind. Get a little closer to the beach than you need on
the pervious tack to account for wind shifts in direction and
speed. This will give you a little room for error. This will allow
you to point a little further away from the wind after the tack to
gain speed before heading up into the beach to de-power at
the last moment.
When approaching a beach when the wind is blowing onshore,
sail in towards the beach from either side of the landing spot.
Sail in just short of touching the bottom with the rudders. Allow
some distance to turn the boat out towards the water and into
the wind just out from the landing spot. Turn sharply to head
into the wind and stall the boat. Raise the rudders and drift
back onto the beach.
Always keep the boat pointed into the wind while beached and
keep the sail trimmed out and un-cleated.
MAINSHEET BLOCK CLEAT ANGLE ADJUSTMENT
The mainsheet cleat angles are pre-adjusted from the factory
at an angle that is best for using the wings on the Getaway. If
you are not using the wings, you may want to adjust the cleat
angle for more ease of use because you are seated at a lower
position. The position of the cleat is often personal
preference. Personal preference. Some sailors prefer the line
to cleat, other want to have the line free run at all times unless
they pull it up to cleat. Follow the instructions on the next
page to adjust your mainsheet block cleat. (See Adjustment
Diagrams on Next Page)
When launching from a beach where the wind is blowing from
the beach towards the water you simply keep the boat pointed
into the wind. Drift backwards with the rudders in the up
position and your weigh towards the front of the boat. Stay
forward as the boat drifts into deeper water.You can hold the
sail out to catch wind backwards to increase reverse speed.
Then move to the rear and lower the rudders. It will be easiest
to lower only one rudder while moving backwards. Then lower
the other when the boat begins to move forward again. Be
aware of the intended direction you wish to sail when lowering
the rudder and steer the boat as the rudder drops into the
water. There will be a lot of force on the rudder to turn one
way or the other when going backwards. Plan ahead and steer
the rudders so that they will be pointing in that direction before
dropping it into the water. Steer the boat while going
backwards so the bow turns away from the wind and toward
the direction you wish to sail. As the sail begins to fill with
wind, the boat will slow then begin to move forward. Trim in
the sail and off you go.
RIGHTING THE BOAT
If you tip the boat over,
stay with the boat. The
boat will not sink and
is easy to right. It is
not necessary, but it is
easier, to right the
boat when the bow
and the mast are
pointed into the wind
as in the following
diagram.
There will be less wind
resistance and better
control in this position.
Be sure the mainsheet
is released, then swim
around to the bottom
of the boat. Skipper
and crew should climb
up on the hull and stand up. Using the righting line, skipper
and crew pull the righting line that is against the upper hull and
hold the line while slowly leaning back away from the
trampoline. Lean to approximately 45 degrees for best
leverage. As the mast and sail lift out of the water and the
upper hull begins to drop back into the water, drop down to
your knees then into the water. Hold onto the righting line near
the crossbar or the crossbar itself near the hull that you were
standing on. This will prevent the hull from being lifted into the
air by momentum which could cause the boat to capsize once
again. Be well aware of the hull and crossbar coming down
over your head. Holding the crossbar or righting line will also
insure that you remain with the boat when it is righted. Climb
aboard and continue sailing.
Wind
Direction
1
This assembly manual takes you step-
by-step through the setting-up and
sailing of your new HOBIE Getaway.
This manual will help you understand
each part in detail.
Setting up your Getaway PAGE
Getaway terminology............................2
List of parts...........................................3
Knots to use .........................................4
The hulls...............................................4
Crossbars & Trampolines..................4-7
Mast assembly ..................................8-9
Mast Wires ...........................................9
Stepping the mast ...........................9-10
Main Sail and Battens ...................10-11
Raising the main sail ..........................11
Downhaul and adjustment..................11
Mainsheet...........................................12
Rigging the jib sail ..............................12
Rudder assembly ...............................13
Tiller cross bar and Extension ............13
Righting line........................................13
Sailing your Getaway .................PAGE
Balancing the boat ...................................14
Steering ....................................................14
Sail power.................................................14
Turning......................................................15
Launching.................................................15
Righting the boat......................................15
Docking and landing ................................16
Trailering...................................................17
Safety tips ..................................Back page
GETAWAY ASSEMBLY MANUAL

2
Getaway Terminology
MAST
DOWNHAUL
RUDDER CASTINGS
TILLER ARM
SHROUD
HULL
BRIDLE
FORESTAY
SAIL CLEW
MAIN SHEET SYSTEM
RUDDER
MAIN
SAIL
BATTENS
FORESTAY / BRIDLE
ADJUSTER
MAST FLOAT
JIB
SAIL
OPTIONAL WINGS
15
TURNING
To tack or turn the boat into and across the wind to the
opposite direction (also known as "coming about"), follow the
points of sail guide illustration and take the boat to the close
hauled point of sail. This is when you are nearly 35 degrees
from sailing straight into the wind. With the boat moving
forward and not stalling, push the tiller away from you slowly.
When the boat is pointing straight into the wind the boat will
become level. Ease the mainsheet trim out just a little. At this
time move your body to the other side of the boat, switch
hands with tiller and mainsheet and begin to bring the rudder
back to straight. The crew should move across the trampoline
at the same time. The crew is responsible to ease the jib
sheet just after the main sail is released and sheet the jib onto
the new course before the mainsheet is trimmed. This action
by the crew will prevent the boat stalling head to wind. As the
boat comes across the wind and falls off onto the opposite,
close hauled point of sail, bring the tiller all the way back to
the straight position and pull the mainsail back in for the
proper sail trim. If you stall pointing into the wind and you
cannot steer the boat, refer back to the sail power description
concerning getting stuck in irons.
When sailing downwind, the turn from one point of sail across
to the other is called a jibe. The jibe is completed by turning
away from the wind (falling off) to the opposite point of sail
rather than into the wind as when tacking. Care must be taken
when attempting a jibe as the boat will be at full power and
you cannot easily de-power it without turning back into the
wind. Also, be aware that the boat will be less stable in this
maneuver as the sail will now have to swing clear across from
fully out one side of the boat to fully out the other.
To start a jibe, turn the boat away from the wind and let the
sail out slowly. Keep the turn going at a steady rate and begin
pulling the sail back in as the boat nears the straight downwind
direction. This will help prevent the sail from slamming all the
way across when the sail fills from the opposite side. Duck
below the sail to avoid getting hit as the wind fills the sail from
the opposite side and swings across the boat. Attempt to
control the speed of the sail while it crosses the deck by
maintaining some tension on the mainsheet. Then ease the
mainsheet out quickly as the boat turns past the downwind
direction onto the new point of sail. Trim the sail correctly for
the desired point of sail.
LAUNCHING THE BOAT
Launching the boat is easiest when the boat can be pointed
into the wind to keep it de-powered and floated into deep
enough water to lower the rudders. It is possible to launch in
shallow water with the rudders partly up. Try not to steer with
too much force on the rudders until you lock them in the down
position. Keep the sail loose and trimmed out completely until
you can power up and steer away from any obstacle. Trim the
sail in quickly to get the boat moving forward and steer away
from the wind slightly to prevent stalling into the wind.
RUDDER INSTRUCTIONS
This new rudder design has a simplified and more intuitive
function: to raise the rudder, raise the tiller; to lower the
rudder, lower the tiller. The rudder automatically locks into
either position and is held by spring-loaded detents. The
rudder will kick-up if beached or if an obstruction is hit.
LOCKING PIN
Attached to the side of
each rudder is a locking
pin. This pin is designed
to keep your rudder in the
“up” position during
transporting. Bumpy
launch ramps or steep
angled beaches could
cause the rudders to drop
down, causing the blade to
dig into the ground. To
install the pin, put the
rudder in the “up” position
and simply remove the pin
that is snapped to the
casting and insert it
through the hole in the
side of the rudder. When
you want to put the rudder
back down, remove the pin
and snap it back into the
side of the casting.
UP-KEEP AND PRECAUTIONS
1. When in use, make sure that the rudder is locked in the
down position. You will know if your rudder isn't down all the
way if steering feels heavy.
2. If used in saltwater, is it always a good idea to rinse rudder
assembly with fresh water.
3. If boat is stored outdoors for extended periods of time
without being used, remove rudder assembly and store
indoors.
4. Avoid storing rudder assembly in extremely hot locations
such as in direct sunlight in a vehicle with windows closed.

14
SAILING YOUR GETAWAY
Safe and sane guideline for the beginner; and an easy review
for the experienced.
Always wear a life jacket when boating.
BALANCING THE BOAT
When sailing, sit on the upwind side of the boat (wind on your
back) just in front of the tiller, facing the sail. Balance your
weight further outboard as the boat begins to tip or heal over
with the wind in the sails. Tuck one foot under the hiking strap
for balance. Use your hand that is forward to hold and control
the mainsheet. Use your hand that is aft to steer.
STEERING
Steer the boat by pushing the tiller away from you to turn
towards the wind. Pull the tiller towards you to turn away from
the wind. Keep the movement of the tiller to a minimum to
prevent over-steering. This will help you keep the boat moving
in a straight line as you pay attention to other watercraft and
sail adjustments.
SAIL POWER
Face the sail in order to pay close attention to the trim or
adjustment of the sail. When the front of the sail, just behind
the mast, luffs or flutters in the breeze, you lose power. To
start moving, pull the sail in just enough to stop the sail from
luffing. There are also short ribbons hanging on either side of
the sail. Follow the diagram of sail and course adjustments
above using the "tell tails" to get the most performance out of
the sail for all angles of sailing. The tell tails react to air flowing
over the sail and will help you see that the sail is pulled in too
tight or too loosely. If you pull the sail too tight you will stall
the sail power. Ease the sail out until it luffs, then pull it in just
a little until it stops luffing. You will adjust the trim whenever
the wind changes direction or you change course.
Refer to the sail trim diagram below for approximate sail
settings for the different points of sail or directions you will be
sailing. Note the "can't sail zone". You cannot sail in this
direction due to the fact that the sail will luff constantly when
pointed into the wind. If you get stuck in irons (or stop pointed
into the wind) you will need to reverse the rudder and push the
sail forward to back-wind it. The jib should be back winded by
the crew to assist. This will back the boat up. Reverse the
rudders and let the sail out until the boat is positioned more
across the wind (close reach). Then you can correctly trim the
sail and start moving forward.
SMALL PARTS
3
LARGE PARTS
You should have:
(2) Hulls with hardware
1(1) Mast float
2(1) Box of small parts
3(1) Sail, battens and sail bag
4(1) Forestay assembly with jib, bag
5(1) Tiller cross bar, Tramp rods
6(1) Front cross bar (Spreader)
7(1) Rear cross bar
8(1) Main cross bar (Mid)
with Trampoline
9(2) Easy Lock Rudder assemblies
NOT SHOWN:
(1) Upper mast section
(1) Lower mast section
(2) Trampoline lace rods
Check the boat and parts carefully to be sure that all of the parts are
present and that the boat is in good order.
LIST OF PARTS
Mainsheet system
Downhaul line
Righting line
Shroud wires
Main halyard line
Trampoline lace lines
1
2
3
4
5
6
7
8
9

THE HULLS
Lay the hulls on the ground, on their sides with bottoms to the
center (graphics down), as shown above. A tarpoline or pads
under the hull may be desirable if the ground surface is rough.
Place the hulls about seven feet apart.
CROSSBARS AND
TRAMPOLINES
The forward and main
trampolines are rolled
onto the front crossbar.
Position the crossbar
between the hulls near
the forward cross bar
sleeve in each hull.
The Bow Spreader Bar
has slides, eye straps,
bridle wires (2) and the
roller furler installed.
Position it near the
recesses on each bow.
Remove the bolt that is
threaded into the
plastic block on each
end of the Bow
Spreader Pole.
ASSEMBLY INSTRUCTIONS
KNOTS TO USE
FIGURE 8 KNOT BOWLINE KNOT HALYARD KNOT CLEATING OFF A LINE
1. 2.
FIGURE 8 KNOT
AT END OF LINE
Main Beam with Trampoline
4
The rear crossbar has the main sheet traveler car and swivel
cam cleat installed. Position it near the aft crossbar sleeve in
each hull.
Note: There is one plug in the rear of each hull. These plugs
are used to drain the hulls. The plugs should be in place
before sailing. Remove the plugs after sailing to drain any
water that may have leaked into the hulls. It is best to travel
with and store the boat with the plugs removed to allow for
pressure changes due to heating, cooling and altitude
changes. This will prevent warping of the hull surface.
13
EASY LOCK RUDDER INSTALLATION
The Hobie Rudder Housing has been completely redesigned
for ease of use. Precision manufactured of engineering-grade
fiberglass reinforced nylon, the Housing is virtually
maintenance free and will never rust or corrode.
Place the rudder assembly on the boat
pintles. Note: The housing may only
be installed or removed from the boat
pintles when the rudder blade is in-
between the upper and lower
positions. This is an additional safety
feature to keep the rudder on the boat
in case of capsize.
Secure the housing to the pintles by
placing the keeper over the upper
pintle. Make sure that it is completely
engaged in the slot.
TILLER CROSSBAR AND EXTENSION
The rudder arms are connected by a bar called the “tiller
crossbar”. One end is labeled “starboard” (right) and the other
“port” (left). Position the crossbar between the two rudders.
Insert the crossbar attachments into the ends of the tiller arms
and run the pin through the hole.
Be sure that the tiller extension hinge is on top.
Install the hiking stick.
INSTALLING THE RIGHTING LINE
A self-retracting righting-line is provided with the boat. Thread
one end of the line through a grommet located at the rear of
the trampoline (on one side or the other of the boat) from the
bottom, going upwards. Tie a figure 8 knot in the end of the
line. The knot will be on top of the trampoline and the righting-
line below. Thread the other end of the righting-line forward to
the main crossbar (under the boat). Pass the line through the
ring attached to the underside of the main crossbar. Pass the
line across the main crossbar to, and through, the other ring.
Pass the line through then back to and up through the aft
grommet on the opposite side. Pass the line upwards through
the grommet. Tie a figure 8 knot in the end of the line (the knot
will be on top of the trampoline).
Refer to page 15 for righting techniques.
NOTES:
The cooler lids may not be water tight. The storage areas are
not to be considered dry storage areas.
Freezing weather conditions can damage the boat if water is
trapped inside the hulls or aluminum extrusions. These areas
must be drained and dry during freezing conditions.
Bottom View
Tie off one end
of the line here.
Pass the line through
the rings on the
crossbar.
Tie off the other end
of the line here.

The jib is held furled by a snap hook
that is attached to the jib clew.
Before releasing the snap hook, spin
the jib clockwise 2 or 3 turns to start
spooling the furler line onto the furler
spool. Release the hook from the
loop and attach the 2 jib clew blocks
to the snap hook. The jib can now
be unfurled by pulling on the jib clew or tightening one side of
the jib sheets. This action will automatically roll the furling line
onto the furler spool as the jib un-furls. (If the jib is not furled
and the line is also not loaded in the drum, wrap the jib
around the forestay until it is furled. Then when you
unfurl, it will load the drum as desired.)
To furl the jib, ease off on the
mainsheet tension and release
the jib sheets, pull on the jib furler
line. Keep light tension on the jib
sheet as the sail is being furled to
get a nice tight wrap. Cleat the
furler line in the furler cleat to
keep the sail furled.
There is a luff adjustment line that is installed at the jib top
(head) and may need to be adjusted. While the mainsheet is
tensioned, and the forestay is taunt, there should be just
enough tension to smooth the sail and remove the horizontal
wrinkles at the luff. Too much tension can damage the sail or
pull the head or tack grommet out when under sailing loads.
To adjust the line you must tip the boat onto it’s side or drop
the mast down to access the tensioning line at the jib top.
If the boat is being put away for the day the snorkel should be
installed. To do so, unhook the jib clew blocks and snap the
hook onto the loop sewn into the sail. This will keep the sail
tightly furled while the snorkel is installed. Re-attach the
zipper and slide the snorkel up the sail as it is zipped up.
The main halyard can be used to pull the snorkel up over the
jib, but if the sail is tightly furled, the halyard will not be
required. Route the halyard under a shroud and hook to the
snorkel and hoist. Tie the halyard to the halyard cleat.
12
RIGGING THE JIB SAIL
Thread the jib sheet line starting from
the eye next to the starboard (right
side) swivel cleat. Pass the line
through the stainless eye and tie a
figure 8 knot. Thread the onthe end
through one of the jib clew blocks and
then through the swivel cleat. Pass
the line through the swivel eye and
then the jaw and onto the main
trampoline. Cross over to the port (left) side and repeat the
process in reverse ending at the stainless eye with another
figure 8 knot.
The jib is furled on the forestay and
covered by a "snorkel". To remove
the snorkel, simply unzip as it is pulled
down.
MAINSHEET SYSTEM
Connect the main sheet block to the
traveler car. Attach the shackle that is
part of the block
through the clevis pin
on the traveler car.
Hook the mainsheet
to the "clew"
grommet at the rear
of the main sail.
The tail end of the main sheet line
is used for traveler adjustment.
Pass this line end through the
swivel cleat jaws (from forward
towards rear of the boat) then
eye. Pass the line through the
traveler car. Pass the line through
the stainless eye on the rear side of
the cross bar. Tie a figure 8 knot in
the end of the line to keep it from
coming out of the eye. When sailing
upwind, cleat the traveler more to
the center of the boat. On a reach
across the wind or when sailing
downwind adjust and cleat the
traveler further out the track. When
sailing in strong winds you can move the car further out to help
keep the boat more level and limit heeling or tipping.
Keep the mainsheets loose when the boat is on the beach to
prevent an accidental capsize.
Slide the other hull onto
the crossbars until the
hulls come in contact
with the stop plates
(located on the
underside of the main
and aft crossbars).
Lifting one hull, or the
other, at the rear can
help align the socket
for the forward
spreader bar.
Using a cross bar as a lever arm, pull the hull to an upright
position so that the crossbars are horizontal.
Insert the crossbars into one hull. See
that the crossbars seat fully into their
sockets in the hull.
Unroll the trampolines from the forward crossbar. Slide the
main trampoline bolt ropes into the hull trampoline tracks.
Soapy water can be used as a lubricant (Do not use an oil or
silicon lubricant on the trampoline track or the bolt rope).
Sliding the bolt rope into the track is a 2 person job. One
person should pull the trampoline and the other feed the bolt
rope into the track.
Be sure the
forward
spreader is fully
seated in both
hulls.
Re-Install the screws
into each end form
the outside of the
hull. Do not over
tighten or compress
the plastic hull
material.
5

Carefully feed the
trampoline into the tracks.
Continue to feed the
trampoline equally on both
sides.
As the trampoline becomes more
difficult to feed, Alternate from one
side to the other keeping the
trampoline somewhat even. You can
sit or lay on the trampoline to stretch
it a bit.
Work your way across the
trampoline to the other
side, then tie off with half
hitches.
Pass the line through the
grommet in the trampoline.
Pass the line back through the
eyelet, then over to the first
slide. Pass the line to the first
cutout and around the rod.
Then back to the first slide.
Continue to each slide and
cutout across the tramp.
Come back to the starting
point and begin tightening
the lace line to pull the
trampoline tight.
After both main trampoline halves are in place, but not laced,
install the forward trampoline following the same technique as
with the main. Except, because the forward trampoline is one
piece, it is necessary to
alternate from side to side
while feeding it into the
tracks.
Once the forward
trampoline is
nearly all the way
into the track it
may be
necessary to use
the Bow
Spreader Pole for
leverage to pull it taught. Tie a lace line to the grommet. Wrap
the line around the beam and then pass it back through the
grommet again. This will create a 3:1 purchase to help pull the
trampoline forward. Once again, alternate from side to side to
keep the trampoline even. Carefully feed at the opposite end
to prevent the trampoline from getting wedged in the track
opening. Pull the trampoline all the way tight.
LACE FORWARD TRAMPOLINE - Slide
the longer (of the two provided) lace rod
into the forward trampolines pocket. Tie
the lace
line to the
eyelet.
6
Once the sail is fully
hoisted, pull the halyard,
with tension, forward
and away from the
mast. Then pull the line
back against the mast.
(Keep the line centered
with the mast). This will
place the locking bead
below the “2 fingered”
hook. Release the halyard to engage the
hook. Repeat the process if the sail does
not remain at the top of the mast. Tie off
the halyard to the cleat.
DOWNHAUL AND ADJUSTMENT
Tie the downhaul line to the grommet at the
bottom of the main sail nearest the mast.
Use a bowline knot.
Pass the line down and
through the downhaul cleat
located in the mast track.
Pass the line back up and through the
downhaul (tack) grommet. Using the 3:1
purchase this creates, tension the luff of the
sail until the sail looks smooth and horizontal
wrinkles are removed.
Tie off the line at the cleat.
The downhaul should be tensioned just
enough to remove the horizontal wrinkles in
the sail luff (forward area). The boat will
perform best with light tension in light air and
a bit more when the wind is stronger. When
not sailing, totally relieving the tension on the downhaul will
greatly reduce sail flogging from wind.
RAISING THE MAIN SAIL
As shown, hook the halyard to the top of
the sail.
Feed the top portion of sail into the mast
track opening.
Begin pulling on the halyard line. Use
caution to be sure the sail feeds smoothly
into the mast while raising.
It will be necessary to help feed the sail
into the track while hoisting.
Hoist the sail all the way to the top of
the mast.
The lines are threaded through
each batten end cap but are not
tensioned. To tension the battens.
pull tension on the line forcing the
batten into the pocket and cleat it.
Tension each batten so that the
batten is well seated and the
wrinkles in the batten pockets are
removed. Excessive batten
tension will cause the sail to be
more difficult to handle. Many sailors release the batten
tension at the end of the day. This action releases the
pressure that might otherwise be stretching the sail while it is
not in use.
Tie a small figure 8 knot in the end
of each line to prevent the battens
from falling from the sail if the line
releases from the cleat. For extra
security, tuck the line under itself.
This insures that the line will not
work it’s way loose from the jam
cleat.
Hook
1
2
3
4
11

STEPPING THE MAST continued...
Be sure to keep the arrows at the
mast base and front crossbar
aligned. Face forward on the
boat with a wide stance for
stability. Walk forward while
lifting the mast until the side
shrouds go tight preventing the
mast from further forward
movement.
Lean your weight
against the mast to
hold it in this
position. The mast
base/crossbar
arrow alignment is
no longer required.
Insert the forestay
adjuster into the furler drum one or two holes and pin in place.
Run the furling line from the drum
to the cleat next to the mast.
Pass the line through the cleat
and tie a small figure 8 knot in the
end of the line to keep it from
slipping back through the cleat.
At this time, pull the furling line to
unwind the drum completely.
The drum will be rewound when
the sail is unfurled.
After stepping the mast, adjustments can be made to tension
the wires and for raking the mast forward or aft. Positioning
the shrouds lower in the shroud adjusters will rake (lean) the
mast aft. This can help boat-handling in higher winds.
There is a limit to the amount of mast rake aft that is possible.
This will be seen when the main sail block on the sail clew
nears or touches the block attached to the rear crossbar when
fully sheeted while sailing. Too much mast rake will not allow
you to sheet the sail properly. It may also be more difficult to
tack the boat.
At this time adjust / tension the
shroud wires lower in their
adjuster plates, one side at a
time. Use the main halyard to
hold the mast up while your crew
makes the adjustments. Be very
careful to tie off the halyard at
the mast cleat in such a way as
it will not slip during this
process. You will be holding the mast with this line alone.
Step aft and away from the boat on the side to be adjusted.
Tension the halyard line to ease the shroud tension on that
side. Lower one side a few holes then refasten the keeper pin
and ring. Do the same for the opposite side. Repeat until all
three mast supporting wires are taunt and the shroud wires
are as nearly equally adjusted as possible. Once the proper
adjustments are made, you will not have to repeat this process
again. Unless you want to make adjustments to the mast rake
angle.
MAIN SAIL AND BATTENS.
Unfurl the sail on the trampoline.
Getaway sails are shipped from
the factory with the battens
installed. It is important that the
means of securing the battens in
the sail be understood.
Note that the batten ends have a
"V" jam cleat molded into them.
These "V" jam cleats will keep the tension line from slipping in
only one direction. Note the hollowed-out side of the cleats.
Pull the line from the flush side toward the hollowed side when
cleating.
Batten pocket
Start here with a
bowline knot
Cleat at mouth of each tip
Hollowed-out
side of tip
10
LACE MAIN TRAMPOLINE - Tie a bowline knot to the forward
left/port grommet in the
trampoline.
Pass the line through the
opposite grommet, top/down
and then through the
lacing flap.
Come up through the next
(left) grommet and then
continue to lace towards
the aft of the trampoline
following this pattern
(down through the right grommets and up through the left
grommets). Keep the laces
loose at this time. Lace as far
aft as the line will go.
Locate the aft lace rod. Feed
the rod through the rear
pocket as shown. Center the
rod, from left to right, in the
pocket.
Locate the aft lace lines.
Tie to the rear grommets
using a long looped
bowline as shown (left and
right sides).
Let the tramp hang below
the aft crossbar. Pull the
lace lines under the cross
bar and tight. Begin the aft
lacing by routing the left line up
and over the first lace peg.
Cross over to the next peg then
down and around the rod. Pull
the lace line tight then up and
over the peg and then over to
the next one and so on... Then
start with the right side and
work towards the center.
Image to left shows the proper
routing of the lace lines around
rod and peg.
When you reach the
center, the pattern must
be changed slightly. Pass up
and over the last peg, before the
center, and then down around
the rod in the gap between tramp
halfs. Then, come up and
through the trampoline grommet
on the opposite side. Once tied
off loosely at the center, cinch
the line tight from each side working towards
the center.
Tie off to the main trampoline grommets just
forward of the aft cross bar.
Once the
aft lace is
tight, begin
cinching the center lace
tight from forward to aft.
You will notice that as you
get the trampoline tight you
will have more lace line aft
to complete the lacing.
Work your way aft
until the entire
trampoline is tight.
Tie off the line with a
few half hitches.
7

Insert the upper section into the
lower section. *The upper
section of the mast must be
glued to the lower half. Please
follow the instruction sheet in the
folder for the mast gluing
instructions.
Install the mast float to the upper
mast section as shown. Be sure
the blunt end of the float is facing
forward towards the blunt side of
the mast. You may have to loosen
the bracket bolts that pass
through the mast head to get the
screws aligned in the float.
Pass the halyard line through the
mast head from rear (track side) to
front. Pull both ends of the halyard
down the mast and tie off at the
halyard cleat on the side of the
mast near the base.
MAST ASSEMBLY
To step the mast upright, position the
mast base next to the mast step ball.
The mast top and float should be
positioned to the rear of the boat in
the center of the rear crossbar. The
arrow stickers on the mast and main
crossbar must
be aligned.
Turn the mast
onto it’s side to
align the arrows.
MAST ASSEMBLY
WA R N I N G! !
The lower section of the mast is aluminum
and displays warnings against assembling and sailing
near overhead wires and
power lines. The upper
section is fiberglass and is
designed to help prevent
injury that can occur if the
mast does contact a high
power line. Before raising the
mast, check that you are in a
safe area and always
remember this warning.
* Getaway mast extrusion to CompTip assembly
(normally performed by dealer prior to delivery)
The purpose is to bond the two section together and
seal out water. This will also keep the joint in proper
alignment. This can affect sail shape if the fit
becomes loose.
Use some masking tape or the like, and mask off the
area above and below the joint to make clean up
easier. Also block off the luff tracks to prevent glue
from bridging the sail openings due to excess glue
oozing out of the joint.
Be prepared to use force during the insertion. Air
trapped inside the joint can prevent easy insertion.
(The small black cap just below the joint can be
removed and an air-release path can be poked
through the foam if needed.) Place the mast on saw
horses or blocks. Place the base of the mast against
a solid, padded object.
Apply the bonding agent to the inside and outside of
the mating sections. Fit the two parts together as far
as possible. If force is required, hold the upper
section and pull the entire assembly a few inches
away from the “solid object” (wall, tree, post) slide
the assembly up against the “solid object” with some
force. When the mast assembly (base) contacts the
“solid object” the inertia will help slide the CompTip
(upper section) deeper into the lower section.
Repeat as many times as necessary to fully seat the
sections together.
Prop the mast up so that the track is straight up and
then sight down the length with your eye to check the
alignment at the joint. Straighten if necessary.
Remove masking tape before glue dries.
Allow bonding agent to dry.
8
Once again, check the wires to see that they are positioned
properly on the mast tang shackle and that they are routed to
the hulls over the mast.
Attach the adjusters to each hull
as shown. Be sure the adjuster
cover boots are installed on the
wires first. Attach the side stay
(shroud) wires to the top hole on
each side of the boat.
Slide the boots over the wire and
adjusters.
STEPPING THE MAST
Before continuing, once again check for overhead power line
wires that could contact the mast when raising it or when
moving to the water for launching.
Stand on the trampoline near the rear crossbar and lift the
mast to your shoulder.
9
MAST ASSEMBLY continued...
Connect the mast base to the
step ball by positioning the step
ball inside the mast base cup.
Pass the pin through the mast
base as shown. Pass the ring
through the pin to keep it captive.
This pin should remain in place
while sailing.
MAST WIRES
Locate the mast wires and uncoil
them. The shrouds in the rig kit
box are attached together by a
shackle.
There is a shackle that is conntecting the two shroud wires
together. Unthread the pin on the shackle and place the jib
sorestay between the thimbles of the shrouds (see diagram
below). Attach the shackle to the lower hole on the comptip
mast tange. Be sure to wrap the small keeper wire through
the small hole and around the shackle to prevent the pin from
unthreading due to vibration.
Check to be sure the wires are
not crossed. Check that they
are clear to allow the mast to
swing to the upright position.
WARNING!!
Watch for overhead power lines. Never rig,
trailer or sail the boat near overhead power lines.
Mast contact with a power line
could be fatal.
Shroud
Shroud
Jib Forestay
Other manuals for Getaway
4
Table of contents
Other Hobie Boat manuals
Popular Boat manuals by other brands

Four winns
Four winns 348 Vista owner's manual

Jilong
Jilong Z-RAY I 200 instruction manual

Klepper
Klepper Aerius manual

Sea-doo
Sea-doo Speedster 200 Operator's guide

fountain mercury
fountain mercury Express Cruiser 2005 Operation, maintenance & warranty manual

Clipper Marine Corp.
Clipper Marine Corp. CM 1/4 ton owner's manual