RXW EC-5 and 10H Soil Moisture Sensor (RXW-SMx-xxx) Manual
1-800-LOGGERS 5 www.onsetcomp.com
See the HOBOlink Help for details on how to change the logging
and connection intervals, view data, check mote status, add the
mote to a map, and more.
Deployment and Mounting
Mounting and Positioning the Mote
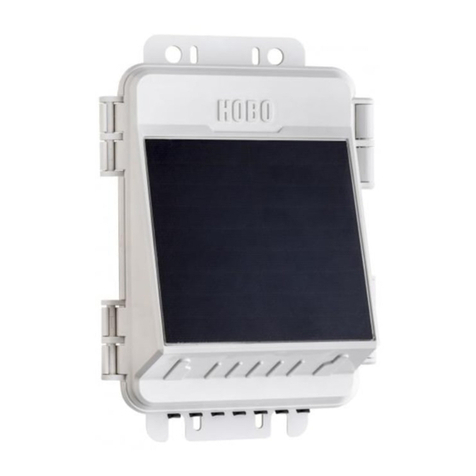
•Mount the mote to a mast or pipe using cable ties or affix
the mote to a wooden post or flat surface with screws.
Insert the cable ties or screws through the holes on the
mounting tabs.
•Consider using plastic poles such as PVC to mount the
mote as certain types of metal could decrease signal
strength.
•Make sure the mote remains in a vertical position once it
is placed in its deployment location for optimal network
communications.
•Make sure the mote door is closed, with both latches fully
locked to ensure a watertight seal.
•Consider using a 3/16 inch padlock to restrict access to the
mote. With the mote door closed, hook a padlock through
the eyelet on the right side of the door and lock it.
•Position the mote towards the sun, making sure the solar
panel is oriented so that it receives optimal sunlight
throughout each season. It may be necessary to
periodically adjust the mote position as the path of the
sunlight changes throughout the year or if tree and leaf
growth alters the amount of sunlight reaching the solar
panel.
•Make sure the mote is mounted a minimum of 1.8 m (6 ft)
from the ground or vegetation to help maximize distance
and signal strength.
•Place the mote so there is full line of sight with the next
mote. If there is an obstruction between two sensor
motes or between the sensor mote and the manager, then
use a repeater mounted on the obstruction. For example,
if there is a hill between the sensor mote and the
manager, place a repeater at the top of the hill between
the sensor mote and the manager.
•There should not be more than five motes in any direction
at their maximum transmission range from the manager.
Data logged by a wireless sensor must travel or “hop”
across the wireless network from one mote to the next
until it ultimately reaches the manager connected to the
station. To make sure the data can successfully travel
across the network, the mote should not be more than
five hops away from the manager.
•The HOBOnet Wireless Sensor Network can support up to
50 wireless sensors or 336 data channels per one HOBO
RX station.
•Use a #4-40 screw to attach a ground wire to the port on
the back of the mote if you are deploying the mote in a
location where lightning is a concern.
Sensor Installation Guidelines
This sensor measures the water content in the space
immediately adjacent to the probe surface. Air gaps or
excessive soil compaction around the probe can profoundly
influence soil water content readings. Do not mount the probes
adjacent to large metal objects, such as metal poles or stakes.
Maintain at least 8 cm (3 inches) of separation between the
probe and other objects. Any objects, other than soil, within 8
cm (3 inches) of the probe can influence the probe’s
electromagnetic field and adversely affect output readings. The
RXW-SMC sensor must be installed at least 3 cm (1.18 inches)
from the soil surface and the RXW-SMD sensor must be
installed at least 10 cm (3.94 inches) from the soil surface to
obtain accurate readings.
It is important to consider the particle size of the medium in
which you are inserting the sensor because it is possible for
sticks, tree bark, roots, or other materials to get stuck between
the sensor prongs, which will adversely affect readings. Be
careful when inserting these sensors into dense soil as the
prongs can break if excessive sideways force is used to push
them into the soil.
To install the soil moisture sensors, follow these guidelines:
•Good soil contact with the sensor probes is required.
•Install the sensor probes into undisturbed soil where there
aren’t any pebbles in the way of the probes.
•Use a soil auger to make a hole to the desired depth (an
angled hole is best) and push the probes into undisturbed
soil at the bottom of the hole. Alternatively, dig a hole and
push the probes into the side of the hole.
•If the probe has a protective cap on the end, remove it
before placing the probe into the hole.
•To push the probe into the soil, use a PVC pipe with slots
for the sensor and a longer slot for the cable.
•Thoroughly water the soil around the sensor after it is
installed with the hole partially backfilled to cause the soil
to settle around the sensor.
•As the hole is back-filled, try to pack the soil to the same
density as the undisturbed soil.
•Secure the sensor cable to the mounting pole or tripod
with cable ties.
•Use conduit to protect the cable against damage from
animals, lawn mowers, exposure to chemicals, etc.
If you need to calibrate your probe for the soil, you may want
to gather soil samples from each sample depth at this time.
When removing the probe from the soil, do not pull it out of
the soil by the cable! Doing so may break internal connections
and make the probe unusable.
Maintenance
The soil moisture sensor does not require any regular
maintenance. If cleaning, rinse the sensor with mild soap and
fresh water.
The mote is designed for outdoor use, but should be inspected
periodically. When inspecting the mote, do the following:
•Verify the mote is free of visible damage or cracks.
•Make sure the mote is clean. Wipe off any dust or grime
with a damp cloth.


