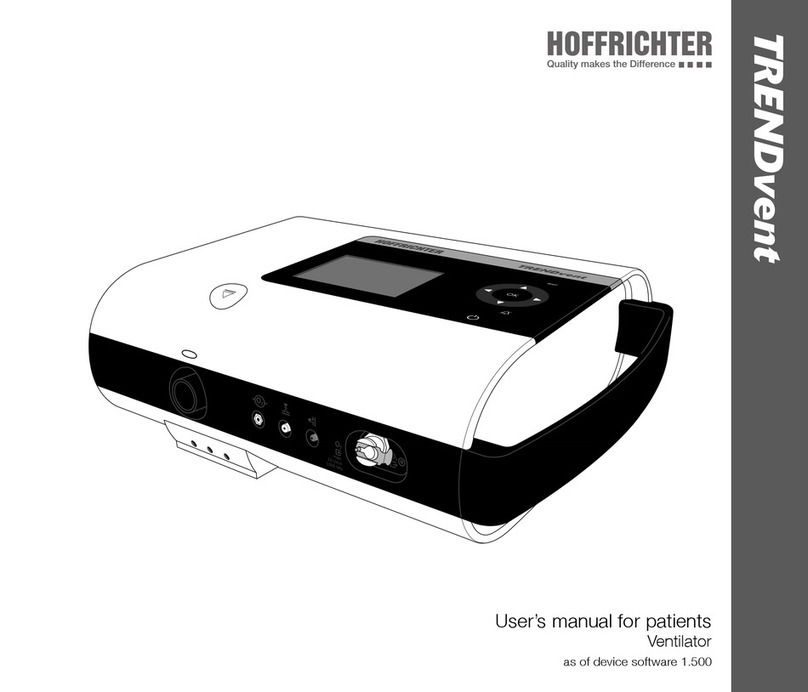
Hoffrichter TRENDvent User manual

Service Manual
Ventilator
TRENDvent

- 2 -
CONTENTS
1 Symbols used in this service manual ..............................................................................4
2 Safety information ...........................................................................................................4
3 Maintenance, repair and safety-related check ...............................................................5
3.1 Maintenance.....................................................................................................................5
3.1.1 Maintenance schedule .....................................................................................................5
3.2 Repairs.............................................................................................................................6
3.3 Hygienic preparation.........................................................................................................6
3.4 Safety-related check.........................................................................................................6
4 Description of device.......................................................................................................7
4.1 Housing, display and control elements..............................................................................7
4.2 Operating unit...................................................................................................................9
4.3 Exploded view - General layout.......................................................................................10
4.4 Exploded view - Housing upper part ...............................................................................11
4.5 Exploded view - Front panel ...........................................................................................12
4.6 Exploded view - Back part..............................................................................................12
4.7 Exploded view - Air outlet unit.........................................................................................13
4.8 Exploded view - Battery pack .........................................................................................13
4.9 Cable connecting plan PCB controller.............................................................................14
4.10 Tube connecting plan .....................................................................................................15
5 Important components ..................................................................................................16
5.1 Block diagrams ..............................................................................................................16
5.1.1 Block diagram of compressed air distribution..................................................................16
5.1.2 Block diagram of entire device ........................................................................................17
5.2 Blower............................................................................................................................17
5.3 PCB DC-communication ................................................................................................17
5.4 Sensors / Valves (distribution of the compressed air)........................................................17
5.5 Power supply .................................................................................................................18
5.6 PCB controller (Control- and operating unit) ....................................................................18
5.7 Operating unit / Display ...................................................................................................18
5.8 Interfaces .......................................................................................................................18
6 Servicing .......................................................................................................................19
6.1 Preliminary steps ............................................................................................................19
6.1.1 Tools and measuring equipment .....................................................................................19
6.1.2 Unpacking and disinfecting.............................................................................................20
6.1.3 Checking for external damage ........................................................................................20
6.1.4 Data backup...................................................................................................................20
6.2 Opening and disassembling the device ...........................................................................20
6.3 Cleaning.........................................................................................................................21
6.4 Check the silicone tubes.................................................................................................21
6.5 Check the cables and connections .................................................................................21
6.6 Changing the 9V rechargeable battery ............................................................................21
6.7 Changing the batteries....................................................................................................22
6.8 Changingthelters.........................................................................................................22
6.9 Exchanging the blower box.............................................................................................22
6.10 Assembling and closing the device .................................................................................24

- 3 -
7 Functional test...............................................................................................................25
7.1 Checking the acoustic alarm...........................................................................................25
7.2 Checking the alarm button light ......................................................................................25
7.3 Checking the display ......................................................................................................25
7.4 Checking the status screen for errors..............................................................................25
7.6 Checking the “Battery operation” alarm...........................................................................25
7.7 Checking the leakage alarm............................................................................................25
7.8 Checking “Frequency too high” alarm .............................................................................25
8 Device settings/tests .....................................................................................................26
8.1 Flow sensor calibration ...................................................................................................26
8.1.1 Measurement setup........................................................................................................26
8.1.2 Manualowsensorcalibration ........................................................................................26
8.1.3 Automaticowsensorcalibration....................................................................................27
8.2 Tightness test.................................................................................................................27
8.3 O2 valve test ..................................................................................................................28
8.4 Battery test.....................................................................................................................29
8.5 Setting the device back to factory settings......................................................................29
8.6 Check the electrical safety of the external power supply..................................................30
9 Final works ....................................................................................................................30
10 Maintenance kits, spare part list....................................................................................31
10.1 Maintenance kits ...........................................................................................................31
10.2 Spare part list.................................................................................................................32
11 Disposal ........................................................................................................................34
11.1 Device and components .................................................................................................34
11.2 Packaging ......................................................................................................................34
11.3 Batteries.........................................................................................................................34
11.4 Oxygen sensor ...............................................................................................................34
12 Shipping instructions.....................................................................................................35
12.1 Shipping instructions for contaminated medical technology ............................................35
12.1.1 Pick-Up..........................................................................................................................35
12.1.2 Packaging for shipping ...................................................................................................35
12.1.3 Shipping.........................................................................................................................35
12.2 Shipping devices after maintenance or repairs ................................................................35
12.2.1 Packaging for shipping ...................................................................................................35
12.2.2 Shipping.........................................................................................................................35

- 4 -
1 SYMBOLS USED IN THIS SERVICE MANUAL
Important information is denoted by symbols in this service manual. Be sure to follow these instruc-
tions in order to avoid accidents, personal injury and material damage.
In addition, the local accident prevention regulations and general safety regulations in force in the
area of use must be observed.
This symbol denotes general safety instructions. Follow these instructions to avoid accidents,
personal injury or material damage.
This symbol denotes hazardous situations that may lead to serious injuries or death.
This symbol denotes hazardous situations that may lead to moderately severe injuries.
This symbol denotes situations that may lead to material damage or damage to the device.
This symbol denotes information, tips and instructions for the efcient, error-free use of the
device.
2 SAFETY INFORMATION
•Before you start with the maintenance, fully read and understand the contents of
this Service Manual.
•There is a danger of short-circuiting of the capacitors and battery, even when no
electrical power is applied to the device. If the main switch is switched off and the
power supply is connected, the internal battery is charged, electrical power is still
applied to the device!
•Repair and maintenance tasks may only be carried out by suitably qualied,
authorized and competent personal.
•Oxygen sensors contain a caustic liquid. Avoid skin or eye contact if there is a
sensor leak!
•For oxygen sensors no adjustment or repair work is required.
•Components carrying oxygen must not come into contact with oils or fats. There
is a risk for re and explosion.
•For hygienic reasons, it is recommended to wear disposable gloves when you
carry out a task on the device. Before the next tasks, please wipe the device with
a commercial disinfecting solution, e.g. Mikrozid® Liquid.
•The documents delivered with the device must be checked when the device
arrives at the Service department. Should anything point to contamination of the
device (e.g., MRSA), this device should be treated separately, according to the
TRENDvent hygiene concept (transport, storage, processing).
•Special hygienic measures are necessary when a maintenance or repair task is
carried out on a machine contaminated by MRSA (Methicillin Resistant Staphylo-
coccus Aureus). In all circumstances, protective clothing must be worn, such as
gloves, lab coat and face mask. Please refer to the TRENDvent hygiene concept
for further information on the handling of MRSA-contaminated devices

- 5 -
3 MAINTENANCE, REPAIR AND SAFETY-RELATED CHECK
All procedures performed are to be recorded.
3.1 MAINTENANCE
The ventilator should be serviced, in accordance with the maintenance schedule, by an authorized
service agency.
3.1.1 MAINTENANCE SCHEDULE
Maintenance interval Action required Page
Every 6 months during
storage
Checking the battery capacity with a battery test 29
Every 12 months
(Maintenance kit 1)
Opening and disassembling the device
Cleaning and disinfection
Check the silicone tubes
Check the cables and connections
Changing the 9V rechargeable battery
Assembling and closing the device
Changingthelters
Flow sensor calibration
Tightness test
O2 valve test
Check the electrical safety of the external power supply
Safety-related check
Documentation
20
21
21
21
21
24
22
26
27
28
30
6
30
Every 2 years
(Maintenance kit 2a or 2b)
Checking the battery capacity 1 with a battery test or
changing the internal batteries 1
Changing the battery pack without PCB or
changing the battery pack with PCB
Safety-related check
Documentation
22
6
30
Every 3 years after last
change of the internal batteries
(Maintenance kit 2a or 2b)
Changing the internal batteries
Changing the battery pack without PCB or
changing the battery pack
22
Every 15000 h blower run time
or every 5 years or displaying
in the device or displaying
via bargraph in VENTcontrol
(Maintenance kit 5)
Exchanging the blower box
Flow sensor calibration
Tightness test
O2 valve test
Battery test
Setting the device back to factory settings
Safety-related check
Documentation
22
26
27
28
29
29
6
30
Table 1: Maintenance intervals
1
1 The person responsible for carrying out the maintenance should decide whether, for the sake of simplicity,
the entire internal battery pack should be changed as a precautionary measure, or if a battery test should be
performedrst.Ifthebatterytestresultsinacapacity<80%,theentirebatterypack(optionallywithorwith-
out PCB) should be changed. At a capacity of ≥ 80%,thebatteriesdonotrequirechanging.

- 6 -
Additional work Action required
Page
Before every recommissioning from 3 months of storage, checking the battery capacity with a
battery test
Safety-related check
Documentation
29
6
30
When changing patients, prepa-
ration, the preparation of con-
taminated devices (e.g., MRSA)
Hygienic preparation, in accordance with the TRENDvent hygiene
concept
Table 2: Additional work
3.2 REPAIRS
Repairs to the device may only be carried out by an authorized service agency.
The following should be carried out in the case of a repair:
•Wipe disinfect the device surface, e.g., Mikrozid® Liquid
•Check the error description and error analysis
•Carry out the repairs
•Final inspection consisting of:
– Safety-related test (see section 3.4 on page 6)
– Checking the electrical safety of the power supply (see section 8.6 on page 30)
– Final work (section 9 on page 30)
•Packaging of the device according to the packing instructions in section 12.2.1 on page 35
•Shipping according to the shipping instructions in section 12.2.2 on page 35
3.3 HYGIENIC PREPARATION
During preparation, preparation on changing patients, as well as preparation after contamination
(e.g., MRSA), the device should be treated according to the TRENDvent hygiene concept.
3.4 SAFETY-RELATED CHECK
The safety-related check must be carried annually, after repairs and before every recommissioning.
This consists of:
•a visual inspection of the device (for external damage)
•a functional check (see page 25)
•a visual inspection of the accessories, in accordance with the manufacturer’s instructions (respi-
ratory tubes, oxygen sensor, etc.)
The safety-related check carried out must be documented.

- 7 -
4 DESCRIPTION OF DEVICE
4.1 HOUSING, DISPLAY AND CONTROL ELEMENTS
G1 Connection for
tube system/
humidier
Oxygen sensor
cable connection
(jack = 2.5 mm)
Display
Operating unit
Unlocking button for
humidier
Contact sockets
forhumidier
G2 Control tube
connection
(ø = 4.5 mm)
G3 Pressure measuring
tube connection
(ø = 3.5 mm)
G4 Oxygen
connection
G5 Oxygen
output
Handle
Figure 1: Front view of device

- 8 -
G6 Check valve
Connection cover
Main switch
Air inlet with integrated
ltercassette(neand
coarselter),detachable
Tube system
switch
Sign for power supply
DC
24V~/5A
Mains socket
Com Service connection
(RS232 interface,
RJ11 6/4)
PC connection
(USB interface, Typ B)
Remote alarm LED
Remote alarm
connection (RJ10 4/4)
Figure 2: Rear view of device
G7 Finelter
Figure 3: Holderltercassette

- 9 -
4.2 OPERATING UNIT
Battery LED
esc button
Touch wheel with
4 cursor buttons
OK button
Heating button
ON/OFF button
Alarm button
Power LED
Figure 4: Operating unit elements

- 10 -
4.3 EXPLODED VIEW - GENERAL LAYOUT
Figure 5: Exploded view - General layout
A1 Front panel
A2 Air outlet with
owelement
A4 Side housing part
without handle
A3 Blower Box
A5 Inner frame
complete
A6 Housing upper
part, complete
A17 Interior wall
A7 Bellows air inlet straight
A8 Back part assembled
A9 PCB,
controller
A10 Side housing part
with handle
A11 Battery pack
complete
A15 Cover,
check valve
A16 Bellows air
outlet, angled
A14 Housing lower
part, complete
A13 4x Lens head screw
for housing (M3 x 8)
A12 4x Housing foot
C6 Control valve
with cable
K10 Motor cable

- 11 -
4.4 EXPLODED VIEW - HOUSING UPPER PART
Figure 6: Exploded view - Housing upper part
B1 Label band
K1 Ribbon cable
operation panel
K2 Ribbon cable
display
B2 Operation panel
B3 Seal operation
panel
B4 Display
B5 3x Screws M2x3
B7 8x Hexagonal nuts M2.5
B6 Housing upper part

- 12 -
4.5 EXPLODED VIEW - FRONT PANEL
Figure 7: Exploded view - Front panel
4.6 EXPLODED VIEW - BACK PART
Figure 8: Exploded view - Back part
C2 Piezo signal transmitter with
PCB and cable
C1 Front panel
C5 O2 connector
C3 O2 block
K3 Signal transmitter cable
K4 Cable
O2 sensor
K5 O2 valve
cable
C4 O2 valve
with cable
D1 PCB, DC-communication
D2 Back part D3 Holderforlter
cassette
D4 Filter cassette
D10 Coarse
lter
D5 Cover for connectors
D6 DC portD7 Main switch
D8 Seal back
wall
D9 4x Lens head
screw 2.2x6.5
C6 Control valve
With cable K9 Control valve
cable

- 13 -
4.7 EXPLODED VIEW - AIR OUTLET UNIT
Figure 9: Exploded view - Air outlet unit
4.8 EXPLODED VIEW - BATTERY PACK
Figure 10: Exploded view - Battery pack
E9 Proportional valve
with cable E10 Spring
E1 Air outlet without
humidiercable
E2 O-ring E3 Seal
owelement
E5 Holder
owelement
E4 Flow element
E6 Humidiercable,
assembled
F1 Half of casing
F1 Half of casing
F2 2x Screws 2.2x6.5
F3 PCB, Battery charging
F4 Internal battery pack
(1 set)
E7 Seal air-outlet
E8 Humidier
unlock key
K8 Cable battery pack
K7 Temperature
sensor cable
K6 Proportional
valve cable

- 14 -
4.9 CABLE CONNECTING PLAN PCB CONTROLLER
Connection
E6Cablehumidier
Connection
K7 Cable temperature
sensor
Connection
K6 Cable
proportional valve
Connection
K5 Cable O2 valve
K9 Cable control valve
Connection
K4 Cable O2 sensor
Connection
K3 Cable signal transmitter
Figure 11: Cable connection plan PCB Controller

- 15 -
4.10 TUBE CONNECTING PLAN
E-Block 9V
C4 Oxygen valve
A1 Front panel
Sinter
element
View A
A
E5 Holder
owelement
E9 Proportional
valve
A9 PCB Controller
A16 Bellows
air outlet
C6 Control
valve
View B
B
blue1
brown
red1
green
grey
white
black
no color
no color
1 incl. sinter element
Figure 12: Tube connecting plan

- 16 -
5 IMPORTANT COMPONENTS
The TRENDvent ventilator comprises the following components:
•Blower
•PCB, DC-communication
•Sensors / valves (compressed air distribution)
•Power supply
•PCB Controller (control and operating unit)
•Interfaces
5.1 BLOCK DIAGRAMS
5.1.1 BLOCK DIAGRAM OF COMPRESSED AIR DISTRIBUTION
Proportional
valve
Pressure sen-
sors/excess
Pressure
switch
Air inlet
Air outlet
Blower
Switch
Filter Control unit
O2 valve
Check
valve
Flow sensor
Oxygen
connection
Pressure
measuring tube
connection
Control tube
connection
Control
valve
Figure 13: Block diagram of compressed air distribution

- 17 -
5.1.2 BLOCK DIAGRAM OF ENTIRE DEVICE
Oxygen
supply
Humidier
Tube
system
Controls / Display
Accessories
PC
Internal
battery Sensors / Valves
Remote alarm
Nurse call
PCB, DC-communication
Blower
Switching
power supply
100 ... 240 V AC
(-20%,+10%)
PCB Controller
(control and operating unit)
Figure 14: Block diagram of entire device
5.2 BLOWER
Theblowerprovidesamaximumpressureof40hPaataowof200l/min.Itisinstalledinasound
insulatedbox.Ontheairinletsidethereisanairltercassettewithacoarseandanelter.
5.3 PCB DC-COMMUNICATION
The DC-communication printed circuit board enables the connection to the external power supply
(power supply unit or battery pack), via the power interface, as well as the connection of accesso-
ries/remote alarm/PC via the communication interfaces (RS232, USB2.0). The appliance switch is
also located on this PCB.
Furthermore, the PCB also accommodates the motor controller with the accompanying block-com-
mutation circuit.
A reed switch switches between the respiratory therapy and ventilation modes.
5.4 SENSORS / VALVES (DISTRIBUTION OF THE COMPRESSED AIR)
For the distribution of the compressed air, the device is composed of the following units:
•Blower (40 hPa at 200 l/min)
• Airoutlet(standardizedtubeconnector[M22])withowelementandproportionalvalve
•Check valve
•Control valve
•Oxygen block including 3/2 directional valve and self-locking connection
•Pressure measuring tube connection (∅= 3.5 mm)
•Control pressure tube connection (∅= 4.5 mm)
•Connection for oxygen sensor (jack 2.5 mm)

- 18 -
5.5 POWER SUPPLY
The device is supplied with power via an AC/DC switching power supply or the internal battery. The
device can also be provided with an external power supply using the AKKUPACK uni. Ask your spe-
cialist dealer about this.
5.6 PCB CONTROLLER (CONTROL- AND OPERATING UNIT)
The controller PCB is the main structural element of the device. It contains the controllers for opera-
tion and controls, the sensors (pressure/temperature), components for measuring voltage and cur-
rent, for acoustic and visual alarms and the generation of supply voltage.
5.7 OPERATING UNIT / DISPLAY
Theoperatingunitismadeofoatglassandis202x110mminsize.Thematerialisapprox.3mm
thick. All elements are described in Figure 4 on page 9.
The display is 81 x 61 mm in size and has a resolution of 320 x 240 pixels.
5.8 INTERFACES
The device has an USB interface for connection to a PC. This interface enables the PC software
VENTcontrol to be used to communicate with the device and software updates can be carried out.
Thereisalsoaconnectionforthenursecalloraremotealarmbox.Fortheowsensorcalibration,
the device has an RS232 interface.

- 19 -
6 SERVICING
6.1 PRELIMINARY STEPS
6.1.1 TOOLS AND MEASURING EQUIPMENT
To carry out maintenance, the tools and equipment are required as follows:
•Respiratory device TRENDvent
•Valve tube system
• Testlungwithfollowingspecications:
– Compliance: 25 ml/mbar
– Vt= 500 ml, PEEP = 0 mbar
– Resistance: 20 mbar/l/s
– Tidal volume: max. 1000 ml
•Screwdriver, long (Phillips-tip PH1 x 200)
•Side cutter
•Compressed air supply or stationary compressed air connection
•Soft brush and vacuum cleaner
•Soft underlay
•Disposable gloves
•TRENDvent power supply (art. no.: 0001 4206) and mains cable (art. no.: 3110 0023)
• AirowPressureMeter(0-200l/min,e.g.HOFFRICHTERAPM,art.no.:00004832)
• Adapterforowsensorcalibration(art.no.:00004946)
•Adapter for oxygen connection, straight (art. no.: 4100 0104)
•RS232 connection cable
• Airowresistor7mm(art.no.:00007305)
•Blind plug APM (art. no.: 0000 4831)
•PC with following system requirements (minimum requirements):
– MS-Windows® XP, Vista or 7
– AMD Athlon/ Pentium Class (x86), operating frequency > 700 MHz
– 512 MB RAM (recommended)
– at least 400 MB free hard disc space
– Microsoft .NET Framework 2.0 Redistributable (x86)
– 2 MB graphics card with at least High Color (16 Bit)
– Mouse
– oneavailableserialinterface+USBPort
•USB cable
•HOFFRICHTER PC-Software VENTcontrol (art.-Nr.: 0001 4876)
•Spray disinfectant
•Device to check the electrical safety (e.g. SECUTEST SIII/DIN EN 62353:2008)
•Service manual, user’s manual
All tools, measuring equipment and aids possibly exposed to contamination must be cleaned
after they have been used and treated with disinfectant.

- 20 -
6.1.2 UNPACKING AND DISINFECTING
To protect against germs, the surface of the device and, where present, the humidier must
be treated with a disinfectant immediately after unpacking.
6.1.3 CHECKING FOR EXTERNAL DAMAGE
Before starting the service works, check the device for external damage.
6.1.4 DATA BACKUP
We recommend that a backup is carried out before starting maintenance work. Connect the device
to a PC and use VENTcontrol to read out and save the device data.
Notes on the following sections of text:
The numbers in brackets designate the position numbers according to the exploded drawings (sec-
tion 4.3 on page 10 to section 4.10 on page 15), and the spare parts list (section 10.2 on page 32).
6.2 OPENING AND DISASSEMBLING THE DEVICE
During the maintenance work, check for any moisture in the device. Damp areas should be wiped
anddisinfected.Beforeassembly,ensurethattheaffectedareasaresufcientlydry.
1. Switch off the device using the main switch and disconnect it from the mains power, as well as
allconnectedcomponents(e.g.,humidier).
2. Removetheltercassetteholder(D3).
3. Place the device with the upper side on a soft surface.
4. If the HOFFRICHTER warranty seal is still in place, remove it.
5. Unscrew the four screws on the underside of the device using a long screwdriver (Phillips-tip
PH1 x 200).
6. Lift off the lower part of the housing (A14). Ensure that the screws do not fall out and are lost.
7. Removebothlateralhousingparts(A4+A10).
8. Detach the battery pack (A11) from the controller PCB (A9) by pulling the battery charging PCB
(F3) away from the controller PCB.
9. Detach the controller PCB (A9) from the DC-communication PCB (D1).
10. Tilt the housing’s back part (A8) outwards and pull the motor cable off from the DC-communi-
cation PCB (D1).
11. Remove the back part (A8).
12. Dismantle the cover for the check valve (A15). Take care to avoid breaking the tabs off.
Other manuals for TRENDvent
2
Table of contents
Other Hoffrichter Fan manuals