manuals.online logo
Brands
  1. Home
  2. •
  3. Brands
  4. •
  5. HOLOVISION
  6. •
  7. Intercom System
  8. •
  9. HOLOVISION 400-S12-PAN2 User manual

HOLOVISION 400-S12-PAN2 User manual

)39)1#=5,!
))7430*'#38,6*42;08/77,<
?""8)3+143,@,=5)+
464+,17
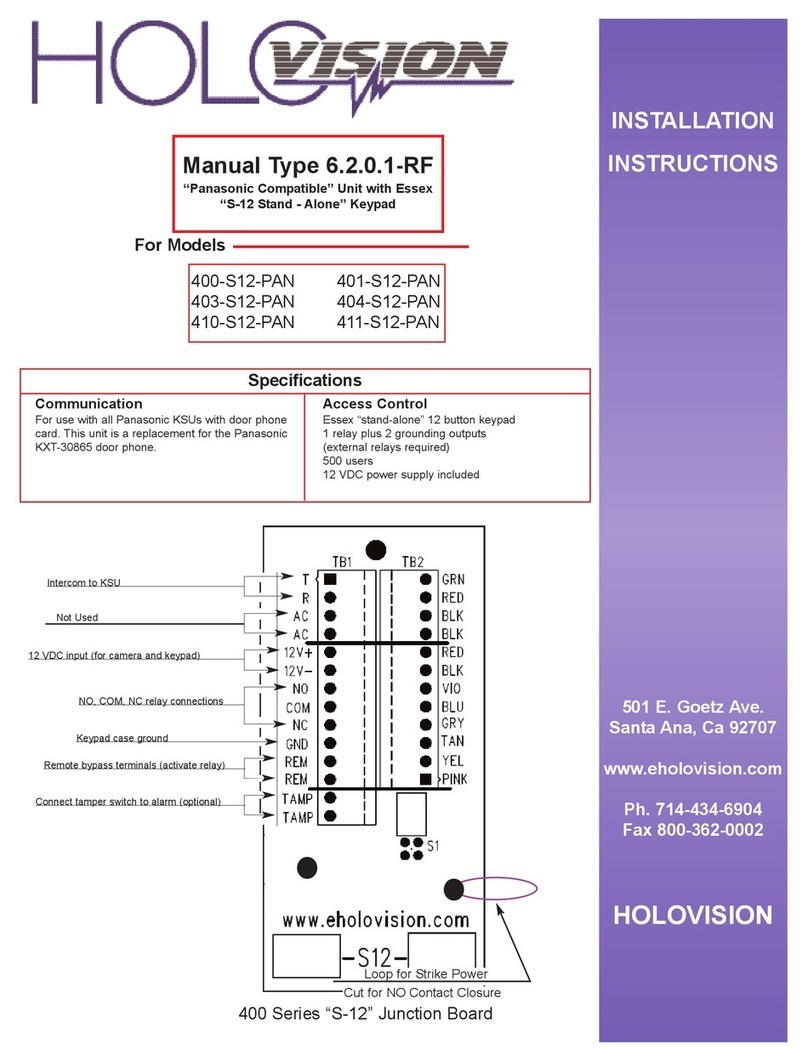
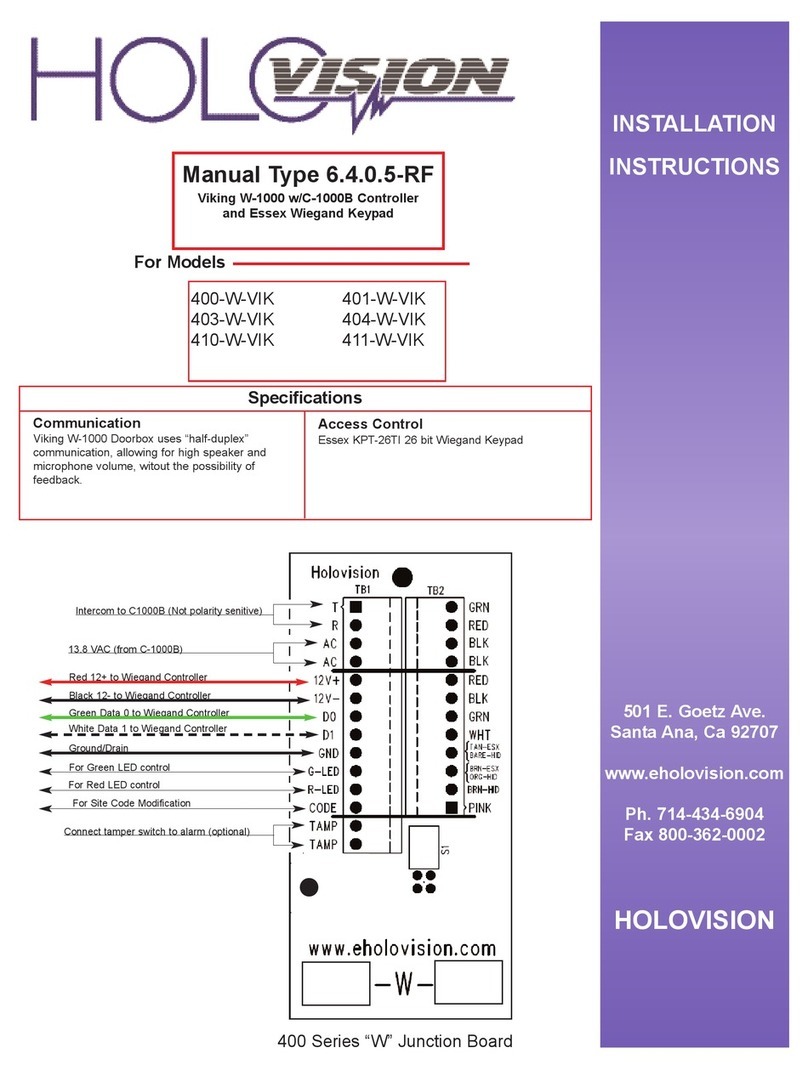
400-S12-PAN2 401-S12-PAN2
403-S12-PAN2 404-S12-PAN2
410-S12-PAN2 411-S12-PAN2
"5,*0-0*)80437
**,77438641
Essex “stand-alone” 12 button keypad
1 relay plus 2 grounding outputs
(external relays required)
500 users
12 VDC power supply included
"##
"#!$#"
4,8>:,
")38)3))
;;;,/414:07043*42
/
)<
%"
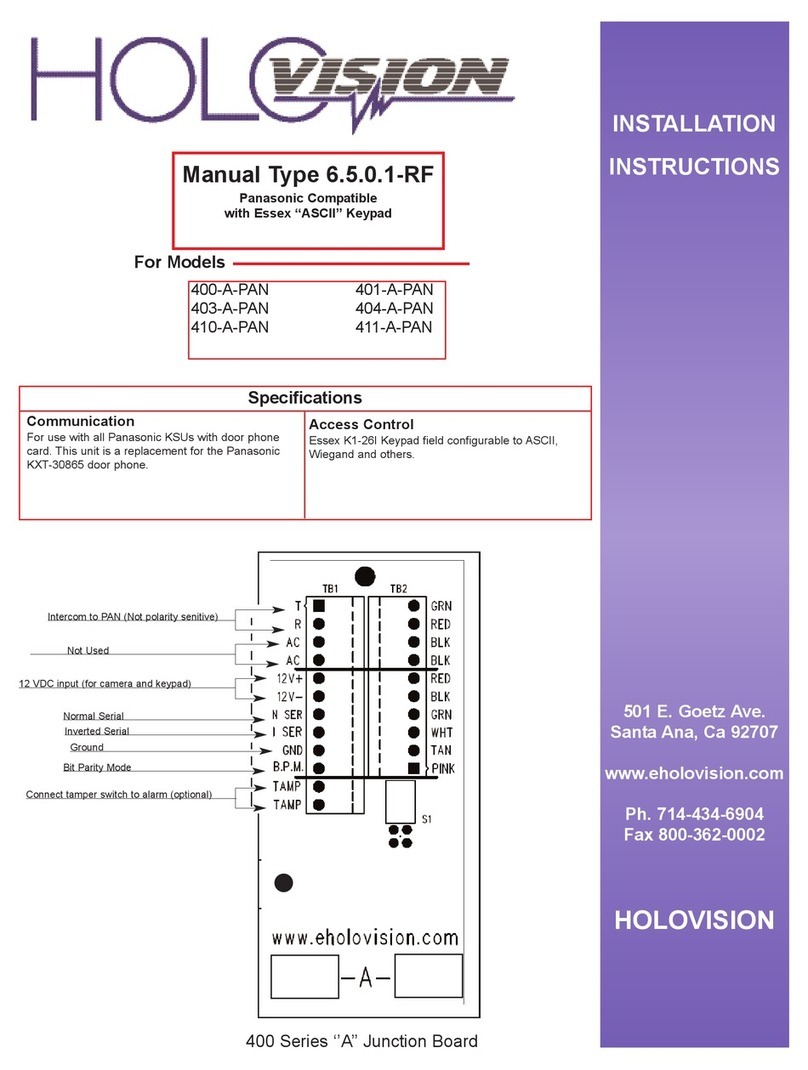
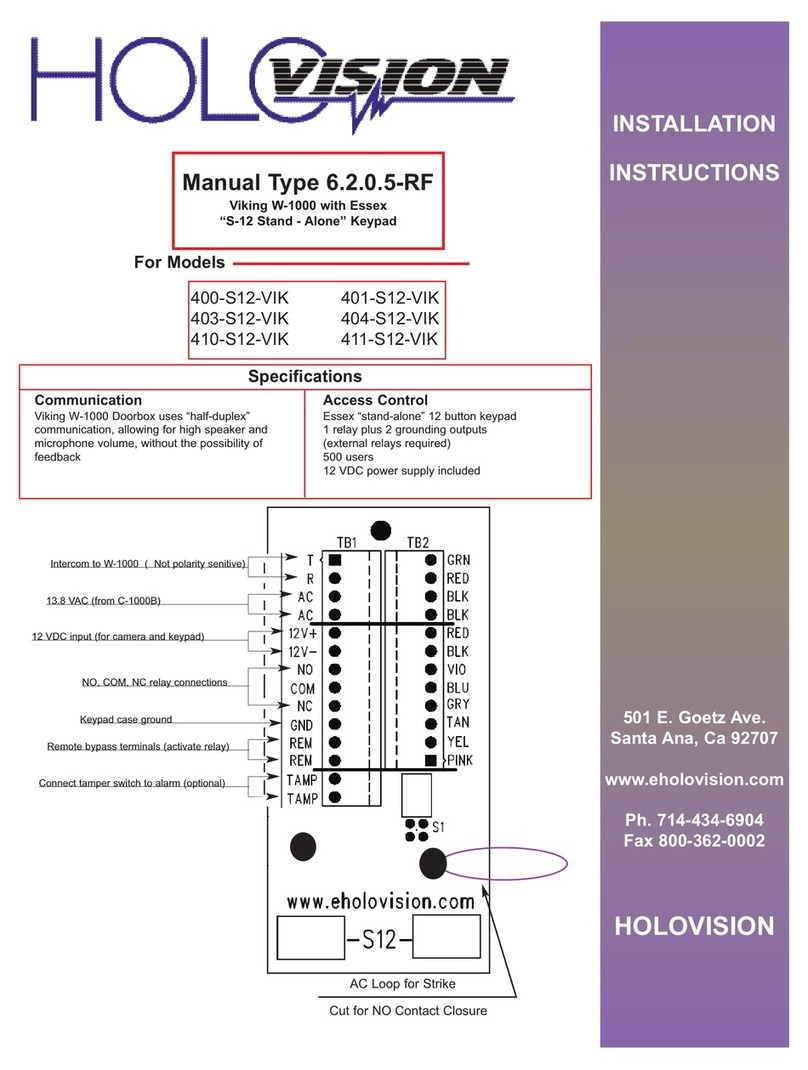
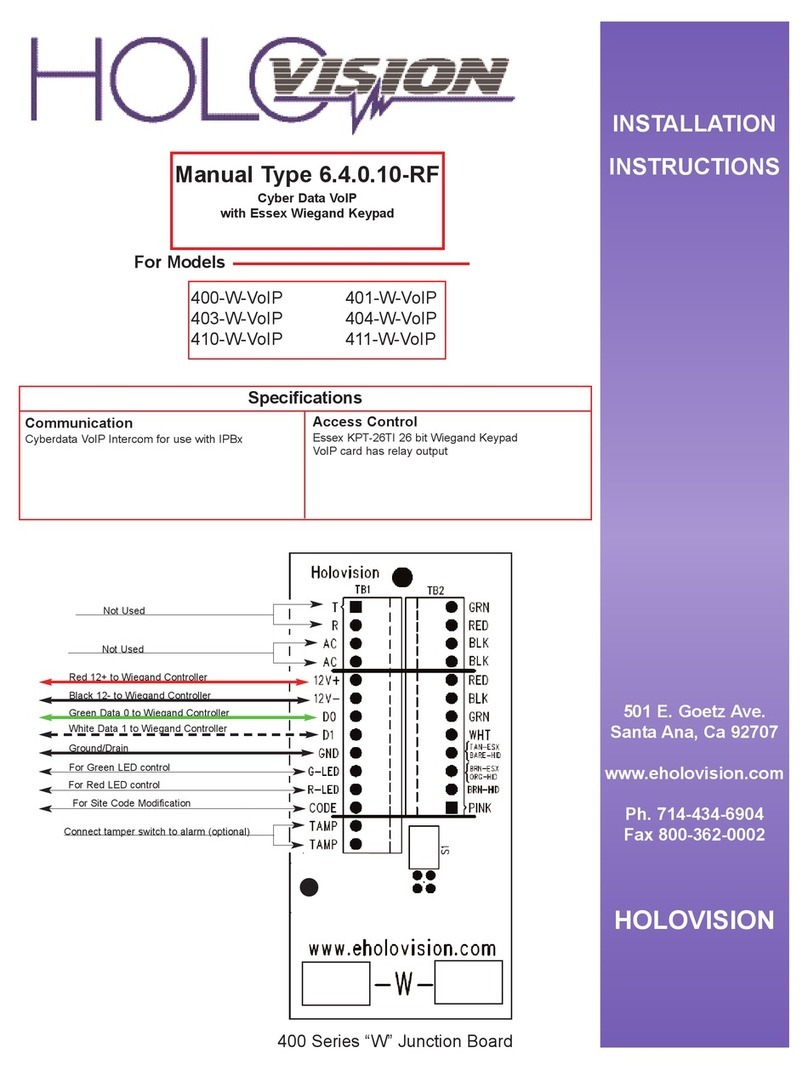
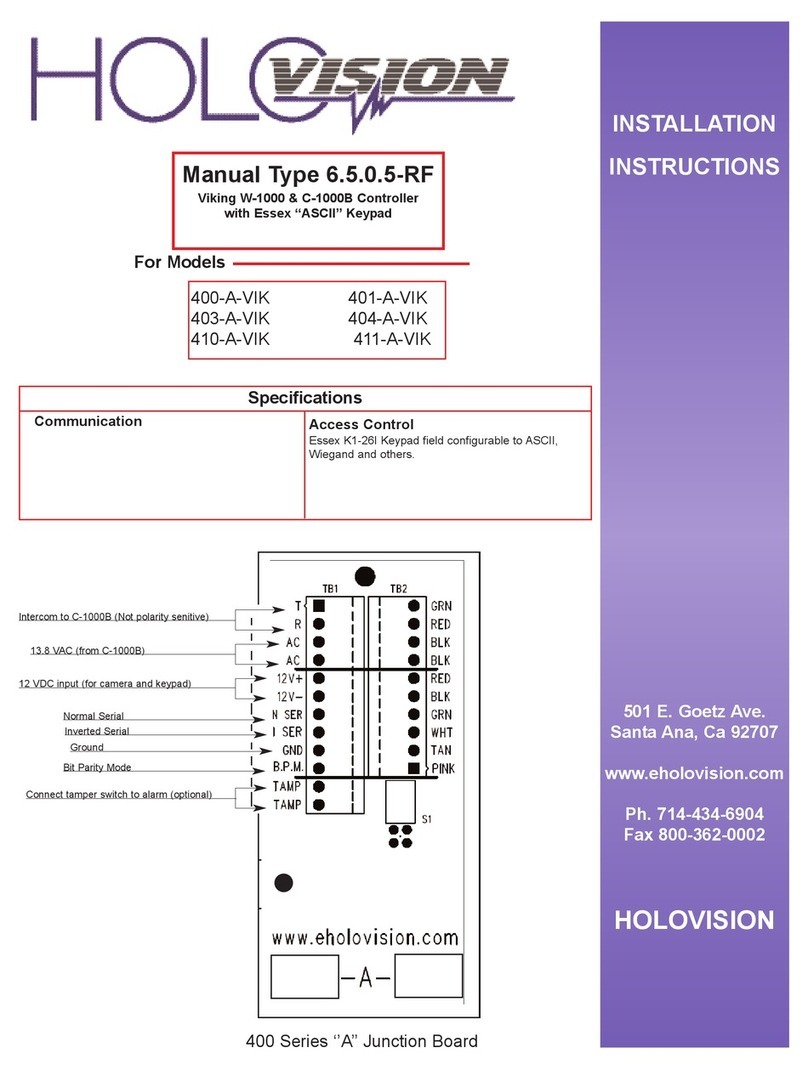
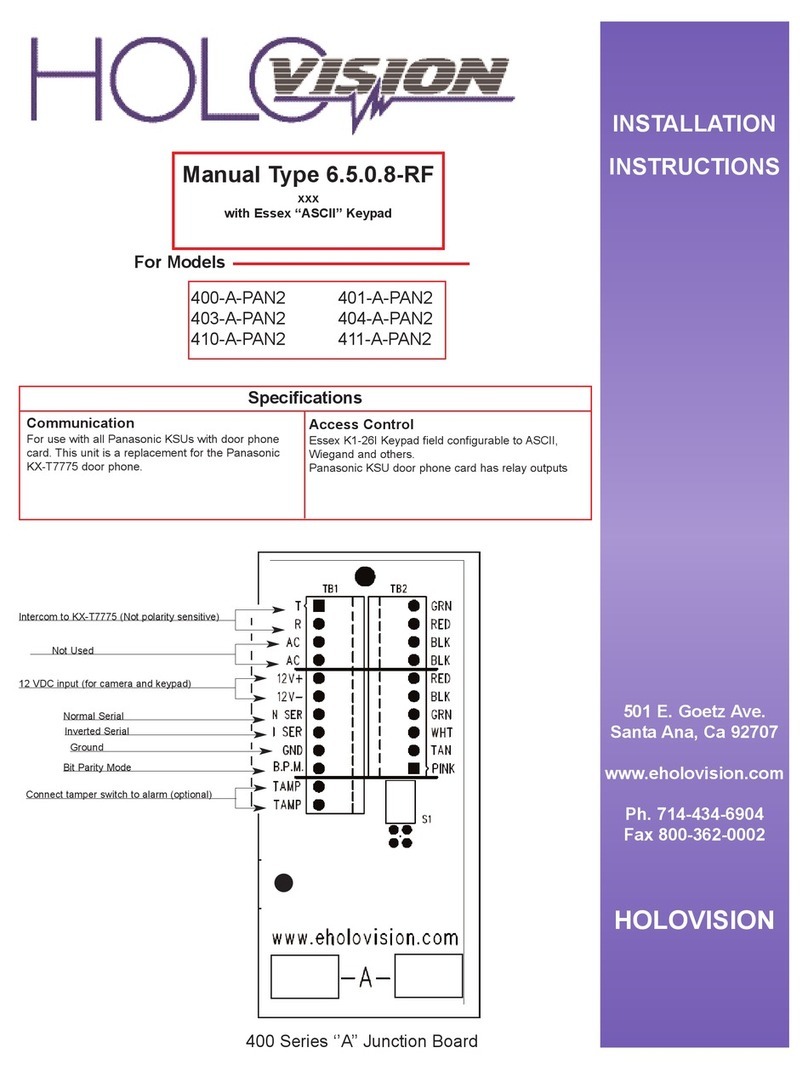
Not Used
12 VDC input (for camera and keypad)
NO, CO , NC relay connections
Keypad case ground
Remote bypass terminals (activate relay)
Connect tamper switch to alarm (optional)
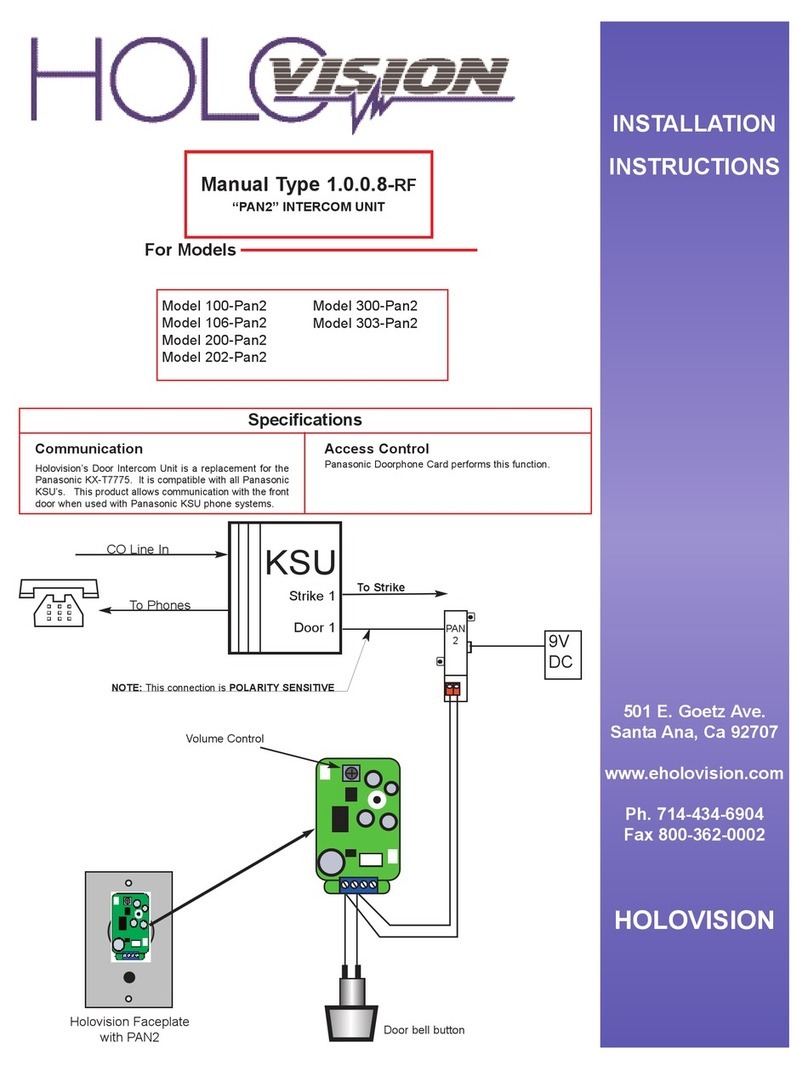
Intercom to PAN-2 odule
422930*)8043
For use with all Panasonic KSUs with door phone
card. This unit is a replacement for the Panasonic
KXT-7775 door phone.
Cut for NO Contact Closure
AC Loop for Strike
:
:
Loop Required for Strike DC
12vDC
1.5 A
Gate Strike
OVisrecommended
NOTE: OV (metal oxide varistor) is the small red component which is included. Its purpose is to absorb “inductive kick
back” which can be created when power is removed from the strike.
Loop is required from 12v positive to contact common for DC power to strike.
77,<,=5)+&0603.
DC Out for Gate Strike
Page 2 #=5,!
KSU
To Phones Strike 1
Door 1
# This connection is !#( ""#%
Refer to manual pages 6-8 for details
Cut for NO Contact Closure
AC Loop for Strike
Remote
Bypass
Button
PAN
29V
DC
:
:
12vDC
1.5 A
77,<,=5)+&0603.
Contact Closure for Gate Operation
Page 3 #=5,!
To Phones
Refer to manual pages 6-8 for details
Cut for NO Contact Closure
AC Loop for Strike
Gate otor
PAN
29V
DC
# This connection is !#( ""#%
KSU
Strike 1
Door 1
64.6)2203.8/,77,<,=5)+
48,: If the User ID, or User Code/PIN has already been assigned, you will hear one long beep when # is entered.
In this case, choose a different User ID / PIN, or see the instructions for changing or deleting codes.
$#A$"!AAA"#!AA"?@
1#/,+,-)918)78,64+,07 ?@.
This can be changed to a unique code 3 - 8 digits long
2 Enter * Double Beep Fast Flash Solid
3 Enter Double Beep Fast Flash Slow Flash
4 Enter new master code, followed by Triple Beep Fast Flash Solid
5 Enter  Double Beep
6 EXA PLE: old code is 123, new code is 456 
Set aster Code
STEP ACTION BEEP Red LED Green LED
1 Remove power
2 Jumper the “CONFIG” pins on the rear of the keypad . V = 12
3 Apply 12 VDC power to red and black wires Quadruple Beep Flash Solid
4 Enter  followed by Double Beep Flash Solid
5 Enter  followed by Triple Beep Flash Solid
6 Remove power
7 Remove “CONFIG” jumper
8 Reapply power
STEP ACTION BEEP Red LED Green LED
Set Keypad Illumination to ##
#( ! Page 4
#( ! Page 5
64.6)2203.8/,77,<,=5)+
1 The aster Code is necessary to do this step.
)78,64+,?@0797,+)7)3,<)251,
2 Enter Double Beep Slow Flash Solid
3 Enter 1 Double Beep Slow Flash Slow Flash
4 Enter 1st User ID (1-500), followed by Double Beep Slow Flash Fast Flash
5 Enter 1st User Code/PIN, followed by Double Beep Slow Flash Fast Flash
6 Enter to complete User 1 programming Triple Beep Slow Flash Slow Flash
7 Enter 2nd User ID (1-500), followed by Double Beep Slow Flash Fast Flash
8 Enter 2nd User Code/PIN, followed by Double Beep Slow Flash Fast Flash
9 Enter to complete User 2 programming Triple Beep Slow Flash Slow Flash
10 Enter A Double Beep X 2
Set User Codes
STEP ACTION BEEP Red LED Green LED
1 The aster Code is necessary to do this step.
)78,64+,?@0797,+)7)3,<)251,
2 Enter Double Beep Slow Flash Solid
3 Enter  Double Beep Slow Flash Slow Flash
4 Enter User ID to be changed (1-500), followed by Double Beep Slow Flash Fast Flash
5 Enter new User Code/PIN, followed by Double Beep Slow Flash Fast Flash
6 Enter to complete programming Triple Beep Slow Flash Slow Flash
7 Enter A Double Beep X 2
Changing User Codes - using User ID
STEP ACTION BEEP Red LED Green LED

* 48,: If the User ID, or User Code/PIN has not been assigned, you will hear one long beep
when # is entered.





Example for entering user code 1 and 2- 
Example for changing user code 1- 
Page 6 #( !
64.6)2203.8/,77,<,=5)+
48,: If the User ID, or User Code/PIN has not been assigned, you will hear one long beep
when # is entered.
1#/,)78,64+,073,*,77)6=84+48/0778,5
In this example, the aster Code is 123
2 Enter Double Beep Slow Flash Solid
3 Enter Double Beep Slow Flash Slow Flash
4 Enter User Code/PIN to be changed, followed by Double Beep Slow Flash Fast Flash
5 Enter new User Code/PIN, followed by Double Beep Slow Flash Fast Flash
6 Enter to complete programming Triple Beep Slow Flash Slow Flash
7 Enter A Double Beep X 2
Deleting User Codes - using User Code/PIN
STEP ACTION BEEP Red LED Green LED
1 The aster Code is necessary to do this step.
In this example, the aster Code is 123
2 Enter Double Beep Slow Flash Solid
3 Enter Double Beep Slow Flash Slow Flash
4 Enter 1st User ID to be deleted (1-500), followed by Triple Beep Slow Flash Fast Flash
5 Enter 2nd User ID to be deleted (1-500), followed by  Triple Beep Slow Flash Fast Flash
.
6 Enter A Double Beep X 2
Deleting User Codes - using User ID
STEP ACTION BEEP Red LED Green LED




Example for deleting user code # 456- 
Example for deleting user ID 1 and 2- 
64.6)2203.8/,77,<,=5)+
48,: If the User ID, or User Code/PIN has not been assigned, you will hear one long beep
when # is entered.
Reset Keypad to Factory Defaults--- This is not normally necessary, but can be done as follows
STEP ACTION BEEP Red LED Green LED
1#/,+,-)918)78,64+,07?@.
This can be changed to a unique code 3 - 8 digits long.
2 Enter  Double Beep Slow Flash Solid
3 Enter Double Beep Slow Flash Slow Flash
4 Enter the desired activation time in ",*43+7 followed by Triple Beep Slow Flash Solid
5 Enter  to exit
6 Example:
 (10 second activation time)
Setting ain Relay Opening Time
STEP ACTION BEEP Red LED Green LED
1 Remove power
2 Jumper the “CONFIG” pins on the rear of the keypad
3 Apply 12 VDC power to red and black wires ONLY Quadruple Beep Flash Solid
5 Enter Double Beep Flash 3 Sec Flash
6 WAIT about 4 seconds Quadruple Beep Flash Solid
7 Enter Triple Beep Flash Solid
8 Remove power
9 Remove “CONFIG” jumper
10 Reapply power
Page 7 #( !
4,8>:,
")38)3))
/
)<
;;;,/414:07043*42

This manual suits for next models

5

Other HOLOVISION Intercom System manuals
HOLOVISION 400-A-TES2 User manual

HOLOVISION

HOLOVISION 400-A-TES2 User manual

HOLOVISION 400-W-VIK User manual

HOLOVISION

HOLOVISION 400-W-VIK User manual

HOLOVISION 100-Pan2 User manual

HOLOVISION

HOLOVISION 100-Pan2 User manual

HOLOVISION 400-W-TES2 User manual

HOLOVISION

HOLOVISION 400-W-TES2 User manual

HOLOVISION 400-A-VIK User manual

HOLOVISION

HOLOVISION 400-A-VIK User manual

HOLOVISION 404-W-VoIP User manual

HOLOVISION

HOLOVISION 404-W-VoIP User manual

HOLOVISION 401-A-PAN2 User manual

HOLOVISION

HOLOVISION 401-A-PAN2 User manual

HOLOVISION Viking E-40 User manual

HOLOVISION

HOLOVISION Viking E-40 User manual

HOLOVISION 420-VIO2 User manual

HOLOVISION

HOLOVISION 420-VIO2 User manual
HOLOVISION 400-A-PAN User manual

HOLOVISION

HOLOVISION 400-A-PAN User manual

HOLOVISION Viking E-10 User manual

HOLOVISION

HOLOVISION Viking E-10 User manual

HOLOVISION 400-S12-PAN User manual

HOLOVISION

HOLOVISION 400-S12-PAN User manual

HOLOVISION 101-VIK User manual

HOLOVISION

HOLOVISION 101-VIK User manual

HOLOVISION 400-S12-VIO2 User manual

HOLOVISION

HOLOVISION 400-S12-VIO2 User manual

HOLOVISION 401-W-PAN User manual

HOLOVISION

HOLOVISION 401-W-PAN User manual

HOLOVISION 401-W-VIO User manual

HOLOVISION

HOLOVISION 401-W-VIO User manual

HOLOVISION 400-S12-VIK User manual

HOLOVISION

HOLOVISION 400-S12-VIK User manual

HOLOVISION 400-A-VoIP User manual

HOLOVISION

HOLOVISION 400-A-VoIP User manual

HOLOVISION 400-S12-TES2 User manual

HOLOVISION

HOLOVISION 400-S12-TES2 User manual
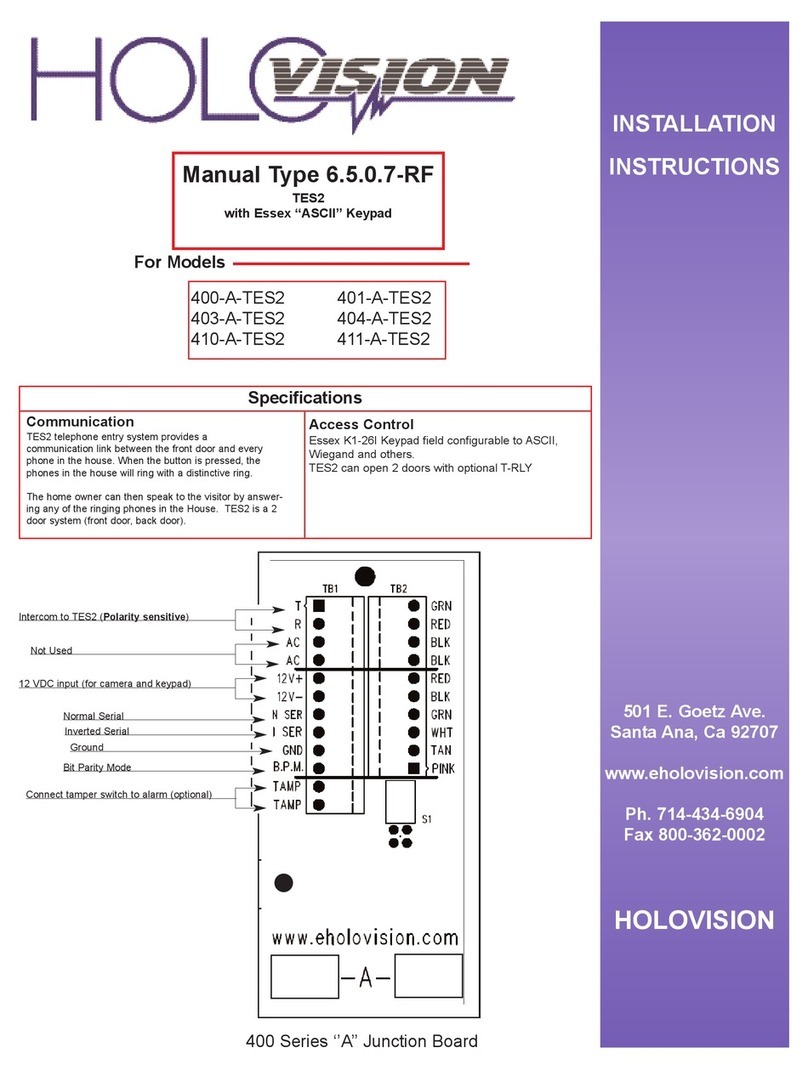
HOLOVISION 400-A-VIO User manual

HOLOVISION

HOLOVISION 400-A-VIO User manual
Popular Intercom System manuals by other brands

CAME BPT AGATAKIT/X1-LVC installation instructions

CAME BPT

CAME BPT AGATAKIT/X1-LVC installation instructions

Aiphone MY-1CD Installation & operation manual

Aiphone

Aiphone MY-1CD Installation & operation manual

CyberData 11307 Operation guide

CyberData

CyberData 11307 Operation guide

ACT ACT1020 - WIRING FOR ENTRYEXIT manual

ACT

ACT ACT1020 - WIRING FOR ENTRYEXIT manual

Aiphone IX-DVF-6 Installation and programming guide

Aiphone

Aiphone IX-DVF-6 Installation and programming guide

Viking E-30 Technical practice

Viking

Viking E-30 Technical practice

DIGITALas DD-5000 manual

DIGITALas

DIGITALas DD-5000 manual

urmet domus 1730 Installation and instruction manual

urmet domus

urmet domus 1730 Installation and instruction manual

Aiphone C-123L/A Installation & operation manual

Aiphone

Aiphone C-123L/A Installation & operation manual

XtendLan DPM-IP700 quick start guide

XtendLan

XtendLan DPM-IP700 quick start guide

Curv HD VIDEO DOORBELL instruction manual

Curv

Curv HD VIDEO DOORBELL instruction manual

Axis A82 Series user manual

Axis

Axis A82 Series user manual

urmet domus IPERVOICE SYSTEM installation manual

urmet domus

urmet domus IPERVOICE SYSTEM installation manual

DSE DM-C2 installation manual

DSE

DSE DM-C2 installation manual

Zenitel TEIV+ Mounting and installation manual

Zenitel

Zenitel TEIV+ Mounting and installation manual

SOMFY V300 installation guide

SOMFY

SOMFY V300 installation guide

Comelit 2619 Technical manual

Comelit

Comelit 2619 Technical manual

Elvox PETRARCA 6209 Installation and operation manual

Elvox

Elvox PETRARCA 6209 Installation and operation manual

manuals.online logo
manuals.online logoBrands
  • About & Mission
  • Contact us
  • Privacy Policy
  • Terms and Conditions

Copyright 2025 Manuals.Online. All Rights Reserved.