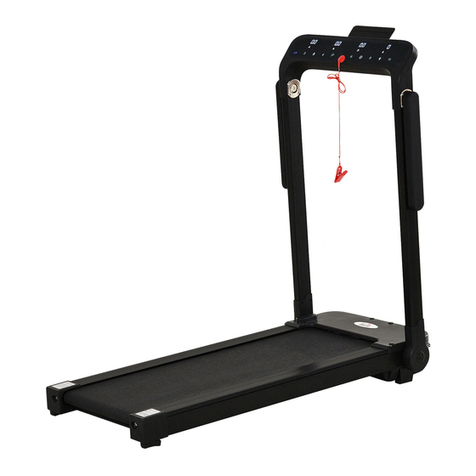
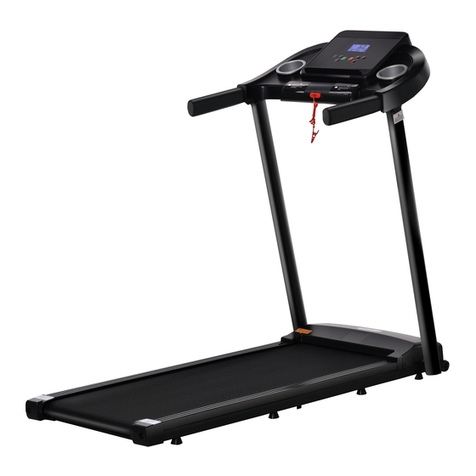
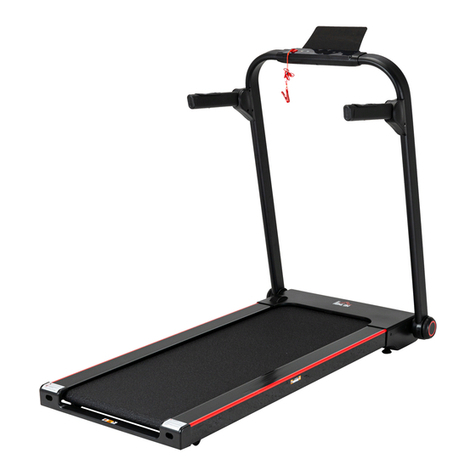
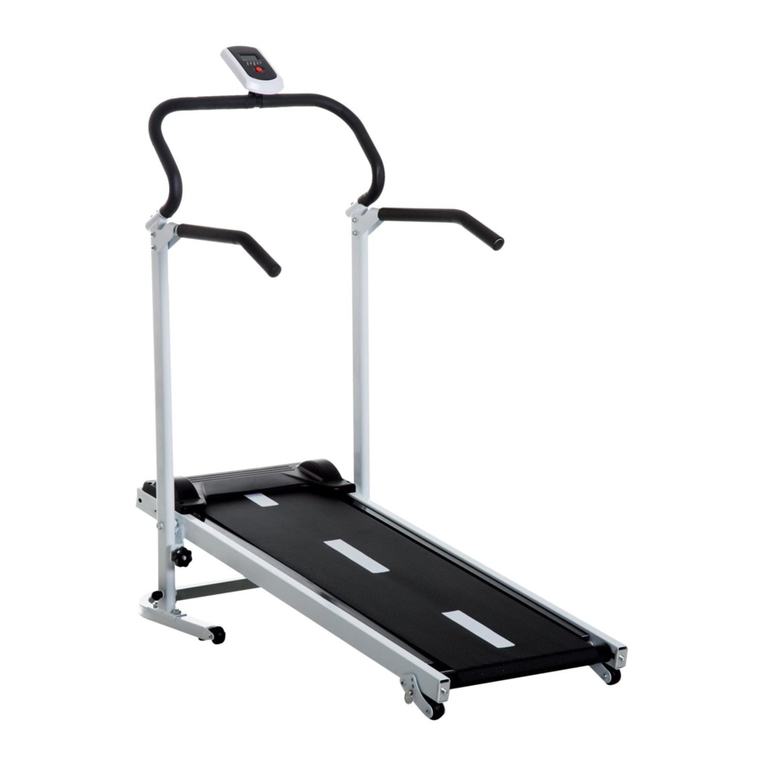
HOMCOM A90-225V70 User manual

ASSEMBLY INSTRUCTION
INan002V02_UK
A
9
0
-
225
V
7
0

Catalogue -----------------------------------------------------------------------------------------------------------------------------2
Safety Instructions -------------------------------------------------------------------------------------------------------------3
Parts List ------------------------------------------------------------------------------------------------------------------------------4
Assembly Instructions ------------------------------------------------------------------------------------------------------5
Folding Instructions ---------------------------------------------------------------------------------------------------------7
Incline Instruction---------------------------------------------------------------------------------------------------------------9
Ground Guide ---------------------------------------------------------------------------------------------------------------------9
Function Instruction ---------------------------------------------------------------------------------------------------------10
Getting Started Guide ---------------------------------------------------------------------------------------------------- 16
Safety Exercise Instructions --------------------------------------------------------------------------------------------17
Warm Up Exercise -------------------------------------------------------------------------------------------------------------18
Maintenance Guide ----------------------------------------------------------------------------------------------------------19
Belt Adjustment------------------------------------------------------------------------------------------------------------------19
Explosive Diagram -------------------------------------------------------------------------------------------------------------20
Parts Catalog Lists--------------------------------------------------------------------------------------------------------------21
Meanings Of Error Message Codes ------------------------------------------------------------------------------24
Table of Contents
-2-

Warning: Consult with your physician or health professional before starting your workout,
especially necessary if your age is up to 35 or once had healthy problem. We take no
responsible for any troubles or hurts if you don’t following our instructions. Treadmill should be
carefully assembled and covered with the motor shield before connected to the power.
Attentions
1、Ensure the safety lock’s clamp were attached to the clothing or belts before using the treadmill.
2、Please do not insert any items to any part of the equipment, which would damage the equipment.
3、Position the treadmill on a clear, level surface. Do not place the treadmill on thick carpet as it may interfere
with proper ventilation. Do not place the treadmill near water or outdoors.
4、Never start the treadmill while you are standing on the walking belt. After turning the power on and
adjusting the speed control, there may be a pause before the walking belt begins to move, always
stand on the foot rails on the sides of the frame until the belt is moving.
5、Wear appropriate clothing when exercising on the treadmill. Do not wear long, loose fitting clothing
that may be caught in the treadmill. Always wear running or aerobic shoes with rubber soles.
6、Keep the children and pets away from the treadmill while starting workout.
7、Don’t exercise in 40-Minutes after dinner.
8、The equipment is suitable for adults, Juveniles need be accompanied with adults while workout.
9、You must hold on to the handrails until you become comfortable and familiar with the treadmill at your first
start the workout.
10、Treadmill is indoor-use equipment, not outdoor-use for avoiding damage. Keep the store-place clean and
flat, drying. Please do not use the equipment for other purpose.
11、The power line of treadmill is special. If the power line is damaged, please buy it from the distributor or
contactthe company directly.
12、If the speed increase suddenly or inadvertently due to an electronic failure, please pull off the safety lock
from the console, then the treadmill will stop.
13、Do not connect other line to the middle of cable; do not lengthen cable or change the cable plug;
do not put any heavy thing on cable or put the cable near the heat source; forbid using socket with
several holes, these may cause fire or people may be hurt by the power. While insert the plug, pls
make sure to Insert it into the socket with the safety ground circuit.
Safety Instructions
-3-
1
32
71
40
24L/R
60
Spare parts list:
NO. DESCRIPTION SPEC Q’TY NO. DESCRIPTION SPEC Q’TY
1 Main Frame 1 71 Allen Wrench S6 55*95mm 1
32 Quick Pull Pin M16 2 40 Safety Key Line length 0.8m 1
24L/R Upright Decoration
Cover L/R 1/1 60 Screw ST4.2*15 4
24L
24R
14、When the equipment is not used, please cut off the power by pulling off the plug. While cutting off
the powder, do not pull the power line which may cause broken to the line. Once the power-line is
broken, please purchase the power-line from the distributor or contact with our company directly, as
the power-line is dedicated to the treadmill.
When you open the carton, you will find the below spare parts:
Parts List
-4-

STEP 1:Rotate the locking plate (06) 90° in
arrow direction .(P1)
STEP 2:Pull out plastic film from Upright Post
Frame(02L/R). (P2).
STEP 3:Rotate the Upright Post Frame(02R/L)
as the direction of the arrow. (P3).Keep holes of
Upright Decoration Cover (24L/R ) inline with
holes of Upright Post Frame(02L/R) ,then lock
Upright Decoration Cover (24L/R ) well by using
Screw(60).
06
P1
02L
02R
60
60
60
24L
24R
P3
Pull out them
P2
02L
02R
-5-

STEP 4:Adjust the handle bar(03) until holes
are aligned,then install quick pull pin(32) and
tighten them in arrow direction .(P4)
STEP 5:Adjust the computer(13)to the required
angle, then install knob(33)and lock it.(P5)
P4
02L
02R
3 2
3 2
0 3
P5
13
33
-6-

STEP 1:Turn the knob(33)loose,rotate the computer(13) 135°in arrow direction .(P6)
STEP 2:Pull out the pins(32) in the direction of the arrow,at the same time , rotate the handle
bar(03) forward in place.(P7)
33
13
P6
Folding Instructions
P7
32
32
03
-7-

STEP 3:Pull the adjust bar(67)in place as the direction of the arrow , at the same time
rotate the upright post frame(02L/R) in the arrow direction to level the main frame(01),(P8)
then turn back the locking plate (06) in beginning position.(P9)
STEP 4:Upright storage.(P10)
67
02L/R
P8 P9
01
06
Attention:Do not turn on the power before assembly is done. Please read
carefully the operation instruction of the treadmill.
P10
-8-

This product must be grounded. If it should malfunction or
breakdown, grounding provides a path of least resistance for
electric current to reduce the risk of electric shock. This product
is equipped with a cord having an equipment-grounding
conductor and a grounding plug. The plug must be plugged into
an appropriate outlet that is properly installed and grounded in
accordance with all local codes and ordinances.
DANGER – Improper connection of the equipment-grounding
conductor can result in a risk of electric shock. Check with a
qualified electrician or serviceman if you are in doubt as to
whether the product is properly grounded. Do not modify the
plug provided with the product – if it will not fit the outlet, have a
proper outlet installed by a qualified electrician.
This product is for use on a nominal 220-volt circuit and has a
grounding plug that looks like the plug illustrated in sketch A in
following figure. Make that the product is connected to an outlet
having the same configuration as the plug. No adapter should
be used with this product.
As above drawing, you can adjust lifting angle by changing pin’s position. There are 3 sections
adjust key to be used.
Ground Guide
Incline Instruction
-9-

WINDOW DISPLAY
1.Sketch
The function of computer
·MP3 interface playback function
·USB interface playback function
·Hand- pulse function
Terminological conventions used in the instructions:
Treadmill parameters:"SPEED" value.
Motion parameter:"DIS" value, "TIME" value,"CAL" value,"BEAT" value.
Motion mode: manual, mode, program
Manual Motion Mode: Motion Mode without Setting Motion Volume.
Model Motion Mode: Motion Mode with Specific Motion Volume.
Programmed Sports Mode: Different Sports Schemes Set up by the treadmill itself. Twelve Sports
Schemes Set up in the treadmill.
2.Specification
Motion parameters in various motion modes:
· Minimum display speed 0.8 km/h
· Maximum display speed 14 km/h
· Maximum exercise time in time mode: 99 minutes
· Minimum exercise time in time mode: 8 minutes
· Maximum distance in distance mode: 99 km
· Minimum distance in distance mode: 1 km
· Maximum calorie consumption in calorie mode: 990 calories
· Minimum calorie consumption in calorie mode: 20 calories
· The shortest running time of (P1-P12) program: 8 minutes
· The longest running time of (P1-P12) program: 99 minutes
3.LCD Display Description
Display content on LCD (92264):
· Speed display
· Time display
· Distance display
· Calorie display
Function Instruction
-10-

· Heartbeat display
4. Button Function Description
·SPEED QUICK BUTTON(3,5,7,9,12)
·START/STOP
·“PROGRAM” BUTTON“MODE” BUTTON
·“SPEED +/- ”BUTTON
5. Button Function
·START Button: Start Motor Operation
Operational Description:1. When the computer is standby, the countdown time of 5 seconds after
pressing this button can start the motor.
2. In the mode setting state, the computer can start the motor by counting down
5 seconds after pressing this button.
3. In the programming state, the computer can start the motor by counting down
5 seconds after pressing this button.
·STOP Button : Stop motor operation
Operational Description:1. When computer is in operation, press this button to stop the motor.
2. When the motor stops running completely, all data will be cleared to the initial
state.
·“PROGRAM” Button:Automatic Program Selection
Operational Description:1. In standby state, press this button to enter automatic program setting.
2. Keep pressing this button after entering P12, and you can enter the settings of
the custom program.
3. After entering the custom program settings, continue to operate this button to
enter the body fat test settings.
4. Operating flow: Programming - Body Fat Test Setting - Returning to Initial
State
·“MODE” Button:Choice of countdown mode
Operational Description:1. When the computer r is standby, press this key to set the countdown mode.
2. In the body fat test setting state, press this button to enter the next parameter
setting.
3. Standby operation process: time countdown-distance countdown-calorie
countdown-return
4. Operation flow under body fat test settings: setting sex-setting age-setting
height-setting weight-body fat test
5. Press this button to enter different periods of time in the customized program
settings
·“SPEED +/- ”Button:Running speed adjustment, setting parameter adjustment
Operational Description:1. The speed value of the computer can be adjusted when it is in operation.
2. Under the condition of parameter setting, the value of setting parameter can
be adjusted.
-11-

·SPEEDQUICK Button:Direct Selection of Runtime Speed Values
Operational Description:In the running state of the computer, press this button to select the corresponding
speed value directly.
6.Motion Mode Description
A、Manual Motion Mode
Enter the manual mode: After the computer is fully displayed on power, it enters the initial
standby state. At this time, press the start button, and then it enters the
manual mode of operation.
Running instructions: Initial running speed is 0.8KM/H, time, distance, calorie window is counted
positively from zero, according to the speed adjustment key, the value of
running speed can be adjusted。
Exercise time is more than 99:59 minutes, the system does not stop, and
the time starts from zero.
B、Countdown Mode Function
1. Enter the Countdown mode:In the initial standby state, select the time countdown mode by
pressing the mode button. At this time, the time window shows 30:00
minutes and flickers to show that the required running time can be set by
the “SPEED +/- ”button. The setting range is 8:00-99:00 minutes. Press
the start button to enter the time countdown mode.
Running instructions:The initial speed of 0.8 KM/H, set according to the operation of the time
window began to count down time, distance and starting from scratch is
counting calories window, press “SPEED +/- ”button, the size of the
adjustable speed value, when setting the time down to zero, electronic
watch began to slowly stop running, speed is reduced to zero, return to
the initial standby mode automatically.
2. Enter distance countdown mode:In the initial standby state, select the distance countdown mode
by pressing the mode button. At this time, the distance window
shows 0.8 kilometers and flickers. The required distance can be
set by “SPEED +/- ”button. The range is 1.0-99.0 kilometers.
Press the start button to enter the distance countdown mode.
Running instructions:The initial running speed is 0.8KM/H, the distance window counts down
according to the set distance, the time and calorie window counts
positively from zero, and the “SPEED +/- ”button can adjust the size
of the running speed value. When the set distance counts down to zero,
the computer starts to stop running slowly and automatically returns to the
initial standby state after the speed decreases to zero.
3. Enter calorie countdown mode:
In the initial standby state, the calorie countdown mode is selected
by pressing the mode button. At this time, the calorie window
displays 50 and flickers. The required running calories can be set
by the “SPEED +/- ”button, and the range is 20-990. Pressing
the start button, the calorie countdown mode can be operated.
-12-

Running instructions:Initial speed of 0.8 KM/H, the terms of the calorie counting, counting
calories window, window of time and distance are counting from scratch,
press “SPEED +/- ”button, the size of the adjustable speed value, can
adjust the size of the gradient value operation, when calorie meter to zero,
set up electronic watch began to slowly stop running, speed reduction to
zero after the return to the initial standby mode automatically.
C、Automatic Programming Function
Enter Auto Program:In the initial standby state or mode setting state, press the program button to
enter the automatic program selection. At this time, the time window displays
30:00 minutes and flashes (the required running time can be set by the
“SPEED +/- ”button, and the setting range is from 8:00 to 99:00 minutes).
Press the start button to enter the automatic program running.
Running instructions:Automatic program is divided into 20 section, the speed of each value to run,
according to the program automatically the default value of each segment
running time is 1/20 of the setting time, set according to the operation of the
time window began to count down time, distance and starting from scratch
is counting calories window, press “SPEED +/- ”button, the size of the
adjustable speed values, when the program run to the next paragraph,
speed value automatically adjusts to the next section of the default values,
when setting the time down to zero, computer began toslowly stop running,
speed is reduced to zero, return to the initial standby mode automatically.
D、Custom Program (U1-U3):
In addition to 12 system built-in programs, the treadmill also has three user-defined programs that allow
users to set up by themselves according to their own circumstances: U1, U2, U3.
1. User-defined Program Settings:
Press "PROGRAM" button in standby state until the user defined program (U1-U3) you want to set,
press "MODE" button to determine the entry settings, and then set the speed for the first time period.
When setting, use “SPEED +/- ”button or SPEED QUICK Button to set the speed. Press "MODE"
button to complete the settings of one time period and enter two time periods to set the state straight.
To complete all 20 (calorie window display S1-S20) time period settings; after settings are completed,
data will be permanently saved until your next reset, during the settings can not power off, otherwise the
data can not be automatically saved.
2. Startup of User-defined Programs:
A. Press the "PROGRAM" button continuously in standby state until the user-defined program (U1-U3)
you want torun is set up, and then press the start button to start.
B. Press the start button immediately after the user-defined program and run time settings are
completed.
3. User-defined Program Settings:
Each program divides the running time into 20 periods. The speed, gradient and running time of all 20
periods should be set before the treadmill can be started by pressing the start button.
4. Speed can be adjusted by “SPEED +/- ”button in the process of operation. When the last stage of
operation is over, it automatically enters the next stage of operation, and the
-13-

speed is automatically adjusted to the set value of the section.
7. Functional description of body fat test
Enter Body Fat Test Settings:In the initial standby state or mode setting state, press the
"PROGRAM" button to select the body fat test setting (in the P12 automatic
program setting state, press the "PROGRAM" button to enter the body fat test
setting state).
Body fat test setting instructions:After entering the body fat test setting state, the distance window
displays the parameter function (-X-), the calorie window displays the setting
value, adjusts the setting value according to the “SPEED +/- ” button, and
chooses to enter the next setting according to the "MODE" button.
The first is gender (-1-) setting: initial value 1 (range 1-2, 1 for men; 2 for
women)
The second item is age (-2-) setting: initial value 25 (range 10-99 years)
The third item is height (-3-) setting: initial value 170 (range 100-220 CM)
The fourth item is weight (-4-) setting: initial value 70 (setting range 20-150 KG)
The fifth item is the body fat (-5-) test: initial value ---
Body fat test:When the settings are completed, enter the 5th body fat test, initially showing
"---". At this time, holding hands on the Hand Pulse Sensors for about 5
seconds will show the body fat test index.
Explanation of body fat index:Body fat index is a measure of a person, the relationship between
height and weight is suitable for any men and women, together with other
health indicators for people to adjust weight basis, the ideal body fat index must
be between 20 ~ 25, if less than 19, said the weight is too light, if between 26 ~
29, said overweight, obesity and if more than 30, said (note: the data are for
reference only, not as a medical data).
8. Hand Pulse function description
Hand Pulse Function:The palms of both hands are attached to the Hand Pulse Sensors of the left
and right armrests respectively. They are held naturally on the handles on
both sides. After 5 seconds or so, the LCD heartbeat display window will
display the initial value of heartbeat. Please keep the hands still. The
heartbeat display window will slowly change the display data and approach
the actual value of heartbeat in 30 seconds.
Instructions for the Hand Pulse function:
The following conditions may produce irregular heartbeat data:
1. When holding the test, the strength of the hand is too tight. Please hold
the moderate strength.
2. When running, the hand-holding and jumping handles test will produce
constant changes in contact. When testing the hand-jumping, it is
recommended to stop the movement, stand on the bilateral edges of the
feet, and hold the hands quietly.
3. Persons with dry or cold hands or especially thick palm skin.
-14-

Note: Hand Pulse heartbeat test data can not be used as medical data only as a
reference for exercise because of the way of measurement and the reasons
of many influencing factors.
9. Description Of Dormancy Function
When the treadmill stops running, if there is no operation for more than 10 minutes, it will enter a
dormant state. The computer will automatically turn off the display and press any button to wake up the
computer, and then re-enter the initial standby state.
10. Safety Lock Function Description
In normal use, the safety lock should be placed in the designated position of the computer before the
computer can be operated and the safety lock can be taken down. The LCD window of the computer
shows E07 or "-". Ifthe safety lock is taken down in operation, the system will shut down quickly and all
movement data will be cleared after the safety lock is closed again.
11.MP3 Function Description
After power-on, music can be played when accessing external MP3 or other audio devices. The volume
can be adjusted by the volume +/- button. Please pay attention to controlling the volume, so as not to
affect the quality of playing music and the audio control circuit inside the electronic meter.
12.USB Function
After the computer is powered on, the cell phone can be charged by inserting a data line.
13. Various numerical display ranges:
BEGIN SET UP VALUE SET UP RANGE DISPLAY RANGE
TIME (MIN: SECOND) 0:00 30:00 8:00-99:00 0:00~99:59
SPEED(KM/H) 0.0 N/A N/A 0.8-14
DISTANCE(KM) 0.0 1.0 1.0-99.0 0.0-99.9
PULSE(BEAT/MIN) P N/A N/A 40-199
CALORIE(KCAL) 0 50 20-990 0-999
Schedule 1:P1—P12 PROGRAM EXERCISE CHART
Time
Program
SET TIME / 20 = EVERY GRADE TIME
1 2 3 4 5 6 7 8 9 10 11 12 13 14 15 16 17 18 19 20
P1 SPD 23345345534544423353
P2 SPD 24456466645644422541
P3 SPD 24466477747744424532
P4 SPD 35567757788595566443
P5 SPD 24456775678854336542
P6 SPD 24345487678364425432
P7 SPD 23334534534533366533
P8 SPD 23367746746744423442
P9 SPD 24477478489944456332
P10 SPD 24567546886654424433
P11 SPD 34595955595555998763
P12 SPD 2 5 8 10 7 7 10 10 7 7 10 10 6 6 9 9 5 5 4 3
-15-

Warm up stage:
If you are over 35 years old, or not very healthy, also it’s your first time exercise, please consult with your
doctor or professional person.
Before you use the motorized treadmill, please learn how to control the machine, know well how to start, stop,
adjust the speed and so on; don’t stand on the machine at this time. After that, you can use the machine.
Stand on anti-slip pad both sides and handle the handle bar with your both hands. Keep the machine at the
low speed about 1.6~3.2 km/h, then test the running machine by one foot, after get used to the speed, then
you can run on the machine and you can add the speed between 3 and 5 km/h. Keep the speed about 10
minutes, then stop the machine.
Exercise stage:
Learn how to adjust the speed and incline before using. Walk about 1 km at stable velocity and write down the
time, it will take you about 15-25 minutes. If walk at 4.8 km/h, it will take you about 12 minutes in 1 km. If you
feel comfortable at the stable velocity, you can add the speed and incline, after 30 minutes, you can have good
exercise. At this stage, you cannot add the speed or incline too much at one time, it can keep you feel
comfortable.
Exercise intensity:
Warm up at the speed 4.8 km/h in 2 minutes, then add the speed to 5.3 km/h and keep walking in 2 minutes,
then add to 5.8km/h and walk in 2 minutes. After that, add up 0.3 km/h in each 2 minutes, until rapid breath but
not feel comfortable
Calorie burning---the best effective way
Warm-up for 5mints by the velocity: 4-4.8KM/H, then slowly increase the speed by 0.3KM/H/2 Mints, until up to
the stable speed which you feel is comfortable for 45Mints.For improving the intensity of movement, you can
maintain the speed during 1H of TV program, then increase the speed by 0.3KM/H each Advertisement
interval time, after that return to the original speed . You can acquaint the best efficiency of workout for calorie
burning during the advertisement time and subsequent heart frequency increasing time. Finally, you should
slow down the speed step by step for 4Mints.
Exercise frequency:
The cycle time: 3-5times/Week, 15-60mints/Times. Make up the schedule of workout scientific, not only for
your hobby.
You can control the running intensity through adjusting the velocity and incline of treadmill. We suggest that
you don’t set the incline at first; improve the incline is the effective way to strengthen the exercise’s intensity.
Gettingss Stasrted Guide
-16-

Consult with your physician or health professional before starting your workout. The professional
people can help you make up the suitable exercise time-chart according to your age and health
condition; determine the velocity of movement, the intensity of exercise. Please stop at once, if you
feel chest tightness, chest pain, irregular heartbeat, breath difficulty, dizziness or other discomfort
during exercise. You should consult with your physician or health professional as keep going.
You can choose the normal walking speed or the jogging speed, if you always take workout
with treadmill. If you don’t have enough experiences or confirm the testing velocity, you can
follow the instruction:
Speed 1.0-3.0KM/H not well physical
Speed 3.0-4.5KM/H less movement and workout
Speed 4.5-6.0KM/H normal walking
Speed 6.0-7.5KM/H fast walking
Speed 7.5-9.0KM/H Jogging
Speed 9.0-12.0KM/H intermediate speed walking
Speed 12.0-14.5M/H well experiences of running
Speed 14.5-16.0KM/H excellent runner
Attention: 6 km/h or less is appropriate for walkers; A speed greater than or equal to 8.0 km/h
is appropriate for runners.
Safety Exercise Instructions
-17-

Before exercise, it is better Warm
muscles stretch more easily, so the first of 5
~ 10 minutes to warm up. Then in
accordance with the following methods to
stop and do stretching exercises - do five
times, each leg every time 10 seconds or
more time to do it again after the end of the
exercise.
1. Down the stretch: knees slightly
curved, the body bent forward slowly, so that
the back and shoulders relaxed, hands try to
touch your toes. Maintain 10 to 15 seconds,
and then relax. Repeat three times to do
(see Figure l).
2. Hamstring stretch: sitting on the clean
seat, put one leg straight. Inward close to the
other leg to make it close to the inside leg
straight. Hand try to touch the toes. Maintain
10 to 15 seconds, and then relax. Repeat for
each leg do three times (see Figure 2).
3. Legs and feet tendon stretch: two on
the Rotary wall or tree stand, one foot in the
post. Keep legs straight and heel to tilt the
direction of the wall or tree. Maintain 10 to 15
seconds, and then relax. Repeat for each leg
do three times (see Figure 3).
4.Quadriceps stretch: the left hand wall
or table Cu master balance, and then
stretched his right hand back to seize the
right foot to the buttocks with slowly pull until
you feel the front thigh muscles tense.
Maintain 10 to 15 seconds, and then relax.
Repeat for each leg to do three times (see
Figure4).
5. Sartorius muscle (inner thigh muscles)
stretch: Foot In contrast, the knee outward to
sit down. The hands grasp the feet to the
groin pull. Maintain 10 to 15 seconds, and
then relax. Repeat three times (see Figure
5).
Warm Up Exercise
-18-

Warning: ALWAYS UNPLUG THE TREADMILL FROM THE ELECTRICAL OUTLET BEFORE
CLEANINGOR SERVICING THE UNIT.
Clean: General cleaning or the unit will greatly prolong the treadmill.
Keep treadmill clean by dusting regularly. Be sure to clean the exposed part of the deck on either side of the
walking belt and also the side rails. This reduces the buildup of foreign material underneath the walking belt by
wearing the clean running shoes.
Warning: Always unplug the treadmill from the electrical outlet before removing the motor cover. At
least once a year remove the motor cover and vacuum under the motor cover.
RUNNING BELT AND DECK LUBRICATION
This treadmill is equipped with a pre-lubricated, low maintenance deck system. The belt/ deck friction may play
a major role in the function and life of your treadmill, thus requiring periodic lubrication. We recommend a
periodic inspection of the deck. You need contact with our service center if you find the damage of the deck.
We recommend lubrication of the deck according to the following timetable:
Light user (less than 3 hours/ week) - Annually
Medium user (3-5 hours/ week) - Every six months
Heavy user (more than 5 hours/ week) - every three months
We recommend that you buy the lubrication from our distributor or directly to our company.
Attention: Any repair needs the professional technician.
Maintenance Guide
Belt Adjustment
-19-

If the belt has drifted to the right, unplug the
safety lock and power switch, and turn the
right adjusting bolt 1/4 turn clockwise, then
insert the power switch and safety lock,
re-start the treadmill and observe the running
belt to see if it deviates. Repeat the above
steps until the running belt is aligned in the
middle. See picture A
If the treadmill belt is swerving to the left,
unplug the safety lock, turn off the power,
then with the left adjusting bolt clockwise
rotation 1 / 4 laps, and turn on the safety lock
and power on to make treadmill running,
checking the deviation of the treadmill belt.
Repeat the above steps until the belt centered.
See picture B
The treadmill belt will gradually relax after
above steps or after a period of time using,
unplug the safety lock, and turn off the power,
with the two adjusting bolt clockwise rotation
1 / 4 laps, and turn on the safety lock and
power to make treadmill running, then
standing on the belt to confirm the tightness.
Repeat the above steps until the belt
moderate tightness. See picture C
Explosive Diagram
-20-
Table of contents
Other HOMCOM Treadmill manuals

HOMCOM
HOMCOM A90-286V70 User manual

HOMCOM
HOMCOM A90-030V01 Installation guide

HOMCOM
HOMCOM A90-136 User manual

HOMCOM
HOMCOM A90-030V01 Installation guide

HOMCOM
HOMCOM A90-128 User manual

HOMCOM
HOMCOM A90-284V90 User manual

HOMCOM
HOMCOM A90-247 User manual

HOMCOM
HOMCOM A90-303 User manual

HOMCOM
HOMCOM A90-250V70 User manual

HOMCOM
HOMCOM A90-208V90 User manual

HOMCOM
HOMCOM A90-252V70 User manual

HOMCOM
HOMCOM A90-287V70 User manual

HOMCOM
HOMCOM B1-0095 User manual

HOMCOM
HOMCOM A90-252V90 User manual

HOMCOM
HOMCOM A90-246 User manual

HOMCOM
HOMCOM A90-250V70 User manual

HOMCOM
HOMCOM A90-282V90 User manual

HOMCOM
HOMCOM A90-224 User manual

HOMCOM
HOMCOM A90-116 User manual

HOMCOM
HOMCOM A90-283V90 Installation guide