manuals.online logo
Brands
  1. Home
  2. •
  3. Brands
  4. •
  5. Honeywell
  6. •
  7. Security Sensor
  8. •
  9. Honeywell DUAL TEC DT8050A User manual

Honeywell DUAL TEC DT8050A User manual

DT8050A DUAL TEC
®
Motion Sensor with Anti-Mask - Quick Installation uide
Détecteur de mouvement DT8050A DUAL TEC
MD
avec Anti-Masque– uide d'installation rapide
Sensor de Movimiento con Antienmascarmiento DUAL TEC
®
DT8050A – uía Rápida de Instalación
Sensor de Movimento com Anti-máscara DUAL TEC
®
DT8050A – uia rápido de instalação
1
*
* Keep Clear / Tenir à l'écart /
Respetar obligatoriamente /
Manter-se afastado
*
6' 9" - 8' 9"
(2.1 - 2.7 m)
12”
(30 cm)
7' 6"
(2.3 m)
Optimal
Optimal
Optimo
Ótimo
2
3
1
2
#6
(3.5 mm)
A
A
B
BB
B
3
A
B
#6 x 1 1/4"
(3.5 mm x 32 mm)
B
X X
A
B
4
Microwave Range Adjustment
Réglage de la portée Hyperfréquence
Ajuste del rango de detección Microondas
Ajuste de Alcance Microondas
Enabled
Activé
Habilitado
Habilitado
*Disabled
*Désactivé
*Deshabilitado
*Deshabilitado
* Factory default / Réglage usine /
Defecto de fábrica / Padrão de fábrica
ON
OFF
*
Anti-mask
Anti-masque
Antienmascaramiento
Anti-máscara
MW
SENSITIVITY
MAX
*
MIN
*
LED
Internal EOL Resistor DIP Switches
Résistance interne EOL commutateur DIP
Interruptores DIP Resistencias internas EOL
DIP Switches Resistores internos EOL
EOL
KOhm
ON
1 2.2 5.62
*
DT8050A
AM LED
EOL
PULL
TO DISABLE
LOOK DOWN
LOOK DOWN
ON
OFF
ON
W1
MW
SENSITIVITY
MAX
KOhm
ON
1 2 2.2 5.6
- 2 -
LED TBL T C V-V+
T NCTBL
9 8 6 4 2 15 37
5
EOL
KOhm
ON
1 2.2 5.62
*
Tamper
30 mA
25 VDC
Trouble
30 mA
25 VDC
Power
18 mA
9-15 VDC
(UL:9.5-15 VDC)
Alarm
30 mA
25 VDC
LED
0 VDC - Vsupply
1.8 mA max
22-20 AWG
(0.31-0.52mm2)
1
2
WIRING EXAMPLES / EXEMPLES DE CÂBLAGE /
EJEMPLOS DE CABLEADO / EXEMPLOS DE CABEAMENTO
To connect all three outputs (sensor alarm, tamper and trouble/ant
i-mask) to one
zone input:
All alarm, tamper and trouble/anti-mask events are “alarms” when the system
is
armed or “fault” when disarmed.
Pour brancher les trois sorties (alarme de capteur, sabotage et défectuosité/anti-
masque) sur une entrée de zone : Toutes les activités d alarme, de sabotage de
défectuosité/anti-masque sont des « alarmes » quand le système est armé ou des
« violations » quand il est désarmé.
Para conectar las tres salidas (alarma del sensor, sabotaje y problemas / anti-
máscara) a una entrada de zona: Todos los eventos de alarma, sabotaje y problema /
anti-máscara son "alarmas" cuando el sistema está armado o "falla" cuando está
desarmado.
Para conectar as três saídas (alarme de sensor, tamper e problema / anti-máscara) a
uma entrada de zona: Todos os eventos de alarme, tamper e problema / anti-máscara
são "alarmes" quando o sistema estiver armado ou "falha" se estiver desarmado.
Zone
COM Ground
Zone
#
Anti-mask
Enabled
+12V
Control Panel
(On-Board, Internal EOLR)
LED TBL T C V
-
V+
T NCTBL
9 8 6 4 2 15 37
EOL
KOhm
ON
1 2.2 5.62
EOL
ON
Sensor
Remote
LED
Control
Note: A masking condition can occur when blocking or reflective material is placed in front of the sensor. Keep 12” (30cm) in front
of the sensor clear.
Remarque : Une condition de masquage peut se produire quand du matériel bloquant ou réfléchissant est placé devant le capteur.
Gardez un espace libre de 30 cm (12 po) devant le capteur.
Nota: Una condición de enmascaramiento puede ocurrir si se coloca frente al sensor algún objeto que bloquee o refleje. Guarde
una distancia de 30cm (12”) frente al sensor.
Nota: Uma condição de mascaramento pode ocorrer quando se um material reflector ou que bloqueia é colocado em frente do
sensor. Mantenha uma distância de 30 centímetros (12 ") em frente do sensor.
To connect the sensor alarm output to one zone input and the tamper and
trouble/anti
-mask outputs to a second zone input: The alarm relay is wired to one
zone; t
he tamper and trouble/anti-mask are wired to another zone; the control panel
differentiates alarm conditions from tamper and trouble/anti
-mask conditions.
Pour brancher la sortie d’alarme du capteur sur une entrée de zone et les sorties de
sabotage et de défectuosité/anti-masque sur une deuxième entrée de zone : Le
relais d alarme est branché sur une zone; le sabotage/anti-masque est branché sur une
autre zone; le panneau de commande différencie les conditions d alarme des conditions
de sabotage et de défectuosité/anti-masque.
Para conectar la salida de alarma del sensor a una entrada de zona y las salidas de
tamper y problema / anti-máscara a una segunda entrada de zona: El relé de alarma
está conectado a una zona, el de tamper y problema / anti-máscara a otra zona: el panel
de control distingue las condiciones de alarma de tamper y las de problema / anti-
máscara.
Para conectar a saída de alarme de sensor a uma entrada de zona e as saídas de
tamper e problema / anti
-máscara a uma segunda entrada de zona: O relay de alarme
é ligado a uma zona,
tamper e problema / anti-máscara são ligados a uma outra zona; o
painel de controle diferencia as condições de alarme de tamper e as condições problema /
anti
-máscara.
*
Zone
COM Ground +12V
Control Panel
Trouble
Zone
Alarm
Zone
W1
* Off-Board, External EOLR (Not supplied),
install inside the sensor housing.
LED TBL T C V-V+
T NCTBL
9 8 6 4 2 15 37
Cut
Anti-mask
Enabled
EOL
KOhm
ON
1 2.2 5.62
EOL
ON
Sensor
(On-Board, Internal EOLR)
JUMPER
Remote
LED
Control
- 3 -
To connect the sensor alarm, tamper and troub
le/anti
-
mask outputs to three
separate zone inputs
: The alarm, tamper and trouble/anti-mask are each wired to a
separate zone;
the control panel differentiates alarm, tamper and trouble/anti-mask
conditions.
Pour brancher les sorties d’alarme de capteur, de sabotage et de défectuosité/anti-
masque sur trois entrées de zone séparées : L alarme, le sabotage et
défectuosité/anti-masque sont branchés sur une zone séparée; le panneau de commande
différencie les conditions d alarme de sabotage et de défectuosité/anti-masque.
Para conectar el sensor de alarma, tamper y salidas de problema / anti-máscara con
tres entradas de zona separadas: Las alarmas, sabotaje y problema / anti-máscara
están cada uno conectado a una zona separada, el panel de control distingue las
condiciones de alarma, problemas y sabotaje / anti-máscara.
Para ligar o alarme de sensor, tamper e saídas de problema / anti-máscara a três
entradas de zona separadas: Os alarmes, tamper e problema / anti-máscara são cada
uma ligada a uma zona separada, o painel de controle diferencia as condições de alarme,
tamper e problema / anti-máscara.
**
Zone
COM Ground +12V
Control Panel
Tamper
Zone
Alarm
Zone
Trouble
Zone
Zone
COM
LED TBL T C V
-
V
+
T NCTBL
9 8 6 4 2 15 37
W1
Cut
Anti-mask
Enabled
EOL
KOhm
ON
1 2.2 5.62
EOL
ON
* Off-Board, External EOLR (Not supplied),
install inside the sensor housing.
Sensor
(On-Board, Internal EOLR)
Remote
LED
Control
6
30 sec
30
0
45
20
10
MW
SENSITIVITY
MAX
MIN
ON
AM LED
Walk Test Reset
1/2 sec.
hold 4x
< 4’ (1.2m)
1. Apply power to the sensor. Initialization is complete when the LED
stops flashing slowly (about 30 seconds).
2. Turn the microwave sensitivity counterclockwise to reduce the
microwave range (minimum = 16.4’ / 5m) and close the sensor.
3. Walk through the detection area and observe the LED.
4. Adjust the microwave range as necessary to meet installation requirements.
Walk test mode is active for 10 minutes, then automatically exits test mode, disables the LED and enters normal
operation mode. For an additional 10 minute walk test, enable walk test mode again with the flashlight feature (see Walk
Test Reset above).
Note: During power up and walk test modes the LED is active regardless of the LED Enable/Disable DIP switch setting.
7
Top View
Vue de dessus
Vista Desde Arriba
Vista Superior
Side View
Vue de coté
Vista Lateral
Vista Lateral 0
PLAN VIEW
ALL ZONES
7’
2 m
0
0
13’
4 m 20’
6 m 27’
8 m 33’
10 m 40’
12 m
7’
2 m
13’
4 m
20’
6 m
27’
8 m
33’
10 m
40’
12 m
7’
2 m
13’
4 m
20’
6 m
27’
8 m
33’
10 m
40’
12 m 46’
14 m 53’
16 m
7’
2 m
0
13’
4 m 20’
6 m 27’
8 m 33’
10 m 40’
12 m 46’
14 m 53’
16 m
A B C D
7’6”
2.3 m
LED Power
Up Walk Test Normal Trouble
Anti-
Mask
Red Slow
Blink
ON
Alarm
ON
Alarm
Fast
Blink OFF
Yellow OFF ON
Microwave
ON
Microwave OFF Fast
Blink
reen OFF ON PIR ON PIR OFF OFF
Zones / Zones / Zonas / Zonas
A
2
Look-down / Basses / Vista Zona 0 /
Vigilância inferior
B
12
Lower / Courtes / Cercana/ Mais baixas
C
10
Intermediate / Intermédiaires / Intermedia /
Intermédias
D
36
Long / Longues / Largo Alcance / Longo
alcance
- 4 -
SPECIFICATIONS:
Operating Temperature: 14°to 131°F / -10°to 55°C
Relative Humidity: 5 to 93% (UL tested at 93%); non-condensing
TROUBLESHOOTING:
TROUBLE*
NORMAL
Mask
1
Low
Voltage
2
Self
-
Test
Failure
3
Alarm Relay
Closed Open Closed Closed
Trouble Relay
Closed
Open
Open
Open
Red LED
Off
Off
Off
Flashing
Yellow LED
Off
Flashing
Off
Off
*TROUBLE CONDITIONS:
1
Mask condition: Sensor IR window is blocked or masked.
2
Low Voltage: The sensor is disabled. [Note: If voltage drops
below 7.9V, the Trouble relay will open.]
3
Self-Test Failure conditions:
• Microwave supervision failure: The
sensor is operating in PIR mode
only.
• PIR self-test failure: The sensor is
disabled.
• Temperature compensation failure:
The temperature compensation is
disabled.
Depending on the Trouble
condition, take the following
corrective actions:
• Verify the sensor is not blocked
or masked.
• Verify the power supply is
sufficient (at least 9V at the
sensor).
• Cycle power to the sensor.
• Walk test the sensor.
If the Trouble condition does not
clear, replace the sensor.
APPROVAL/ LISTINGS:
•FCC part 15, Class B verified
•IC ICES-003, Class B verified
•UL 639
•ULC S306-03
•SIA-PIR-01 Passive Infrared detector standard features for false alarm
immunity.
Product must be tested at least once each year / Le fonctionnement du produit doit être vérifié au moins une fois par année /
El producto debe ser probado al menos una vez al año / O produto deve ser testado pelo menos uma vez por ano
All wiring must be in accordance with: the National Electrical Code (ANSI/NFPA70); the Canadian Electrical Code, Part I (where applicable); UL681,
Standard for Installation and Classification of Burglar and Holdup Alarm Systems; ULC-S302, Standard for Installation and Classification of Burglar
Alarm Systems for Financial and Commercial Premises, Safes and Vaults; ULC-S310, Standard for Installation and Classification of Residential Burglar
Alarm Systems; local codes and the authorities having jurisdiction.
The products are intended to be powered by a power-limited output of a UL/CUL Listed Burglar Alarm control unit, or via a Listed UL603/ULC-S318
power-limited power supply that provides 4 hours of standby power.
The sensor must be mounted indoors, within the protected premises, and on a wooden stud, solid wood or with a robust wall anchor.
UL Notes: All interconnecting devices must be UL Listed. The anti-mask feature has not been evaluated by UL.
For the latest documentation and online support information, please go to:
Pour de l assistance en ligne, visitez :
Para recibir soporte en línea, visite:
Para qualquer informação adicional, contacte:
http://www.security.honeywell.com/hsc/resources/MyWebTech/
For the latest U.S. warranty information, please go to: www.honeywell.com/security/hsc/resources/wa or
Please contact your local authorized Honeywell representative for product warranty information.
Pour obtenir de l'information sur la garantie de ce produit, veuillez communiquer avec le représentant
autorisé de Honeywell de votre région.
Por favor contacte con su distribuidor Honeywell Security para información sobre la garantía del producto.
Contacte o representante autorizado Honeywell local para obter informações relativas a garantia.
 2013 Honeywell International Inc. Honeywell and DUAL TEC are registered trademarks of Honeywell International Inc.
All other trademarks are the properties of their respective owners. All rights reserved. Made in China.
FEDERAL COMMUNICATIONS COMMISSION STATEMENTS
The user shall not make any changes or modifications to the equipment unless authorized by the Installation Instructions or User's Manual.
Unauthorized changes or modifications could void the user's authority to operate the equipment.
CLASS B DIGITAL DEVICE STATEMENT
This equipment has been tested to FCC requirements and has been found acceptable for use. The FCC requires the following statement for your
information:
This equipment generates and uses radio frequency energy and if not installed and used properly, that is, in strict accordance with the
manufacturer's instructions, may cause interference to radio and television reception. It has been type tested and found to comply with the limits for
a Class B computing device in accordance with the specifications in Part 15 of FCC Rules, which are designed to provide reasonable protection
against such interference in a residential installation. However, there is no guarantee that interference will not occur in a particular installation. If this
equipment does cause interference to radio or television reception, which can be determined by turning the equipment off and on, the user is
encouraged to try to correct the interference by one or more of the following measures:
• Reorient the receiving antenna until interference is reduced or eliminated.
• Move the radio or television receiver away from the receiver/control.
• Move the antenna leads away from any wire runs to the receiver/control.
• Plug the receiver/control into a different outlet so that it and the radio or television receiver are on different branch circuits.
• Consult the dealer or an experienced radio/TV technician for help.
INDUSTRY CANADA CLASS B STATEMENT
This Class B digital apparatus complies with Canadian ICES-003.
Cet appareil numérique de la classe B est conforme à la norme NMB-003 du Canada.
FCC / IC STATEMENT
This device complies with Part 15 of the FCC Rules, and RSS210 of Industry Canada. Operation is subject to the following two conditions: (1) This
device may not cause harmful interference, and (2) This device must accept any interference received, including interference that may cause
undesired operation.
Cet appareil est conforme à la partie 15 des règles de la FCC & de RSS 210 des Industries Canada. Son fonctionnement est soumis aux conditions
suivantes: (1) Cet appareil ne doit pas causer d’interférences nuisibles. (2) Cet appareil doit accepter toute interférence reçue y compris les
interférences causant une réception indésirable.
P/N 800-13827 03/14 Rev C
To protect the environment, a detailed installation guide is available on
the Honeywell website – Please consider before printing the document!
2 Corporate Center Drive, Suite 100
P.O. Box 9040, Melville, NY 11747
www.honeywell.com/security

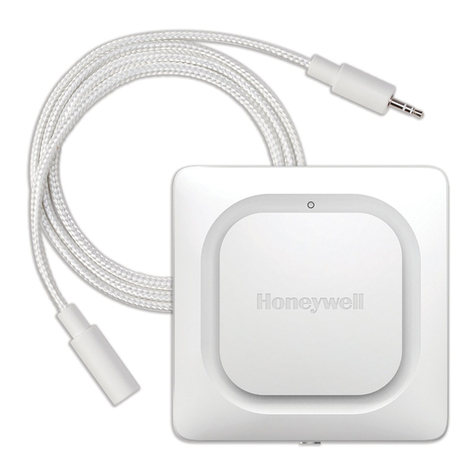
Other Honeywell Security Sensor manuals

Honeywell Miller Falcon MP50G-LE Installation instructions

Honeywell

Honeywell Miller Falcon MP50G-LE Installation instructions

Honeywell SS2 Series User manual

Honeywell

Honeywell SS2 Series User manual

Honeywell 5800PIR User manual

Honeywell

Honeywell 5800PIR User manual

Honeywell 5800FLOOD User manual

Honeywell

Honeywell 5800FLOOD User manual

Honeywell MIDAS-T-HTP User manual

Honeywell

Honeywell MIDAS-T-HTP User manual

Honeywell Notifier FST-951 User manual

Honeywell

Honeywell Notifier FST-951 User manual

Honeywell ESSER 784763 User manual

Honeywell

Honeywell ESSER 784763 User manual

Honeywell SiXCOMBO User manual

Honeywell

Honeywell SiXCOMBO User manual

Honeywell Notifier FSP-951AUS User manual

Honeywell

Honeywell Notifier FSP-951AUS User manual

Honeywell 5898 User manual

Honeywell

Honeywell 5898 User manual

Honeywell krom schroder DG Smart Manual

Honeywell

Honeywell krom schroder DG Smart Manual

Honeywell 5800PIR-RES User manual

Honeywell

Honeywell 5800PIR-RES User manual

Honeywell Series 3000 MkII User manual

Honeywell

Honeywell Series 3000 MkII User manual

Honeywell X-ND100 User manual

Honeywell

Honeywell X-ND100 User manual

Honeywell MeshGuard LEL IR User manual

Honeywell

Honeywell MeshGuard LEL IR User manual

Honeywell 1031030 User manual

Honeywell

Honeywell 1031030 User manual

Honeywell C7061A1020 User manual

Honeywell

Honeywell C7061A1020 User manual

Honeywell Ex-Or MLS Series Quick start guide

Honeywell

Honeywell Ex-Or MLS Series Quick start guide

Honeywell SC100 User manual

Honeywell

Honeywell SC100 User manual

Honeywell Ex-Or MR1500P Installation and operation manual

Honeywell

Honeywell Ex-Or MR1500P Installation and operation manual

Honeywell VERSAFLOW MAG 4000 User manual

Honeywell

Honeywell VERSAFLOW MAG 4000 User manual

Honeywell Miller Revolution Harness User manual

Honeywell

Honeywell Miller Revolution Harness User manual

Honeywell Miller RACDTA-5K6/6FT Operator's manual

Honeywell

Honeywell Miller RACDTA-5K6/6FT Operator's manual

Honeywell Minipeeper C7035A Operation manual

Honeywell

Honeywell Minipeeper C7035A Operation manual

Popular Security Sensor manuals by other brands

SUREN PYROFLEX CS-106 User Operation and Specification

SUREN

SUREN PYROFLEX CS-106 User Operation and Specification

Conrad RSL operating instructions

Conrad

Conrad RSL operating instructions

Camp Safety GOBLIN manual

Camp Safety

Camp Safety GOBLIN manual

MDT Technologies SCN-BWM55.01 Technical manual

MDT Technologies

MDT Technologies SCN-BWM55.01 Technical manual

Hama 00176554 operating instructions

Hama

Hama 00176554 operating instructions

Vega VEGAFLEX 81 operating instructions

Vega

Vega VEGAFLEX 81 operating instructions

NORLUX Ultranik UC01 installation manual

NORLUX

NORLUX Ultranik UC01 installation manual

Leedarson Motion Sensor Pet Immunity Z-Wave 700 quick start guide

Leedarson

Leedarson Motion Sensor Pet Immunity Z-Wave 700 quick start guide

DSC LC-103PIMSK installation instructions

DSC

DSC LC-103PIMSK installation instructions

MDT Technologies SCN-P360D3.01 Technical manual

MDT Technologies

MDT Technologies SCN-P360D3.01 Technical manual

Linear NAPPIR01 installation instructions

Linear

Linear NAPPIR01 installation instructions

Refco AQUASWITCH Installation, operation and maintenance guide

Refco

Refco AQUASWITCH Installation, operation and maintenance guide

Sofamel D-TUERI PRO manual

Sofamel

Sofamel D-TUERI PRO manual

CWSI AR-5 Operating and installation instruction manual

CWSI

CWSI AR-5 Operating and installation instruction manual

Intermatic LC2100 Series Instructions for installing

Intermatic

Intermatic LC2100 Series Instructions for installing

Pepperl+Fuchs ML71-55 quick start guide

Pepperl+Fuchs

Pepperl+Fuchs ML71-55 quick start guide

Vitek VTC-PIRC4 manual

Vitek

Vitek VTC-PIRC4 manual

Global GFE-CH Series Installation Wiring Diagram

Global

Global GFE-CH Series Installation Wiring Diagram

manuals.online logo
manuals.online logoBrands
  • About & Mission
  • Contact us
  • Privacy Policy
  • Terms and Conditions

Copyright 2025 Manuals.Online. All Rights Reserved.