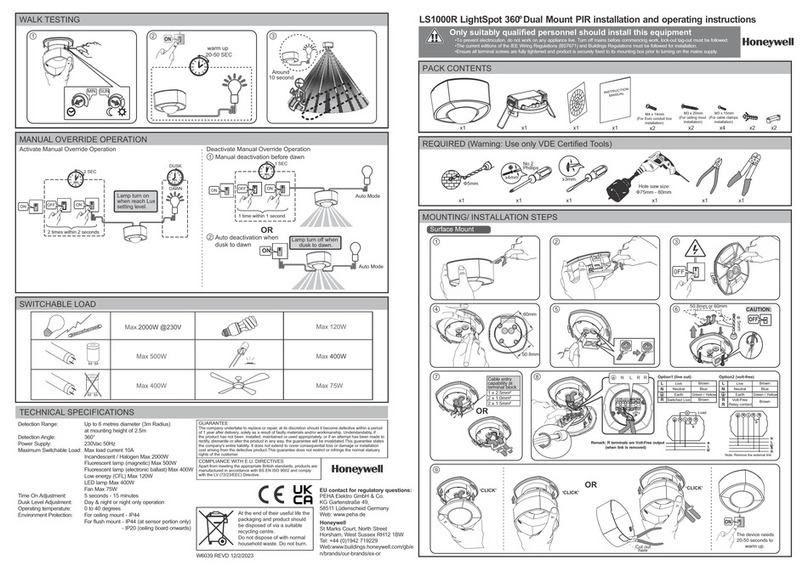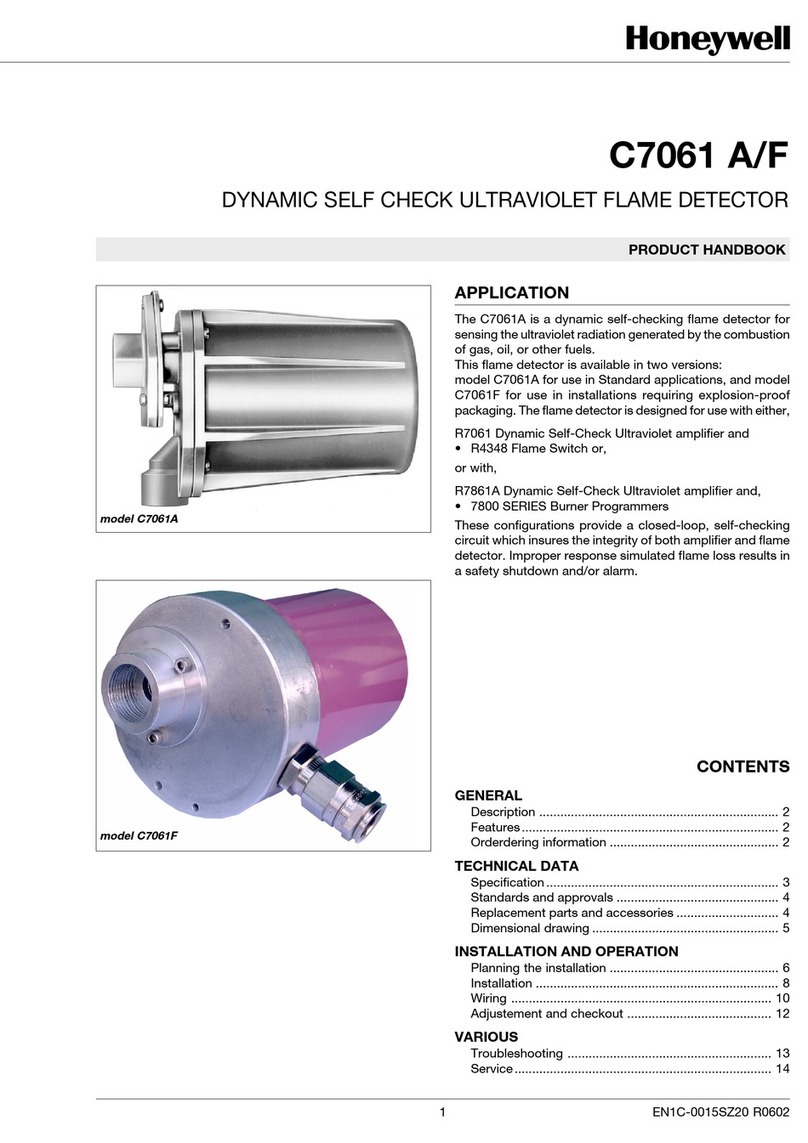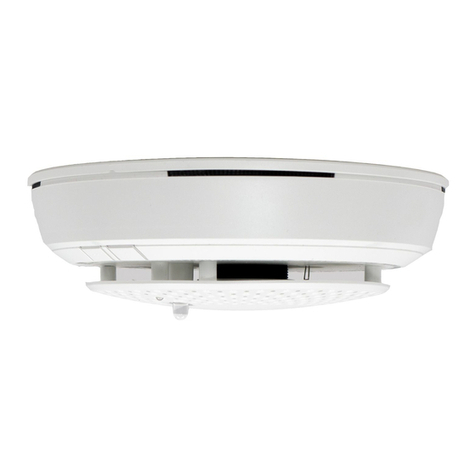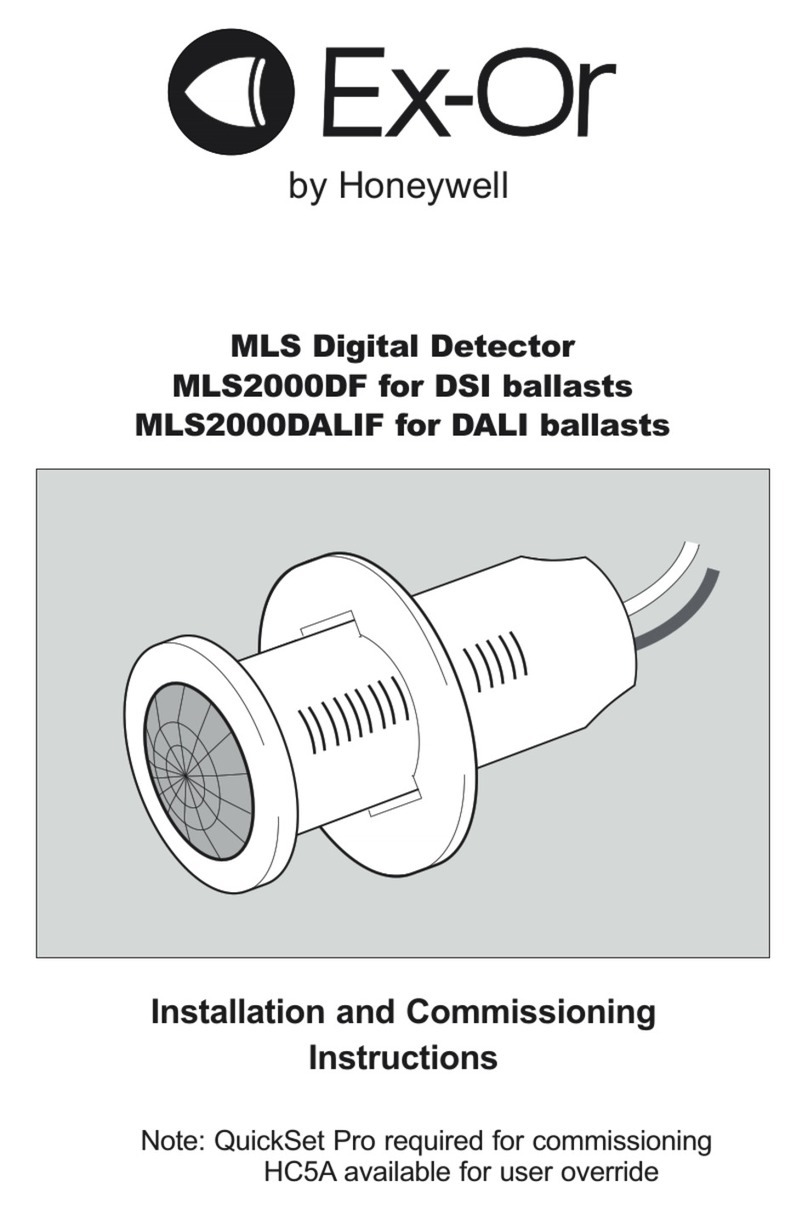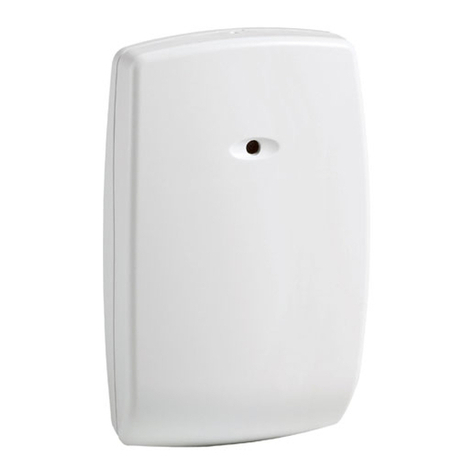
PACK CONTENTS | VERPACKUNGSINHALT | VERPAKKING INHOUD
REQUIRED (Warning: Use only VDE Certified Tools) | ERFORDERLICH (Warnung: Verwenden Sie nur
VDE zertifiziertes Werkzeug) | VEREIST (Waarschuwing: Gebruik alleen goedgekeurd gereedschap.)
MOUNTING/ INSTALLATION STEPS | MONTAGE- UND INSTALLATIONSSCHRITTE | INBOUW / MONTAGE STAPPEN
Surface Mount | Aufputz-Montage | Opbouwmontage
1
4
2
5
3
6
7
230V
φ
5mm
50.8mm or 60mm
60mm
50.8mm
CAUTION:
ACHTUNG:
LET OP:
Or | Oder |
Of
x1x1 x1 x1 x2
x2 x4 x2 x2
x1 x1 x1 x1 x1 x1
Hole saw size:
Durchmesser der Lochkreissäge:
Diameter van de gatenzaag:
Ф75mm - 80mm
Ф5mm
4mm
No 2
Phillips
3mm
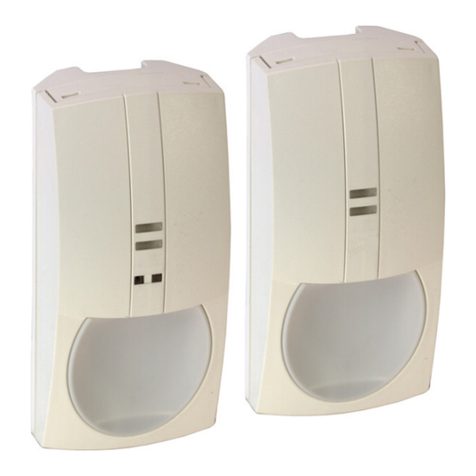
D-LS1000R 360° Dual Mount PIR installation and operating instructions
Only suitably qualified personnel should install this equipment
!!
8Option 1 (live out) |
Option 1 (Spannungsführender Schaltausgang) |
Optie 1 (Spannings- schakeluitgang)
L
N
Live | Phase | Fase Brown | Braun | Bruin
Brown | Braun | Bruin
RSwitched Live |
Geschaltete Phase |
geschakelde fase
Neutral | N-Leiter |
Neutraal Blue | Blau | Blauw
Earth |
Schutzleiter (PE) |
aarde
Green / Yellow |
Gelb/grün |
geel / groen
L
N
Live | Phase | Fase Brown | Braun | Bruin
Brown | Braun | Bruin
R
RVolt-Free Relay
contact | Potentialfreier
Relais-Kontakt |
Potentiaal vrij
schakelcontact
Neutral | N-Leiter |
Neutraal Blue | Blau | Blauw
Earth |
Schutzleiter (PE) |
aarde
Green / Yellow |
Gelb/grün |
geel / groen
Option 2 (volt-free) |
Option 2 (Potentialfreier Schaltausgang) |
Optie 2 (potentiaalvrije-uitgang)
N
N L R R
L
R
R
µ
•To prevent electrocution, do not work on any appliance live. Turn off mains before commencing work, lock-out tag-out must be followed.
•The current editions of the IEE Wiring Regulations (BS7671) and Buildings Regulations must be followed for installation.
•Ensure all terminal screws are fully tightened and product is securely fixed to its mounting box prior to turning on the mains supply.
D-LS1000R 360° Decken-Bewegungsmelder Montage- und Betriebsanleitung
Nur entsprechend qualifiziertes Personal darf dieses Gerät installieren
!! •Um Stromschläge zu vermeiden, darf auf keinen Fall an einem spannungsführenden Gerät gearbeitet werden. Schalten Sie das Netz vor Beginn der Arbeiten ab.
•Die aktuellen Ausgaben der relevanten VDE-Richtlinie (BS7671) und Gebäudevorschriften müssen für die Installation berücksichtigt werden.
•Es ist Sicherzustellen, dass alle Klemmenschrauben fest angezogen sind und das das Produkt sicher in der Einbaudose befestigt ist bevor die Stromversorgung
eingeschaltet wird.
D-LS1000R 360° Dual Mount PIR- installatie- en bedieningsinstructies
Alleen voldoende gekwalificeerde personeel mag deze apparatuur installeren
!! •Om elektrokutie te voorkomen, mag niet op even welk toestel onder spanning gewerkt worden. Schakel de stroomvoorziening uit voordat u begint.
•De huidige uitgaven van het VDE-reglementen (BS7671) en Gebouwen reglementen moeten worden gevolgd voor de installatie.
•Zorg ervoor dat alle aansluit- schroeven goed vastzitten en het product stevig is bevestigd in de inbouwdoos voorafgaand aan het inschakelen van de netspanning.
N
N L
µ
R R
L
1 x 2.5mm²
2 x 1.0mm²
2 x 1.5mm²
Cable entry capability
at terminal block |
Kabelquerschnitt für
Anschlußklemmen |
Kabeldoorsnede voor
aansluitklemmen
0FF
AUS
UIT
RRLN
M4 x 14mm
(For Euro conduit box
installation)
(Für Euro
Anschlussdoseninstallation)
(Voor Euro-verdeeldozen
installatie)
M3 x 20mm
(For ceiling mout
installation)
(Für
Deckenmontage)
(Voor
plafondmontage)
M3 x 15mm
(For cable clamps
installation)
(Zur Installation mit
Kabelschellen)
(Voor kabelklemmen
installatie)
* Remark: R terminals
are Volt-Free output
(when link is removed) |
* Hinweis: R Klemmen
sind potentialfreier
Ausgang (wenn Brücke
entfernt wird) |
* Opmerking: R klemmen
zijn de potentiaalvrije
uitgang (wanneer de
brug wordt verwijderd)
Note: Remove the external link |
Anmerkung: Entfernen Sie die
externe Brücke |
Opmerking: Verwijder de
externe brug
0FF
AUS
UIT
Activate Manual Override Operation | Aktivierung des manuellen Betriebes |
Activeren handmatige bediening
MANUAL OVERRIDE OPERATION | MANUELLER BETRIEB | HANDBEDIENING
SWITCHABLE LOAD | SCHALTBARE LASTEN |
SCHAKELBARE BELASTING
TECHNICAL SPECIFICATIONS | TECHNISCHE DATEN |
TECHNISCHE SPECIFICATIES
Detection Range:
Detection Angle:
Power Supply:
Maximum Switchable
Load:
Time On Adjustment:
Dusk Level Adjustment:
Operating temperature:
Environment Protection:
Up to 6 metres diameter (3m Radius) at mounting height of 2.5m
360°
220 ~ 240 VAC / 50 Hz
Max load current 6A
Incandescent / Halogen Max 1440W
Flourescent lamp (magnetic) Max 500W
Flourescent lamp (electronic ballast) Max 600W
Low energy (CFL) Max 120W
LED lamp Max 110W
Fan Max 75W
5 seconds - 15 minutes
Day & night or night only operation
0 to 40°C
For ceiling mount - IP44
For flush mount - IP44 (at sensor portion only)
- IP20 (ceiling board onwards)
Detectiebereik:
Detectie hoek:
Stroomvoorziening:
Maximale schakelbare
belasting:
Instelling
uitschakeltijdsvertraging:
Instelling van de
helderheid:
bedrijfstemperatuur:
beschermingsgraad:
Tot 6 meter diameter (3m Radius), inbouwhoogte van 2,5m
360°
220 ~ 240 VAC / 50 Hz
Max laststroom 6A
Gloeilampen / halogeen Max 1440W
TL-lamp (kva) Max 500W
TL-lamp (elektronisch voorschakelapparaat) Max 600W
Lage energie lamp (CFL) Max 120W
LED-lamp Max 110W
Ventilator max. 75W
5 seconden - 15 minuten
Dag en nacht of alleen 's nachts operatie
0 tot 40° C
Plafondmontage - IP44
Voor inbouwmontage - IP44 (Alleen de sensor)
- IP20 (op de overige componenten)
Erfassungsbereich:
Erfassungswinkel:
Spannungsversorgung:
Maximale schaltbare
Last:
Einschaltzeit-Einstellung:
Helligkeitseinstellung:
Betriebstemperatur:
Schutzart:
Bis zu 6 m Durchmesser (3 m Radius) bei Montagehöhe 2,5 m
360°
220 ~ 240 VAC / 50 Hz
Max. Laststrom 6A
Glüh- / Halogenlampen Max 1440W
Leuchtstofflampe (KVG) Max 500W
Leuchtstofflampe (EVG) Max 600W
Sparlampen (CFL) Max 120W
LED-Lampe 110W Max
Ventilator max. 75W
5 Sekunden - 15 Minuten
Tag & Nacht oder nur Nacht -Betrieb
0 bis 40° C
Für Deckenmontage - IP44
Für Unterputzmontage - IP44 ( nur für Sensorteil )
- IP20 (ab Deckenplatte aufwärts)
Max 600W
Max 500W
Max 1440W
Max 120W
Max 110W
Max 75W
2 times within 2 seconds |
2 mal innerhalb von 2 Sekunden |
2 keer binnen 2 seconden
1 time within 1 second |
1 mal innerhalb von 1 Sekunde |
1 keer binnen 1 seconde
DUSK | Abends |
'S avonds
DAWN | Morgens |
'S morgens
Hrs
2 SEC
5
SEC
1
Deactivate Manual Override Operation | Ausschalten des manuellen Betriebes |
Deactiveren handmatige bediening
Manual deactivation before dawn | Manuelle Abschaltung vor der
Morgendämmerung | Handmatig uitschakelen voor zonsopgang
2Auto deactivation when dusk to dawn | Automatische Abschaltung, beim
Übergang von Dunkelheit auf Tageslicht | Automatische uitschakeling bij de
overgang van schemering tot daglicht
1 SEC
5
SEC
OR
Auto Mode |
Auto-Modus |
Auto-modus
GUARANTEE
PEHA Elektro GmbH & Co. KG
a Honeywell Company
Postfach 1727
D-58467
Lüdenscheid
www.peha.de
Technical Support |
Technischer Support |
Technische Ondersteuning
+49 (0) 2353/9118-333
+31 26 36 87500
ON
EIN
AAN
ON
EIN
AAN
ON
EIN
AAN
ON
EIN
AAN
0FF
AUS
UIT
0FF
AUS
UIT
Lamp turn on when
reach Lux setting level.
Lampe schaltet ein,
sobald Lux-Wert
erreicht ist
Verlichting gaat
branden als lux waarde
is bereikt
Lamp turn off when dusk to dawn.
Leuchte schaltet aus beim Übergang von Dunkelheit auf Tageslicht
Verlichting schakelt uit bij de overgang van schemering naar het daglicht
The company undertake to replace or repair, at its discretion should it become defective within a
period of 1 year after delivery, solely as a result of faulty materials and/or workmanship.
Understandably, if the product has not been installed, maintained or used appropriately, or if an
attempt has been made to rectify, dismantle or alter the product in any way, the guarantee will be
invalidated. This guarantee states the company's entire liability. It does not extend to cover
consequential loss or damage or installation cost arising from the defective product. This guarantee
does not restrict or infringe the normal statuary rights of the customer.
GARANTIE
Het bedrijf verbindt zich ertoe een defect product naar eigen inzicht te vervangen of te herstellen,
als het defect zich binnen een periode van 1 jaar na levering, uitsluitend als gevolg van materiaal-
fouten en / of fabricagefouten opgetreden is. Als het product niet is geïnstalleerd, onderhouden of
op de juiste wijze gebruikt, of als er een poging is gedaan om te herstellen, te ontmantelen of het
product op enigerlei wijze te veranderen, zal de garantie begrijpelijkerwijze,ongeldig worden
gemaakt. Voor deze garantie staat de volledige aansprakelijkheid van het bedrijf. Het is niet van
toepassing op gevolgschade of schade of installatie kosten die voortvloeien uit het defecte product.
Deze garantie is niet beperkt of in strijd met het normale rechten van de klant.
GARANTIE
Das Unternehmen verpflichtet sich ein defektes Produkte nach eigenem Ermessen zu ersetzen oder
zu reparieren, sollte der Defekt innerhalb von 1 Jahr nach der Lieferung ausschließlich aufgrund
fehlerhafter Materialien und / oder Verarbeitung aufgetreten sein. Wenn das Produkt nicht
installiert, gewartet oder entsprechend eingesetzt wurde oder wenn ein Versuch unternommen
wurde es zu reparieren, auseinander zu nehmen oder das Produkt in irgendeiner Weise zu
verändern, verfällt verständlicherweise die Garantie. Hinter dieser Garantie steht die gesamte
Haftung des Unternehmens. Sie erstreckt sich nicht auf Folgeschäden, Schäden oder
Installations-kosten, die aus dem fehlerhaften Produkts entstehen. Diese Garantie verletzt die
normalen Rechte des Kunden nicht oder schränkt diese ein.
COMPLIANCE WITH E.U. DIRECTIVES
Apart from meeting the appropriate British
standards, products are manufactured in accordance
with BS EN ISO 9002 and comply with the LV
(72/23/EEC) Directive.
EINHALTUNG DER E.U. RICHTLINIEN
Neben der Einhaltung der entsprechenden britischen
Normen werden die Produkte entsprechen der BS
EN ISO 9002 gefertigt und entsprechen der LV (72/23
/ EWG) Richtlinie.
OVEREENSTEMMING MET E.U. RICHTLIJNEN
Afgezien van het voldoen aan de geschikte Britse
normen, zijn de producten vervaardigd in
overeenstemming met de BS-EN-ISO 9002 en
voldoen aan de LV (72/23 / EEG) Richtlijn.
At the end of their useful life the packaging and product should be
disposed of via a suitable recycling centre. Do not dispose of with normal
household waste. Do not burn.
Am Ende der Nutzungsdauer müssen Produkt und Verpackung über
einen geeigneten Recyclingstelle entsorgt werden. Nicht über den
normalen Hausmüll entsorgen. Nicht verbrennen.
Aan het einde van de levensduur van het product en de verpakking moet
deze worden verwijderd via een geschikte recyclingbedrijf. Deze niet
vernietigen met het huishoudelijk afval. Niet verbranden.
Auto Mode |
Auto-Modus |
Auto-modus
ON
EIN
AAN
EN
DE
NL
