honor 9X PRO User manual

User Guide

Contents
Exciting Features
Featured Usage Tips 1
Camera Tips 1
More Features 5
New Device
New Device Conguration 7
Gestures and Operations
Smart Recognition 9
Screenshots and Screen Recording 10
Split-screen 12
Home Screen
Navigation Bar 14
Use Shortcut Switches to Quickly Enable Frequently Used
Features
15
Notication Panel and Status Bar 15
Screen Lock and Unlock 18
Go Back to Basics with Simple Mode 19
Home Screen Management 20
Contacts
Share Contacts Using Electronic Business Cards 22
Search Contacts 23
Managing Contacts 23
Dialling
Basic Calling Functions 24
VoLTE 25
Use VoWi-Fi for a New Calling Experience 26
Camera
Basic Camera Functions 27
Use Portrait Mode to Shoot Like a Pro 29
Use Wide Aperture Mode to Highlight Your Shooting Subjects 30
Use Panorama Mode to Take Panoramic Photos 30
Pro Mode 31
Light Painting Mode 33
More Capture Modes 38
Gallery
Photo Management 40
i

Optimiser
Use Optimise 42
Manage Mobile Data Usage 42
Enable Smart Power Saving 42
Use Auto-launch to Prevent Unwanted App Activities 43
Enable Virus Scanner 43
Email
Manage Email Accounts 45
Manage VIP Email Contacts 45
Import Important Events to Calendar 45
Calendar
Navigate the Calendar 47
Import To-Dos to Keep Your Work Organised 47
View Global Holidays 47
Clock
Use the Clock 48
Notepad
Manage Your Notes to Keep Your Records in Order 49
Utilities
Check Your Screen Time 50
Use Recorder to Make Audio Notes 50
Phone Clone 50
Device Connection
Bluetooth 52
Transfer Data between Your Phone and Computer 54
Huawei Share 55
Security and Privacy
Fingerprint 57
Enable App Lock 58
Wi-Fi and Network
Wi-Fi 59
Connecting to the Internet 62
Share Your Mobile Network with Other Devices 62
Apps and Notications
App Twin: Log in to Two Social Media Accounts at Once 64
Customise App Permissions to Use Your Device Your Way 64
Contents
ii

Sound and Display
Set Up Do Not Disturb Mode 65
Congure Your Sound Settings 65
Enable Eye Comfort Mode 66
More Display Settings 66
Storage
Enable Memory Cleanup 68
Smart Assistance
Access Device Functions from Anywhere with Navigation Dock 69
Enable or Disable Mistouch Prevention 69
System
Change the Input Method 70
Accessibility 70
General Settings 70
System Update
Update the Device System Online 72
Legal Notice
Legal Notice 73
Contents
iii

Exciting Features
Featured Usage Tips
Access Device Functions from Anywhere with Navigation Dock
In order to close an app or return to the home screen, you must use the navigation bar at the
bottom of your device. You can enable the Navigation dock feature on your device to avoid
using navigation buttons and to comfortably operate your device with one hand.
Open Settings. Go to System > System navigation > Navigation dock and enable
Navigation dock. The Navigation dock will appear on the screen. You can then drag it to
your preferred location. The Navigation dock can perform the following actions:
•Back: Touch the Navigation dock once to go back one step, or touch it twice to go back
two steps.
•Home: Touch and hold the Navigation dock and then release it to go to the home screen.
•View background apps: Touch and hold the Navigation dock and then swipe left or right
to view any apps that are running in the background.
Use Shortcut Switches to Quickly Enable Frequently Used Features
Want to quickly enable or disable mobile data or hotspot? You can enable frequently used
features by using shortcut switches.
%JTQMBZBMMTIPSUDVU
TXJUDIFT
5PVDIUIFTIPSUDVU
TXJUDIUPFOBCMF
UIFDPSSFTQPOEJOH
GFBUVSF
5PVDIBOEIPMEUP
FOUFSTFUUJOHT
3FBSSBOHFTIPSUDVU
TXJUDIFT
Camera Tips
Use Portrait Mode to Shoot Like a Pro
Go to Camera > Portrait, adjust the following settings, then touch to take a portrait.
•Blur and lighting eects: Touch the icon in the viewnder and select a blur or lighting
eect.
A light source (such as a neon or street light) in a relatively well-lit background will
contribute to better results. Taking photos at long distance will reduce the eect.
1

•Beauty eect: Touch in the viewnder and drag the slider to adjust beauty settings. A
larger value will produce a more distinct beauty eect.
To disable the beauty eect, touch the icon in the viewnder and drag each setting
to its lowest value.
Use Panorama Mode to Take Panoramic Photos
Panoramas provide a wider viewing angle than ordinary photos, letting you take sweeping
landscape shots.
To capture a panorama shot, the camera takes multiple photos of objects within our visual
eld and stitches them together into a single photo.
When taking a panorama, nd a wide, open space that is some distance away from the
subject and try to avoid backgrounds that are all in one colour.
1Go to Camera > More > Panorama.
2Touch at the bottom of the screen to congure the shooting direction.
3Hold your Phone steady, and then touch to start shooting. Slowly move the Phone in
the direction indicated, holding the device steady and ensuring that the arrow stays level
with the centre line.
4Touch when you are nished. The camera will automatically stitch the photos
together to create a panorama.
Use Pro Mode to Take Scenic Photos
Want to make your scenic photos more vibrant and interesting? Use Pro mode to take unique
and personalised scenic photos.
Go to Camera > More > Pro to enter Pro mode.
Select a metering mode based on the shooting subject: Touch , and select a metering
mode.
Exciting Features
2
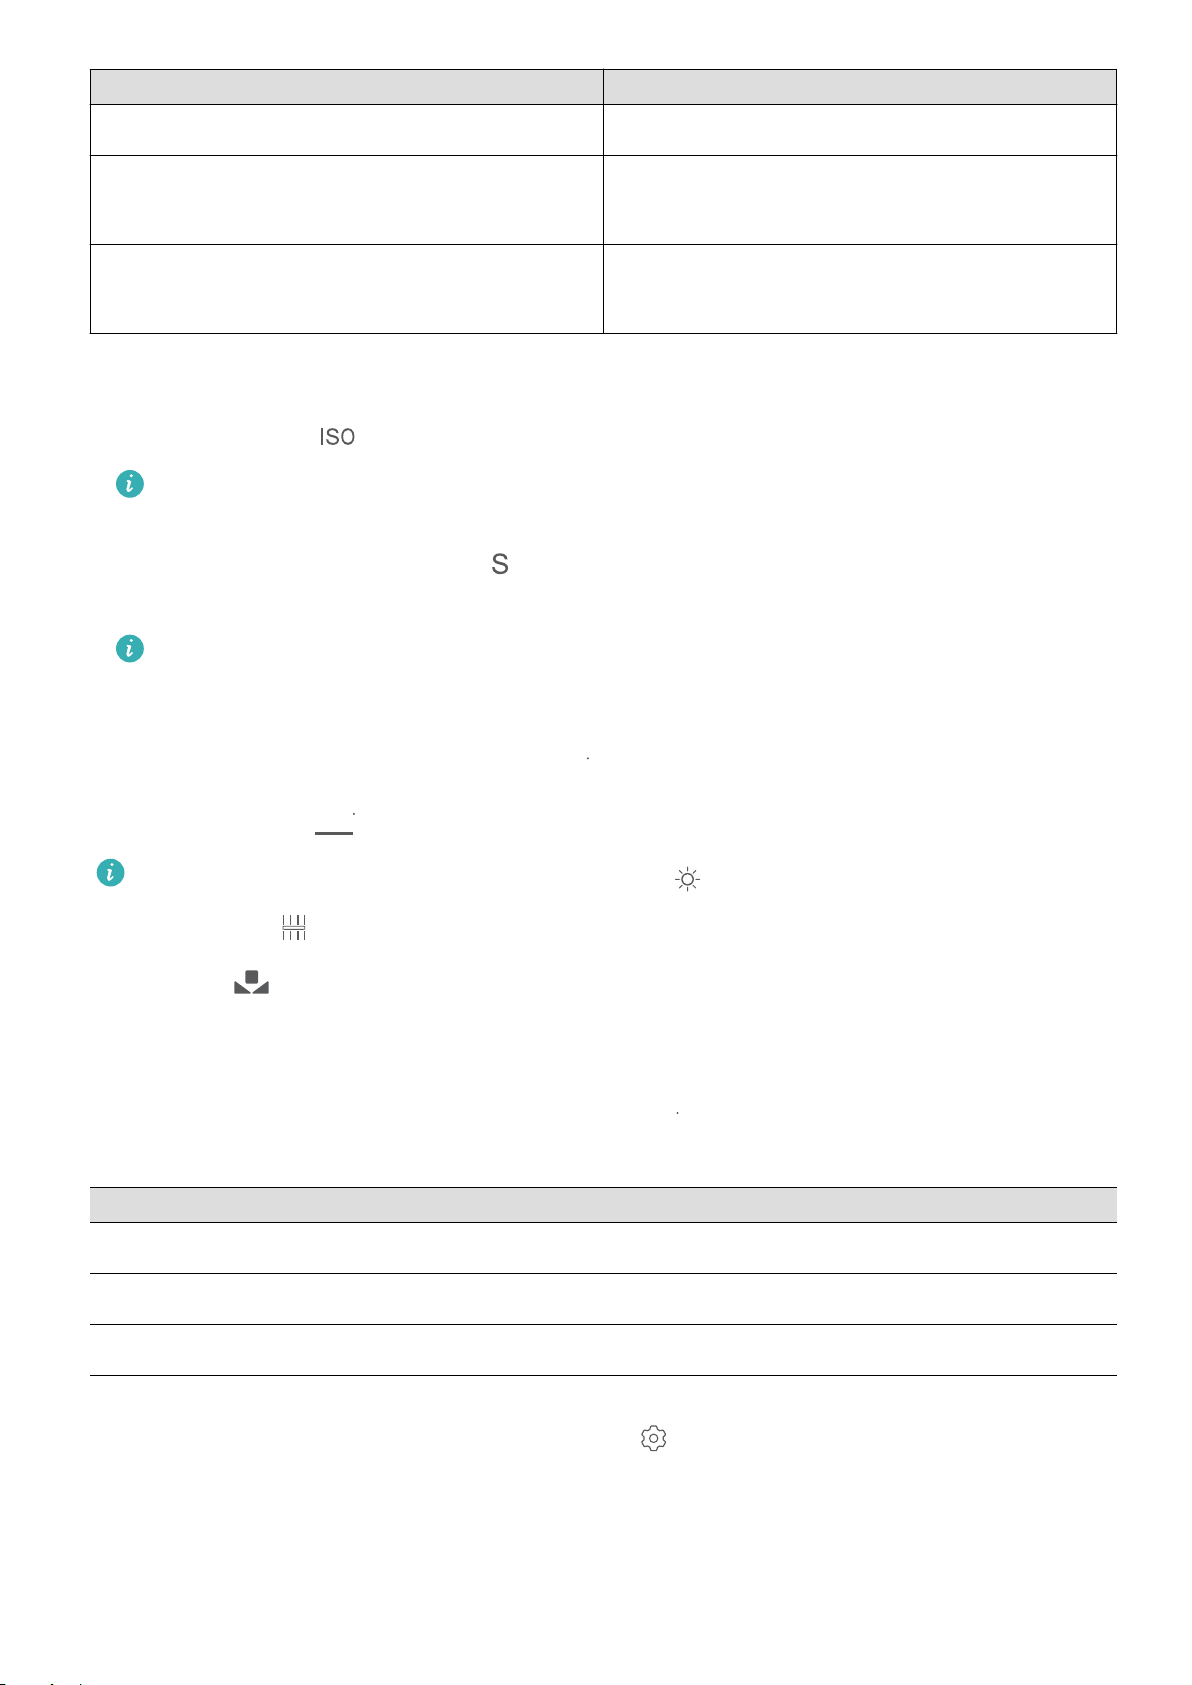
Metering Mode Application Scenario
Matrix Broad landscapes and seas
Centre The subject is in the centre of the picture, and
stands out from the background.
Spot The subject to be highlighted in the picture is
relatively small, such as a ower or a tree.
Adjust brightness based on the shooting environment:
•Adjust ISO: Touch , and drag the ISO slider to adjust its value.
To avoid excessive noise, the recommended ISO is below 400. The recommended ISO
for the daytime is between 100 and 200 and around 400 for night scenes.
•Adjust the shutter speed: Touch (shutter speed), and drag the shutter speed slider to
your desired speed.
The recommended shutter speed for static scenes (such as mountains) is between 1/80
and 1/125, and faster for moving subjects (such as waves). For best results, use a tripod
when shooting a moving subject.
•Adjust exposure compensation: Touch
&7
, and drag the EV slider to your desired value.
Adjust AWB: Touch
"8#
, and drag the AWB slider to your desired value.
•When shooting under sunlight, you can select . In a weak light environment, you
can select .
•Touch
to adjust the colour temperature. If you want to give your photo a cosy,
nostalgic tone, increase the K value. For a cold, calm or futuristic tone, lower the K
value.
Adjust AF based on the shooting subject: Touch
"'
, and drag the AF slider to your desired
value.
Focusing Mode Application Scenario
AF-S mode Static scenes (such as mountains)
AF-C mode Moving scenes (such as owing water and waves)
MF mode Protruding objects (such as a close-up of a ower)
Hold your device steady when shooting: Touch and enable Horizontal level. After this
feature is enabled, two horizontal guiding lines will appear on the viewnder. When the
dotted line overlaps with the solid line, the camera is horizontally aligned.
Exciting Features
3
•Some options in Pro mode may change after you modify settings.
•The aforementioned recommended settings are for reference only. You may adjust
them based on the actual usage conditions to achieve your desired eect.
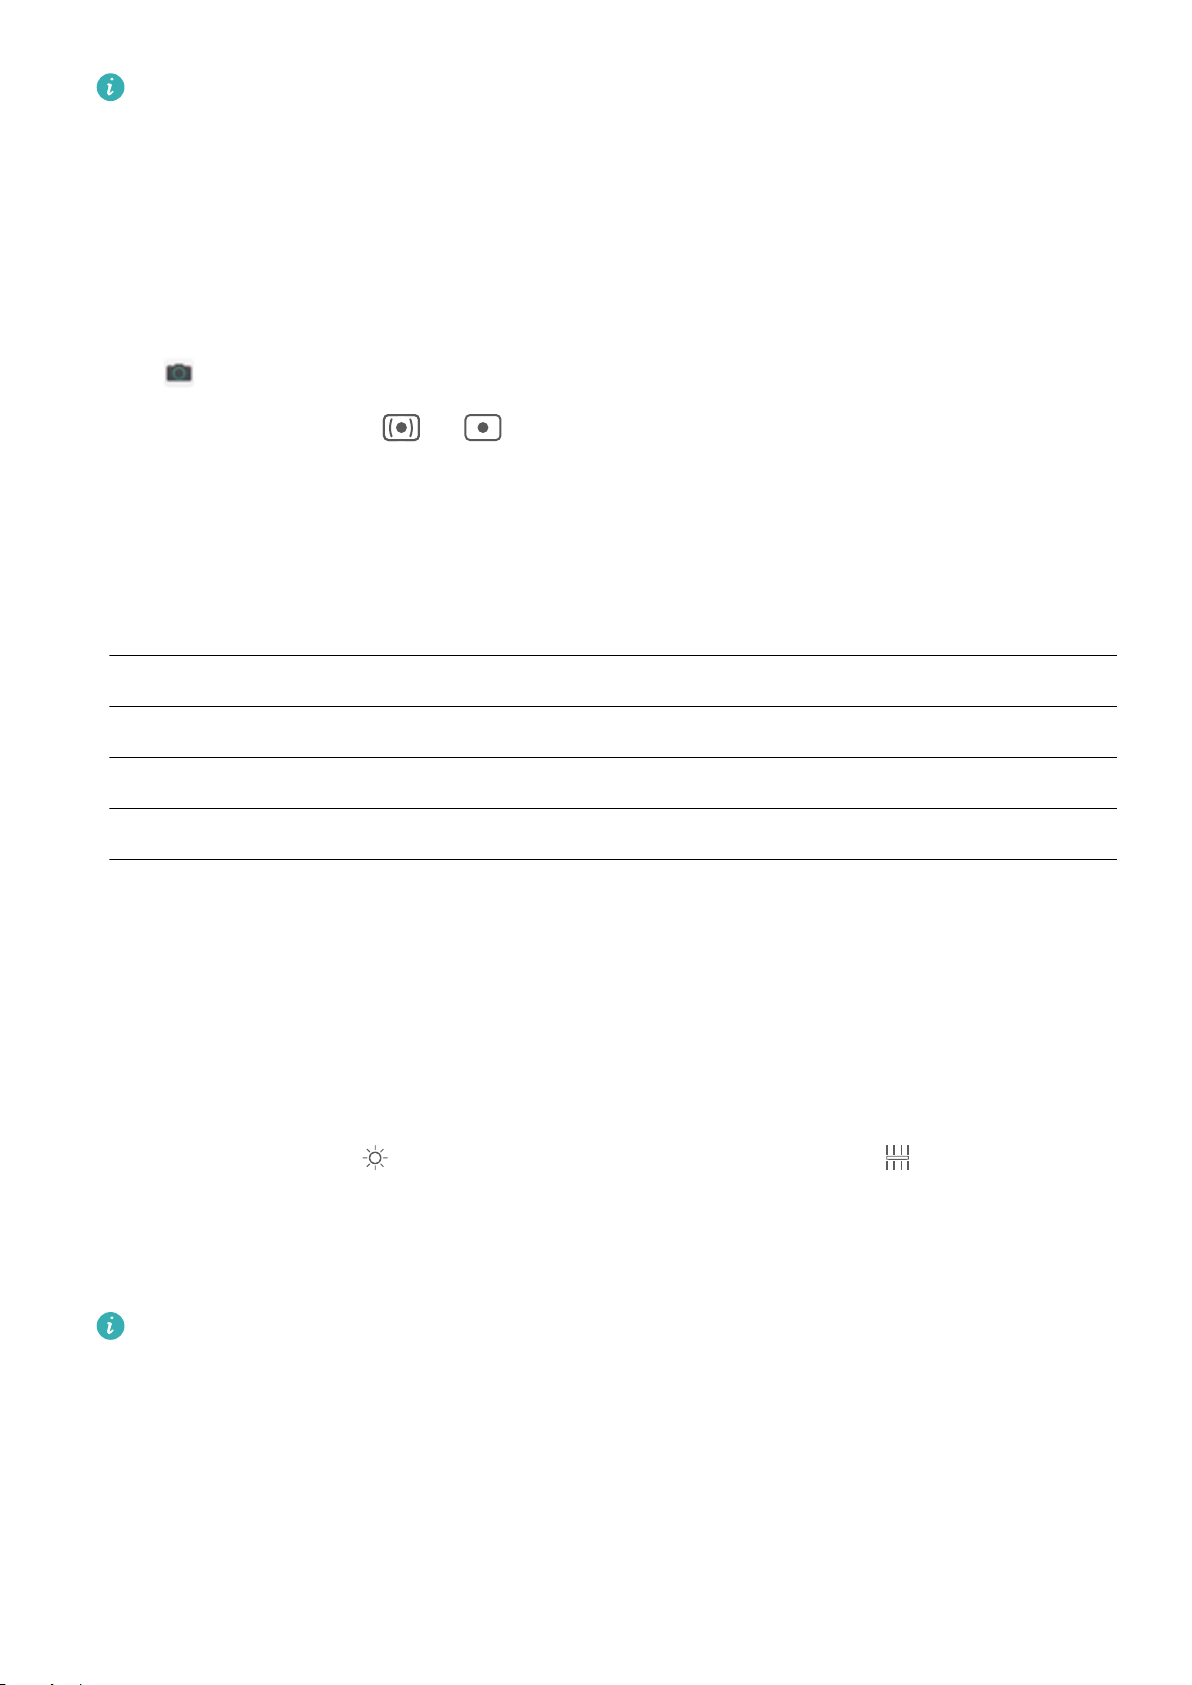
Use Pro Mode to Capture Portraits
Want to take more professional portraits? The Pro mode allows you to adjust your camera
settings to shoot professional portraits.
Open Camera > More > Pro.
Select a Metering mode: or mode is recommended for taking portraits. Place your
shooting subjects (their faces for example) in the centre of the viewnder.
Adjust brightness based on the shooting environment
•Adjust ISO: To avoid excessive noises, it is recommended that you adjust the ISO to a low
level when shooting portraits. You may adjust the ISO based on the actual shooting
environments.
Shooting Environment Recommended ISO
Outdoors Between 100 and 200
Indoors Around 400
Night scenes Between 400 and 800
•Adjust shutter speed: The shutter speed should be slow if the ambient light is low and fast
when the ambient light is strong. The recommended shutter speed for static portraits is
between 1/80 and 1/125. To shoot moving subjects, select a shutter speed at or above
1/125.
•Adjust EV compensation: You may increase the EV compensation if the light on the
subjects or background is low, and decrease the EV compensation if there is too much light.
Adjust AWB: Select AWB depending on the lighting conditions. When shooting under
sunlight, you can select . In a low light environment, you can select .
Adjust Focus: To better highlight a subject, it is recommended that you use manual focus
(MF) when shooting portraits. In the viewnder, touch to focus on the part (the subject's face
for example) you want to highlight.
•In Pro mode, some settings may change after you change a setting. You may adjust
them based on your actual needs.
•The recommended settings above are for reference only. You may adjust them based
on the actual usage conditions to achieve your desired eect.
Exciting Features
4

More Features
Enable App Lock
App lock allows you to set a password for your important apps. Once you restart your device
or unlock the screen, you will be asked to enter your App lock password when opening these
apps. App lock adds an extra layer of protection for your private information and prevents
unauthorised access to important apps on your device.
Enable App lock: Open Settings. Go to Security & privacy > App lock. When you rst
access App lock, select Lock screen password or Custom PIN as your App lock verication
password. Enter your password as prompted and on the App lock screen, toggle on the
switch for the apps you want to lock.
Set your App lock password: Touch on the App lock screen, then touch Password type.
Select Lock screen password or Custom PIN.
Set Your Home Screen Wallpaper
Tired of default wallpapers? Set a photo you like as your home screen wallpaper to
personalise your home screen.
Open Settings, and then go to Home screen & wallpaper > Wallpaper. You can:
Set a picture as your home screen wallpaper: Touch Gallery or select a preset wallpaper in
your device, and follow the onscreen instructions to select Lock screen, Home screen or
Both.
Set a photo as your wallpaper from Gallery: Have a great photo you want to set as your
wallpaper? In Gallery, open the photo that you like, go to > Set as > Wallpaper,
and follow the onscreen instructions to set the photo as your home screen wallpaper.
Use App Drawer to Store Apps
Want to store your apps in one location on your home screen to make your home screen
look cleaner? You can enable app drawer on your home screen to store all your apps and free
up space on your home screen.
Open Settings, go to Home screen & wallpaper > Home screen style, and select
Drawer. If you want to switch back to a standard home screen, select Standard.
Add an app icon from app drawer to the home screen: After you enable app drawer,
touch on the home screen to enter the app list. From the app list, touch and hold
the app icon that you want to add until your Phone vibrates, and then drag it to the
desired position on the home screen.
Exciting Features
5

Enable Memory Cleanup
Your device may slow down over time as your storage space gets smaller. Use Memory
cleanup to free up storage space, improve system performance, and keep your device running
smoothly.
Open Optimiser, then touch Cleanup to clean up memory and clear the cache to
optimise performance. If your storage space is still low, perform a deep clean to free up
additional storage space.
Exciting Features
6
New Device
New Device Conguration
Connecting to the Internet
Connect to Wi-Fi networks eortlessly with your device.
Connecting to a Wi-Fi network
1Swipe down from the status bar to open the notication panel.
2Touch and hold to open the Wi-Fi settings screen.
3Switch on Wi-Fi. Your device will list all available Wi-Fi networks at your location.
4Select the Wi-Fi network you want to connect to. If you select an encrypted network, you
will also need to enter the Wi-Fi password.
Connecting using mobile data
Before using mobile data, ensure that you have a data plan with your network provider
to avoid incurring excessive data charges.
1Swipe down from the status bar to open the notication panel.
2Touch to enable mobile data.
To save battery power and reduce data usage, disable your mobile data connection
when you don't need it.
Enrol a Fingerprint
You can enrol a ngerprint on your device and then use your ngerprint to unlock your
screen and access your Safe or App lock without a password.
•When your device restarts or your ngerprint is not recognised, you will need to use
your lock screen password to unlock.
•Before enrolling a ngerprint, make sure your nger is clean and dry.
1Open Settings.
2Go to Security & privacy > Fingerprint ID and follow the instructions to set or enter the
lock screen password.
3Go to New ngerprint to enrol your ngerprint.
4Place your ngertip on the ngerprint sensor and hold until your device vibrates. Repeat
this step using dierent parts of your ngertip.
5After enrolment is complete, touch OK.
To unlock the screen, simply place your nger on the ngerprint sensor.
7
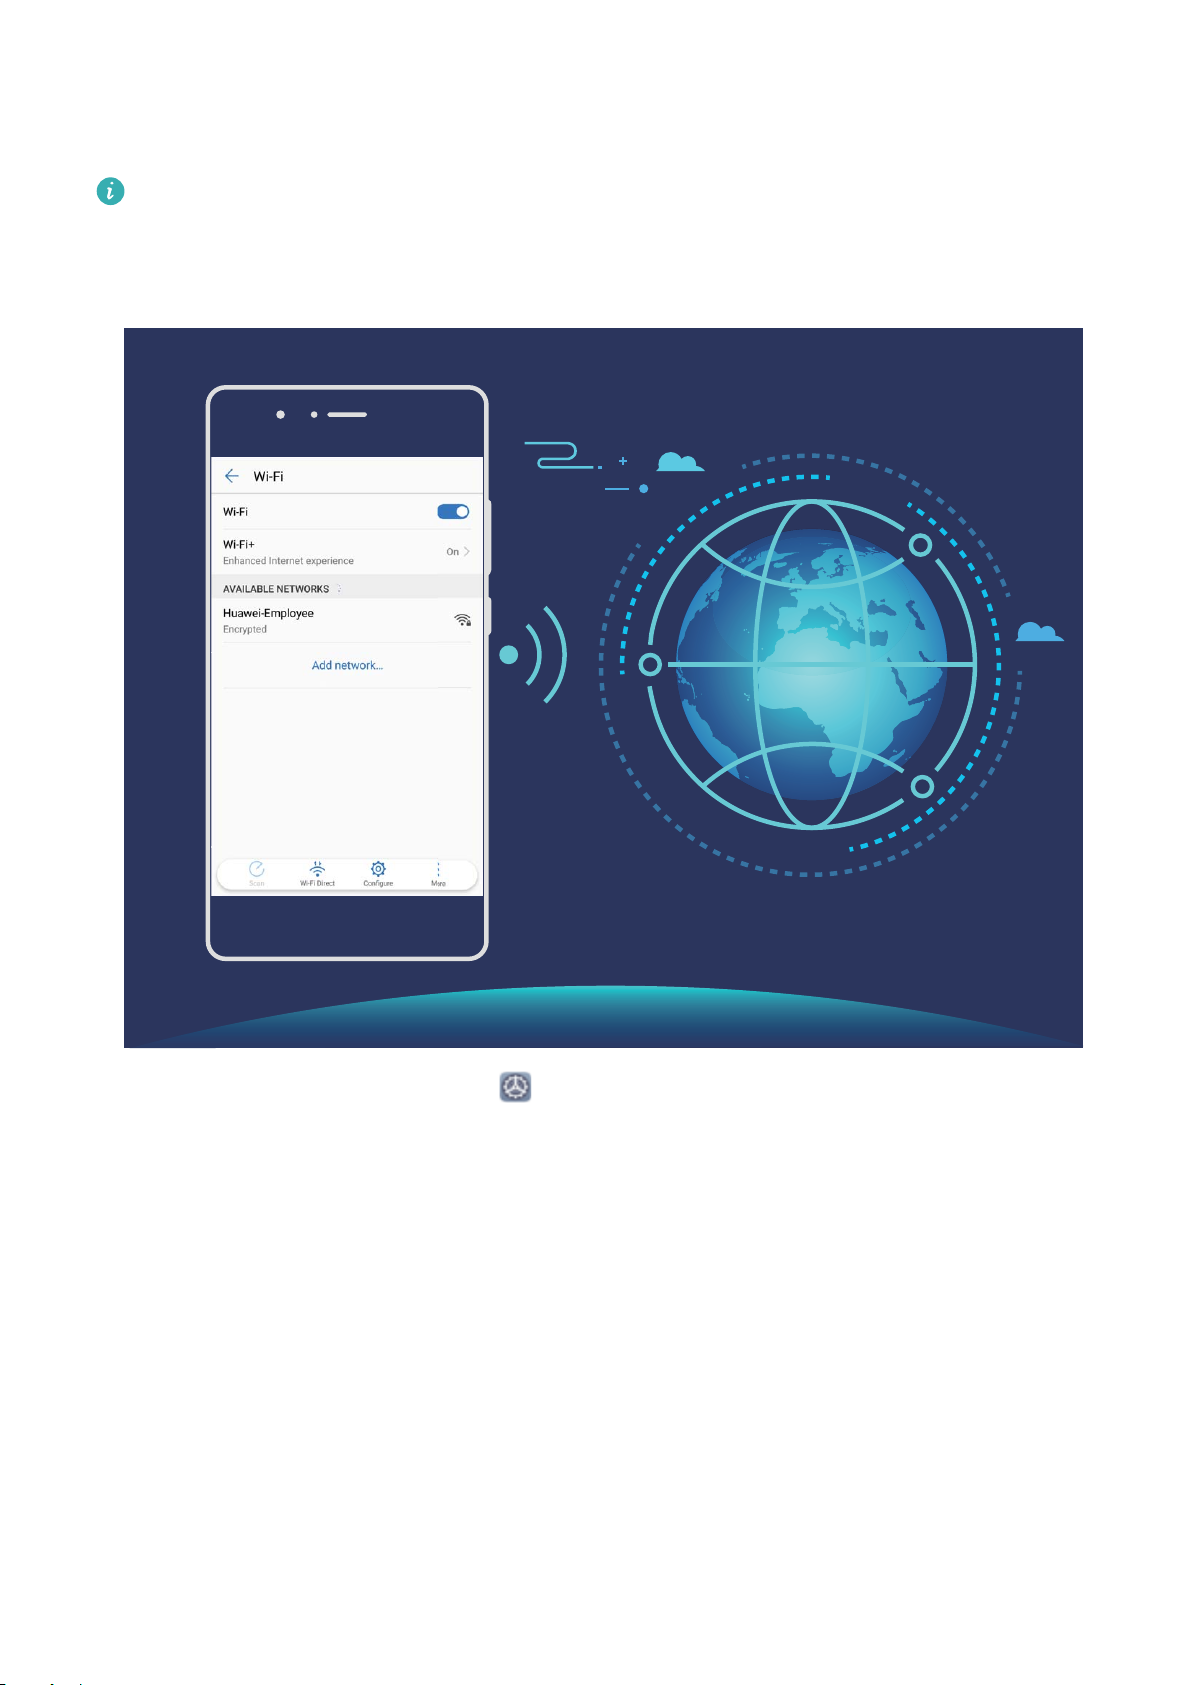
Connect to Wi-Fi
By connecting your device to a Wi-Fi network, you can eectively save mobile data.
To avoid potential security risks (such as unauthorised access to your personal data and
nancial information), please exercise caution when connecting to a public Wi-Fi
network.
Connect to a Wi-Fi Network: Open Settings, go to Wireless & networks > Wi-Fi, and
enable Wi-Fi. Touch a Wi-Fi network to access it, and enter the network password or
complete the authentication if required. Alternatively, you can scroll to the bottom of the
menu, touch Add network, and follow the onscreen instructions to add a network hotspot by
entering its name and password.
New Device
8

Gestures and Operations
Smart Recognition
Read QR Codes and Barcodes
1Swipe down on the home screen, and touch to open HiVision.
2Touch and place the QR code or barcode within the scan frame to acquire information.
3From the results screen, you can:
•Touch to copy the information to the clipboard and paste anywhere you like.
•If the QR code contains contact information, touch to add the information to your
Contacts.
Scan Products
When you encounter an unknown item, you want to buy but can't nd it. After scanning
goods, you can get the purchase recommendations of similar items, which is convenient for
you to buy favourite things.
This feature requires an Internet connection. Connect to a Wi-Fi network to avoid
incurring unnecessary data charges.
1Once your device is unlocked, swipe down from the centre of the home screen, and touch
to open HiVision.
2On the HiVision screen, touch , then you can shop by scanning a product or by taking a
screenshoot.
•Take a screenshoot to purchase: Frame the item in the viewnder, then touch to
take a screenshoot. The system will automatically recognise and recommend similar
items.
•Scan the product to purchase: Frame the item in the viewnder, the system will
automatically scan and recommend similar items.
HiTouch: Find Out More
HiTouch oers you more information about the products that you read about on your device.
1To enable HiTouch, go to Settings > Smart assistance > HiTouch, and enable HiTouch.
2Spread two ngers over a picture or a QR code to enable HiTouch. Products will be
recommended based on the images. You can select a recommended product to be
redirected to a third-party app for details.
This feature is only supported in some countries and regions.
9

Screenshots and Screen Recording
Take Scrolling Screenshots to Capture Entire Pages
Tired of having to take several screenshots to capture long articles or chat records? You can
use your Phone's scrolling screenshot feature to take a screenshot that scrolls all the way
down to the bottom of the page, capturing all of the information on the page in a single
screenshot.
Use shortcuts to take a scrolling screenshot: Swipe down from the status bar to open the
notication panel, then touch to take a scrolling screenshot. Touch within two
seconds of taking the screenshot, and the screen will automatically scroll down and keep
taking the screenshot. During the scrolling process, touch the scrolling area to end the
screenshot.
After taking the screenshot, touch or to edit or share the screenshot. The screenshot
will be saved in Gallery by default.
Gestures and Operations
10

Record Exciting Moments on Your Screen
•Screen recordings will end if you make or answer a call.
•If you are making an audio recording on your device before starting a screen recording,
will be disabled by default.
•Touching during a recording will enable or disable the microphone.
•Enable microphone: You can record the ambient sounds and the system sounds of
your device (system sounds can be played via the speaker).
•Disable microphone: You are unable to record the ambient sounds, but you can still
record the system sounds of your device (system sounds can be played via the
speaker).
•Disable microphone and turn o the sound: The screen will be recorded in silence.
Use shortcut to start recording: Swipe down from the status bar to open the notication
panel, then touch to start a screen recording. You can turn on or o according to your
requirements. To end the recording, touch the red timer in the upper left corner of the screen.
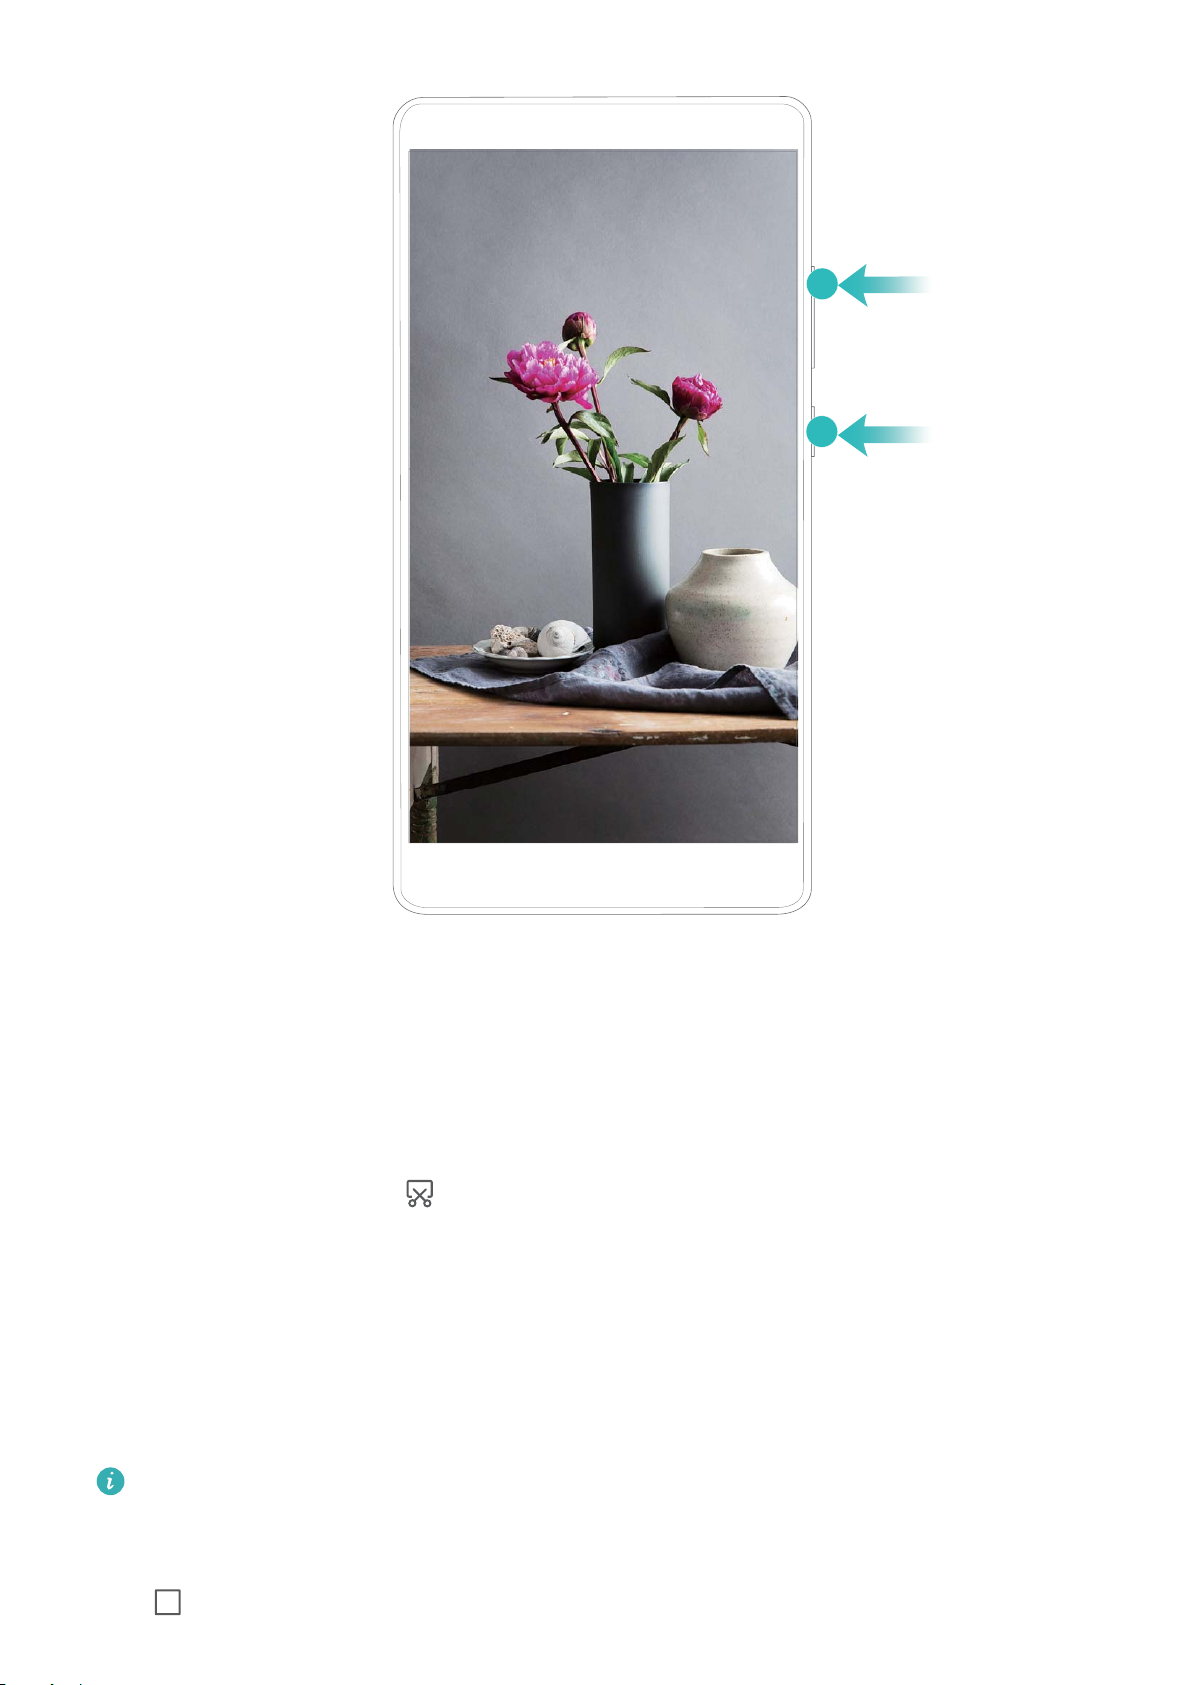
Use key combination to start recording: Simultaneously press and hold the Power button
and Volume up button to start a screen recording. You can turn on or o according to
your requirements. To end the recording, simultaneously press and hold the Power button
and Volume up button again.
Gestures and Operations
11
You can view your screen recordings in Gallery.
Take a Screenshot of Your Entire Screen
Use combo key to take screenshot: Simultaneously press and hold the Power button and
the Volume down button to take a screenshot of the full screen.
Use shortcut switch to take screenshot: Swipe down from the status bar and open the
shortcuts panel, then touch to take a screenshot of the full screen.
Split-screen
Enable Split-Screen Mode
Split-screen mode can help you multitask by separating your screen into two panes, allowing
you to display and operate two dierent apps simultaneously.
Not all devices or apps support Split-screen mode. Some apps may be not able to run
properly in this mode.
Use the Recent key to enable Split-screen mode: Open a compatible app, then touch and
hold .
Gestures and Operations
12

For devices featuring a front navigation button, the virtual navigation bar is disabled by
default. If you want to enable the virtual navigation bar, go to Settings > System >
Phone navigation > Three-key navigation > Settings. After enabling the virtual
navigation bar, the front navigation button will be disabled and will not respond if you
touch and hold it or swipe it.
Use at the top of an app to enable Split-screen mode: If you are using Three-key
navigation, touch on the navigation bar to access the recent tasks screen. If you are
using Gestures, swipe up from the bottom of the screen and hold to access the recent tasks
screen. Select a compatible app and touch at the top of the app.
Use three ngers to enable Split-screen mode: Open a compatible app and swipe up on
the screen with three ngers. Make sure not to swipe up from the very bottom of the screen.
Exit Split-Screen Mode
How to exit Split-screen mode.
To exit Split-screen mode, touch and select .
Gestures and Operations
13

Home Screen
Navigation Bar
Congure Your Navigation Bar Layout
Using the navigation bar, you can conveniently access the home screen, return to the
previous page, exit an app, or view recent apps used.
To congure your navigation bar layout, open Settings, then go to System > System
navigation > Three-key navigation > Settings, and select the navigation key combination
and enable or disable Hide navigation keys based on your usage habits.
•Back key: Touch to return to the previous page or exit an app. Touch to close the
onscreen keyboard when inputting text.
•Home key: Touch to return to the home screen.
•Recent key: Touch to open a list of recently used apps. Touch and hold to enable split
screen mode.
•Downward swipe notication key: Touch to open the notication panel.
Use the Recent Key to Manage Background Apps
If you want to quickly switch to a recently used app, you might try using the Recent key. The
Recent key can help you quickly switch between several recently used apps. You can also use
it to close your background apps to increase your Phone's operating speed.
Touch . You can view, switch to, close, or lock recently used background apps:
•View recently used apps: Recently used apps will be displayed on the screen and you can
check them by swiping left or right.
14

•Switch to a recently used app: Swipe left or right on the screen to nd the app you want
to use, and touch the app tab.
•Close an app: Swipe up on an app tab to close the corresponding app.
•Close all apps: Touch to close all apps.
Navigate with Gestures
Navigate with gestures to quickly go back to the previous screen, return to the home screen,
or view recent tasks.
Open Settings, go to System > System navigation, and select Gestures. From here you
can:
•Go back to the previous screen: Swipe inward from one side of the screen.
•Return to the home screen: Swipe upwards from the bottom of the screen.
•View recent tasks: Swipe upwards from the bottom of the screen and hold. Swipe up on an
app's preview to close the app, or touch to close all apps.
Use Shortcut Switches to Quickly Enable Frequently
Used Features
Want to quickly enable or disable mobile data or hotspot? You can enable frequently used
features by using shortcut switches.
%JTQMBZBMMTIPSUDVU
TXJUDIFT
5PVDIUIFTIPSUDVU
TXJUDIUPFOBCMF
UIFDPSSFTQPOEJOH
GFBUVSF
5PVDIBOEIPMEUP
FOUFSTFUUJOHT
3FBSSBOHFTIPSUDVU
TXJUDIFT
Notication Panel and Status Bar
Notication and Status Icons and Descriptions
The icons on the status bar give you a quick overview of the general status of your device,
including its network connection, battery level, and any new messages received when your
device is in Silent mode.
Status icons: By glancing at the status icons, you can quickly learn the status of your device,
such as its network connection, signal strength, battery level, time, and more.
The network status icons may vary by regions and service providers.
Home Screen
15

Signal strength No signal
4G+ network connected 3G network connected
4G network connected HSPA network connected
2G network connected
LTE
LTE
LTE network connected
LTE
LTE
LTE+ network connected NFC enabled
HSPA+ network connected Airplane mode enabled
VoLTE available Wi-Fi network connected
Roaming Receiving location data from GPS
Bluetooth enabled Silent mode enabled
Wi-Fi network available Charging
Vibration mode enabled Battery level low
Alarms enabled No SIM card detected
Battery fully charged Headset plugged in
Power saving mode enabled Performance mode enabled
Wired or wireless projection in
use Super charging
Quick charging Eye comfort mode enabled
Do not disturb mode enabled USB cable connected
Data saving mode enabled Bluetooth power
Hotspot enabled Optimiser reminder
Unstable signal Can't connect a call on current
network
Select-to-speak enabled Screen time management
enabled
Notication icons: When there is a new message, notication or reminder on your device,
the relevant icon will be displayed in the status bar.
Missed calls New emails
Home Screen
16
Table of contents
Other honor Cell Phone manuals


