honor X8 User manual

User Guide

Contents
Essentials
System Navigation 1
Device Clone 1
Lock and Unlock Your Screen 2
Notification and Status Icons 3
Shortcut Switches 4
Home Screen Widgets 5
Set Your Wallpaper 6
Screenshots & Screen Recording 7
View and Clear Notifications 10
Adjust Sound Settings 11
Power On and Off or Restart Your Device 12
Charging 13
Smart Features
Easy Projection 15
HONOR Share 15
Camera and Gallery
Launch Camera 17
Take Photos 17
Shoot in Portrait, Night, and Wide Aperture Modes 18
AI Photography 19
Macro 19
Take Panoramic Photos 19
Add Stickers to Photos 20
High-Res Mode 20
Pro Mode 20
Record Videos 22
Time-Lapse Photography 23
Adjust Camera Settings 23
Manage Gallery 24
Apps
Apps 29
Phone 29
Messaging 34
Calendar 35
Clock 37
Notepad 38
Recorder 40
i

Email 41
Calculator 42
Flashlight 43
Compass 43
Mirror 43
Optimizer 44
Device Clone 47
Tips 47
Settings
Wi-Fi 49
Bluetooth 50
Mobile Network 51
More Connections 55
Home Screen & Wallpaper 58
Display & Brightness 60
Sounds & Vibration 62
Notifications 63
Biometrics & Password 64
Apps 66
Battery 67
Storage 68
Security 69
Privacy 70
Accessibility Features 71
System & Updates 73
About Phone 76
Contents
ii

Essentials
System Navigation
Change the System Navigation Mode
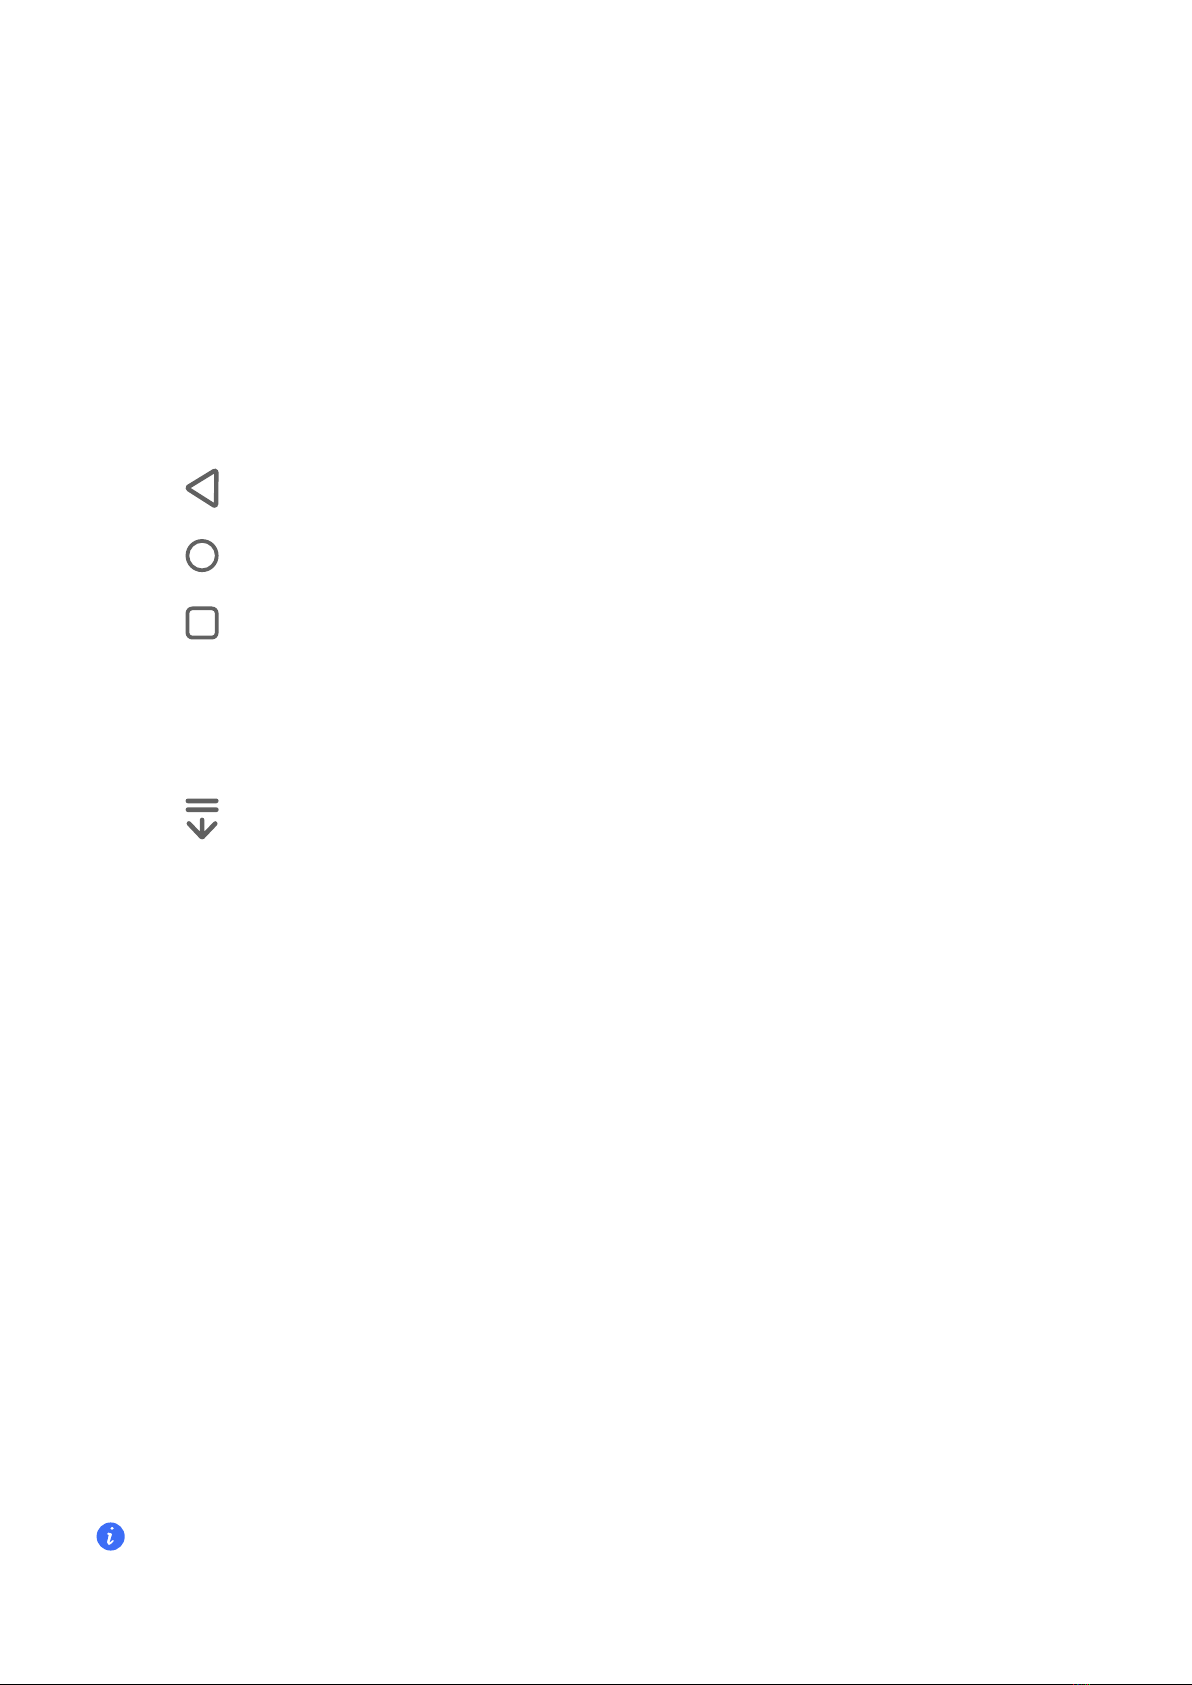
Use Three-Key Navigation
Go to Settings > System & updates > System navigation, and select Three-key navigation.
You can then:
•Touch to return to the previous menu or exit the current app.
•Touch to return to the home screen.
•Touch to access the recent tasks screen.
You can touch Settings to configure more settings.
•Select a navigation key combination.
•Enable Hide navigation keys to allow you to hide the navigation bar when not in use.
•Touch (if available in the selected navigation key combination) to open the notification
panel.
Device Clone
Use Phone Clone to Move Data to Your New Device
Device Clone lets you quickly and seamlessly move all the basic data (including contacts,
calendar, images, and videos) from your old phone to your new phone.
Migrate Data from an Android Device
1On your new phone, open the Device Clone app. Alternatively, go to Settings > System &
updates > Device Clone, touch This is the new device, then touch Honor or Other
Android.
2Follow the onscreen instructions to download and install Device Clone on your old device.
3On your old device, open the Device Clone app and touch This is the old device. Follow
the onscreen instructions to connect your old device with your new phone by scanning a code
or connecting manually.
4On your old device, select the data you want to clone, then touch Transfer to start cloning.
Device Clone is only available on phones running Android 7.0 or later.
1

Migrate Data from an iPhone or iPad
1On your new phone, open the Device Clone app. Alternatively, go to Settings > System &
updates > Device Clone, touch This is the new device, then touch iPhone/iPad.
2Follow the onscreen instructions to download and install Device Clone on your old device.
3On your old device, open the Device Clone app and touch This is the old device. Follow
the onscreen instructions to connect your old device with your new phone by scanning a code
or connecting manually.
4On your old device, select the data you want to clone, then follow the onscreen instructions to
complete the data cloning.
Device Clone is only available on phones running iOS 8.0 or later.
Lock and Unlock Your Screen
Lock the Screen
If your phone remains inactive for a period of time, it will automatically lock the screen and enter
sleep mode to save power.
Alternative, you can manually lock the screen in either of the following ways:
•Press the Power button.
•On the home screen, pinch two fingers together to enter screen editing mode. Touch Widgets,
then drag the Screen Lock icon to the home screen. You can now touch the Screen Lock
icon to lock the screen.
Set the Screen Timeout Period
Go to Settings > Display & brightness > Sleep and select a screen timeout period.
Unlock the Screen with Password
Once the screen is turned on, swipe up from the middle of the screen to display the password
input panel. Then, enter your lock screen password.
Use Face Unlock
Turn on the screen and align it with your face. Your phone will unlock once your face is
recognized.
Unlock Your Phone with Your Fingerprint
Press an enrolled finger against the fingerprint sensor to unlock your phone.
Essentials
2

Display Your Signature on the Lock Screen
Go to Settings > Home screen & wallpaper, touch Lock screen signature, then type text to
display on the lock screen.
To remove the signature, touch Lock screen signature and delete the text.
Launch apps from the lock screen
You can launch common apps, such as Camera, Calculator, and Timer from the lock screen.
•Light up the screen, touch and hold the Camera icon at the lower right corner and swipe up to
open Camera.
•Light up the screen, swipe up from the bottom edge of the screen to open the quick operation
panel, tap an icon to launch the app. This include Flashlight, Calculator, Timer, etc.
Notification and Status Icons
Common notification and status icons
The network status icon may vary depending on your region or network service provider.
Since functions vary among different products, the following icons may not appear on your phone.
5G network connected 4G network connected
3G network connected 2G network connected
Full signal Roaming
Data Saver enabled No SIM card inserted
Hotspot enabled Hotspot connected
Wi-Fi network connected Dual Wi-Fi networks connected
Automatic network switching via
Wi-Fi+ enabled Hotspot disconnected
Out of battery Low battery
Charging Quick Charge enabled
Super Charge enabled Wireless Super Charge
Wireless Quick Charge Regular wireless charge
Essentials
3

Power Saving mode enabled Digital Balance enabled
Bluetooth enabled Battery of the Bluetooth device
Bluetooth device connected VPN connected
More hidden information Screen projection device
connected
Location service enabled Eye Comfort enabled
Earphones connected Airplane mode enabled
Phone call connected VoLTE HD Calls enabled
Missed call New message
Silent mode Vibration mode
NFC enabled Do Not Disturb enabled
Syncing data Data sync failure
Performance mode enabled New email
New event reminder Alarm enabled
Shortcut Switches
Use Shortcut Switches
Turn on a Shortcut Switch
Swipe down from the status bar to open the notification panel, then swipe down on it again to
show all shortcuts.
Essentials
4

•Touch a shortcut switch to enable or disable the corresponding feature.
•Touch and hold a shortcut switch to access the settings screen of the corresponding feature.
(Supported by some features.)
•Touch to access the system settings screen.
Customize Shortcut Switches
Touch , touch and hold a shortcut switch, then drag it to the desired position.
Home Screen Widgets
Essentials
5

Add, Move, or Delete Home Screen Widgets
You can add, move, or delete home screen widgets, such as Screen lock, Weather, Notepad,
Clock, Contacts and Calendar, according to your personal requirements.
Add Weather, Clock, and Other Widgets to the Home Screen
1Pinch two fingers on the home screen to access Home screen settings mode.
2Touch Widgets, then swipe left to view all widgets.
3Some widgets, such as Weather, come in various formats. Touch the widget to show all
formats, and swipe right to collapse.
4Touch a widget to add it to the home screen. If there is no room on the current screen, touch
and hold it, then drag it to a different screen.
To configure the Weather app, open it, and touch to set the configurations as prompted.
For example, to switch between Celsius and Fahrenheit, go to > Temperature unit, and touch
Celsius (℃) or Fahrenheit (℉).
Move or delete widgets
On the home screen, touch and hold a widget, then drag it to the desired position. Or tap
Remove to delete the widget.
Set Your Wallpaper
Set Your Wallpaper
Use a Preset Wallpaper
1Go to Settings > Home screen & wallpaper > Wallpaper.
2Touch an image you want to set as the wallpaper.
3Set the following according to your preferences:
•Blur: applies a blur effect, which can be adjusted by dragging the slider.
•Scrollable: enables the wallpaper to be scrollable on the home screen.
4Touch , then determine whether you'd like to set it as the wallpaper for the Lock screen,
Home screen, or Both.
Set an Image from Gallery as Your Wallpaper
1Open Gallery, and open the image you want to set as your wallpaper.
2Go to > Set as > Wallpaper, then follow the onscreen instructions.
Essentials
6

Screenshots & Screen Recording
Take a Screenshot
Use Your Knuckle to Take a Screenshot
1Go to Settings > Accessibility features > Shortcuts & gestures > Take screenshot, and
ensure that Knuckle screenshots is enabled.
2Knock the screen twice in quick succession with one knuckle to take a screenshot.
Use a Key Combination to Take a Screenshot
Press and hold the Power and Volume down buttons simultaneously to take a screenshot.
Use a Shortcut to Take a Screenshot
Swipe down from the status bar to open the notification panel, then swipe down on it again to
show all shortcuts. Touch to take a screenshot.
Share and Edit a Screenshot or Switch to Scrollshot
Essentials
7

After you take a screenshot, a thumbnail will be displayed in the lower left corner of the screen.
You can then:
•Swipe down on the thumbnail to take a scrolling screenshot.
•Swipe up on the thumbnail to select a way to share the screenshot with your friends.
•Touch the thumbnail to edit or delete it. You can also touch Scrollshot to take a scrolling
screenshot.
Screenshots are saved to Gallery by default.
Use Your Knuckle to Take a Scrolling Screenshot
1Knock the screen with a knuckle and hold to draw an "S". The screen will automatically scroll
down to the bottom for you to capture the entire page.
2You can touch the screen at any point to stop the screenshot.
Swipe Down Using Three Fingers to Take a Screenshot
1Go to Settings > Accessibility features > Shortcuts & gestures > Take screenshot, and
ensure that Three-finger screenshot is enabled.
2Swipe down from the middle of the screen with three fingers to take a screenshot.
Essentials
8

Take a Partial Screenshot
1Knock on the screen with a knuckle and hold to draw an outline around the part of the screen
that you want to capture. Make sure that your knuckle does not leave the screen.
2The screen will display the movement trajectory of your knuckle and take a screenshot of the
selected area. You can then:
•Drag the frame to the desired position or resize it.
•Touch a shape icon to determine the shape of the partial screenshot, or retain the current
shape.
3Touch to save the screenshot.
Precautions for Using Knuckle Screenshots
•Please double knock the screen consecutively at the same place and at an appropriate speed.
•Keep your knuckle vertical to the screen.
•If you want to take more than one screenshot, wait 2 seconds before knocking on the screen
again.
•If there is a screen protector on the screen, knock the screen harder or remove the screen
protector and try again.
Essentials
9

Record the Screen
Record your screen activities in sharable videos to compose a tutorial, show off your awesome
gaming skills, and a lot more.
Use a Key Combination to Start Screen Recording
Press and hold the Power and Volume up buttons simultaneously to start screen recording. To
stop recording, press and hold both buttons again.
Use a Shortcut to Start Screen Recording
1Swipe down from the status bar to open the notification panel, then swipe down on it again to
show all shortcuts.
2Touch Screen Recorder to start screen recording.
3To stop the recording, touch the timer at the top of the screen.
4The recording will be saved to Gallery.
Use Two Knuckles to Start Screen Recording
1Go to Settings > Accessibility features > Shortcuts & gestures > Record screen, and
ensure that Record screen is enabled.
2Knock the screen twice in quick succession with two knuckles to start screen recording. To
stop recording, knock twice again.
Record Your Voice During Screen Recording
You can enable the microphone to record your voice while recording the screen.
After starting a screen recording, touch the microphone icon and ensure that it is displayed as
. You can now record your voice.
If the microphone is disabled (if it is displayed as ), you will only be able to record system sounds,
such as music. If you don't want any system sounds in your screen recording, mute your phone and
turn off any music or other media sounds before starting the screen recording.
View and Clear Notifications
View Notifications
When there is a notification reminder, you can unlock the screen and swipe down from the status
bar to open the notification panel and view the notification.
Clear Notifications
•You can remove a notification by swiping right on it.
Essentials
10

•You can touch to clear all notifications.
Some system notifications and notifications from apps running in the foreground cannot be cleared.
Do not show notification
To not get disturbed by notifications, swipe left on the notification you want to process, and tap
, you can select:
•DISABLE NOTIFICATIONS
•USE GENTLE NOTIFICATIONS
•
•Some system notifications and notifications from foreground apps cannot be closed or delayed.
•Different apps may support different options, please refer to the actual situations.
Adjust Sound Settings
Press a Volume Button to Adjust the Volume
Press the Volume up or down button to adjust the volume.
Press the Power Button to Mute Your Device When It Rings
When your phone rings for an incoming call or alarm, you can press the Power button to mute it.
Change ringtone and vibration
You can change the ringtone for texts, notifications, and incoming calls, and customize vibration.
1Go to Settings > Sounds & vibration and tap Phone ringtone or Notification tone.
2You can perform any of the following operations:
•Set a ringtone
Select a system ringtone, or tap Music on device to select a local song as the text
ringtone.
For a dual-SIM phone, select SIM 1, SIM 2 to set their ringtone separately.
•Set the vibration mode
Tap Vibration, select the desired vibration mode.
Use a Shortcut to Switch Between Sound, Vibration, and Silent Modes
1Swipe down from the status bar to open the notification panel, then swipe down on it again to
show all shortcuts.
2Touch the Sound, Silent, or Vibration icon to switch between different modes.
Essentials
11

In Sound mode, your phone plays all sounds as normal.
In Silent mode, your phone only mutes the ringtones for incoming calls, messages, notifications,
and some third-party app notifications. Other sounds, including alarms, voice calls, music,
videos, and games, will not be muted.
In Vibration mode, your phone is muted and vibrates to provide discreet alerts for calls or
messages.
You can also go to Settings > Sounds & vibration to switch between Sound, Vibration, and
Silent modes.
System Haptics
The system uses haptics to provide feedback when certain operations are completed, such as
when you touch and hold text, a contact, or some other elements on the screen.
Go to Settings > Sounds & vibration > More settings and enable or disable System haptics
according to your preferences.
Flip to Mute
When there is an incoming call, you can flip your phone to mute it.
For the features to take effect, go to Settings > Accessibility features > Shortcuts & gestures
> Mute ringtone and make sure that Flip to mute ringtone is enabled.
Set More settings
On the Sounds & vibration screen, touch More settings, and set more notification methods
according to your preferences. For example, you can set Keypad tones and Screenshot.
This feature may vary by device.
Power On and Off or Restart Your Device
Power Your Device On and Off
To power off your device, press and hold the Power button for a few seconds, touch Power off
and Touch to power off.
To power on your device, press and hold the Power button for a few seconds until your device
vibrates and displays the logo.
Restart Your Device
Restart your device on a regular basis to clear the cache and keep the device in an optimal
state. A restart can sometimes resolve the issue when your device encounters a problem.
Just press and hold the Power button for a few seconds, then touch Restart and Touch to
restart.
Essentials
12

Forcefully restart your phone
You can forcefully restart your phone if it is not working or turning off normally. Just press and
hold the Power button for 10 seconds or longer.
Charging
Charge Your Phone
Your phone will alert you when it is running out of power. Please make sure to charge your
phone in time to prevent it from turning off automatically when the power runs out.
Precautions for Charging
•Charge your phone using the standard adapter and USB cable that came with your device.
Using other chargers or USB cables may cause repeated restarts, slow charging, overheating,
or other undesirable effects.
•Your phone will automatically run a safety check when a charger or other device is connected
to the USB port. If moisture is detected in the USB port, your phone will automatically activate
safety measures and stop charging. Disconnect your phone from the USB port and wait until
the USB port is dry.
•The time required to fully charge the battery depends on the ambient temperature and age of
the battery.
•Batteries have a limited number of charge cycles. When the battery life becomes noticeably
shorter, go to an authorized HONOR Customer Service Center to replace the battery.
•Do not cover your phone or charger during charging.
•Your phone may heat up when you have been using it for an extended period of time,
especially in high temperatures. In this case, stop charging, disable some features, and move
your phone to a cool place.
•Please do not use your phone while it is charging.
•If your phone does not respond after you press and hold the Power button, the battery may
have run out. Charge for 10 minutes and then power it on.
Use the Charger that Came with Your Device
1Use the USB cable that came with your phone to connect your phone and the adapter.
2Plug the adapter into a power socket.
Charging Your Phone with a PC
1Connect your phone to a PC or other device using a USB cable.
2When the Use USB to dialog box is displayed on your phone, touch Charge only.
If another option has been set previously, the dialog box will not pop up. Swipe down from the
status bar to open the notification panel, touch Settings, then select Charge only.
Essentials
13

Overview of Battery Icons
You can check the battery level from the battery icon on the phone screen.
Battery Icon Battery Level
Less than 10% battery remaining.
10% to 20% battery remaining.
Charging, 20% to 90% battery remaining.
Charging, at least 90% battery remaining.
If 100% is displayed next to the battery icon, or a charging complete
message is displayed on the lock screen, the battery is fully charged.
Essentials
14

Smart Features
Easy Projection
Project Your Phone Screen Wirelessly
For security reasons, after projecting your phone screen wirelessly to a large display (such as a
TV) for work or entertainment, notifications such as incoming call notifications, SMS messages,
and clock alarms will only be displayed on your phone.
1Perform the following based on the model and functions of the large display:
•If the large display supports Miracast, turn on its wireless projection switch.
•If the large display does not support Miracast, connect a wireless HDMI adapter to it.
Ensure that the wireless HDMI adapter is connected to a power supply.
To check whether the large display supports Miracast and how to enable wireless projection on it,
consult the user guide or customer service of the large display manufacturer.
2On your phone, swipe down from the status bar to open the notification panel, and turn on
.
3Swipe down again to show all shortcuts and enable Wireless Projection. Your phone will
start searching for available display devices.
4In the device list, touch the name corresponding to the large display or wireless HDMI
adapter to complete the projection connection.
After the connection is set up, you can place your phone in landscape mode for a better display.
Alternatively, swipe down from the status bar, and touch Disconnect.
HONOR Share
HONOR Share
HONOR Share is a wireless sharing technology that allows you to quickly transfer images,
videos, documents, and other types of files between devices. This technology uses Bluetooth to
discover nearby devices that supports HONOR Share and Wi-Fi Direct to transfer files without
using mobile data.
Enable or Disable HONOR Share
You can enable or disable HONOR Share in either of the following ways:
•Swipe down from the status bar to open the notification panel, swipe down on it again to show
all shortcuts, then turn on or turn off HONOR Share. You can also touch and hold HONOR
Share to access its settings screen.
•Go to Settings > More connections > HONOR Share to enable or disable HONOR Share.
15

Share Files Between Phones with HONOR Share
You can use HONOR Share to quickly share files between HONOR phones. The recipient can
preview the files before they are sent, then view the full content of the files once they have been
received.
1On the receiving device, enable HONOR Share.
2On the sending device, tap and hold to select a file or album you want to share, then tap .
Tap HONOR Share, then tap the name of the receiving device to send the file.
These steps may be different if you are sharing files directly from an app.
3On the receiving device, tap ACCEPT to accept the transfer.
On the receiving device, go to Files, tap Phone > HONOR Share under the Browse tab to view
the received file.
Received pictures or videos can also be viewed in Gallery > Albums > HONOR Share.
One-Touch Printing with HONOR Share
When a printer that supports HONOR Share is nearby, you can use HONOR Share to find the
printer and print out pictures or PDF files stored on your phone.
1Depending on the type of printer, ensure the following:
•Wi-Fi capable printers: The printer must be powered on and connected to the same
network as your phone.
•WiFi Direct capable printers: The printer must be powered on and have enabled WiFi
Direct.
•Bluetooth capable printers: The printer must be powered on and discoverable via
Bluetooth.
2On your phone, preview the file to be printed, then go to Share > HONOR Share.
3Once the printer has been discovered, touch its name on your phone, and adjust the settings
on the preview screen. Then touch PRINT to print.
If you are connecting a Bluetooth printer to your phone for the first time, find the printer on
your phone, touch the printer name, then press and hold the Power button on the printer for
about 1 second to confirm the connection.
For a list of supported printers, touch Help on the HONOR Share sharing screen, select Printers,
then touch What printers are supported?.
Smart Features
16

Camera and Gallery
Launch Camera
Launch Camera
There are multiple ways to open the Camera app.
From the Home Screen
From the home screen, open Camera.
From the Lock Screen
When the screen is locked, turn on the screen, then swipe up on the camera icon in the lower
right corner to open the camera.
Take Photos
Taking Photos
1Open Camera.
2You can perform the following operations:
•Focus: tap in the screen where you want to highlight.
To separate the focus point and metering point, press and hold in the viewfinder frame,
and when the focus frame and metering frame appear at the same time, drag them to the
desired position separately.
•Adjust the brightness: Tap the screen and swipe up or down next to the focus frame.
•Zoom in or out: Open/pinch both fingers on the screen or slide the zoom bar next to the
screen to zoom in/out.
•Select camera mode: In the camera mode area, swipe left or right to select a mode.
•Turn the flash on or off: tap and select (Auto), (On), (Off), or
(Always on).
When (Auto) is selected, if the camera detects that you are in a dark environment, a
flash alert will appear in the viewfinder and the flash will automatically turn on when
shooting.
•Select a filter: Tap to preview the filter effect.
Not all modes support the above operation, please refer to each mode for details.
3Tap the shutter to shoot.
17
Other manuals for X8
3
This manual suits for next models
3
Table of contents
Other honor Cell Phone manuals

honor
honor 10 Lite Installation guide

honor
honor 6A User manual

honor
honor TFY-LX1 User manual

honor
honor JAT-L41 User manual

honor
honor ANY-NX1 User manual

honor
honor 3C Lite User manual

honor
honor COL-L29 User manual

honor
honor KSA-LX9X User manual

honor
honor 3C Lite User manual

honor
honor HRY-LX1 User manual