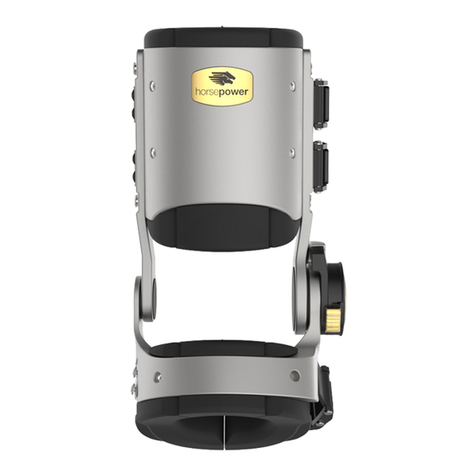
Horsepower Technologies FastTrack User manual

FastTrack™Heating and Fitting Guide

Congratulations on your purchase of
Horsepower Technologies FastTrack™. Please
take a moment to read these instructions
before using the Heater Kit and FastTrack™.
You can find step-by-step videos online at
http://www.horsepowertech.com/support
For questions or comments please contact:
Customer Support
844-51-HORSE
support@horsepowertech.com
or visit www.horsepowertech.com
WARNING:
1. Correct and accurate fit is critical to this device's proper
performance.
• Carefully read instructions and warnings prior to use.
2. Use extreme caution while using the Heater Kit as this
device and FastTrack™ become very hot during use.
3. To avoid potential fire hazards always ensure the Heater
Kit is placed on clean, dry and level surfaces prior to use.
4. If unit is damaged or inoperable, please discontinue use
and call Customer Support: 844-51-HORSE.
5. A fire may result if the Heater Kit is not used with care,
therefore:
• Be careful when using the Heater Kit in places where
there are combustible materials.
• Do not use in presence of an explosive atmosphere.
• Be aware that heat may be conducted to combustible
materials that are out of sight.
• Allow Heater kit to cool down before storage.
• Do not leave the Heater Kit unattended when it is
switched on.
6. If the supply cord is damaged it must be replaced by the
manufacturer, its service agent, or similarly qualified
persons in order to avoid a hazard.
7. For your safety, please use included heat-resistant
gloves.
8. Horses are prone to sudden movements, please exercise
caution while applying and fitting FastTrack™.
9. Unplug the Heater Kit when not in use.
1 2

4. Remove bag with heat-resistant gloves.
5. Check to make sure the power switch is
in the “Off” position.
1. Ensure Heater Kit is placed on a clean,
dry and level surface.
WARNING: Remove hay or potentially
combustible materials surrounding
heater as this could be a fire hazard.
Do NOT leave Heater Kit unattended
during use.
2. Undo both side latches.
3. Remove cover and set aside.
Set Up Heater Kit
1
Heater Kit Features
43

1. With the lid off, turn the Heater Kit “On.”
Note: "On" will be in the down
position and red indicator light will be
illuminated when Heater Kit is on.
Note: If the Heater Kit fan turns off
during use, the red indicator light will
remain on. This indicates that the Heater
Kit has overheated. Turn switch off and
allow Heater Kit to cool down for 30
minutes. If you continue to experience
issues please contact Support.
Preheat
2
2. Run the Heater Kit for 10 minutes. Read
ahead and complete Section 3 (Page 7)
during Preheat. When time has elapsed
turn off the Heater Kit and proceed to
Section 4 (Page 8).
WARNING: User must turn off the
Heater Kit to avoid potentially serious
injury before proceeding to Section 4.
Note: The following sections make
reference to the horse's Center of
Rotation and other anatomical features.
Please familiarize yourself with these
terms in the FastTrack™ Daily Use Guide
before proceeding to Section 6.
6. Uncoil power cord fully and plug into
standard 120 VAC outlet. Cord should
not cross over the top surface of the
Heater Kit in any way.
Set Up Heater Kit cont.
1
65

1. Place unbuckled FastTrack™ into Heater
Kit.
2. Ensure FastTrack™ is fully seated
between vertical heating surfaces.
3. Straps should be outside of the vertical
heating surfaces and hanging on the
outside of the base.
Insert FastTrack™into Heater Kit
4
4. You should be able to fully see both
padding alignment marks when
FastTrack™ is properly installed.
1. Unpack FastTrack™ from shipping box.
Take care when opening the box to not
accidentally cut FastTrack™. Confirm
both FastTrack™ units are undamaged.
2. Choose which leg to start working
on first and select the corresponding
FastTrack™. Left/right is designated on
the top removable sticker on the front of
FastTrack™.
Note: Remove stickers before heating.
3. Familiarize yourself with the features
of FastTrack™ and application of
FastTrack™ to the horse's legs before
proceeding to Section 4 (Page 8).
4. Make sure the horse’s legs from the
knee down are well-groomed, clean, dry
and free of abrasions or irritations.
5. Ensure SafeStop™ is set to 90 degrees.
Refer to Daily Use Guide for detailed
instructions.
Note: 90 degrees is the last line on the
SafeStop™ dial.
6. Unbuckle all straps from FastTrack™
and loosen Velcro wraps.
Prepare FastTrack™for Fitting
3
7 8

1. Make sure the horse is standing square
on a firm, flat surface.
2. Using supplied heat-resistant gloves,
remove FastTrack™ and immediately
put on horse’s leg.
Note: The padding cools quickly; the
best fit is achieved when the padding
is applied to the leg immediately after
heating.
Fit FastTrack™to Horse’s Leg
6
3. Gently but firmly, put lower cuff on
horse’s leg first followed by upper cuff
and secure the straps. Refer to Daily
Use Guide for clarification on applying
FastTrack™ to horse’s leg.
WARNING: Upper cuff may be difficult
to apply to horse's cannon when heated
due to expanded foam. Open upper cuff
fully and use caution when applying.
4. Keep FastTrack™ on horse’s leg for 15
minutes until the padding has cooled.
5. Check the fit of FastTrack™ to ensure
the padding has formed correctly to the
horse’s leg. The heating process may
be repeated to achieve a better fit if
necessary.
6. A snug but not uncomfortably tight fit of
FastTrack™ on the limb is essential to
ensure full effectiveness.
1. Turn Heater Kit “On.”
Note: "On" will be in the down
position and red indicator light will be
illuminated when Heater Kit is on.
2. Heat FastTrack™ for 10 minutes.
3. When time has elapsed, turn heater off.
4. Immediately proceed to Section 6
(Page 10).
Heat FastTrack™for Fitting
5
109

7. Check for a minimum of 0.5" clearance
between interior of tendon bumpers
and sides of FastTrack™, from any
tendon and/or ligament structures on
the horse’s distal limb between knee
(carpus) and fetlock.
Note: A gap behind the tendon is
desirable. The lower cuff must close
completely in the back.
8. Check that the center of the SafeStop™
is at the same height off the ground as
the Center of Rotation, i.e. the 2 axes of
rotation should be in alignment.
9. Test fit by placing index finger in
between pad and horse’s leg from the
top.
Note: Fit should be very snug. It should
be difficult to get your index finger
between the cannon and the padding.
Note: You may not have the same
spacing on both sides of the cannon.
Fit FastTrack™to Horse’s Leg cont.
6
12. Once cool, remove FastTrack™ and
check the horse’s leg for any rubbing,
irritation and/or swelling at contact
points between FastTrack™ and the leg.
Minor hair disturbance is normal and is
not cause for concern.
13. Reapply FastTrack™ to confirm the
padding fits correctly.
14. Once a correct FastTrack™ fit has been
confirmed, excess strap length can be
trimmed with scissors so they tuck
better into the keepers.
Repeat the above steps for the other FastTrack™ unit.
10. Lower cuff should be set mid-pastern
with no contact of cuff padding with heel
bulbs or coronary band while horse is
standing square.
11. Lower cuff should fit very snug against
pastern. The padding should close
securely in the back.
Fit FastTrack™to Horse’s Leg cont.
6
1211

1. Unplug Heater Kit. Allow device to cool
down for 10 minutes or as needed.
Cool Down and Storage
7
2. Recoil power cable and store gloves.
3. Place cover back on Heater Kit and
secure using side latches unless Heater
Kit is to be used in a clean environment.
4. Heater Kit is safe to transport once cool.
For Product Warranty information, please refer to
our website: www.horsepowertech.com
Storage and Care Instructions
After Every Use: • Inspect for damage to unit and cord
Storage: • Store in a cool and dry area
Cleaning: • Clean and dry by hand using cloth or brush
• Do not use water / liquids to clean
Customer Support
844-51-HORSE
support@horsepowertech.com
or visit www.horsepowertech.com
13 14

Horsepower Technologies
110 Canal Street, Suite 311
Lowell, MA 01852 USA
For questions and support,
please contact customer support:
844-51-HORSE
support@horsepowertech.com
visit www.horsepowertech.com
Version 1.0
526-03-219
Other manuals for FastTrack
1
Table of contents
Other Horsepower Technologies Medical Equipment manuals
Popular Medical Equipment manuals by other brands

Dräger
Dräger Fabius Series Supplement to instructions for use

STILLE
STILLE imagiQ2 Service and Technical Manual

Richard Wolf
Richard Wolf FLUID CONTROL Lap 2216 manual

ZOLL
ZOLL PD 1400 Operator's guide

Medset
Medset PADSY TELESMART-H/P Instructions for use

KLS Martin
KLS Martin independant Care Vertical ES Instructions for use

Nellcor
Nellcor OXIMAX N-600X Series Operator's manual

Precision Medical
Precision Medical PM3300 user manual

Chronolife
Chronolife Keesense user guide

Mac Medical
Mac Medical PTF1000 Preparations for Using

Mediroyal
Mediroyal TFCC Series instructions

Braun
Braun Aesculap activ C Instructions for use/Technical description