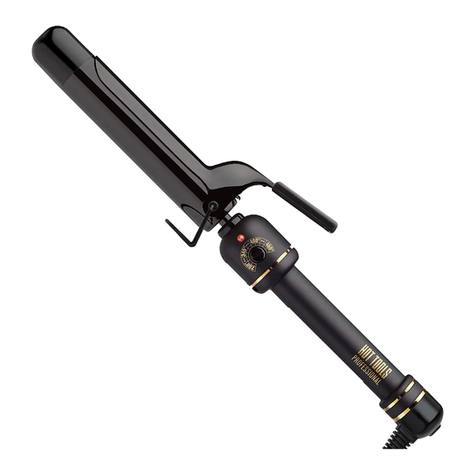
The appearance of your appliance may vary from the illustrations above.
La apariencia del artefacto puede variar con relación a las ilustraciónes anteriores.
On / Off Button
Botón de “On / Off”
(encendido / apagado)
Temperature Select Buttons
Botones para seleccionas la temperatura
LCD Temperature Display
Pantalla de LCD de
temperatura
Straightening Plates
Placas para alisar
Swivel Cord
Cable giratorio
Seven-Year Limited Warranty
Helen of Troy warrants to the original purchaser that this appliance is free from
defects in workmanship for seven years from the date of purchase.
This warranty does not cover damages resulting from accident, misuse, abuse,
attempts at repair or the use of unauthorized attachments. If this appliance fails to operate
properly under normal use within 30 days from purchase because of defect, simply return
it to the place of purchase with proof of purchase for a no-charge replacement.
If found defective after 30 days and within the warranty period, send the appliance
postage paid along with proof of purchase, a note explaining reason for return, and
$5.00 US to cover handling, insurance, and return postage costs to: Helen of Troy L.P.,
Consumer Service Department, 1 Helen of Troy Plaza, El Paso, Texas 79912 USA.
(California residents are not required to send $5.00 US.) Toll-free number
1-800-487-8769.
This warranty gives you specific legal rights, and you may also have other rights,
which may vary depending on where you live.
Garantía limitada de siete años
Helen of Troy garantiza al comprador original que este artefacto no presenta defectos
de mano de obra durante siete años a partir de la fecha de compra.
Esta garantía no cubre daños causados por accidentes, uso indebido, abuso, intentos
de reparación o uso de accesorios no autorizados. Si el artefacto deja de funcionar
correctamente en condiciones de uso normal dentro de los 30 días posteriores a la
compra debido a algún defecto, simplemente devuélvalo al lugar donde lo compró junto
con un comprobante de compra y recibirá un reemplazo sin cargo.
Si surge un defecto después de 30 días y dentro del período de vigencia de la
garantía, envíe el artefacto con franqueo pagado acompañado del comprobante de
compra, una nota explicando el motivo de la devolución, y $5.00 US para cubrir gastos
administrativos, de seguro y envío. Los envíos deben realizarse a: Helen of Troy L.P.,
Consumer Service Department, 1 Helen of Troy Plaza, El Paso, Texas 79912 USA. (En
EE.UU. solamente: Los residentes de California no necesitan enviar $5.00 US.) Número
telefónico sin cargo 1-800-487-8769.
Esta garantía le da derechos legales específicos y podrá tener otros derechos que
varían dependiendo del lugar donde vive.
Plate Locking Switch
Interruptor de seguro
de las placas
Use and Care Instruction Manual
Manual de instrucciones de uso y cuidado
Extra-long Salon Flat Iron
Plancha extra larga de salón
Model / Modelo
HT7113RGV1
OPERATING INSTRUCTIONS
This appliance has a polarized plug (one blade is wider than the other). As a
safety feature, this plug will fit in a polarized outlet only one way. If the plug
does not fit fully in the outlet, reverse the plug. If it still does not fit, contact
a qualified electrician. Do not attempt to defeat this safety feature.
IMPORTANT: During the first few minutes of initial use, you may notice
smoke and a slight odor. This is normal and is not a cause for concern.
Automatic Worldwide Dual Voltage
This appliance will automatically adjust to the proper voltage. In North
America, connect the plug into any outlet. Outside North America, use a
plug adapter of the proper configuration with the plug before connecting
into any outlet.
Auto Shut-off
• The Auto Shut-off feature is automatically “On” when you turn on the iron.
• The Shut-off feature will automatically turn your iron off, if you forget to
do so, in 1 hour.
Temperature Memory
Your Flat Iron has a state-of-the-art temperature memory design which will
automatically recall the last temperature as your preferred heat setting and
will recall the selected heat setting the next time the unit is turned on.
Start-up
• Plug the flat iron into an electrical outlet and press and hold On/Off
Button.
• The Flat Iron automatically sets to 180°F. Choose your temperature
according to your hair type.
• Use the Temperature Select Buttons (+/-) to select the heat level best
suited to your hair type.
• Allow the appliance at least 30 seconds’ heating time.
NOTE: Once desired temperature is selected, the LCD temperature display
will show temperatures ramping up until the selected temperature is
reached.
Caution: Flat irons with heat controls operate at high temperatures when
used on high settings. When using for the first time, begin with the
LOWEST setting. Please read all instructions carefully before using. For best
results, follow these guidelines:
Heat Selection Hair Type
180°F - 280°F For fine, thin, fragile hair
280°F - 330°F For normal hair
330°F - 380°F For wavy, medium-textured hair
380°F - 455°F For thick, coarse hair
Helpful Styling Hints
• Hair should be clean and dried completely before using any styling tool.
• Separate a 1-inch section of hair, gently place hair between the
Straightening Plates and clamp the straightener down firmly on the hair.
You will achieve professional results if you work from the scalp to the
ends of your hair.
• Carefully slide the iron along the isolated section, making sure the hair is
heated and straightened all the way to the ends. The ends will probably
require less heat than the hair which grows closer to the scalp.
• For best results, hold end of hair while smoothing the hair section.
• To create flips or curls, use rounded edge of iron’s Straightening Plates
to curl ends out or under.
• To remove hair from the straightener, release pressure and allow the hair
to gently slip out from the Straightening Plates.
• The straightening process does not require overlapping. Separate each
section of hair and work on it as indicated above.
• Allow hair to cool before combing or brushing.
• Repeat the process until you have achieved the look you desire.
• When styling is complete, press and hold the On / Off Button to turn off.
The blue LCD light will flash and display “OFF.” Unplug the appliance
and allow it to cool before storing.
PLATE-LOCKING SWITCH
For easier storage, the plates of the flat iron can be locked together. To
engage the locking switch, first turn the appliance off and unplug it. Push
the switch backward while pressing the handles together to lock the plates.
To unlock the plates, push the switch forward. WARNING: DO NOT engage
the Plate-locking Switch during styling, and DO NOT lock the plates onto
hair, as serious damage to hair or even injury could result.
INSTRUCCIONES DE USO
Este artefacto tiene un enchufe polarizado (una hoja es más ancha que la
otra). Por seguridad, este enchufe podrá introducirse de una sola manera
en tomacorrientes polarizados. Si el enchufe no entra hasta el fondo en
el tomacorrientes, dé vuelta el enchufe. Si sigue sin entrar, consulte a un
electricista profesional. No intente alterar esta característica de seguridad.
IMPORTANTE: Durante los primeros minutos de uso inicial, puede notar
humo y un poco de olor. Esto es normal y no es motivo de preocupación.
Tensión Doble Automática Para Uso En Todo El Mundo
El artefacto se ajustará automaticamente al voltaje apropiado. En
Norteamérica, conecte el enchufe en cualquier tomacorrientes. Fuera de
Norteamérica, use un adaptador de enchufe con la configuración adecuada
para conectar el enchufe en cualquier tomacorrientes.
Apagado automático
• La función de apagado automático se activa automáticamente cuando
encienda la pinza.
• La función de apagado automáticamente apagará la pinza, si olvida
hacerlo, en 1 hora.
Temperatura de Calor Inteligente
Su plancha tiene un diseño de memoria de temperatura de calor inteligente
que automáticamente seleccionará el último ajuste de calor referido la
próxima vez que se encienda la unidad.
Comienzo
• Enchufe el alisador directamente en un tomacorrientes. Presione el
botón de encendido hasta que la pantalla de cristal líquido se ilumine.
• La plancha de cobre con cerámica se ajusta automaticamente a 180°F.
Escoja su temperatura de acuerdo al tipo de cabello.
• Use los botones de selección de calor (+/-) para elegir la temperatura
más adecuada para su cabello.
• Deje que el artefacto se caliente durante por lo menos 30 segundos.
NOTA: Una vez seleccionada la temperatura deseada, la pantalla de
temperatura LCD mostrará las temperaturas aumentando hasta alcanzar la
temperatura seleccionada.
Precaución: Planchas con los controles de calor funcionan a altas
temperaturas cuando se usa en configuraciones altas. Cuando la
use por primera vez, seleccione la posición MÁS BAJA. Por favor lea
cuidadosamente todas las instrucciones antes de usar este artefacto. Para
obtener los mejores resultados, siga las sigiuentes indacaciones:
Posicion de calor Tipo de cabello
180°F - 280°F Para cabello fino, delgado, frágil
280°F - 330°F Para cabello normal
330°F - 380°F Para cabello ondulado, de textura mediana
380°F - 455°F Para cabello grueso
Consejos para el estilizado
• El cabello debe estar limpio y completamente seco antes de usar
cualquier herramienta modeladora.
• Separe una seción de 1 pulgada de cabello, suavemente ponga el
cabello entre las placas alisadoras y presione el cabello con el enlaciador
firmemente. Si se empieza del cuero cabelludo a las puntas del cabello,
el resultado sera mas profesional.
• Deslize cuidadosamente el enlaciador en la area escogida, asegurandoze
que el cabello se caliente y se enlacie hasta las puntas. Las puntas
requerirán menos tiempo de calentamiento que el resto del cabello que
crece cerca del cuero cabelludo.
• Para mejores resulatados, detenga las puntas del cabello mientras
enlacia la parte selecionada.
• Para crear vueltas y rizos, use el borde redondeado de las placas
alisadoras de la plancha para rizar las puntas hacia afuera o hacia
adentro.
• Para remover el cabello del enlaciador, simplemente deje de presionar y
permita que el cabello suavemente se deslize de las placas alisadoras.
• El procedimiento de enlaciar no requiere empalme; separe cada
seción de cabello y trabaje siguiendo las indicaciones mencionadas
anteriormente.
• Deje que el cabello se enfríe antes de peinarlo o cepillarlo.
• Repita el proceso hasta alcanzar el estilo deseado.
• Al terminar el peinado, pulse y mantenga así el botón para apagar.
Destellará la luz azul de LCD indicando apagado “OFF”. Desenchufe el
artefacto y déjelo enfriar antes de guardarlo.
INTERRUPTOR DE SEGURO DE LAS PLACAS
Para facilitar el almacenamiento, las placas de la pinza pueden trabarse
juntas. Para activar el interruptor del seguro, apague primero el artefacto y
desenchúfelo. Empuje hacia atrás el interruptor mientras oprime las manijas
juntas para trabar las placas. Para destrabar las placas, mueva el interruptor
hacia delante. ADVERTENCIA: NO active el interruptor del seguro durante
el modelado, y NO trabe las placas en el cabello, porque podría dañarse
seriamente el cabello o inclusive causar lesiones.
Product Registration – Go Online NOW!
Benefits of registering your new product.
• Proof of ownership: your model number, serial number and other information will be
kept in our files.
• Stay informed of the latest trends and product releases via email.
Your privacy is important to us and we will NOT share or sell this information.
hottools.com/product-registration/
Registro del producto – iConéctese en línea AHORA!
Beneficios de registrar su nuevo producto:
• Evidencia de propiedad: su número de modelo, número de serie y otros datos se
mantendrán en nuestros archivos.
• Mantenerse informado de las últimas tendencias y productos por correo electrónico.
Su privacidad es importante para nosotros y NO comunicaremos ni venderemos esta
información. hottools.com/product-registration/
CHECK OUT OUR HOW-TO VIDEOS AT HotTools.com
MIRE NUESTROS VIDEOS INSTRUCTIVOS EN HotTools.com
Distributed by:
Helen of Troy L.P.
1 Helen of Troy Plaza, El Paso TX 79912
Printed in China / Impreso en China
© 2021 Helen of Troy. All rights reserved. / Reservados todos los derechos.
(AW015763)(112817)
For product information, visit us at / Para información sobre productos, visítenos en:
HotTools.com


