manuals.online logo
Brands
  1. Home
  2. •
  3. Brands
  4. •
  5. Hot Tub Company
  6. •
  7. Spa Accessories
  8. •
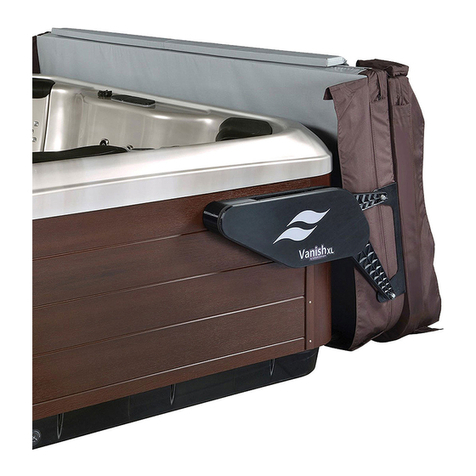
  9. Hot Tub Company SpaEase 100 User manual

Hot Tub Company SpaEase 100 User manual

2
2
1
2
2
4
2
1
2
2
4
13
24
2
37
4
A. Support Arm
B. Foam Grip
C. Center Coupler
D. Pivot Arm
E. Pivot Arm Foam Handle
F. Bushing
G. Mounting Bracket
H. Towel Holder
I. 3/8” x 3” Hex Cap Bolt
J. 3/8” Nylon Locknut
K. 3/8” Flat Washer
L. #10 x 5/8” Self Tapping Screws
M.#10 x 1” Mounting Screws
N. Large Black Dome Caps
O. Small Black Dome Screw Caps
P. 7/16” Plugs
ITEM DESCRIPTION AMOUNT
GH
B
A
C
D
Not Shown
A. B.
C.
D.
E.
F.
G.
H.
J.
K.
N.
O.
Not Shown
P.
I.
Recommended Tools
-Ruler or Square
-Drill w/ bits
-Ratchet
-3/8” Extended socket
-3/8” Wrench
-Flat or Phillips head screwdriver
CAUTION!!
DO NOT USE THE SPAEASE 100 IN HIGH WIND CONDITIONS. DOING SO COULD CAUSE THE COVER TO FALL. DAMAGE TO THE SPA/COVER/
SPAEASE 100, OR INJURY TO THE OCCUPANTS MAY OCCUR. NEVER LEAVE AN UNCOVERED HOT TUB OR SPA UNATTENTED. NEVER LEAVE A
COVERED HOT TUB OR SPA UNLOCKED.
Hot Tub Products • (860) 469-2580 • [email protected] • 2 Toelles Road, Wallingford, CT 06492 • www.HotTubProducts.com
Figure 1
Figure 2
D.
I.
G.
K.
K.
J. Mounting Bracket
Pivot Arm
Washer Washer
Hex Cap Bolt
M.
Installation Instructions
Step 1:
Position the spa cover (in closed position) on the spa, making sure that all four corners are properly positioned and square
on the spa. (See Fig 1)
Step 2:
Connect the Pivot Arms to the Mounting Brackets (See Fig 2.) After the Pivot Arms are connected, tilt them back into the
upright position. (This step needs to be performed before mounting the Brackets as access to the rear bolts will be limited once
mounted to your spa)
Figure 3
Figure 4
Step 3:
Attach the Mounting Brackets (G) to the left
and right sides of the spa with the #10 x 1” Mounting
Screws (M) Position the Mounting Bracket in either
Position A or Position B depending on how high you
want your cover to stand up and how much rear
clearance you have.
Caution< To prevent splitting of cabinet panels predrill
mounting holes with 1/16” Drill Bit
Position A: The Mounting Brackets (G) are mounted 8”
from the top of the spa shell and 9” from the back of
the spa shell. Approximately 9” of clearance is needed
behind the spa, at this position approximately 75% of
the spa cover will be standing above the spa surface
when lifted as shown in (See Fig 3)
Position B: The Mounting Brackets (G) are mounted 12”
from the top of the spa shell and 9” from the back of
the spa shell. Approximately 15” of clearance is
needed behind the spa, at this position approximately
50% of the spa cover will be standing above the spa
surface when lifted as show in (See Fig 4)
Center Coupler (C)
Support Arms (A)
Step 4:
Insert the long side of the Support Arms (A) into the Center Coupler (C) as shown in (See Fig 5)
Note: for narrow covers flip to Support Arms (A) and insert the short side of the Support Arm (A) into the Center Coupler (C)
Step 5: Insert the short arms of the Support Arms (A) into the Pivot Arms (D) as shown in (See Fig. 6)
Figure 5
Figure 6
Step 6:
Lay the SpaEase 100 on the spa cover as shown in (See Fig 7). Adjust the Center Coupler Assembly and the Support
Arms so that the Center Coupler Assembly is lying parallel to the spa cover hinge approximately ½” away. (See Fig 8)
Overhead View with cover closed.
Cover hinge
Figure 7Figure 8
Step 7:
Using the #10 x 5/8” Self-Tapping Screws (L) to
fasten the Support Arms (A) to the Pivot Arms (D)
and the Center Coupler (C) Refer to (See Fig 9)
Note: Be sure to rotate the center coupler so that the
inserted screws are horizontal, with the heads facing the
back of the spa, where the cover will be stowed.
Back of Spa
Figure 9
Step 8:
Press the decorative Large Black Dome Caps (N) over the heads
of the 3/8” x 3” Hex Cap Bolts. Then press the decorative Small Black
Dome Caps (O) over the heads of all exposed #10 screws (L & M) You
may need a small amount of glue/epoxy depending on climate.
(See Fig 10)
The SpaEase 100 was designed for a specific use. The SpaEase 100 is not designed to BEND, WARP, or to be ABUSE PROOF. Do
Not stand, sit, or lie on, or permit heavyweight to rest on the SpaEase 100. Do not clean with abrasives, solvents, or strong
detergents. Most of the hardware has been Zinc coated for durability but will deteriorate quicker when exposed to high levels of
Chlorine, Bromine, Ozone, or other active chemicals. Check nuts and bolts often and tighten if necessary.
Any parts showing evidence of wear should be replaced immediately. Call 1-860-469-2580 or email [email protected]
for any replacement or special-order parts. Caution must be used when operating the SpaEase 100 in order to maintain its
function and longevity. The maintenance and use instructions are provided to prevent damage to the SpaEase 100. Damage
caused by the failure to follow the maintenance and operation instructions will not be covered by the manufacturer’s warranty.
How to OPEN your spa cover using the SpaEase 100:
1. Fold spa cover onto itself.
2. Lift SpaEase 100 and spa cover to upright position by
lifting at the Foam Grip (T) on the Support Arm (A),
while supporting the middle of the cover with the other
hand. The Pivot Arm will stop when it contacts the
Mounting Bracket (F).
How to CLOSE your spa cover using the SpaEase 100:
1. With the spa cover in the upright position, hold the Foam
Grip (T) on the Support Arm (A), and slowly guide the cover
and SpaEase 100 onto the spa shell. NEVER allow the spa
cover to fall onto the spa shell unassisted, as it can cause
damage to your SpaEase 100, spa, and/or spa cover!
2. Unfold the spa cover off itself and engage the spa cover
locks if available.
OPEN
CLOSE
Operation Instructions
Figure 10
Hot Tub Products • (860) 469-2580 • [email protected] • 2 Toelles Road, Wallingford, CT 06492 • www.HotTubProducts.com

Popular Spa Accessories manuals by other brands

Wellness AquaGlo Plus N1581 owner's manual

Wellness

Wellness AquaGlo Plus N1581 owner's manual

Frog Serene operating instructions

Frog

Frog Serene operating instructions

SIGURO SGR-AD-F500W Translation of the operating instructions

SIGURO

SIGURO SGR-AD-F500W Translation of the operating instructions

Leisure Concepts Smartop Upright 3.0 DeckMount installation instructions

Leisure Concepts

Leisure Concepts Smartop Upright 3.0 DeckMount installation instructions

Memorism AURA PWM65 user manual

Memorism

Memorism AURA PWM65 user manual

Gecko DJS-1 quick reference

Gecko

Gecko DJS-1 quick reference

Gecko Aeware 3 in.ye User instructions and functions

Gecko

Gecko Aeware 3 in.ye User instructions and functions

Soehnle VALENCIA user manual

Soehnle

Soehnle VALENCIA user manual

Takara Belmont YUME ESPOIR operating instructions

Takara Belmont

Takara Belmont YUME ESPOIR operating instructions

anko DR-408 user manual

anko

anko DR-408 user manual

Gecko in.ye-5 Quick start card

Gecko

Gecko in.ye-5 Quick start card

Home Spa LY-54K2 user manual

Home Spa

Home Spa LY-54K2 user manual

Living Earth Crafts Napa Spa Treatment Table user manual

Living Earth Crafts

Living Earth Crafts Napa Spa Treatment Table user manual

HYDUR Midi Tower manual

HYDUR

HYDUR Midi Tower manual

Custom Spa Cover Sirocco User guide and guarantee

Custom Spa Cover

Custom Spa Cover Sirocco User guide and guarantee

SPAccessories Cover Classic Lifter Installation & use manual

SPAccessories

SPAccessories Cover Classic Lifter Installation & use manual

manuals.online logo
manuals.online logoBrands
  • About & Mission
  • Contact us
  • Privacy Policy
  • Terms and Conditions

Copyright 2025 Manuals.Online. All Rights Reserved.