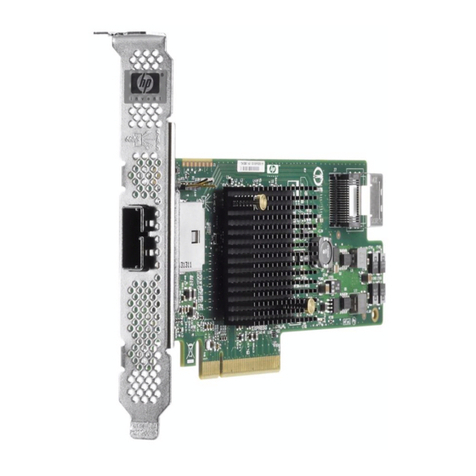
HP StoreFabric CN1100R User manual

HPE StoreFabric CN1100R Dual Port
Converged Network Adapter
User Guide
Abstract
This document is for the person who installs, administers, and troubleshoots servers and storage systems. Hewlett Packard Enterprise
assumes you are qualified in the servicing of computer equipment and trained in recognizing hazards in products with hazardous energy
levels.
Part Number: 728508-002R
November 2015
Edition: 3

© Copyright 2013, 2015 Hewlett Packard Enterprise Development LP
The information contained herein is subject to change without notice. The only warranties for Hewlett Packard Enterprise products and services
are set forth in the express warranty statements accompanying such products and services. Nothing herein should be construed as constituting
an additional warranty. Hewlett Packard Enterprise shall not be liable for technical or editorial errors or omissions contained herein.
Microsoft® and Windows® are either registered trademarks or trademarks of Microsoft Corporation in the United States and/or other countries.

Contents 3
Contents
Technician notes.................................................................................................................................... 4
Warnings, cautions, and notes .................................................................................................................................4
Introduction............................................................................................................................................ 5
Overview ..................................................................................................................................................................5
Downloading files .....................................................................................................................................................5
Installation prerequisites...........................................................................................................................................5
Recording reference numbers..................................................................................................................................5
LED indicators ..........................................................................................................................................................6
Installing an adapter .............................................................................................................................. 7
Installing a CNA in a server......................................................................................................................................7
Installing a low profile bracket for a CNA .................................................................................................................7
Attaching media........................................................................................................................................................9
Connecting the fiber optic cable ....................................................................................................................9
Connecting the copper cable.......................................................................................................................10
Powering up the CNA.............................................................................................................................................10
Installing the device drivers.................................................................................................................. 12
Installing drivers on the OS ....................................................................................................................................12
Setting up a boot ....................................................................................................................................................12
Installing multi-pathing software .............................................................................................................................12
Installing BACS ......................................................................................................................................................12
Specifications ...................................................................................................................................... 13
Environmental specifications..................................................................................................................................13
General specifications ............................................................................................................................................13
Media specifications ...............................................................................................................................................13
Cable specifications ...............................................................................................................................................14
Compliance ............................................................................................................................................................14
Hewlett Packard Enterprise product QuickSpecs...................................................................................................15
Electrostatic discharge......................................................................................................................... 16
Preventing electrostatic discharge .........................................................................................................................16
Grounding methods to prevent electrostatic discharge ..........................................................................................16
Warranty and regulatory information .................................................................................................... 17
Warranty information ..............................................................................................................................................17
Regulatory information ...........................................................................................................................................17
Safety and regulatory compliance ...............................................................................................................17
Belarus Kazakhstan Russia marking...........................................................................................................17
Turkey RoHS material content declaration..................................................................................................18
Ukraine RoHS material content declaration ................................................................................................18
Support and other resources................................................................................................................ 19
Accessing Hewlett Packard Enterprise Support.....................................................................................................19
Information to collect ...................................................................................................................................19
Accessing updates .................................................................................................................................................19
Websites.................................................................................................................................................................19
Customer Self Repair .............................................................................................................................................20
Remote support......................................................................................................................................................28
Acronyms and abbreviations................................................................................................................ 29
Documentation feedback ..................................................................................................................... 32
Technician notes 4
Technician notes
Before installing the unit, review and adhere to all device-specific warnings provided in the HPE
StoreFabric CN1100R Dual Port Converged Network Adapter User Guide and in Safety and Compliance
Information for Server, Storage, Power, Networking, and Rack Products on the Hewlett Packard
Enterprise website (http://www.hpe.com/support/Safety-Compliance-EnterpriseProducts).
Warnings, cautions, and notes
WARNING:
To reduce the risk of electric shock or damage to the equipment:
•Do not disable the power cord grounding plug. The grounding plug is an important safety
feature.
•Plug the power cord into a grounded (earthed) electrical outlet that is easily accessible at all
times.
•Unplug the power cord from the power supply to disconnect power to the equipment.
•Do not route the power cord where it can be walked on or pinched by items placed against
it. Pay particular attention to the plug, electrical outlet, and the point where the cord extends
from the server.
This symbol indicates the presence of a hot surface or hot component. If this surface
is contacted, the potential for injury exists.
WARNING: To reduce the risk of injury from a hot component, allow the surface to
cool before touching.
IMPORTANT:
Any indications of component replacement or printed wiring board
modifications might void any warranty.

Introduction 5
Introduction
Overview
The StoreFabric CN1100R 2P CNA is a dual-port converged network adapter that supports Gen8 ML and
DL ProLiant servers and uses the Broadcom 57810s Meru-D.
For more information about the StoreFabric CN1100R 2P CNA, see the Hewlett Packard Enterprise
website (http://www.hpe.com/info/cna).
Downloading files
1. Go to the Hewlett Packard Enterprise website (http://www.hpe.com/info/cna).
2. Select the adapter.
3. Select Technical Support/Manuals, and then select Drivers, Software & Firmware.
4. Download the drivers and firmware as needed.
Installation prerequisites
Before you begin, be sure the following items are available:
•An optical multi-mode cable with an LC-style duplex connector and approved SFP+ module or
copper cable
•A server with an empty x8 PCIe bus slot
WARNING: Disconnect the host from the power source before installing the CNA.
Recording reference numbers
The CNA ships with the IEEE address (Port 1 MAC address) clearly marked on the board.
The MAC address is a unique, 48-bit identifier for configuring the system. The Fibre Channel industry
uses the WWN derived from the MAC address for Fibre Channel connectivity. The MAC addresses are
permanent identifiers that cannot be changed.
The CNA has two ports, so it has two MAC addresses and two WWNs, one for each port. Use the serial
number when communicating with Hewlett Packard Enterprise. Determine and record the serial number,
MAC addresses, and WWNs before installation.
Identifier
Port 1
Port 2
MAC address
(From IEEE address label)
AC-16-2D-83-00-B0
Port 1 MAC address:
(Port 1 MAC address + 4)
AC-16-2D-83-00-B4
Port 2 MAC address:
WWN
(20:00:[Port 1 MAC address +1])
20:00:AC-16-2D-83-00-B1
Port 1 WWN:
(20:00:[Port 2 MAC address +1])
20:00:AC-16-2D-83-00-B5
Port 2 WWN:

Introduction 6
LED indicators
The CN1100R Adapter has two ports with LED indicators for activity and link for each port. A
standard-height bracket is shown below with SFP+ ports and LED indicators.
The CN1100R Adapter LED indicators operate as described in the following table.
Item
LED indicator
Status
Description
1
Activity
Off
No network activity exists on the link.
—
—
Blinking (green)
Network activity is on the link. The CNA is sending or
receiving network data at up to 10 Gb/s.
2
Link
Off
No link to the adapter is established. The CNA is not
receiving power or the cable connection is faulty.
—
—
On (orange)
A link to the CNA is established at 10 Gb/s. The CNA
is receiving power and the cable connection is good.

Installing an adapter 7
Installing an adapter
Installing a CNA in a server
WARNING: Disconnect the host from the power source before installing the CNA.
1. Power down the server, and then remove the power cord.
2. Remove the server case.
3. Remove the blank panel from an empty x8 or larger PCIe bus slot.
Identify the PCI Express option slot in which the CNA is to be installed. If a low profile option slot is to
be used, install the low profile bracket onto the CNA. See "Installing a low profile bracket for a CNA
(on page 7)."
4. Insert and firmly seat the CNA in the PCI Express slot.
5. Secure the CNA mounting bracket to the case with the panel clip or screw.
6. Re-install the server case, and then plug in the power cord.
The CNA is installed in the server and ready for media attachment.
Installing a low profile bracket for a CNA
Change the bracket if the server requires a different mounting bracket. The CNA comes installed with a
standard PCIe bracket and ships with an optional low profile bracket in the box. The low profile mounting
bracket, approximately 7.9 cm (3.11 inches), is shorter than the standard bracket, approximately 12.06
cm (4.75 inches).

Installing an adapter 8
To install a low profile bracket:
1. To remove any SFP transceivers or cables from the CNA transceiver cage assembly, pull the bail
(handle) out and down to release the latch.
2. Gently pull the SFP transceiver out. Store the transceiver in an ESD-safe place.
3. Using a correctly sized slotted screwdriver, carefully remove the two board lock screws located at
the top and bottom of the connector.

Installing an adapter 9
4. Remove the standard profile bracket, and then store it for future use.
5. Align the new mounting bracket tabs with the holes in the CNA.
IMPORTANT: Do not push the bracket past the grounding tabs on the transceiver housing.
Be sure the LEDs are properly aligned with the holes in the bracket.
6. Install the screws that attach the CNA to the bracket.
Attaching media
Connect the CNA with either removable SFP optical transceivers or copper interface cables.
Connecting the fiber optic cable
1. Insert the transceiver into the cage. Be sure that the tab on the plug clicks into position.
2. Connect one end of the fiber optic cable to the LC connector on the CNA.
3. Connect the other end of the cable to the converged network switch.

Installing an adapter 10
For more information, see "Cable specifications (on page 14)".
Connecting the copper cable
1. Insert the transceiver into the cage. Be sure that the tab on the plug clicks into position.
2. Connect one end of the copper cable to the CNA.
3. Connect the other end of the cable to the converged network switch.
For more information, see "Cable specifications (on page 14)".
Powering up the CNA
1. Verify that the CNA is securely installed in the server and that the correct media is attached.
2. Plug in and power up the server.
3. Observe the link and activity LEDs to be sure the CNA connects to the switch.

Installing an adapter 11
4. Watch the server console for any POST error messages and the CNA for the correct BIOS startup
message.

Installing the device drivers 12
Installing the device drivers
Installing drivers on the OS
The CNA runs on the following drivers: NIC, iSCSI, and FCoE. The drivers are bundled in one kit.
Download the appropriate kit, and then run the Smart Component. Install one kit only.
Install the software in the following order:
1. Install the drivers.
2. Download and update the CNA firmware.
3. Install or configure multi-pathing software (if required).
4. (Optional) Install BACS management software.
Setting up a boot
The CN1100R Adapter supports either hardware-accelerated FCoE or hardware-accelerated iSCSI
protocols on either port. FCoE is enabled on both ports by default.
To use FCoE with a local-disk boot configuration, see the HPE FCoE Configuration for Broadcom-based
Adapters User Guide (http://www.hpe.com/support/FCoE_Config_UG_en).
To perform a Boot from SAN installation over FCoE, see the HPE Boot from SAN Configuration Guide
(http://www.hpe.com/info/sandesignguide).
To perform an iSCSI boot, see the Broadcom iSCSI Boot for HPE FlexFabric Adapters User Guide
(http://www.hpe.com/support/iSCSI_Boot_UG_en).
Installing multi-pathing software
Multi-pathing software is optional.
To install multi-pathing software, do one of the following:
•For Windows, locate the MPIO DSM specific to the arrays and operating system version and
download it to your server.
•For Linux, see the Native Linux Device-Mapper Multipath for HPE StorageWorks Arrays Reference
Guide on the SPOCK website (http://www.hpe.com/storage/spock).
An HP Passport is required for access.
Installing BACS
For more information about BACS, see the Broadcom BACS for FlexFabric and StoreFabric Adapters
User Guide (http://www.hpe.com/support/HPE_BACS_UG_en) and the documentation available with the
BACS download.

Specifications 13
Specifications
Environmental specifications
Specification Value
Temperature
Operating: 0° to 55°C (32° to 131°F)
Non-operating: -40° to 149°F (-40° to 65°C)
Humidity
Operating: 10 to 90% relative humidity, non-condensing
Non-operating: 5 to 95% relative humidity, non-condensing
Airflow
200 If/min (minimum)
General specifications
Specification
Value
Controller
StoreFabric CN1100R Dual Port Converged Network Adapter (QW990A)
Dimensions (LxW)
5.2 x 2.7 inches (13.208 cm x 6.89 cm) without bracket
Power requirements
4 Watts typical, 9 Watts maximum
Data rate
10 Gb/s per port, 20 Gb/s combined, full-duplex
PICe slot requirements
PCI Express x8 Gen2.1
Agency approvals
Safety:
US
Canada
Europe
EMI and EMC (Class A):
US
Canada
Europe
Australia/New Zealand
Japan
Korea
Taiwan
Media specifications
Copper cables and SFP+ Ethernet optical modules (SR)
Part number
SFP+ active copper cables for HPE B-series FCoE converged network
switches
--
1m B-series active copper SFP+ cable
AP818A
3m B-series active copper SFP+ cable
AP819A
5m B-series active copper SFP+ cable
AP820A
SFP+ copper cables for HPE C-series FCoE converged network switches
--
3m C-series passive copper SFP+ cable
AP784A
5m C-series passive copper SFP+ cable
AP785A
7m C-series active copper SFP+ cable
QK701A
10m C-series active copper SFP+ cable
QK702A
10Gb SFP+ Ethernet optical modules (SR)
--

Specifications 14
Copper cables and SFP+ Ethernet optical modules (SR) Part number
10Gb SR SFP+
455883-B21
Optical cables * Part number
PremierFlex OM3+ type cables
--
0.5 m PremierFlex LC/LC multi-mode optical cable
BK837A
1 m PremierFlex LC/LC multi-mode optical cable
BK838A
2 m PremierFlex LC/LC multi-mode optical cable
BK839A
5 m PremierFlex LC/LC multi-mode optical cable
BK840A
15 m PremierFlex LC/LC multi-mode optical cable
BK841A
30 m PremierFlex LC/LC multi-mode optical cable
BK842A
50 m PremierFlex LC/LC multi-mode optical cable
BK843A
OM3 LC-LC type cables
--
.5 m LC-LC multi-mode OM3 Fibre Channel cable
AJ833A
1 m LC-LC multi-mode OM3 Fibre Channel cable
AJ834A
2 m LC-LC multi-mode OM3 Fibre Channel cable
AJ835A
5 m LC-LC multi-mode OM3 Fibre Channel cable
AJ836A
15 m LC-LC multi-mode OM3 Fibre Channel cable
AJ837A
30 m LC-LC multi-mode OM3 Fibre Channel cable
AJ838A
50 m LC-LC multi-mode OM3 Fibre Channel cable
AJ839A
For more information about support of specific cables, see the product release notes.
Cable specifications
Cable
Maximum length
Minimum length
Connector
Fiber optic cable
Short range, LC-LC multi-mode OM3 -
50/125 duplex
100 meters (328.08 ft)
1 meter
LC
Copper cable
10GbE direct-attach copper cable
10 meters (32.8 ft)
1 meter
Direct attach
A CNA does not allow normal data transmission on either 10 Gb optical or copper link unless it is
connected to a compatible optical or copper interface connection (that is, multimode to multimode). For
more information about the appropriate media supported by the switch, see the appropriate CN switch
QuickSpec.
CAUTION: Do not plug optical cables into cages without SFP modules pre-installed.
Compliance
Compliance Standard
IEEE
IEEE802.3, IEEE802.3ap, IEEE802.3xx, IEEE802.2x, IEEE802.3ad, 802.1Qaz,
802.1Qau, 802.1Qbb, 802.1Qbg, 802.1Qbh
Safety
UL Mark (US and Canada)
EN 60950

Specifications 15
Compliance Standard
Other
x8 PCI Express V2.0 (5 GT/s) support
RoHS 6 of 6
IPv4, IPv6
CE
Microsoft Windows Hardware Quality Labs
Server Design Guide version 3.0
SNMP
IPv4, TCP and UDP Checksum Offload
IPv4/IPv6 TCP, Large Send Offload
Receive-Side Scaling
Jumbo Frames up to 9000 Bytes
Hewlett Packard Enterprise product QuickSpecs
For more information about product features, specifications, options, configurations, and compatibility,
see the product QuickSpecs on the Hewlett Packard Enterprise (http://www.hpe.com/info/qs) website.

Electrostatic discharge 16
Electrostatic discharge
Preventing electrostatic discharge
To prevent damaging the system, be aware of the precautions you need to follow when setting up the
system or handling parts. A discharge of static electricity from a finger or other conductor may damage
system boards or other static-sensitive devices. This type of damage may reduce the life expectancy of
the device.
To prevent electrostatic damage:
•Avoid hand contact by transporting and storing products in static-safe containers.
•Keep electrostatic-sensitive parts in their containers until they arrive at static-free workstations.
•Place parts on a grounded surface before removing them from their containers.
•Avoid touching pins, leads, or circuitry.
•Always be properly grounded when touching a static-sensitive component or assembly.
Grounding methods to prevent electrostatic
discharge
Several methods are used for grounding. Use one or more of the following methods when handling or
installing electrostatic-sensitive parts:
•Use a wrist strap connected by a ground cord to a grounded workstation or computer chassis. Wrist
straps are flexible straps with a minimum of 1 megohm ±10 percent resistance in the ground cords.
To provide proper ground, wear the strap snug against the skin.
•Use heel straps, toe straps, or boot straps at standing workstations. Wear the straps on both feet
when standing on conductive floors or dissipating floor mats.
•Use conductive field service tools.
•Use a portable field service kit with a folding static-dissipating work mat.
If you do not have any of the suggested equipment for proper grounding, have an authorized reseller
install the part.
For more information on static electricity or assistance with product installation, contact an authorized
reseller.

Warranty and regulatory information 17
Warranty and regulatory information
Warranty information
HPE ProLiant and x86 Servers and Options (http://www.hpe.com/support/ProLiantServers-Warranties)
HPE Enterprise Servers (http://www.hpe.com/support/EnterpriseServers-Warranties)
HPE Storage Products (http://www.hpe.com/support/Storage-Warranties)
HPE Networking Products (http://www.hpe.com/support/Networking-Warranties)
Regulatory information
Safety and regulatory compliance
For important safety, environmental, and regulatory information, see Safety and Compliance Information
for Server, Storage, Power, Networking, and Rack Products, available at the Hewlett Packard Enterprise
website (http://www.hpe.com/support/Safety-Compliance-EnterpriseProducts).
Belarus Kazakhstan Russia marking
Manufacturer and Local Representative Information
Manufacturer information:
Hewlett Packard Enterprise Company, 3000 Hanover Street, Palo Alto, CA 94304 U.S.
Local representative information Russian:
•Russia:
•Belarus:
•Kazakhstan:
Local representative information Kazakh:

Warranty and regulatory information 18
•Russia:
•Belarus:
•Kazakhstan:
Manufacturing date:
The manufacturing date is defined by the serial number.
CCSYWWZZZZ (serial number format for this product)
Valid date formats include:
•YWW, where Y indicates the year counting from within each new decade, with 2000 as the starting
point; for example, 238: 2 for 2002 and 38 for the week of September 9. In addition, 2010 is indicated
by 0, 2011 by 1, 2012 by 2, 2013 by 3, and so forth.
•YYWW, where YY indicates the year, using a base year of 2000; for example, 0238: 02 for 2002 and
38 for the week of September 9.
Turkey RoHS material content declaration
Ukraine RoHS material content declaration

Support and other resources 19
Support and other resources
Accessing Hewlett Packard Enterprise Support
•For live assistance, go to the Contact Hewlett Packard Enterprise Worldwide website
(http://www.hpe.com/assistance).
•To access documentation and support services, go to the Hewlett Packard Enterprise Support
Center website (http://www.hpe.com/support/hpesc).
Information to collect
•Technical support registration number (if applicable)
•Product name, model or version, and serial number
•Operating system name and version
•Firmware version
•Error messages
•Product-specific reports and logs
•Add-on products or components
•Third-party products or components
Accessing updates
•Some software products provide a mechanism for accessing software updates through the product
interface. Review your product documentation to identify the recommended software update
method.
•To download product updates, go to either of the following:
oHewlett Packard Enterprise Support Center Get connected with updates page
(http://www.hpe.com/support/e-updates)
oSoftware Depot website (http://www.hpe.com/support/softwaredepot)
•To view and update your entitlements, and to link your contracts and warranties with your profile, go
to the Hewlett Packard Enterprise Support Center More Information on Access to Support
Materials page (http://www.hpe.com/support/AccessToSupportMaterials).
IMPORTANT
: Access to some updates might require product entitlement when accessed
through the Hewlett Packard Enterprise Support Center. You must have an HP Passport set up
with relevant entitlements.
Websites
•Hewlett Packard Enterprise Information Library (http://www.hpe.com/info/enterprise/docs)
•Hewlett Packard Enterprise Support Center (http://www.hpe.com/support/hpesc)
•Contact Hewlett Packard Enterprise Worldwide (http://www.hpe.com/assistance)

Support and other resources 20
•Subscription Service/Support Alerts (http://www.hpe.com/support/e-updates)
•Software Depot (http://www.hpe.com/support/softwaredepot)
•Customer Self Repair (http://www.hpe.com/support/selfrepair)
•Insight Remote Support (http://www.hpe.com/info/insightremotesupport/docs)
•Serviceguard Solutions for HP-UX (http://www.hpe.com/info/hpux-serviceguard-docs)
•Single Point of Connectivity Knowledge (SPOCK) Storage compatibility matrix
(http://www.hpe.com/storage/spock)
•Storage white papers and analyst reports (http://www.hpe.com/storage/whitepapers)
Customer Self Repair
Hewlett Packard Enterprise products are designed with many Customer Self Repair (CSR) parts to
minimize repair time and allow for greater flexibility in performing defective parts replacement. If during
the diagnosis period Hewlett Packard Enterprise (or Hewlett Packard Enterprise service providers or
service partners) identifies that the repair can be accomplished by the use of a CSR part, Hewlett Packard
Enterprise will ship that part directly to you for replacement. There are two categories of CSR parts:
•Mandatory—Parts for which customer self repair is mandatory. If you request Hewlett Packard
Enterprise to replace these parts, you will be charged for the travel and labor costs of this service.
•Optional—Parts for which customer self repair is optional. These parts are also designed for
customer self repair. If, however, you require that Hewlett Packard Enterprise replace them for you,
there may or may not be additional charges, depending on the type of warranty service designated
for your product.
NOTE: Some Hewlett Packard Enterprise parts are not designed for customer self repair. In order to
satisfy the customer warranty, Hewlett Packard Enterprise requires that an authorized service provider
replace the part. These parts are identified as "No" in the Illustrated Parts Catalog.
Based on availability and where geography permits, CSR parts will be shipped for next business day
delivery. Same day or four-hour delivery may be offered at an additional charge where geography
permits. If assistance is required, you can call the Hewlett Packard Enterprise Support Center and a
technician will help you over the telephone. Hewlett Packard Enterprise specifies in the materials shipped
with a replacement CSR part whether a defective part must be returned to Hewlett Packard Enterprise. In
cases where it is required to return the defective part to Hewlett Packard Enterprise, you must ship the
defective part back to Hewlett Packard Enterprise within a defined period of time, normally five (5)
business days. The defective part must be returned with the associated documentation in the provided
shipping material. Failure to return the defective part may result in Hewlett Packard Enterprise billing you
for the replacement. With a customer self repair, Hewlett Packard Enterprise will pay all shipping and part
return costs and determine the courier/carrier to be used.
For more information about the Hewlett Packard Enterprise CSR program, contact your local service
provider. For the North American program, go to the Hewlett Packard Enterprise CSR website
(http://www.hpe.com/support/selfrepair).
Réparation par le client (CSR)
Les produits Hewlett Packard Enterprise comportent de nombreuses pièces CSR (Customer Self Repair
= réparation par le client) afin de minimiser les délais de réparation et faciliter le remplacement des pièces
défectueuses. Si pendant la période de diagnostic, Hewlett Packard Enterprise (ou ses partenaires ou
mainteneurs agréés) détermine que la réparation peut être effectuée à l'aide d'une pièce CSR, Hewlett
Packard Enterprise vous l'envoie directement. Il existe deux catégories de pièces CSR :
Table of contents
Other HP Adapter manuals

HP
HP P3410A - NetRAID 1M RAID Controller Operator's manual

HP
HP 665240-B21 User manual

HP
HP E2492A User manual

HP
HP e3000 User manual

HP
HP A6826A User manual

HP
HP Compaq NC6136 User instructions

HP
HP FlexFabric 10Gb 2-port 533FLR-T User instructions

HP
HP NC1020 User manual

HP
HP NC6170 User manual

HP
HP 366T User manual

HP
HP 90W User manual

HP
HP 571SFP User manual

HP
HP NL571AA User manual

HP
HP NC373F User instructions

HP
HP 381513-B21 - Smart Array P800 Controller... User manual

HP
HP Model 744 - VME Workstation Installation and maintenance instructions

HP
HP NC364m User instructions

HP
HP 665243-B21 User manual

HP
HP 674764-B21 User manual

HP
HP Photosmart 7100 User manual