manuals.online logo
Brands
  1. Home
  2. •
  3. Brands
  4. •
  5. HP
  6. •
  7. Fax Machine
  8. •
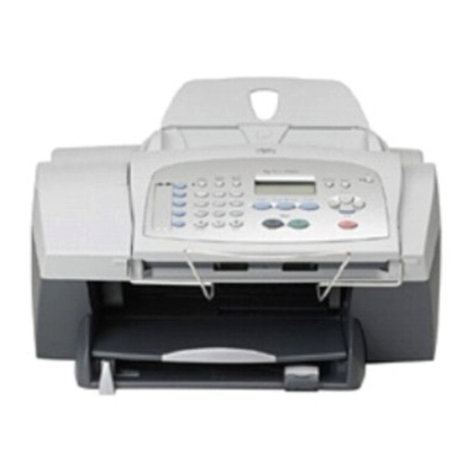
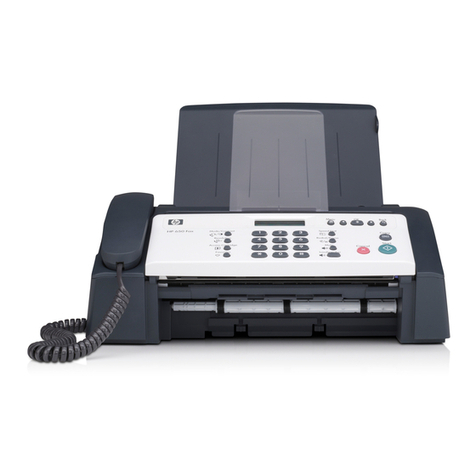
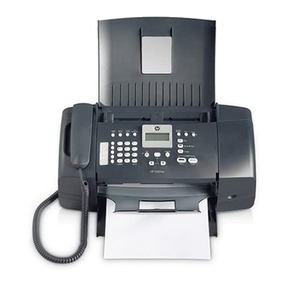
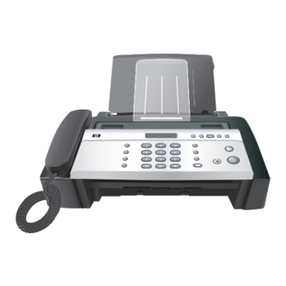
  9. HP 1250 Fax User manual

HP 1250 Fax User manual

1
2
3
Retire la cinta y el cartón
Inicio
Asegúrese de retirar toda la cinta y los cartones del
interior del dispositivo.
HP Fax 1250 Setup Guide
Ubique los componentes
Desdoble las bandejas de papel
cubierta del panel de control
Start Here
Make sure to remove all tape and cardboard on the
inside of the device.
Remove tape and cardboard
Guía de instalación del Fax 1250 de HP
Locate components
control panel faceplate
Unfold paper trays
ab
HP Officejet 4300 All-in-One series
User Guide
cab
2 • HP Fax
4
5
Monte la cubierta del panel de control
a Ajuste las pestañas de la cubierta en las ranuras de la parte
superior del dispositivo.
b Gire la cubierta hacia abajo. A continuación, presione
firmemente hacia abajo ambas esquinas frontales hasta que
queden fijadas en su sitio.
IMPORTANTE: Compruebe que todas las esquinas encajen
perfectamente con las del dispositivo y que todos los botones
sobresalgan por los orificios correspondientes de la cubierta.
Es imprescindible que la cubierta del panel de control esté
instalada en el fax de HP para que éste funcione.
Cargue papel
Cargue papel normal blanco en la bandeja inferior.
No fuerce el papel para introducirlo demasiado en la
bandeja de entrada ya que podría atascarse.
Attach the control panel faceplate
a Fit the faceplate tabs into the slots on top of the device.
b Rotate the faceplate down. Then firmly press down on both
front corners until they snap into place.
IMPORTANT: Make sure that all edges are even with the device,
and that all buttons come through the holes in the faceplate.
The control panel faceplate must be attached for the HP
Fax to work!
Load paper
Load plain white paper into the bottom tray.
Do not force paper too far into the input tray, or it
might cause a paper jam.
a
b
HP Fax • 3
6
7
Conecte el cable de alimentación y el adaptador
Connect the power cord and adapter
Conecte el cable telefónico suministrado
a (1-LINE)
Conecte un extremo del cable telefónico suministrado
al puerto telefónico (1-LINE) y el otro extremo al
conector telefónico de pared.
b (2-EXT)
Siga los pasos descritos a continuación si desea
conectar su teléfono o contestador al fax de HP.
Retire el enchufe del puerto (2-EXT) y conecte el
cable de su contestador a este puerto. Consulte la
Guía del usuario para obtener más información
sobre la instalación del fax.
Consulte la Guía del usuario si desea utilizar su
propio cable telefónico o si necesita ayuda en
alguna otra opción de instalación del fax.
Connect the supplied phone cord
a (1-LINE)
Connect one end of the supplied phone cord to the
phone port (1-LINE) and the other to a wall jack.
b (2-EXT)
Follow the step below if you want to connect your
phone/answering machine to the HP Fax.
Remove the plug from the (2-EXT) port, and then plug
your answering machine cord into the port. See the
User Guide for additional fax setup information.
See the User Guide if you want to use your
own phone cord or for help with other fax setup
options.
HP Officejet 4300 All-in-One series
User Guide
a
b
HP Officejet 4300 All-in-One series
User Guide
4 • HP Fax
8
9
10
Pulse el botón de encendido y configure el dispositivo
aUna vez haya pulsado el botón Encender, espere a que aparezca un
mensaje solicitándole el idioma deseado antes de continuar.
bPara ajustar el idioma de pantalla, utilice las teclas de dirección para
seleccionar su idioma, pulse Aceptar y confirme la selección. Utilice
las teclas de dirección para seleccionar su país/región, pulse Aceptar
y confirme la selección.
Abra la puerta de los cartuchos de tinta
Levante la puerta de los cartuchos de tinta El carro de impresión se
mueve hacia la derecha.
Retire la cinta de ambos cartuchos
Tire de la pestaña para retirar la cinta de ambos cartuchos de tinta.
PRECAUCIÓN: No toque los contactos de color cobre ni cambie las
cintas de los cartuchos.
Press the on button and configure
Lift the print cartridge door. The print carriage moves to the right side.
Pull the tab to remove the tape from both print cartridges.
CAUTION: Do not touch the copper-colored contacts or retape the
cartridges.
aAfter you press the On button, wait for the language prompt before
continuing.
bTo set the language for the display, use the arrow keys to select your
language, press OK, and then confirm. Use the arrow keys to select
your country/region, press OK, and then confirm.
Open the print cartridge door
Remove tape from both cartridges
HP Fax • 5
11
12
Introduzca el cartucho de tinta de tres colores
IMPORTANTE: El dispositivo debe estar ajustado en Encendido
antes de introducir los cartuchos de tinta.
aDeslice el cartucho de tinta de tres colores dentro de la
ranura izquierda tal y como se muestra.
bEmpuje la parte superior del cartucho con firmeza hacia
arriba y hacia dentro de la ranura hasta que quede fijado
en su sitio.
Introduzca el cartucho de tinta negra
aDeslice el cartucho de tinta negra dentro de la ranura
derecha.
bEmpuje la parte superior del cartucho con firmeza hacia
arriba y hacia dentro de la ranura hasta que quede fijado
en su sitio.
c Compruebe que ambos cartuchos estén correctamente
colocados. Cierre la puerta de los cartuchos de tinta.
Insert the tri-color print cartridge
IMPORTANT: The device must be On before you can insert the
print cartridges.
aSlide the tri-color print cartridge into the left slot as shown.
bPush the top part of the cartridge firmly up and into the slot
until it snaps into place.
Insert the black print cartridge
aSlide the black print cartridge into the right slot.
bPush the top part of the cartridge firmly up and into the slot
until it snaps into place.
c Make sure both cartridges are secure. Close the print
cartridge door.
a
b
a
b
6 • HP Fax
13 Alinee los cartuchos de tinta
a Pulse Aceptar para imprimir la página de alineación.
(Compruebe que ha cargado papel blanco normal en la
bandeja inferior).
bRetire la página de alineación de la bandeja de salida.
cColoque la página de alineación boca abajo en el
alimentador de documentos como se muestra en el
diagrama c.
dPulse Aceptar para escanear la página de alineación.
Una vez se haya escaneado la página, el proceso de
alineación se habrá completado.
Align the print cartridges
a Press OK to print the alignment page. (Make sure you have
loaded plain white paper in the bottom tray).
bRemove the alignment page from the output tray.
cPlace the alignment page facedown into the document feeder
as shown in diagram c.
dPress OK to scan the alignment page.
After the page is scanned, alignment is complete.
a
b
c
OK
OK
d
HP Fax • 7
14
15
Ajuste la fecha y la hora
Configuración de la cabecera del fax
aPulse el botón Configurar, pulse 5 y, a continuación, pulse 3. Introduzca la fecha: aparece en la pantalla LCD.
bIntroduzca la fecha en formato mm-dd-aa mediante el teclado numérico y pulse el botón Aceptar. Introduzca la hora: aparece
en la pantalla LCD.
c Introduzca la hora en formato hh:mm con el teclado numérico. Cuando se le solicite, pulse 1para AM o 2 para PM.
Nota: La configuración de la cabecera del fax es obligatoria por la legislación de varios países.
a Pulse el botón Configurar, pulse 3 y, a continuación, pulse 1. Introduzca su nombre: aparece en la pantalla LCD.
bUse el teclado numérico para escribir su nombre con las teclas numéricas que correspondan a las letras de su nombre. Por
ejemplo, para introducir la letra R, pulse la tecla 7 tres veces hasta que aparezca la letra R en la pantalla LCD. Siga este
mismo procedimiento hasta haber introducido su nombre completo. Para introducir un símbolo, pulse la tecla * repetidamente
hasta que aparezca el símbolo que desee en la pantalla LCD. Para introducir un espacio, pulse la tecla #.
cCuando haya acabado de introducir su nombre, pulse el botón Aceptar. Su número de fax: aparece en la pantalla LCD.
dIntroduzca su número de fax con el teclado numérico y pulse el botón Aceptar.
Set the date and time
Set the fax header
aPress the Setup button, press 5, and then press 3. Enter date: appears on the LCD screen.
bEnter the date in mm-dd-yy format using the numeric keypad, and then press OK button. Enter time: appears on the LCD
screen.
c Enter the time in the hh:mm format using the numeric keypad. When prompted, press 1 for AM or 2 for PM.
Note: Setting the fax header is required by law in many countries.
a Press the Setup button, press 3 and then press 1. Enter your name: appears on the LCD screen.
bUsing the numeric keypad, enter your name using the numeric keys that correspond to the letters in your name. For example,
to enter letter R, press the 7 key three times until the letter R appears on the LCD screen. Continue in this manner until your
entire name is entered. To enter a symbol, press the * key repeatedly until the required symbol appears on the LCD screen. To
enter a space, press the # key.
cWhen you are finished entering your name, press the OK button. Your fax number: appears on the LCD screen.
dEnter your fax number using the numeric keypad, and then press the OK button.
© Copyright 2006 Hewlett-Packard Development Company, L.P.
Printed on at least 50% total recycled fiber with at least 10% post-consumer paper.
© Copyright 2006 Hewlett-Packard Development Company, L.P.
Impreso en papel 50% reciclado y con un mínimo de un 10% de papel reaprovechado.
Problema: Aparece un mensaje de atasco de papel en la pantalla.
Acción: Levante el panel de control y retire con cuidado el papel
atascado. Compruebe que ha retirado todas las cintas de embalaje.
Una vez haya solucionado el atasco, compruebe que encaja el
panel de control de nuevo en su sitio. Es posible que también tenga
que retirar papel atascado desde la puerta posterior de acceso o del
interior del dispositivo.
Problema: El mensaje Retire y compruebe los cartuchos de tinta
aparece después de haberlos introducido.
Acción: Retire los cartuchos de tinta. Asegúrese de retirar toda la
cinta de los contactos de cobre. Vuelva a introducir los cartuchos de
tinta y cierre la puerta.
Solución de problemas
Problem: The paper jam message appears on the display.
Action: Lift the control panel and gently remove any jammed paper.
Make sure that you removed all packaging tape. After you have
cleared the jam, make sure you press the control panel back into
place. You may also need to remove any jammed paper from the
rear access door or from inside the device.
Problem: The Remove and check print cartridges message appears
after you insert print cartridges.
Action: Remove print cartridges. Make sure you remove all tape from
the copper contacts. Re-insert the cartridges, and then close the print
cartridge door.
*Q8096-90103*
Q8096-90103
*Q8096-90103*
Troubleshooting

Other HP Fax Machine manuals

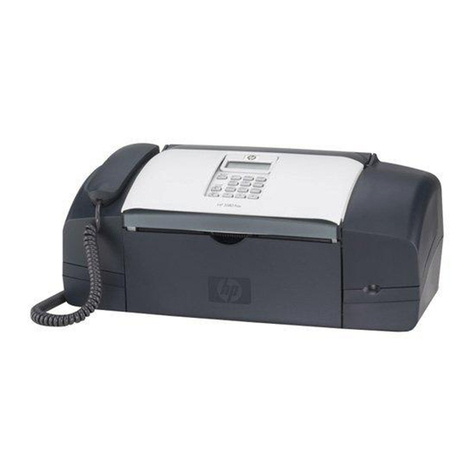
HP FAX 1250 Series User manual

HP

HP FAX 1250 Series User manual

HP MFP Analog Fax Accessory 300 Quick start guide

HP

HP MFP Analog Fax Accessory 300 Quick start guide

HP 600 Series User manual

HP

HP 600 Series User manual

HP MFP Analog Fax Accessory 300 Installation and maintenance instructions

HP

HP MFP Analog Fax Accessory 300 Installation and maintenance instructions

HP Fax 1200 Series How to use

HP

HP Fax 1200 Series How to use

HP MFP Analog Fax User manual

HP

HP MFP Analog Fax User manual

HP MFP Analog Fax Installation and maintenance instructions

HP

HP MFP Analog Fax Installation and maintenance instructions

HP MFP Analog Fax Accessory 300 User manual

HP

HP MFP Analog Fax Accessory 300 User manual

HP LASERJET 3100 User manual

HP

HP LASERJET 3100 User manual

HP fax 1010 series How to use

HP

HP fax 1010 series How to use

HP MFP Analog Fax Accessory 300 Manual

HP

HP MFP Analog Fax Accessory 300 Manual

HP LaserJet MFP Analog Fax Accessory 300 Installation and maintenance instructions

HP

HP LaserJet MFP Analog Fax Accessory 300 Installation and maintenance instructions

HP 640 Fax series User manual

HP

HP 640 Fax series User manual

HP DESKJET 1050 User manual

HP

HP DESKJET 1050 User manual

HP Digital Sender 8100C Service manual

HP

HP Digital Sender 8100C Service manual

HP MFP Analog Fax Accessory 300 Installation and maintenance instructions

HP

HP MFP Analog Fax Accessory 300 Installation and maintenance instructions

HP 1040 User manual

HP

HP 1040 User manual

HP SERIES 1230 User manual

HP

HP SERIES 1230 User manual

HP 640 series User manual

HP

HP 640 series User manual

HP LaserJet 1010 series User manual

HP

HP LaserJet 1010 series User manual

HP 700 Series User manual

HP

HP 700 Series User manual

HP FAX-700 User manual

HP

HP FAX-700 User manual

HP MFP Analog Fax Accessory 300 Installation and maintenance instructions

HP

HP MFP Analog Fax Accessory 300 Installation and maintenance instructions

HP 900 Series Specification sheet

HP

HP 900 Series Specification sheet

Popular Fax Machine manuals by other brands

Canon IR3250 reference guide

Canon

Canon IR3250 reference guide

Utax FAX SYSTEM (K) Instruction handbook

Utax

Utax FAX SYSTEM (K) Instruction handbook

Panasonic KX-PD383DLE1 Quick reference guide

Panasonic

Panasonic KX-PD383DLE1 Quick reference guide

Muratec F-80 operating instructions

Muratec

Muratec F-80 operating instructions

Panasonic KX-FHD351 Description

Panasonic

Panasonic KX-FHD351 Description

Murata M-1600 operating instructions

Murata

Murata M-1600 operating instructions

Furuno FAX-408 Operator's manual

Furuno

Furuno FAX-408 Operator's manual

Epson PriorityFAX 2000 Specifications

Epson

Epson PriorityFAX 2000 Specifications

Panasonic KX-FT931LA-B Service manual

Panasonic

Panasonic KX-FT931LA-B Service manual

Brother FAX-2800 Quick setup guide

Brother

Brother FAX-2800 Quick setup guide

Toshiba TF 610 user guide

Toshiba

Toshiba TF 610 user guide

Olivetti Fax-Lab 100 user manual

Olivetti

Olivetti Fax-Lab 100 user manual

Panasonic Panafax UF-8000 Service handbook

Panasonic

Panasonic Panafax UF-8000 Service handbook

Brother MFC-8500 Service manual

Brother

Brother MFC-8500 Service manual

Panasonic KX-F780 operating instructions

Panasonic

Panasonic KX-F780 operating instructions

Panasonic KX-PD725DL Quick reference guide

Panasonic

Panasonic KX-PD725DL Quick reference guide

Panasonic KX-F1200 Service manual and technical guide

Panasonic

Panasonic KX-F1200 Service manual and technical guide

Panasonic KX-PD205DL Quick reference guide

Panasonic

Panasonic KX-PD205DL Quick reference guide

manuals.online logo
manuals.online logoBrands
  • About & Mission
  • Contact us
  • Privacy Policy
  • Terms and Conditions

Copyright 2025 Manuals.Online. All Rights Reserved.