manuals.online logo
Brands
  1. Home
  2. •
  3. Brands
  4. •
  5. HP
  6. •
  7. Storage
  8. •
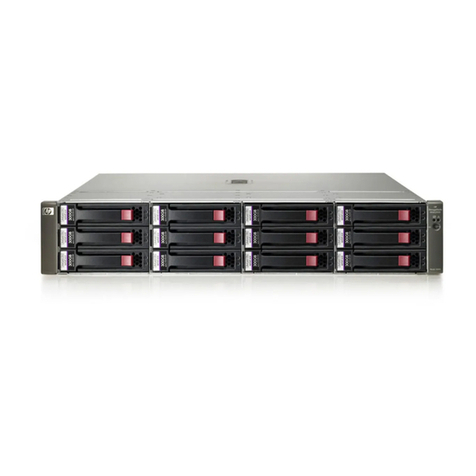
  9. HP StorageWorks ESL E Series Use and care manual

HP StorageWorks ESL E Series Use and care manual

Other manuals for StorageWorks ESL E Series

2

Other HP Storage manuals

HP ProLiant SB460c - SAN Gateway Storage Server Instruction Manual

HP

HP ProLiant SB460c - SAN Gateway Storage Server Instruction Manual

HP StorageWorks 1606 - Extension SAN Switch Instruction Manual

HP

HP StorageWorks 1606 - Extension SAN Switch Instruction Manual

HP P9000 User manual

HP

HP P9000 User manual

HP Surestore Disk Array 12h - And FC60 User manual

HP

HP Surestore Disk Array 12h - And FC60 User manual

HP dat72 5242 User manual

HP

HP dat72 5242 User manual

HP StorageWorks P4000 Series User manual

HP

HP StorageWorks P4000 Series User manual

HP P9000 User manual

HP

HP P9000 User manual

HP v119r User manual

HP

HP v119r User manual

HP P9000 User manual

HP

HP P9000 User manual

HP SureStore DLT VS80 User manual

HP

HP SureStore DLT VS80 User manual

HP 705 Workstation User manual

HP

HP 705 Workstation User manual

HP Surestore XP256 - Disk Array User manual

HP

HP Surestore XP256 - Disk Array User manual

HP StorageWorks MSA1510i Installation guide

HP

HP StorageWorks MSA1510i Installation guide

HP 600 Series Manual

HP

HP 600 Series Manual

HP SmartMemory User manual

HP

HP SmartMemory User manual

HP AU183AA - 2TB Personal Media Drive Use and maintenance manual

HP

HP AU183AA - 2TB Personal Media Drive Use and maintenance manual

HP 705 Quick start guide

HP

HP 705 Quick start guide

HP StorageWorks P2000 User manual

HP

HP StorageWorks P2000 User manual

HP AJ765A - StorageWorks RDX Removable Disk Backup... User manual

HP

HP AJ765A - StorageWorks RDX Removable Disk Backup... User manual

HP XP20000/XP24000 User manual

HP

HP XP20000/XP24000 User manual

HP LTO-4 Ultrium 1760 Reference guide

HP

HP LTO-4 Ultrium 1760 Reference guide

HP Surestore Tape Library Model 3/30 Manual

HP

HP Surestore Tape Library Model 3/30 Manual

HP P9000 User manual

HP

HP P9000 User manual

HP D6030A - NetServer - E50 User manual

HP

HP D6030A - NetServer - E50 User manual

Popular Storage manuals by other brands

IBM 40/80 GB HH DLTVS user guide

IBM

IBM 40/80 GB HH DLTVS user guide

Synology DiskStation DS716+II Quick installation guide

Synology

Synology DiskStation DS716+II Quick installation guide

Vantec NexStar-HX4 user manual

Vantec

Vantec NexStar-HX4 user manual

LaCie Christofle Galet datasheet

LaCie

LaCie Christofle Galet datasheet

LaCie Rugged Thunderbolt user manual

LaCie

LaCie Rugged Thunderbolt user manual

OCZ IBIS datasheet

OCZ

OCZ IBIS datasheet

Transcend JetFlash 110 Brochure & specs

Transcend

Transcend JetFlash 110 Brochure & specs

QNAP TS 32PXU Series user guide

QNAP

QNAP TS 32PXU Series user guide

LaCie RUGGED RAID user manual

LaCie

LaCie RUGGED RAID user manual

Freecom CLS DOCK Quick install guide

Freecom

Freecom CLS DOCK Quick install guide

PNY Attache P-FD64MBATT3 install guide

PNY

PNY Attache P-FD64MBATT3 install guide

OWC Mercury Elite Pro Dual mini Assembly manual

OWC

OWC Mercury Elite Pro Dual mini Assembly manual

OLT 6x6 Maximizer Assembly manual

OLT

OLT 6x6 Maximizer Assembly manual

Transcend JetFlash 160 Specifications

Transcend

Transcend JetFlash 160 Specifications

Thunderbolt 600 user manual

Thunderbolt

Thunderbolt 600 user manual

Intel RAID High Availability user guide

Intel

Intel RAID High Availability user guide

LaCie 12big Thunderbolt 3 Quick install guide

LaCie

LaCie 12big Thunderbolt 3 Quick install guide

Spectra Logic T-Series Spectra T50e quick start guide

Spectra Logic

Spectra Logic T-Series Spectra T50e quick start guide

manuals.online logo
manuals.online logoBrands
  • About & Mission
  • Contact us
  • Privacy Policy
  • Terms and Conditions

Copyright 2025 Manuals.Online. All Rights Reserved.

hp
StorageWorks
ESL E-Series
Ultrium FC Drive
Replacement
hp
StorageWork s
Caution:Parts canbedamagedby
electrostaticdischarge. Keepparts in their
containers until needed. Ensureyouare
properlygroundedwhentouchingstatic-
sensitive components.
Note:This part is hot-pluggable. It is not
necessaryto power downthelibraryto
replace this part.
34
1
Tapedrivesclusters are
numberedstartingat
thetopof the
cabinet as follows:
0,1, 2, 3, 4, 5.
In eachcluster the
drives areidentified
as follows: top
right is A, topleft
is B, bottom right
is C, bottom left is
D. Adrawing
showingthis is on
theinsideof theback
door.
Opentheback door of thelibrary.
Inspect thecontents of thekit.
0
1
2
3
4
5
1
24
hp
StorageWorks
ESL
E-series
TapeDrive
Caution:Partscanbedamagedby
electrostaticdischarge.Keeppartsintheir
containersuntilneeded.Ensureyouare
properlygroundedwhentouchingstatic-
sensitivecomponents.
Note:Thispartishot-pluggable.Itisnot
necessarytopowerdownthelibraryto
replacethispart.
2
4
3
1
Identifythetapedrivetobereplaced.TheLEDof
thedrivewillberedoroff.
Tapedrivesclustersare
numberedstartingat
thetopofthe
cabinetasfollows:
0,1,2,3,4,5.
Ineachclusterthe
drivesareidentified
asfollows:top
rightisA,topleft
isB,bottomright
isC,bottomleftis
D.Adrawing
showingthisison
theinsideoftheback
door.
Openthebackdoorofthelibrary.
Inspectthecontentsofthekit.
0
1
2
3
4
5
1
24
2
From the Operator Control Panel (OCP), power off
the drive to be replaced.
a.
From Menu, select the Ops button.
b.
Use the Up and Downbuttons to select the
drive, then press the Selectbutton.
c.
Use the Up and Downbuttons to change the
drive to off-line, then press the Selectbutton.
d.
Select the Backbutton to return to Menu.
e.
Verify that the correct drive is powered down.
ESL E-Series
Ultrium 460
NFC Drive
Replacement
Caution: Parts can be damaged by
electrostatic discharge. Keep parts in their
containers until needed. Ensure you are
properly grounded when touching static-
sensitive components.
Note: This part is hot-swappable. It is not
necessary to power down the library to
replace this part.
34
1
Drive clusters are
numbered from 0 to 5
starting at the top
of the cabinet. In
each drive cluster
the drives are
identified as
follows: top right
is A, top left is B,
bottom right is C,
bottom left is D.
A drawing of
the drive cluster is
located on the
inside of the back door.
Open the back door of the library.
Inspect the contents of the kit.
0
1
2
3
4
5
2
From the Home screen, select the Ops button.
a. From Menu, select the Ops button.
b. Use the Up and Down buttons to select the
drive, then press the Select button.
c. Use the Up and Down buttons to change the
drive to off, then press the Select button.
d. Select Yes to confirm.
e. Select the Back button to return to Menu.
f. Verify that the correct drive is powered down.
© Copyright 2004-2005 Hewlett-Packard Development Company, L.P.
Printed in the US
Second Edition (March 2005)
Part Number: 358832-002
*358832-002*
358832-002
Getting help
• HP product information:
http://www.hp.com/products/esle
• HP technical support and phone numbers:
http://www.hp.com/support
• HP StorageWorks Library and Tape Tools
(L&TT) diagnostic software:
http://www.hp.com/support/tapetools
• Interface Manager and HP StorageWorks
Command View TL:
http://www.hp.com/support/cvtl
Firmware Upgrade
17
If necessary, upgrade the drive firmware
using the Interface Manager's command-line
interface. Refer to the HP StorageWorks
Interface Manager and Command View TL
User Guide for detailed procedures on
upgrading drive firmware.
Close the back door of the library.
16
1
2
Drive Replacement
1
2
Drive Removal
8
9
7
Remove the FC cable from the cable clip.
1) Insert the new drive into the
vacant drive bay. 2) Tighten the captive
screw to secure the drive to the cluster.
Using a
slotted screwdriver,
1) loosen the captive screw at
the upper left corner of the drive module.
2) Move the FC cable to the side and out of the
way. Grasp the drive handle and pull the drive
from its bay.
10
Verify that the FC port LED on the FC interface
controller card is green.
13
The LED for the replaced
drive and its associated
cluster controller card LED
should be green.
14 15
Make sure that Command View TL recognizes
the replaced drive using the Command View TL
console. Refer to the HP StorageWorks
Interface Manager and Command View TL
User Guide for detailed procedures.
CAUTION: To avoid damaging FC cables,
do not sharply bend or pinch them. Allow a
radial bend when reattaching the FC cables.
Note: If needed, the tie wrap provided
with this kit can be used to help keep
the FC cables clear of the drive cluster
below by attaching the cables to the
drive handle.
11
Power on the drive by completing the following
steps from the OCP for the new drive.
a. From Menu, select the Ops button.
b. Use the Up and Down buttons to select the
drive, then press the Select button.
c. Use the Up and Down buttons to change the
drive to on-line, then press the Select button.
d. Select the Back button to return to Menu.
12
Use the Command View TL user interface to
reboot the interface controller card. Refer to
the HP StorageWorks Interface Manager and
Command View TL User Guide for detailed
procedures.
Connect the FC cable to the new drive. The FC
cable connector clicks into place. Insert the cable
into the cable clip on the drive.
5
Identify the drive to be replaced.
The LED of the drive to be replaced will be off.
CAUTION: To avoid damaging the drive,
do not remove it if the LED is still lit.
See step 2 to power off the drive.
1
2
6
Disconnect the Fibre Channel (FC) cable from the
drive to be replaced by 1) pressing down on the
cable connector tab and 2) pulling the connector
away from the drive.
CAUTION: To avoid damaging FC
cables, do not sharply bend or pinch them.
1
2
Drive Replacement
1
2
Drive Removal
8
9
7
Remove the FC cable from the cable clip.
1) Insert the new drive into the
vacant drive bay. 2) Tighten the captive
screw to secure the drive to the cluster.
Using a
slotted screwdriver,
1) loosen the captive screw at
the upper left corner of the drive module.
2) Move the FC cable to the side and out of the
way. Grasp the drive handle and pull the drive
from its bay.
10
Verify that the FC port LED on the FC interface
controller card is green.
13
The LED for the replaced
drive and its associated
cluster controller card LED
should be green.
14 15
Make sure that Command View TL recognizes
the replaced drive using the Command View TL
console. Refer to the HP StorageWorks
Interface Manager and Command View TL
User Guide for detailed procedures.
CAUTION: To avoid damaging FC cables,
do not sharply bend or pinch them. Allow a
radial bend when reattaching the FC cables.
Note: If needed, the tie wrap provided
with this kit can be used to help keep
the FC cables clear of the drive cluster
below by attaching the cables to the
drive handle.
11
Power on the drive by completing the following
steps from the OCP for the new drive.
a. From Menu, select the Ops button.
b. Use the Up and Down buttons to select the
drive, then press the Select button.
c. Use the Up and Down buttons to change the
drive to on-line, then press the Select button.
d. Select the Back button to return to Menu.
12
Use the Command View TL user interface to
reboot the interface controller card. Refer to
the HP StorageWorks Interface Manager and
Command View TL User Guide for detailed
procedures.
Connect the FC cable to the new drive. The FC
cable connector clicks into place. Insert the cable
into the cable clip on the drive.
5
Identify the drive to be replaced.
The LED of the drive to be replaced will be off.
CAUTION: To avoid damaging the drive,
do not remove it if the LED is still lit.
See step 2 to power off the drive.
1
2
6
Disconnect the Fibre Channel (FC) cable from the
drive to be replaced by 1) pressing down on the
cable connector tab and 2) pulling the connector
away from the drive.
CAUTION: To avoid damaging FC
cables, do not sharply bend or pinch them.
hp
StorageWorks
ESL E-Series
Ultrium FC Drive
Replacement
hp
StorageWork s
Caution:Parts canbedamagedby
electrostaticdischarge. Keepparts in their
containers until needed. Ensureyouare
properlygroundedwhentouchingstatic-
sensitive components.
Note:This part is hot-pluggable. It is not
necessaryto power downthelibraryto
replace this part.
34
1
Tapedrivesclusters are
numberedstartingat
thetopof the
cabinet as follows:
0,1, 2, 3, 4, 5.
In eachcluster the
drives areidentified
as follows: top
right is A, topleft
is B, bottom right
is C, bottom left is
D. Adrawing
showingthis is on
theinsideof theback
door.
Opentheback door of thelibrary.
Inspect thecontents of thekit.
0
1
2
3
4
5
1
24
hp
StorageWorks
ESL
E-series
TapeDrive
Caution:Partscanbedamagedby
electrostaticdischarge.Keeppartsintheir
containersuntilneeded.Ensureyouare
properlygroundedwhentouchingstatic-
sensitivecomponents.
Note:Thispartishot-pluggable.Itisnot
necessarytopowerdownthelibraryto
replacethispart.
2
4
3
1
Identifythetapedrivetobereplaced.TheLEDof
thedrivewillberedoroff.
Tapedrivesclustersare
numberedstartingat
thetopofthe
cabinetasfollows:
0,1,2,3,4,5.
Ineachclusterthe
drivesareidentified
asfollows:top
rightisA,topleft
isB,bottomright
isC,bottomleftis
D.Adrawing
showingthisison
theinsideoftheback
door.
Openthebackdoorofthelibrary.
Inspectthecontentsofthekit.
0
1
2
3
4
5
1
24
2
From the Operator Control Panel (OCP), power off
the drive to be replaced.
a.
From Menu, select the Ops button.
b.
Use the Up and Downbuttons to select the
drive, then press the Selectbutton.
c.
Use the Up and Downbuttons to change the
drive to off-line, then press the Selectbutton.
d.
Select the Backbutton to return to Menu.
e.
Verify that the correct drive is powered down.
ESL E-Series
Ultrium 460
NFC Drive
Replacement
Caution: Parts can be damaged by
electrostatic discharge. Keep parts in their
containers until needed. Ensure you are
properly grounded when touching static-
sensitive components.
Note: This part is hot-swappable. It is not
necessary to power down the library to
replace this part.
34
1
Drive clusters are
numbered from 0 to 5
starting at the top
of the cabinet. In
each drive cluster
the drives are
identified as
follows: top right
is A, top left is B,
bottom right is C,
bottom left is D.
A drawing of
the drive cluster is
located on the
inside of the back door.
Open the back door of the library.
Inspect the contents of the kit.
0
1
2
3
4
5
2
From the Home screen, select the Ops button.
a. From Menu, select the Ops button.
b. Use the Up and Down buttons to select the
drive, then press the Select button.
c. Use the Up and Down buttons to change the
drive to off, then press the Select button.
d. Select Yes to confirm.
e. Select the Back button to return to Menu.
f. Verify that the correct drive is powered down.
© Copyright 2004-2005 Hewlett-Packard Development Company, L.P.
Printed in the US
Second Edition (March 2005)
Part Number: 358832-002
*358832-002*
358832-002
Getting help
• HP product information:
http://www.hp.com/products/esle
• HP technical support and phone numbers:
http://www.hp.com/support
• HP StorageWorks Library and Tape Tools
(L&TT) diagnostic software:
http://www.hp.com/support/tapetools
• Interface Manager and HP StorageWorks
Command View TL:
http://www.hp.com/support/cvtl
Firmware Upgrade
17
If necessary, upgrade the drive firmware
using the Interface Manager's command-line
interface. Refer to the HP StorageWorks
Interface Manager and Command View TL
User Guide for detailed procedures on
upgrading drive firmware.
Close the back door of the library.
16