manuals.online logo
Brands
  1. Home
  2. •
  3. Brands
  4. •
  5. HP
  6. •
  7. Storage
  8. •
  9. HP StorageWorks P4000 Series User manual

HP StorageWorks P4000 Series User manual

HP StorageWorks
P4000 10GbE SFP+ Hardware
Installation Instructions
© Copyright 2009, 2010 Hewlett-Packard Development Company,
L.P.
Second edition: June 2010
The information in this document is subject to change without notice.
Printed in the US
www.hp.com
*AX705-96003*
Overview
This document describes how to upgrade the HP LeftHand P4000 to
10 Gigabit Ethernet (GbE). Upgrade instructions vary depending on
whether the HP LeftHand P4000 is new and/or whether it is already in
a management group.
Prerequisite
The motherboard BIOS firmware must be up-to-date with the latest version
installed.
Table 1 General upgrade steps for P4000s
Download the software patch
Download software patch 10073. This procedure is the same regard-
less of the state or location of the P4000 storage node.
1. Go to http://www.hp.com/support/storage.
2. Select P4000 SAN Solutions.
3. Select Disk Storage Systems > P4000 SAN Solutions > HP
LeftHand P4000 SAN Solutions.
4. Select Download drivers and software.
5. Select your product.
6. Select Cross operating system (BIOS, Firmware, Diagnostics, etc.).
7. Download the patch version 10073.
P4000 is in a management group
P4000 is new or not in a man-
agement group
Download the HP StorageWorks
P4000 G1 Series 1GbE to 10GbE
SFP+ Migration Guide.
Follow instructions in the Migration
Guide for planning the upgrade.
Install hardware using the HP
StorageWorks P4000 10GbE
SFP+ Hardware Installation In-
structions
Shut down the management group
using the instructions in the Migra-
tion Guide. Shutting down the
management group places it in
maintenance mode for the upgrade
process, and also powers off the
storage nodes, so that you can re-
move them from the rack.
Open the CMC and install
software patch 10073 onto the
P4000.
Install hardware using the 10GbE
SFP+ Hardware Installation Instruc-
tions.
Following instructions in the 1GbE
to 10GbE SFP+ Migration Guide
•Open the CMC and install soft-
ware patch 10073 on the stor-
age node.
•Configure network bonding on
the 10GbE ports if desired.
Installing the 10GbE board and RAM
Have the following items ready:
Page 1
•HP StorageWorks P4000 10G BASE-SFP+ Upgrade Kit, which in-
cludes:
•HP NC550SFP Dual Port 10GbE
•2GB Reg PC2-5300 2x1GB Kit
•Software patch 10073
To install the hardware
1. Locate the torx tool on the back of the unit and loosen the cover
screw.
2. Push down on the cover indents, slide the cover towards the back
of the unit, then lift the cover off the unit.
3. Locate the riser board assembly and using the torx tool, loosen the
two riser assembly captive screws to lift the assembly straight up.
4. In the P4500, remove the single cable from the motherboard
connector. The P4300 does not have the cable on the motherboard
connector.
5. Set the riser assembly on the blower plenum and power supply bay.
6. Remove the anchor screw from the blank plate, and remove the
blank plate from the riser assembly. Be sure to keep the screw.
7. Install the 10GbE board into the top slot in the riser board.
8. Make sure the board is fully seated in the mating connector, then
tighten the anchor screw.
9. In the P4500, attach the cable connector back into the motherboard
mating connector. In the P4300, the cable is not connected to the
motherboard connector.
10. Install the riser assembly back into the motherboard mating
connector.
a. Make sure the riser board assembly is properly aligned with
the motherboard mating connector and the sheet metal chassis.
b. Push straight down on the assembly to fully seat it into the
motherboard.
11. Using the torx tool, tighten the two riser assembly captive screws.
12. Remove the air plenum from the unit.
13. Locate the empty RAM slots and open the locking latches on these
two slots as shown.
NOTE:
Note the locating key on the RAM, and in the mating
RAM slots on the motherboard. Make sure the locating
key in the RAM matches up with the locating key in the
motherboard slot. Failure to do so and forcing the RAM
in place will damage the system motherboard and/or
RAM.
Page 2
14. Install the RAM by pushing straight down on the RAM.
When the RAM is fully seated, the locking latches will lock in place
on each side of the RAM.
15. Install the air plenum back in place as shown.
16. Place the cover back on the unit.
17. Tighten the captive cover screw, and place the torx tool back in the
holder on the rear of the unit.
18. Place the storage node back in the rack, connect the Ethernet cable,
and power on the storage node.
Upgrading the SAN/iQ software
Upgrading HP LeftHand P4000s that are in a
management group
Continue with the software upgrade instructions in the 1-Gigabit to
10-Gigabit Ethernet Migration Instructions.
Upgrading HP LeftHand P4000s that are new
and/or not in a management group
1. Open the CMC and find the P4000s.
2. Log in to the first storage node you want to upgrade.
3. Click Storage Node Tasks on the Details tab and select Install
Software.
4. From the list, select the storage node that you want to upgrade. Use
the CTRL key to select multiple storage nodes to upgrade from the
list.
5. Select the radio button: Install file on selected nodes one at a time
(Recommended).
6. Click Browse to navigate to the folder where you copied the upgrade
or patch file.
7. Select the file and click Open Install File.
Focus returns to the Install Software window. When the file name
is present, the Install button becomes enabled.
8. Review the version and description to be sure that you are using
the correct upgrade file.
9. Click Install.
a. Select the check box in the Install Status window to have the
install messages automatically scroll. These messages can be
saved to a file.
b. (Optional) After the installation completes, click Save To File
and choose a name and location for the file.
After the installation completes, the system reboots. After the system
comes back online, it conducts a post-install qualification. After the
system passes the post-install qualification, the upgrade process is
complete.
10. Click Close when the installation on all the storage nodes is
completed.
Page 3

Other manuals for StorageWorks P4000 Series

17

Other HP Storage manuals

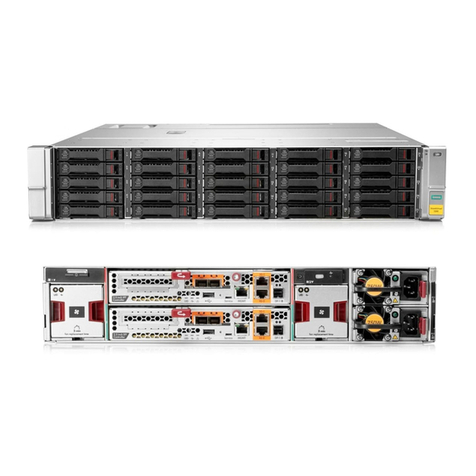
HP StorageWorks XP10000 - Disk Array User manual

HP

HP StorageWorks XP10000 - Disk Array User manual

HP 7957A User manual

HP

HP 7957A User manual

HP Colorado 5GB C4354A User manual

HP

HP Colorado 5GB C4354A User manual

HP StorageWorks 2000fc Guide

HP

HP StorageWorks 2000fc Guide

HP Performance Optimized Datacenter 20c Manual

HP

HP Performance Optimized Datacenter 20c Manual

HP Surestore Tape Library Model 6/100 Manual

HP

HP Surestore Tape Library Model 6/100 Manual

HP 11180A Service manual

HP

HP 11180A Service manual

HP P10000 User manual

HP

HP P10000 User manual

HP StorageWorks ESL E-Series User manual

HP

HP StorageWorks ESL E-Series User manual

HP P9000 Quick setup guide

HP

HP P9000 Quick setup guide

HP StorageWorks MSL5000 series User manual

HP

HP StorageWorks MSL5000 series User manual

HP StorageWorks 1000 - Modular Smart Array Use and care manual

HP

HP StorageWorks 1000 - Modular Smart Array Use and care manual

HP PERSONAL MEDIA DRIVE User manual

HP

HP PERSONAL MEDIA DRIVE User manual

HP StorageWorks 2000fc Guide

HP

HP StorageWorks 2000fc Guide

HP AD510A - StorageWorks Modular Smart Array 1500 cs 2U Fibre Channel SAN Attach Controller Shelf Hard... Guide

HP

HP AD510A - StorageWorks Modular Smart Array 1500 cs 2U Fibre Channel SAN Attach Controller Shelf Hard... Guide

HP Colorado Trakker 250 Instruction Manual

HP

HP Colorado Trakker 250 Instruction Manual

HP Surestore Disk Array 12h - And FC60 Service manual

HP

HP Surestore Disk Array 12h - And FC60 Service manual

HP 800 Series User manual

HP

HP 800 Series User manual

HP P9000 User manual

HP

HP P9000 User manual

HP StorageWorks 2000fc User manual

HP

HP StorageWorks 2000fc User manual

HP 88780B User manual

HP

HP 88780B User manual

HP dat72 5242 User manual

HP

HP dat72 5242 User manual

HP v119r User manual

HP

HP v119r User manual

HP StorageWorks 4000/6000/8000 - Enterprise Virtual... Instruction Manual
HP

HP StorageWorks 4000/6000/8000 - Enterprise Virtual... Instruction Manual

Popular Storage manuals by other brands

Hitachi Travelstar 40GNX Quick installation guide

Hitachi

Hitachi Travelstar 40GNX Quick installation guide

LaCie Porsche Design P'9220 Quick install guide

LaCie

LaCie Porsche Design P'9220 Quick install guide

IBM DJNA-352500 Quick installation guide

IBM

IBM DJNA-352500 Quick installation guide

RS PRO evikey 8 quick start guide

RS PRO

RS PRO evikey 8 quick start guide

Hitachi 2.5-INCH Travelstar HTS542525K9A300 datasheet

Hitachi

Hitachi 2.5-INCH Travelstar HTS542525K9A300 datasheet

Asus Travelair N user guide

Asus

Asus Travelair N user guide

Altera MAX 10 series user guide

Altera

Altera MAX 10 series user guide

Hitachi Dk23FB-20 Quick installation guide

Hitachi

Hitachi Dk23FB-20 Quick installation guide

Spectra Logic AIT-3 supplementary guide

Spectra Logic

Spectra Logic AIT-3 supplementary guide

Hama Highspeed FlashPen Floater USB 2.0 Operating	 instruction

Hama

Hama Highspeed FlashPen Floater USB 2.0 Operating instruction

KEHUA TECH iStoragE Series installation guide

KEHUA TECH

KEHUA TECH iStoragE Series installation guide

Toshiba MK2023GAS user manual

Toshiba

Toshiba MK2023GAS user manual

Hitachi T7K250 - Deskstar - Hard Drive Specifications

Hitachi

Hitachi T7K250 - Deskstar - Hard Drive Specifications

Sony USM512H operating instructions

Sony

Sony USM512H operating instructions

Seagate BARRACUDA 7200.10 ST3400620AS product manual

Seagate

Seagate BARRACUDA 7200.10 ST3400620AS product manual

PQI A100 user manual

PQI

PQI A100 user manual

Husky GS05403-1D Use and care guide

Husky

Husky GS05403-1D Use and care guide

Fujitsu MAB3045 product manual

Fujitsu

Fujitsu MAB3045 product manual

manuals.online logo
manuals.online logoBrands
  • About & Mission
  • Contact us
  • Privacy Policy
  • Terms and Conditions

Copyright 2025 Manuals.Online. All Rights Reserved.