6HP Webcam User’s Guide
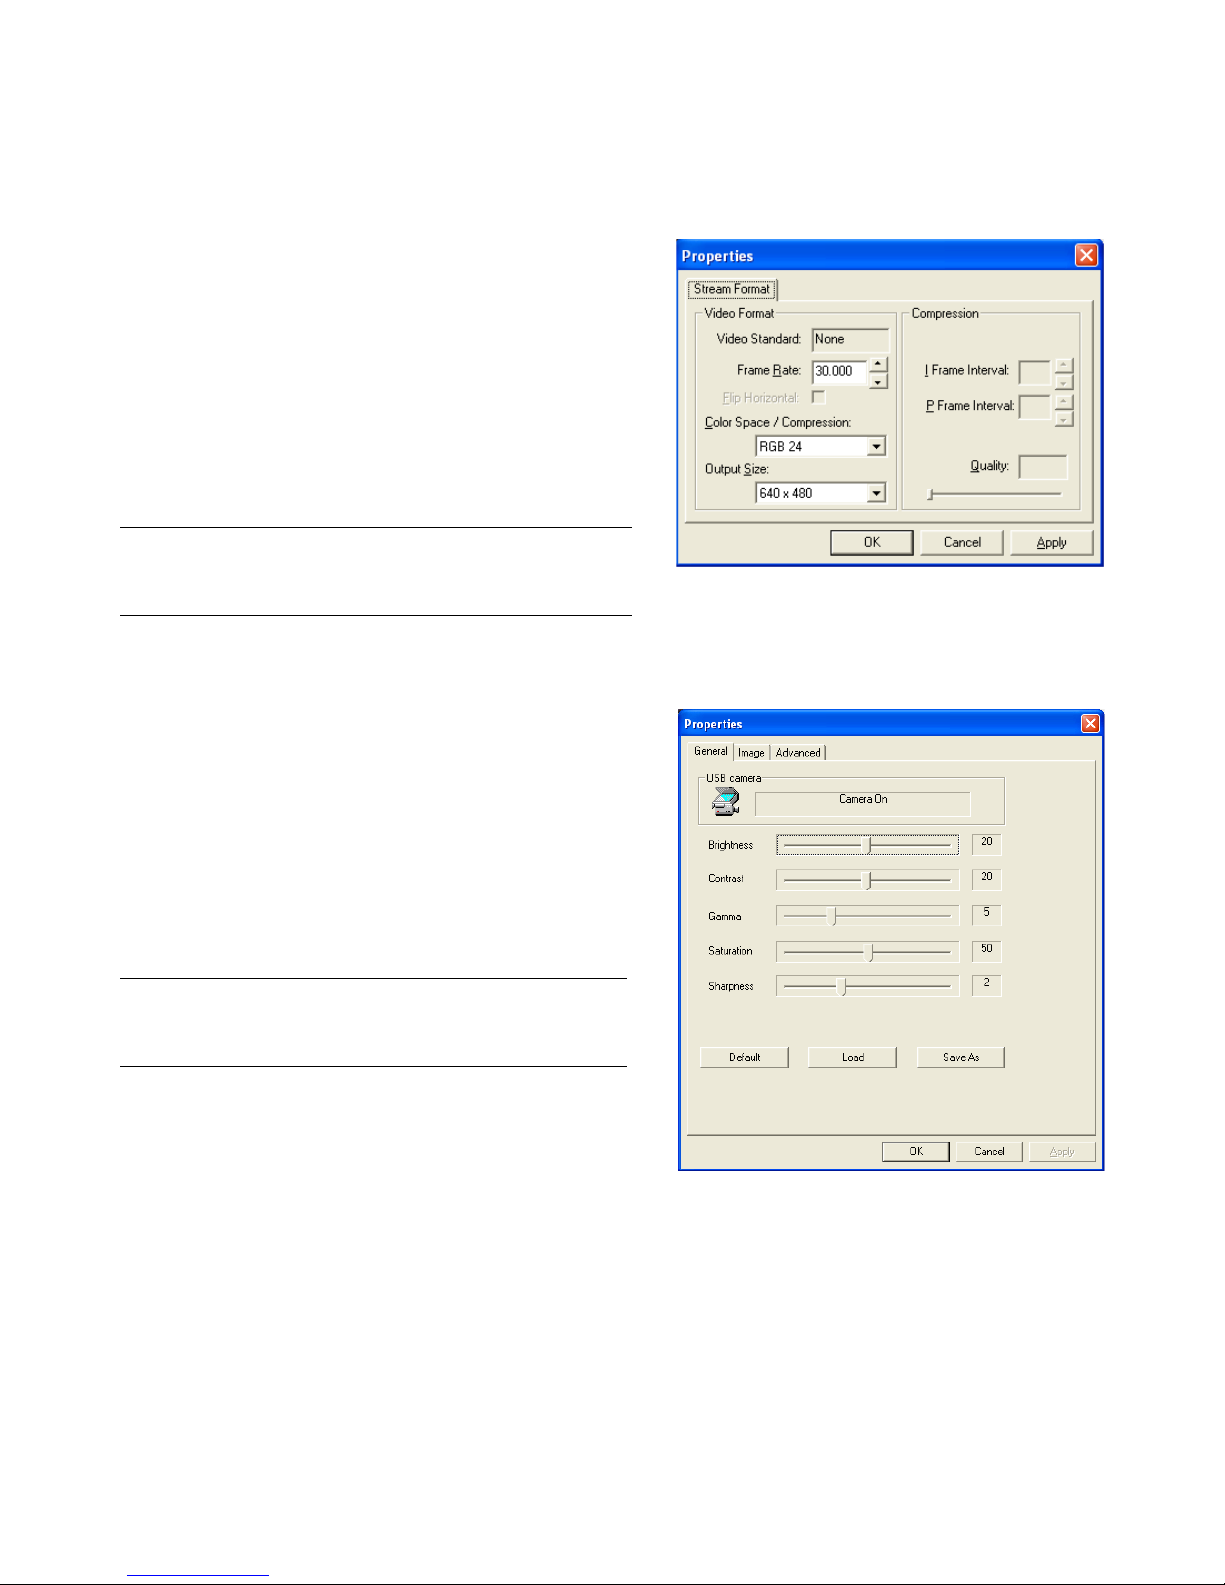
Adjusting Video Stream Settings
1In ArcSoft VideoImpression or HP Photosmart Essential,
click Format.
2Click Frame Rate to adjust the number of frames per
second.
3Click Color Space/Compression to adjust the
number of colors. The file size decreases when you select
fewer colors.
4Click Output Size to adjust the size of the image.
5Click OK.
Adjusting General Settings
1In ArcSoft VideoImpression or HP Photosmart Essential,
click Settings.
2Click the General tab.
3Drag the sliders to adjust the Brightness, Contrast,
Gamma, Saturation, or Sharpness levels.
4(Optional) Click Save As to store your settings and
assign them a name, so you can use them again later.
5Click OK.
NOTE: If the Output Size is larger than 640x480,
you cannot adjust the Advanced settings in the Settings
dialog box.
NOTE: To use previously saved settings, select Load and
then select the name you assigned to the settings. To
restore the factory settings, select Default.