manuals.online logo
Brands
  1. Home
  2. •
  3. Brands
  4. •
  5. Hubbell
  6. •
  7. Lifting System
  8. •
  9. Hubbell EH-85 User manual

Hubbell EH-85 User manual

Other Hubbell Lifting System manuals

Hubbell BH-85 User manual

Hubbell

Hubbell BH-85 User manual

Hubbell EH-09 User manual

Hubbell

Hubbell EH-09 User manual

Hubbell BH-09 User manual

Hubbell

Hubbell BH-09 User manual

Popular Lifting System manuals by other brands

probst SDH-H-15 operating instructions

probst

probst SDH-H-15 operating instructions

Bruno OUTDOOR ELITE CRE-2110E Operator's manual

Bruno

Bruno OUTDOOR ELITE CRE-2110E Operator's manual

matev FPS Mounting Assembly Installation Guide

matev

matev FPS Mounting Assembly Installation Guide

Vestil CYL-HLT Series instruction manual

Vestil

Vestil CYL-HLT Series instruction manual

Butts Tools BXS0002 operating instructions

Butts Tools

Butts Tools BXS0002 operating instructions

Safelift MoveAround MA60 Original instructions

Safelift

Safelift MoveAround MA60 Original instructions

Terex Genie Z452513A-48153 Service and repair manual

Terex

Terex Genie Z452513A-48153 Service and repair manual

Granberg InDIago 510 Operating and care instructions

Granberg

Granberg InDIago 510 Operating and care instructions

EUFAB Bike Lift operating instructions

EUFAB

EUFAB Bike Lift operating instructions

morse 82H-124 Operator's manual

morse

morse 82H-124 Operator's manual

Braun NL955 Series Operator's manual

Braun

Braun NL955 Series Operator's manual

Protekt AT 252 instruction manual

Protekt

Protekt AT 252 instruction manual

R. Beck Maschinenbau HS 600 operating manual

R. Beck Maschinenbau

R. Beck Maschinenbau HS 600 operating manual

Nova Technology International, LLC NAS Series quick start guide

Nova Technology International, LLC

Nova Technology International, LLC NAS Series quick start guide

Genie Z-60/34 Operator's manual

Genie

Genie Z-60/34 Operator's manual

Screen Technics INTERFIT Vertical Up Lift instructions

Screen Technics

Screen Technics INTERFIT Vertical Up Lift instructions

Drive DUPONT SAMERY Hermes user manual

Drive

Drive DUPONT SAMERY Hermes user manual

Custom Equipment Hy-Brid 3 Series MAINTENANCE & TROUBLESHOOTING MANUAL

Custom Equipment

Custom Equipment Hy-Brid 3 Series MAINTENANCE & TROUBLESHOOTING MANUAL

manuals.online logo
manuals.online logoBrands
  • About & Mission
  • Contact us
  • Privacy Policy
  • Terms and Conditions

Copyright 2025 Manuals.Online. All Rights Reserved.

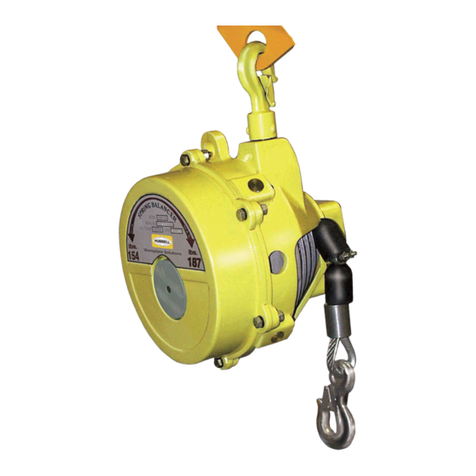
The EH balancer is designed to be hung, above the
work area, from a stationary support, such as an eye
bolt, or a movable trolley (Fig 1). For best operation, bal-
ancer should be hung directly above work area so that
tool is lowered vertically, not at an angle, when in use
(compare Fig 1-A and Fig 1-B, below). Hanging from trol-
ley with safety cable or chain affixed to second trolley is
recommended (Fig 1-C). Prior to installation, check to
make sure tool weight including air hose or power cable
plus fittings falls within the range shown on the balancer
serial plate. Contact your local distributor if it does not.
INSTALLATION
1. Hang balancer in desired location using hook at top of
balancer. Make sure safety latch on hook is in place to
prevent unhooking.
2. Attach safety chain or cable from eye at top of bal-
ancer to either a separate support (if statically mounted)
or to separate trolley.
3. Attach tool to balance cable by lifting tool to hook. DO
NOT attempt to pull hook down to tool.
ADJUSTING TENSION
1. Tension is adjusted by turning the hex drive on the
housing at the rear of the balancer (Fig 2). To increase
tension, turn the hex drive in a clockwise direction. To
decrease tension, turn hex drive counter-clockwise.
A. If balancer will not hold tool in raised position,
increase tension by turning drive clockwise.
B. If tool is difficult to pull down, decrease tension
by turning drive counter-clockwise.
NOTE: Avoid adjusting tension above or below rated
capacity of balancer.Tightening spring over its rated
capacity will shorten cable stroke and decrease spring
life. If spring is loosened to lower than minimum capaci-
ty, the safety device may engage preventing operation.
Installation and Operation Instructions
EH-85 Tool Balancers
CAUTION
1. Prior to installation, make sure rated range of
balancer matches weight of tool to be used.
2. Check to make sure hook or trolley from which
balancer will hang will support six times combined
weight of balancer and tool.
3. A safety chain or cable MUST be installed between
eye on balancer to separate hanger or trolley.
CAUTION
Do not adjust thrust pin (Fig 2). The thrust pin
holds the tension adjustment worm in place
and has been factory adjusted.
THRUST
PIN
TENSION
ADJUSTMENT
WORM
Figure 2
Figure 1
Safety
Chain or
Cable
AC
B
ROUTINE MAINTENANCE
1. All bearings are pre-lubricated and require no periodic
lubrication.
2. Periodically check both hooks and cable for wear.
Replace if hooks or support show excessive wear or if
cable is frayed.
3. Periodically check safety chain or cable. Check fas-
teners for tightness. Tighten as required. Replace chain
or cable if there is undue wear.
4. Check to make sure all four safety stop pins (Fig 3)
are securely in place. Pins must be fully inserted and
secured with allen screw. Replace if missing.
SAFETY
STOP PIN
ALLEN
SCREW
Figure 3
600 South Clark Street • P.O. Box 26
Mayville, WI 53050
Phone: 920-387-4120
Fax: 920-387-4189
63049204.a