manuals.online logo
Brands
  1. Home
  2. •
  3. Brands
  4. •
  5. Hubbell
  6. •
  7. Water Heater
  8. •
  9. Hubbell ST Operating instructions

Hubbell ST Operating instructions

OPERATING AND MAINTENANCE MANUAL
FOR
STEAM FIRED WATER HEATER
ELECTRIC HEATER COMPANY
BASE MODEL “ ST and STH ”
HUBBELL ELECTRIC HEATER COMPANY
P.O. BOX 288
STRATFORD, CT 06615
PHONE: (203) 378-2659
FAX: (203) 378-3593
INTERNET: http://www.hubbellheaters.com/
-- IMPORTANT --
Always reference the full model number and serial number when calling the
factory.
WARNING / CAUTION
1. Tank is to be completely filled with water and all air is to be vented before
energizing.
2. Due to the rigors of transportation, all connections should be checked for tightness
before heater is placed in operation.
3. Safety relief valve must be installed in tapping provided.
4. KEEP AWAY FROM LIVE ELECTRICAL CIRCUITS.
Do not perform any maintenance, make any adjustments, or replace any
components inside the control panel with the high voltage power supply turned on.
Under certain circumstances, dangerous potentials may exist even when the power
supply is off. To avoid casualties, always turn the power supply safety switch to
off, turn the charge or ground the circuit before performing any maintenance or
adjustment procedure.
5. Generalized instructions and procedures cannot anticipate all situations. For this
reason, only qualified installers should perform the installation. A qualified
installer is a person who has licensed training and a working knowledge of the
applicable codes regulation, tools, equipment, and methods necessary for safe
installation of a steam fired water heater. If questions regarding installation arise,
check with your local plumbing and electrical inspectors for proper procedures
and codes. If you cannot obtain the required information, contact the company.
2
SECTION TITLE PAGE No.
I GENERAL DESCRIPTION AND CONSTRUCTION 7
II INSTALLATION AND OPERATION 9
III SCHEDULED MAINTENANCE AND OPERATION 12
IV ADJUSTMENT AND TEMPERATURE REGULATORS 18
V TROUBLESHOOTING 20
VI MISCELANEOUS CHARTS AND FORMULAS 22
3
4
NOMENCLATURE FOR PARTS
5
NOMENCLATURE FOR ACCESSORY PARTS
6
SECTION I -GENERAL DESCRIPTION AND CONSTRUCTION
GENERAL DESCRIPTION
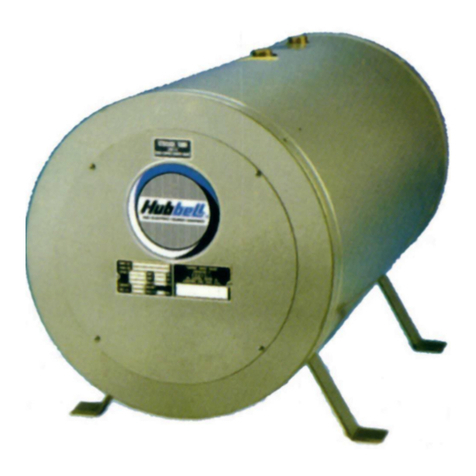
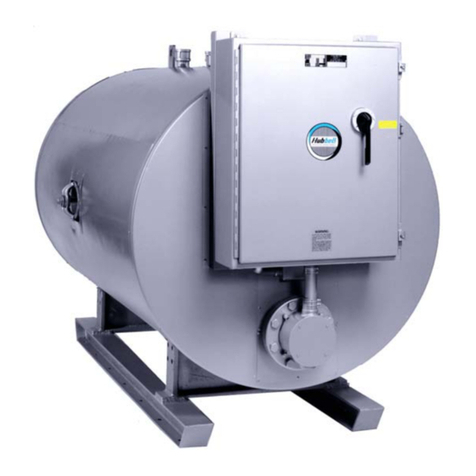
This book describes a packaged steam powered water heater that is a stationary, self-
contained unit. The complete assembly on a standard unit consists of the storage tank,
immersion heating coil, steam regulator, steam drip trap, condensate trap, steam
strainer, condensate strainer, vacuum breaker, and an ASME rated combination
temperature and pressure safety relief valve. Optional equipment may be supplied
with your unit. Please consult the product drawing for details specific to your
assembly. The unit is factory assembled, insulated, jacketed, primed, painted, piped,
tested, and ready for service connections.
CONSTRUCTION
TANK
Standard Tank Construction:
The standard storage tank is constructed of all welded carbon steel, designed and built in
accordance with ASME Section VIII and stamped, certified, and registered with the
National Board of Boiler and Pressure Vessel Inspectors. It is internally lined with
specially formulated Hydrastone cement to a 5/8-inch minimum thickness for superior
protection and tank longevity.
Optional Tank Linings:
1. Phenolic – An epoxy coating applied in two coats to a total thickness of 10-12
mils. Typically used in process applications using low conductivity deionized
(DI), distilled, or food grade water.
2. Copper – A 3lb./sq. ft. copper sheet approximately 0.0646-inches thick covers all
interior surfaces. All copper sheet seams are factory tested to ensure long lasting
protection of the steel vessel.
3. Flame-Spray Copper – Molten copper is sprayed on the interior surfaces to a
thickness of 5-6 mils. The copper bonds to the steel, and an additional overcoat of
Phenolic lining is applied on the copper to seal all pores.
4. Galvanizing – The steel pressure vessel is pickled and hot dipped in molten zinc to
create a barrier which internally and externally protects the steel vessel for cold
and hot water storage.
Optional Non-Ferrous Tank Materials:
1. Copper-Silicon – A copper-silicon alloy offers tremendous tank longevity due to
its ability to withstand the cycling effects induced from changes in water
temperature and pressure. This material is suitable for storage of hot potable water
in a variety of commercial and industrial applications.
2. 90/10 Copper-Nickel – A 90% copper and 10% nickel alloy similar to copper-
silicon, but with added strength and corrosion resistance. Typically used in
applications with corrosive environments (salt water) or critical applications.
3. Stainless Steel – Stainless steel (type 304, 316, or 316L) is well suited for high
purity applications requiring a corrosion resistant tank with minimal leaching of
impurities into the water. Well suited for process, RO, and DI water systems in the
pharmaceutical, food, and electronic industries.
TANK CONNECTIONS
The heater is supplied with separate cold water and hot water connections. A connection
is provided for mounting a combination safety temperature and pressure relief valve. An
overflow line should be utilized from the relief valve outlet to a floor drain. See drawing
for locations and sizes.
7
OUTER SHELL, INSULATION, AND SUPPORTS
The tank is encapsulated in 2-inches of high-density fiberglass insulation. The protective
shell is constructed of galvaneel and is coated with a durable silver hammertone finish.
The entire vessel is supported on heavy-duty integrally welded steel supports for sturdy
floor mounting.
STEAM HEATING COIL
The water heater is supplied with a high quality factory installed 2-pass U-tube heating
coil constructed from 20-gauge ¾-inch O.D. single wall copper tubing designed for a
maximum working pressure of 150 psi. The tubing is installed in a heavy-duty fabricated
steel head with threaded NPT steam and condensate connections. Each assembly is
fastened to a corresponding tank flange
using a gasket and hex head steel bolts
and nuts. Specialized heating coil
construction may be included. These
options include: double wall tubing with a
leak detection port, or special materials
(stainless steel, 90/10 copper-nickel,
other) for the tubes and/or head. See
drawing for complete details.
STEAM OPERATING CONTROLS
The steam operating controls are factory selected, sized, piped, and tested to ensure
reliable operation. Steam controls can be shipped loose, upon request, for in the field
installation by others. All steam components are factory plumbed with schedule 40
black iron pipe and ready for steam and condensate connections. A cast iron ‘Y’
strainer with 20 mesh screen protects the steam controls and coil from dirt and debris
in the steam supply.
Traps
Two traps should be utilized in the immediate steam piping system of the water heater.
The first trap in the system is a drip trap that is designed to collect condensate from the
main steam line before entering the steam regulator. Additionally, a main condensate trap
should be located in the condensate line after the steam coil. This trap ensures that the
steam remains in the coil and releases its energy before exiting the coil and traveling
down the condensate line. There are various types of traps available. The following may
be included in your water heater package:
1. Drip Trap
a. Thermostatic (Standard)
b. Cast Iron Float and Thermostatic type
c. Cast Steel Float and Thermostatic type
2. Main Trap
a. Cast Iron Float and Thermostatic type (Standard)
b. Cast Steel Float and Thermostatic type
c. Bucket
Steam Control Valves
1. Pilot Operated (Standard) – A high quality cast iron pilot operated steam
control valve comes with the standard unit. It is the most widely used type of
valve for water heating applications. In this type of valve, a temperature pilot
device utilizes steam to operate the main valve. No external power source is
required other than steam. This highly dependable temperature control system is
suitable for most commercial and industrial applications.
2. Self Operating – This valve design includes a bulb and capillary assembly
charged with a thermally responsive vapor. The expansion / contraction of the
8
vapor acts upon the valve bellows in order to control the flow of steam through
the valve. No external power is required for operation.
3. Pneumatically Operated – In this configuration the building air supply feeds a
factory installed temperature controller that operates the steam control valve.
The temperature controller sends a precise air signal to the steam control valve
which adjusts the flow of steam into the heating coil. The temperature controller
is fully adjustable from 50° - 250 ° F and requires 20 psi air at a maximum
consumption of 0.5 SCFM.
4. Electronically Operated – This control valve is similar to a pneumatically
operated system, except in this case the temperature controller is a sophisticated
digital display electronic device which outputs a 4-20 ma signal to a compact
motor mounted on the steam control valve in order to proportionally control the
flow of steam to the heating coil. The temperature controller displays set point
as well as actual water temperature and is available with an RS485
communications port for remote control.
OPTIONS
The following optional features may be included in your water heater. Reference the
drawing specific to your heater for further details.
Single Solenoid Safety System
A single solenoid safety system closes the steam supply to the control valve should the
temperature in the tank reach the high limit set point. This option requires 120-volt, 5-
amp electrical service.
Double Solenoid Safety System
A double solenoid safety system dumps over heated water in the storage tank to drain
in addition to closing the steam supply to the control valve. This option requires 120-
volt, 5-amp electrical service.
Anticipator Control System
The anticipator control system forces incoming cold water over the control valve
sensing bulb in order to begin heating water immediately.
Skid Mounting
Optionally, the unit may be mounted on heavy duty all welded I-beams.
Circulating Pump Package
An intra-tank circulation pump package with On/Off switch to continuously circulate
water within the tank and thereby reduce stratification may be installed. An all bronze
circulator pump.
Dial Temperature and Pressure Gauge
A combination temperature (70° - 250° F) and pressure (0 – 200
psi) gauge with 2½-inch dial may be factory installed in the tank.
SECTION II –INSTALLATION AND OPERATION
WARNING / CAUTION
DO NOT TURN ON THE STEAM SUPPLY to this unit until heater is completely
filled with water and all air has been released. If the heater is NOT filled with water
when the steam supply is turned on, damage to the heating coil may result.
For protection against excessive pressures and temperatures, local codes require the
installation of a temperature-and-pressure (T&P) relief valve certified by a nationally
recognized laboratory that maintains periodic inspection of production of listed
9
equipment of materials, as meeting the requirements for Relief Valves and Automatic
Gas Shutoff for Hot Water Supply Systems. ANSI Z21.22-1971. THE CUSTOMER
IS RESPONSIBLE TO PROTECT PROPERTY AND PERSONNEL FROM HARM
WHEN THE VALVE FUNCTIONS.
All water heaters have a risk of leakage at some unpredictable time. IT IS THE
CUSTOMER'S RESPONSIBILITY TO PROVIDE A CATCH PAN OR OTHER
ADEQUATE MEANS, SO THAT THE RESULTANT FLOW OF WATER WILL
NOT DAMAGE PROPERTY.
If unit is painted or insulated on the job site, care should be taken not to paint or
insulate over the A.S.M.E. nameplate. This plate should be accessible and legible at
all times to inspectors, and information from this plate must be used when ordering
parts from the factory.
The tank should be fully drained in the event the steam has been turned off and if there is
danger of freezing. If tank is drained and to be left empty for more than 8 hours, at least
2-inches of water should be left in the bottom of cement lined tanks to prevent lining
from drying and cracking.
WATER HEATER PLACEMENT
1. Adequate space should be provided for removal of heating element.
2. Unit should be level to permit proper drainage
PIPING INSTALLATION
NOTE: The most effective means for preventing deterioration from accelerated
corrosion due to galvanic and stray current is the installation of dielectric
fittings/unions. The installation of these fittings is the responsibility of the installing
contractor.
1. All integral components have been properly sized to meet design conditions.
Piping to the unit should be sized to meet the design conditions, as dictated by
good engineering practices.
2. Refer to the enclosed drawing for location of piping connection.
3. Install the combination temperature and pressure safety relief valve in the tapping
provided. Note that this is required by law for safety considerations.
Outlet to floor drain
Installintoprovidedtapping
Manual Release
Lever
TemperatureProbe
4. Install a relief valve overflow pipe to a nearby floor drain. CAUTION: No valve
of any type should be installed between the relief valve and tank or in the drain
line.
HOOK-UP OF AIR AND WATER OPERATED CONTROLS
1. Most air or water operated valves on Hubbell water heaters are controlled by
Powers Accritem. Occasionally, a Robertshaw Fultrol is furnished which
operates identically to the Powers control except supply and output connections
are reversed in location. Controls are normally mounted on the back side of the
tank shell.
10
Typical Piping Diagram
ELECTRICAL INSTALLATION
1. If the unit is furnished with a pilot or self contained control valve, no external
source of power is required for the valve. (See enclosed operation and
maintenance manual for specific valves).
2. If the unit is furnished with an air or electric control valve, see enclosed
drawings for required connections. (See enclosed operation and maintenance
manuals for specific valves).
Torque screws per torque chart included in Section VI.
11
3. All other electrical connections are made at the factory; therefore, no other
electrical connections are necessary.
FILLING THE HEATER
1. Begin with all steam, condensate, and water valves closed.
2. Open the isolation valves on the integral circulator line ,if supplied.
3. Open cold water valve, fill unit with cold water. Lift lever on relief valve to
relieve trapped air. Release relief valve lever when all traces of air have been
vented from the unit. Leave cold water valve open.
STARTUP
1. Turn pump switch to the “ON” position, if supplied. (Do not operate pump
without unit being filled with water and isolation valves being opened, as
damage to the pump could result).
2. Set control valve thermostat to approximately 30° F below desired temperature,
observe unit, if unit operates properly gradually raise set point to desired set
point.
3. If unit has a safety system, set hi-limit thermostat to desired temperature. (This
thermostat must be set at a higher temperature than the operating thermostat or
the unit will never reach the desired temperature). Refer to the enclosed piping
and wiring drawings.
Gradually open valve to allow heating medium to enter the heating element.
(Boiler water lines should be vented to eliminate trapped air). Monitor the tank
temperature until the desired temperature is reached. If the temperature
regulator shuts off before the desired temperature is reached, or if over-shoot
occurs, adjustment of the temperature regulator will be required. (Refer to
enclosed O&M manuals for your specific control valve).
4. After control valve adjustments have been made and the desired temperature
has been reached, open the valve on the hot water outlet and the building
recirculation line.
5. Tightening of some gasketed joints may be required after unit has been heated.
6. Never break any joint, gasketed or screwed on unit until the pressure in the unit
has been reduced to zero and the unit drained.
7. Observe operation of unit for 30-40 minutes after initial start up.
SHUTDOWN
1. Close valve to heating medium and air supply valve, if air operated controls are
furnished
2. Disconnect all electrical power to unit.
3. Close hot water outlet valve.
4. Close building recirculation inlet valve, and shut down building circulation pump.
5. Close cold water inlet valve.
6. Turn off pump, if supplied.
7. Drain unit by lifting lever on relief valve to vent tank, then slowly open drain
valve.
SECTION III - SCHEDULED MAINTENANCE AND SERVICING
WARNING / CAUTION
Before performing any maintenance procedure,make certain steam supply and
electrical power supply is OFF and cannot accidentally be turned on.
12
QUARTERLY INSPECTION
1. Monitor thermostat
a. Let water heater completely heat to a designated thermostat setting.
b. After thermostat satisfies (that is, when the thermostat actually clicks off), draw
water from heater.
c. Compare water temperature of drawn water to the temperature setting of the
thermostat when it satisfies. Normal variation between the two points is
approximately + 5°F.
d. If these two readings do not coincide within acceptable tolerances and
verification has been made of the accuracy of the temperature-reading
gauge, replace the thermostat.
2. Lift test lever on relief valve and let water run through valve for a period of
approximately 10 seconds. This will help flush away any sediment that might
build up in water passageways.
ANNUAL INSPECTION
1. Units subject to fouling or scaling should be cleaned periodically. A marked
increase in pressure drop and/or reduction in performance usually indicates
cleaning is necessary.
2. To clean inside of tubes, remove all heads and covers. (Caution: Do not loosen
heads until you are sure all pressure is off the equipment, and the unit is
drained).
3. In cleaning a tube bundle, tubes should not be hammered on. If it is necessary to
use scrapers, care should be taken to insure that the tubes are not damaged.
4. Before it is necessary to apply mechanical means for cleaning, try to clean the
unit using the following methods.
a. Circulate hot fresh water at a reasonable velocity.
b. Try spraying with water hose.
c. Consult with manufacturers of cleaning compounds and chemicals. They
will check the nature of the deposit, recommend the right cleaning
compound, and in many cases provide equipment and personnel for a
complete cleaning job.
5. Do not clean tubes by blowing steam through individual tubes.
6. To tighten a loose tube joint, use a suitable roller type tube expander. Do not
roll tubes that are not leaking. If double wall tubes are supplied return to the
factory for repairs.
7. If the unit is dismantled for any reason, it should be reassembled using new
gaskets.
8. Do not tighten bolts until gaskets are properly seated.
9. Exterior of unit should be cleaned and if necessary repainted.
10.When tightening bolts in the element head, tighten the bolts in a criss-cross
pattern. This will evenly distribute pressure around the flange, and help prevent
warping. See diagram below.
13
11.Convection packages may be equipped with an integral circulator. This
circulator should be serviced per the enclosed pump O&M manual.
12.The unit as well as all strainers should be blown down regularly to remove any
trash, and sediment that may have accumulated.
13.If unit is supplied with anode rod, it shall be inspected for excessive wear.
14.Packing on valves and regulators should be checked for leaks and repaired or
replaced as necessary.
15.To seal the manhole gasket, first install the cover, crab, new gasket, bolt and
nut. Turn the nut until it is snug against the crab, then turn 1 ½ revolutions. Fill
the tank with water and allow pressure to build up, letting the water pressure
seal the gasket. (Some leakage may occur at this point, but as the gasket seats,
leaking will gradually stop). After leaking has stopped, turn the nut
approximately 1 revolution. At this point there may be some miner seepage,
wait a few minutes to see if this seepage stops. If seepage continues drain the
tank, inspect the manhole ring, and cover for any damage, (repair or replace as
required) Repeat the above procedure using a new gasket.
Never try to seal the cover solely by turning the nut down tight this may
cut or crush the gasket and make sealing impossible.
16.Drain and flush tank as follows. Perform annually or more often , if required.
NOTE: Cement lining is a durable lining that will provide many years of
service protecting your steel pressure vessel from corrosion. The process of
14
cement lining includes an inspection to ensure that the lining is applied to the
correct thickness, covers all appropriate surfaces, and is free from defects or
cracks greater than 3 mm (1/8”) in width. Any deficiencies are repaired at the
factory prior to shipment. However, it is characteristic to find hairline cracks
in the cement lining prior to initial installation. After the vessel is first filled, the
water will work its way into these cracks and begin the corrosion process. At
the same time the cement lining undergoes a “wet curing” process whereby the
cement absorbs water and expands. The water that is absorbed into the lining
becomes trapped between the cement lining and the steel tank and once the
cement is fully absorbed with water, the water in contact with the steel tank
becomes deoxygenated which serves to protect the steel vessel. In addition, the
cement leaches minerals and various impurities from the water which fills and
“heals” the cracks. This “healing” together with the “wet curing” and expansion
of the cement prevents any ongoing corrosion. In the unlikely event a crack
greater than 3 mm (1/8”) develops, the cement lining can be easily repaired in
the field. For repair procedures please contact Hubbell
a. Shut down unit as described in Section II.
b. Close valve on hot water outlet piping.
c. Open valve on drain piping.
d. Cold water inlet line pressure will be strong enough to flush sediment from
the bottom of the tank out through the drain. Let water run for 3-4 minutes.
e. Clean strainer filter, see below.
f. Close drain valve.
g. Open hot water valve.
h. Re-start unit as described in Section II.
17.Clean strainer filter. Perform
annually or more often , if
required.
a. Remove blowoff bushing
(E) or cap (F), as required.
b. Remove gasket (B), if
required.
c. Remove, clean, and re-
install screen (A).
d. Replace gasket (B).
e. Re-install blowoff bushing
(E) or cap (F), as required.
15
16
SINGLE SAFETY SOLENOID SYSTEM (if installed)
17
DOUBLE SAFETY SOLENOID SYSTEM (if installed)
SECTION IV –ADJUSTMENT OF TEMPERATURE REGULATORS
1. The spring tension on temperature regulators is adjusted at the factory to meet
design conditions. However, design conditions may vary from actual operating
conditions and re-adjustment might be required on this job.
2. Whenever possible, Hubbell uses “fail safe” regulators. This means that if the
controlling medium, such as air or water is lost, the valve will close under it’s
own spring tension.
3. ADJUSTMENT OF 2-WAY AIR OR WATER OPERATED VALVES
a. Release all air pressure from the diaphragm.
b. Apply steam pressure to the valve.
c. If at this point, there is pressure on the downstream side of the valve, or if
steam can be heard passing through the valve, valve spring tension needs to
18
be increased.
d. Turn the spring adjustment screw slowly to increase spring tension until the
pressure on the down stream side of the valve has dropped to “0” and there
is no sound of flow through the valve. Do not turn spring adjustment past
this point.
If the valve will not open with air on the diaphragm, spring is adjusted too
tightly.
(1)Release all air pressure from the valve diaphragm.
(2)Apply steam pressure to the valve.
(3)Loosen tension on the spring until steam begins to seep through the
valve.
(4)Slowly, tighten spring tension until flow stops.
(5)Do not turn spring adjustment past this point.
4. ADJUSTMENT OF 3-WAY AIR OR WATER OPERATED VALVES
a. Turn thermostat down so that no air pressure is on the valve diaphragm. If
unit continues to heat, valve spring tension needs to be increased.
b. Shut off heating medium.
c. Disconnect stem coupling (A).
d. Lift lower stem (B) and hold against upper valve seat.
e. Turn adjustment screw (C) until there is approximately a 1/16-inch gap
between the two stem halves.
f. Apply air pressure to valve diaphragm so that stem halves are aligned and
re-connect stem halves.
g. If valve will not open with air on the diaphragm, spring tension should be
decreased.
h. Adjustment is essentially the same as if spring tension were increased except
the adjustment screw is turned in the opposite direction.
5. ADJUSTMENT OF PILOT OPERATED VALVES
a. Pilot operated valves such as Spence or Spirax/Sarco are not fail safe. These
valves have a liquid or gas filled thermo-static bulb and if this bulb loses its
charge, the valve will go to its full open position and cause overheating of
the water heater. This situation should be considered before attempting to
adjust these valves.
b. Spirax/Sarco Valves are completely pre-set at the factory and there is no
spring adjustment. Set the thermostat at the desired temperature and no
further adjustment is required.
19
c. Spence Valves: There is no main spring adjustment on Spence Valves. To
set temperature on the water heater:
(1)Turn pilot spring adjustment “A” clockwise until all tension is off the
spring.
(2)Refer to unit start-up section and start unit except for thermostat setting.
(3)Turn spring adjustment “A” counter-clockwise until the wheel is firmly
against the spring.
(4)Continue to turn wheel “A” one 360° turn or until steam begins to pass
thru the valve.
(5)Allow unit to heat until the valve closes off.
(6)If unit is not up to temperature at this point, continue to turn adjustment
wheel ½ turn, stop and allow valve to shut off.
(7)Repeat this cycle until unit is up to the desired temperature.
SECTION V – TROUBLESHOOTING
(See separate component O&M for additional details.)
Symptom Probable Cause Corrective Action / Remedy
Gradual loss of heating
capacity. Tubes are fouled. Clean tubes per Section III,
annual scheduled maintenance.
Excess silt in bottom of
tank. Drain and flush tank per Section
III , annual scheduled
maintenance.
Air or water leak in
temperature control. Repair or replace per separate
O&M.
Ruptured diaphragm on
air or water operated
valve.
Repair or replace per separate
O&M.
Debris in Accritem. Clean Accritem.
Strainers clogged. Clean strainers per Section III,
annual scheduled maintenance.
Pump impellor
deteriorated. Repair or replace per separate
O&M.
20

This manual suits for next models

1

Other Hubbell Water Heater manuals

Hubbell MSH Operating instructions

Hubbell

Hubbell MSH Operating instructions

Hubbell JTX011 User manual

Hubbell

Hubbell JTX011 User manual

Hubbell D User manual

Hubbell

Hubbell D User manual

Hubbell 110-2 User manual

Hubbell

Hubbell 110-2 User manual

Hubbell CE110 User manual

Hubbell

Hubbell CE110 User manual

Hubbell V15 Operating instructions

Hubbell

Hubbell V15 Operating instructions

Hubbell JHX User manual

Hubbell

Hubbell JHX User manual

Hubbell E User manual

Hubbell

Hubbell E User manual

Hubbell HD Installation and operating instructions

Hubbell

Hubbell HD Installation and operating instructions

Hubbell Prime User manual

Hubbell

Hubbell Prime User manual

Hubbell V10 Operating instructions

Hubbell

Hubbell V10 Operating instructions

Hubbell EMV Operating instructions

Hubbell

Hubbell EMV Operating instructions

Hubbell BWXSS-3775 User manual

Hubbell

Hubbell BWXSS-3775 User manual

Hubbell RFHP-R User manual

Hubbell

Hubbell RFHP-R User manual

Hubbell TXA Series Operating and installation instructions

Hubbell

Hubbell TXA Series Operating and installation instructions

Hubbell ME User manual

Hubbell

Hubbell ME User manual

Hubbell TX User manual

Hubbell

Hubbell TX User manual

Hubbell Geyser-RO Operating instructions
Hubbell

Hubbell Geyser-RO Operating instructions

Hubbell BWP Series User manual

Hubbell

Hubbell BWP Series User manual

Hubbell PS Series User manual

Hubbell

Hubbell PS Series User manual

Hubbell 280-3 User manual

Hubbell

Hubbell 280-3 User manual

Hubbell J User manual

Hubbell

Hubbell J User manual

Hubbell T User manual

Hubbell

Hubbell T User manual
Hubbell GX200 User manual

Hubbell

Hubbell GX200 User manual

Popular Water Heater manuals by other brands

VOKERA Compact A Installation & servicing instructions

VOKERA

VOKERA Compact A Installation & servicing instructions

US CRAFTMASTER 100263116 Installation and operation guide

US CRAFTMASTER

US CRAFTMASTER 100263116 Installation and operation guide

Rinnai Smart Cylinders ME13548830S Owner and installer guide

Rinnai

Rinnai Smart Cylinders ME13548830S Owner and installer guide

EemaX EX190 TC Installation guide and owner's manual

EemaX

EemaX EX190 TC Installation guide and owner's manual

TESY VB 3038 D02 P Instructions for use

TESY

TESY VB 3038 D02 P Instructions for use

Midea MWH-38EU3-GR instruction manual

Midea

Midea MWH-38EU3-GR instruction manual

Suburban SW4DEL Installation and operation manual

Suburban

Suburban SW4DEL Installation and operation manual

TESY GCV6SL 804420 B11 TSR Instructions for use and maintenance

TESY

TESY GCV6SL 804420 B11 TSR Instructions for use and maintenance

BM2 BIEMMEDUE THERMAL manual

BM2 BIEMMEDUE

BM2 BIEMMEDUE THERMAL manual

PVI Industries TURBOPOWER 1000 P 250A-TPL specification

PVI Industries

PVI Industries TURBOPOWER 1000 P 250A-TPL specification

A.O. Smith GPDH owner's manual

A.O. Smith

A.O. Smith GPDH owner's manual

Rinnai REU-16FUA-E Infinity 16 i Installation and user manual

Rinnai

Rinnai REU-16FUA-E Infinity 16 i Installation and user manual

Zip AP3/05 Installation, maintenance and user instructions

Zip

Zip AP3/05 Installation, maintenance and user instructions

Antares T.124.00 instruction manual

Antares

Antares T.124.00 instruction manual

Vaillant atmoMAG operating instructions

Vaillant

Vaillant atmoMAG operating instructions

PVI Industries MAXIM 20 N 125A-MXS Specifications

PVI Industries

PVI Industries MAXIM 20 N 125A-MXS Specifications

Faber SOTTILE SLIM Series user manual

Faber

Faber SOTTILE SLIM Series user manual

Giant UGTC-199N Installation and operation manual

Giant

Giant UGTC-199N Installation and operation manual

manuals.online logo
manuals.online logoBrands
  • About & Mission
  • Contact us
  • Privacy Policy
  • Terms and Conditions

Copyright 2025 Manuals.Online. All Rights Reserved.