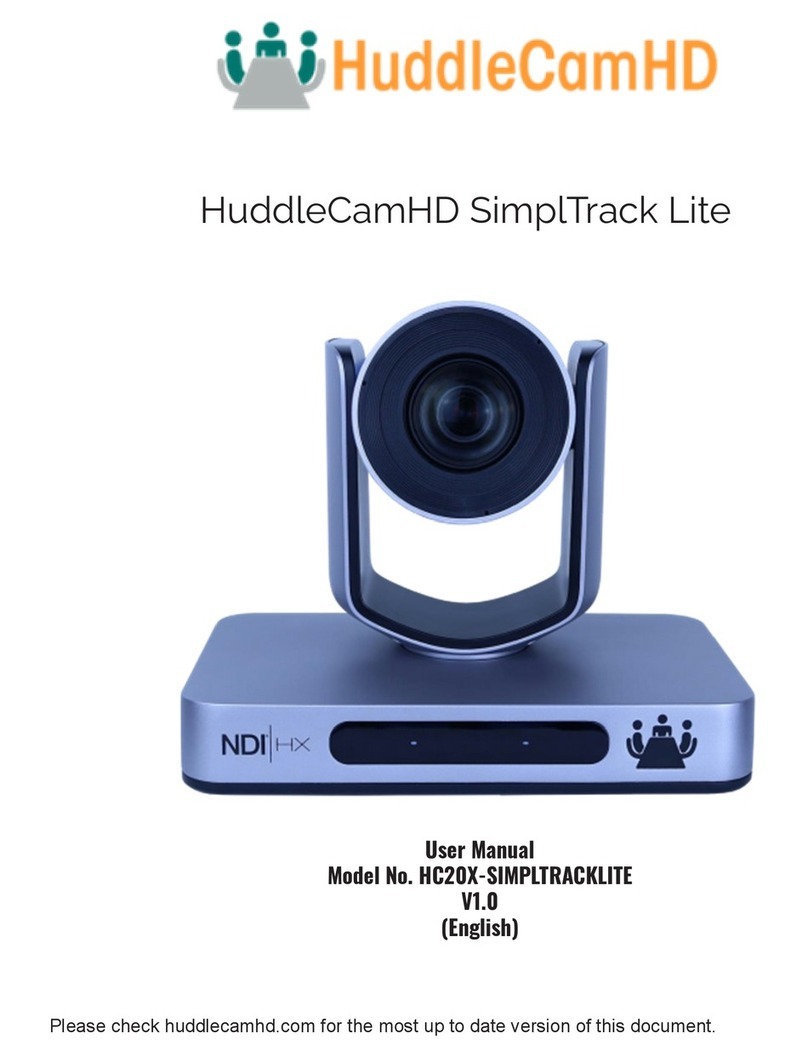
HuddleCamHD SimplTrack Lite User manual

Rev 1.0 9/21
HuddleCamHD SimplTrack Lite
User Manual
Model No. HC20X-SIMPLTRACKLITE
V1.0
(English)
Please check huddlecamhd.com for the most up to date version of this document.

1
Rev 1.0 9/21
Table of Contents
Preface ................................................................................................................................................................................................................ 2
Precautions......................................................................................................................................................................................................... 2
Supplied Accessories ......................................................................................................................................................................................... 3
Dimensional Drawings (mm) ............................................................................................................................................................................ 5
Features .............................................................................................................................................................................................................. 6
Technical Specifications .................................................................................................................................................................................... 7
NDI®|HX with NDI®4 Connection.................................................................................................................................................................... 8
Tracking Software .............................................................................................................................................................................................. 9
Device Management Interface ..................................................................................................................................................................... 9
Connecting the Camera .............................................................................................................................................................................. 10
Configuring the Camera.............................................................................................................................................................................. 10
Removing the Camera................................................................................................................................................................................. 13
Main View Interface..................................................................................................................................................................................... 14
Controlling the Camera............................................................................................................................................................................... 14
Tracking Settings.......................................................................................................................................................................................... 15
Preset Zones................................................................................................................................................................................................. 15
Video Recording & Screenshot....................................................................................................................................................................... 17
IR Remote Controller Guide............................................................................................................................................................................ 19
RS-232 Interface............................................................................................................................................................................................... 21
Serial Communication Control ....................................................................................................................................................................... 21
HuddleCamHD VISCA Command List ............................................................................................................................................................ 22
On Screen Display Menu................................................................................................................................................................................. 32
Network Connection........................................................................................................................................................................................ 34
Assigning an IP Address .................................................................................................................................................................................. 35
DHCP ............................................................................................................................................................................................................. 35
Static Address............................................................................................................................................................................................... 35
Modify Netinfo ............................................................................................................................................................................................. 36
Remote Configuration > Network Interface ............................................................................................................................................. 37
Discovering your Network Info ...................................................................................................................................................................... 37
Windows ....................................................................................................................................................................................................... 37
Mac ................................................................................................................................................................................................................ 38
Maintenance and Troubleshooting ............................................................................................................................................................... 39
Unqualified Applications............................................................................................................................................................................. 39
Troubleshooting........................................................................................................................................................................................... 39
Control .......................................................................................................................................................................................................... 39
Changelog......................................................................................................................................................................................................... 40

2
Rev 1.0 9/21
Preface
Thank you for using the HD Professional Video Conferencing Camera. This manual introduces the function, installation, and
operation of the HD camera. Prior to installation and usage, please read the manual thoroughly.
Precautions
This product can only be used in the specified conditions in order to avoid any damage to the unit itself.
•Don’t subject the camera to rain or moisture.
•Don’t remove the cover. Removal of the cover may result in an electric shock. In addition to voiding the warranty. In case
of abnormal operation, contact support@huddlecamhd.com.
•Never operate outside of the specified operating temperature range, humidity, or with any other power supply than the
one originally provided with the unit.
•Please use a soft dry cloth to clean the unit. If the unit is very dirty, clean it with diluted neutral detergent; do not use
any type of solvents, which may damage the surface.
Warning
•Electrical Safety
Installation an operation must be in accordance with national and local electric safety standards. Do not use any power
supply other than the one originally supplied with this camera.
•Polarity of Power Supply
The power supply output for this product is 12V DC with a maximum current supply of 2A. Polarity of the power supply
plug is critical and is as follows:
•Handling
oAvoid any stress, vibration, or moisture during transportation, storage, installation, and operation.
oDo not lift or move the camera by grasping the camera head. Do not turn the camera head by hand. Doing so
may result in mechanical damage.
oDo not expose the camera to any corrosive solid, liquid, or gas to avoid damage to the cover which is made of a
plastic material.
oEnsure that there are no obstacles in the pan or tilt ranges of the camera lens.
oNever power the camera on before installation is complete.
•Do not dismantle the camera –HuddleCamHD is not responsible for any unauthorized modification or dismantling.

3
Rev 1.0 9/21
Warranty
HuddleCamHD includes a limited parts & labor warranty for all HuddleCamHD manufactured cameras. The warranty is valid only
if HuddleCamHD receives proper notice of such defects during the warranty period. HuddleCamHD, at its option, will repair or
replace products that prove to be defective. HuddleCamHD manufacturers its hardware products from parts and components
that are new or equivalent to new in accordance with industry standard practices.
Supplied Accessories
When you unpack your camera, check that all the supplied accessories are
included:
•Camera 1
•AC Power Supply 1
•RS-232C Cable 1
•IR Remote Controller 1
•Quick Start Guide 1
•AAA Batteries 2
FCC Statement
This equipment has been tested and found to comply with the limits for a Class A digital device, pursuant to part 15 of the FCC
Rules. These limits are designed to provide reasonable protection against harmful interference when the equipment is operated
in a commercial environment. This equipment generates, uses, and can radiate radiofrequency energy and, if not installed and
used in accordance with the instruction manual, may cause harmful interference to radio communications. FCC Caution: Any
changes or modifications not expressly approved by the party responsible for compliance could void the user's authority to
operate this equipment. Operation is subject to the following two conditions: (1) This device may not cause harmful interference,
and (2) this device must accept any interference received, including interference that may cause undesired operation.
Warning - This is a class A product. In a domestic environment, this product may cause radio interference in which case the user
may be required to take adequate measures.
Remote Control Battery Safety Information - Store batteries in a cool and dry place. Do not throw away used batteries in the
trash. Properly dispose of used batteries through specially approved disposal methods. Remove the batteries if they are not in
use for long periods of time. Battery leakage and corrosion can damage the remote control. Do not use old batteries with new
batteries. Do not mix and use different types of batteries: alkaline, standard (carbon-zinc) or rechargeable (nickel-cadmium). Do
not dispose of batteries in a fire. Do not attempt to short-circuit the battery terminals.
Copyright Notice
The entire contents of this manual / guide, whose copyright belongs to HuddleCamHD, may not be cloned, copied, or translated in any
way without the explicit permission of the company. The product specifications referred to in this document are for reference only and
as such are subject to updating at any time without prior notice.
©2021 | HuddleCamHD | All Rights Reserved

4
Rev 1.0 9/21
Connection Guide
1. USB 2.0 USB 2.0 type B female connection
2. HDMI HDMI ver. 1.4 connection
3. Line In 3.5mm audio connection
4. Network RJ45 port for NDI®|HX & network streaming / control
5. SDI 3G-SDI connection
6. RS-232 In 8-pin mini din connection for joystick controller
7. RS-232 Out 8-pin mini din connection for daisy chaining
8. DC12V DC 12V power connection

5
Rev 1.0 9/21
Dimensional Drawings (mm)
211mm
139mm
211mm
169mm
169mm
139mm

6
Rev 1.0 9/21
Features
•Image Sensor
o1/2.8”, 2.14 million effective pixels, HD CMOS sensor.
oHigh quality telephoto lens supporting 20X optical zoom and optional 12X digital zoom.
oFull HD 1920x1080p resolution up to 60 frames per second.
o2D & 3D noise reduction with our latest “low noise CMOS sensor”.
oWide angle 59.5° horizontal field of view.
oDynamic Range Control (DRC) for higher image quality and detail across simultaneously well lit and shadowed
scenes.
oHigh SNR (signal to noise ratio) of the CMOS sensor (≥55dB), combined with 2D & 3D noise reduction
algorithms, effectively reduces noise, even under low illuminated conditions.
•Video Outputs
oSimultaneous NDI®|HX using NDI®4 / IP network streaming, USB 2.0, 3G-SDI, & HDMI 1.4
oUSB 2.0 Full HD video output up to 1080p 30 frames per second.
o3G-SDI Full HD video output up to 1080p 60 frames per second.
oHDMI 1.4 Full HD video output up to 1080p 60 frames per second.
oRTSP, RTMP, & RTMPS streaming using H.264 or MJPEG.
oLine level audio embeds over NDI®|HX / network stream. Uses AAC audio encoding for better sound quality
and lower bandwidth usage.
•Control and Settings
oAutomatic tracking of active participant.
oNDI®|HX control through NDI®approved platforms that offer control
oHuddleCamHD VISCA & VISCA over IP
oIR Remote Control
oRS-232 & RS-485 VISCA & Pelco-D control
•Installation
oStandard 1/4-20 female thread for camera mounting
o12V DC 2.5A Power Supply
oPoE 802.3af
•Warranty
o3-year warranty

7
Rev 1.0 9/21
Technical Specifications
Model
HC20X-SIMPLTRACKLITE
Type
HuddleCamHD SimplTrack Lite HD 1080p Color Video Camera
Camera
Video System
1080p-60/50/30/25, 1080i-60/50, 720p-60/50
Sensor
1/2.8” CMOS, 2.14 megapixel
Lens
20X
Digital Zoom
12X Digital Zoom
Shutter
1/1 ~ 1/10000
White Balance
Auto, ATW, OnePush, Indoor, Outdoor, Manual, Sodium Lamp, Fluo Lamp
Backlight Compensation
Supported
Digital Noise Reduction
2D & 3D Digital Noise Reduction
Video S/N
≥55dB
Horizontal Field of View
2.9° ~ 59.5°
Vertical Field of View
2° ~ 36°
Horizontal Rotation Range
±170°
Vertical Rotation Range
-30° ~ +90°
Pan Speed Range
0.2° ~ 100°/s
Tilt Speed Range
0.2° ~ 60°/s
Image Flip / Mirror
Supported
Image Freeze
Not supported
PoE
Supports PoE (802.3af)
Face Detection
Not supported
Local Storage
Not supported
Number of Presets
64
Preset Accuracy
0.1°
Input / Output Interface
HD Output
1 x RJ45 NDI®|HX using NDI®4 / IP Network 10/100M Ethernet port
1 x USB 2.0, Type B Female
1 x HDMI version 1.4
1 x 3G-SDI: BNC type, 800mVp-p, 75Ω, Along to SMPTE 424M standard
Network Interface
1 x RJ45: 10/100M Adaptive Ethernet ports
Audio Interface
1 x 3.5 audio interface, Line in (NDI®|HX & IP Network stream only) (Unbalanced stereo)
Communication Interface
1 x RS-232 In: 8-pin mini DIN, Max Distance 30m, Protocol: VISCA/Pelco-D
1 x RS-232 Out: 8-pin mini DIN, Max Distance 30m, Protocol: VISCA daisy chaining only
IR
4 x IR addresses, Max Distance 9m (30ft)
Power Jack
JEITA type (DC IN 12V)
IP Video Features
Video Compression
NDI®|HX / H.264 / H.265
Video Stream
Two (2) IP video output streams available
First Stream Resolutions
1080p / 720p / 704x480(D1) / 320x240(QVGA) –60/50/30/25
Second Stream Resolutions
704x480(D1) / 320x240(QVGA) –60/50/30/25
Video Bit Rate
0Kbps ~ 16383 Kbps
Bit Rate Type
Constant or Variable bit rate
Frame Rate
50Hz: 1 ~ 50 FPS, 60Hz: 1 ~ 60 FPS
Audio Compression
AAC
Audio Bit Rate
16Kbps, 32Kbps, 48Kbps
Supported Protocols
TCP/IP, HTTP, RTSP, RTMP, DHCP, Multicast, NDI®, etc.
Generic Specifications
Input Voltage
DC 12V / PoE (802.3at)(optional)
Current Consumption
<15W
Operating Temperature
32°F ~ 104° (0°C ~ +40°C)
Storage Temperature
-4°F ~ 140° (-20°C ~ +60°C)
Humidity Range
10% RH ~ 90% RH
Size in. (W x D x H)
8.31” x 5.47” x 8.19” | 211mm x 139mm x 208mm
Camera Weight
2.43lbs | 1.1kg

8
Rev 1.0 9/21
NDI®|HX with NDI®4 Connection
The NDI®|HX connection allows you to connect and control your camera through any NDI compatible hardware or software on
your Local Area Network. Once your camera is setup on a LAN, you can utilize the NDI®|HX connection.
Two Easy Steps:
1. Download and install the latest NDI®|HX Tools.
2. Select your camera within the NDI®|HX compatible device.
Step 1. Download and install the latest NDI®|HX Tools from https://www.ndi.tv/tools.
Step 2 (Optional). Configure your camera settings from the NDI Config tab in the camera’s web interface.
Step 3. Select your camera. The NDI feed will utilize the camera’s device friendly name.
NewTek®, NDI®, NDI®4 & NDI®|HX are all registered trademarks by NewTek®.
Please note that your NDI License key is non-transferrable.

9
Rev 1.0 9/21
Tracking Software
Device Management Interface
1
Device Management interface
7
*Selected* device within Device Management
2
Video Configuration interface
8
Add selected camera from Online Device section
3
View & Download video and / or photos.
9
Modify network settings of selected Online Device
4
Manually add device using camera info
10
Refresh Online Device list
5
Delete selected device from Device Management list
11
Start / Stop searching for Online Devices
6
Configure network settings of camera
12
*Unselected* device from Online Devices section

10
Rev 1.0 9/21
Connecting the Camera
To connect the camera to the Tracking Software, you will first need to make sure it is on the same network range as your PC.
Once confirmed, choose your method of connection below. If your camera is not on the same network range as your PC, follow
the instructions in the Assigning an IP Address section below.
Network Search –The Tracking Software is able to search your network for any HuddleView, SimplTrack2, or SimplTrack Lite
cameras. Simply click the “Start Search” button from the Online Devices section to begin the search. Once a camera is discovered,
you may click “+ Add to Client” to add it to the Device Management section.
Manually Adding –Alternatively, you can manually add a camera to the Device Management section. To do this, click the “+ Add
Device” button from the Device Management section. From here, select “Add by IP” or “Add by Import” to determine the
connection method.
Add by IP –To add a camera by its IP address, you will need to know the camera’s IP address & port number. If the
camera has authorization enabled, you will also need the connection username and password (“admin” by default).
Add by Import –To add a camera by import, you will need to have an import file already on hand. To produce this
import file, click the “+ Add Device” button, then click “Add by Import”. From here, click the “Export Model” button to
produce an import.csv file, that can be used by the Tracking Software.
Configuring the Camera
To configure a camera, you will need to connect it to the Device Management section using the methods above. From there,
select the camera you wish to configure, then select “Remote Configuration”.
Streaming –The Streaming tab allows you to adjust the camera’s Real Time Streaming Protocol settings.
•Stream Type –RTSP stream dropdown selector.
oOptions include: Main Stream, Sub Stream, Stream 3, &
Stream 4
•Resolution –RTSP resolution.
oMain Stream resolutions: 1080p, 720p, 704x480(D1), &
320x240(QVGA)
oSub Stream resolutions: 720p, 704x480(D1), &
320x240(QVGA)
oStream 3 resolutions: 720p, 704x480(D1), &
320x240(QVGA)
oStream 4 resolutions: 704x480(D1) & 320x240(QVGA)
•Video Rate Type –Adjust the video rate.
oOptions include: CBR & VBR
•Max Rate (Kbps) –Adjust the RTSP stream’s maximum bit rate.
oOptions include: 1 ~ 16383
•Frame Rate –Adjust the RTSP stream’s frames per second.
oMain, Stream 3, & Stream 4 options include: fullfps, 1, 2, 4, 6, 8, 10, 12, 15, 16, 18, 20, 22, 25, 30, 50, & 60
oSub Stream options include: fullfps, 1, 2, 4, 6, 8, 10, 12, 15, 16, 18, 20, 22, 25, & 30
•Key Frame Interval –Adjust the RTSP stream’s I-Key Frame Interval
oOptions include: 1 ~ 120 (we recommend setting this value to double the stream’s frame rate)
•Video Coding Type –Adjust the Video Coding type.
oOptions include: H.264 & MJPEG
•Encode Level –Adjust the level at which the video is encoded.
oOptions include: Base, Main, & High

11
Rev 1.0 9/21
•Channels –Adjust the audio channel of the embedded audio.
oOptions include: Mono & Stereo
•Encode Type –Adjust the Audio Encoding type of the embedded audio.
oOptions include: AAC
•Sample Rate –Adjust the audio sample rate of the embedded audio.
oOptions include: 16KHz, 44.1KHz, & 48KHz
•Audio Rate –Adjust the audio rate of the embedded audio.
oOptions include: 48Kbps, 64Kbps, 96Kbps, & 128Kbps
•Input Pin –Adjust the embedded audio connection type.
oOptions include: LineIn & MicIn
•Volume Slider –Adjust the audio level of the embedded audio.
oRange: 0 ~ 100
Network –The Network tab allows you to adjust the camera’s network settings.
•Connect With –Adjust the method of network connection.
oOptions include: DHCP & Static IP
Note: While in DHCP, you can only adjust the RTSP Port &
App Port.
•IP Address –Displays the IP Address of your camera.
oDefault value: DHCP; or 192.168.1.180 (Fallback IP
address).
•Mask –Adjust the camera’s Subnet Mask.
oDefault Value: 255.255.255.0
•Gateway –Adjust the camera’s gateway.
oDefault value: 192.168.1.1
•DNS 1 –Adjust the camera’s DNS 1.
oDefault value: 0.0.0.0
•DNS 2 –Adjust the camera’s DNS 2.
oDefault value: 0.0.0.0
•RTSP Port –Adjust the camera’s RTSP port number.
oDefault value: 554
•App Port –Adjust the camera’s App Port number.
oDefault value: 5000
RTMP –The RTMP tab allows you to adjust the camera’s Real Time Multimedia Protocol settings for up to 4 streams.
•RTMP # Checkbox –Enable / Disable the corresponding RTMP
stream.
•Stream # Dropdown –Select the stream you would like to
utilize.
oOptions include: Main Stream, Sub Stream, Stream 3, &
Stream 4.
•RTMP Text Field –This field allows you to input the RTMP
server address and stream key you wish to stream to.

12
Rev 1.0 9/21
Protocol –The Protocol tab allows you to adjust the camera’s control settings.
•Enable –Enable / Disable 3rd party control to the camera.
oOptions include: Enable & Disable
•Protocol –Adjust the control protocol method.
oOptions include: TCP & UDP
•Camera As –Adjust whether the camera acts as a server or a
controllable device (Client).
oOptions include: Server & Client
•IP –Adjust the IP address to which the camera sends commands
to (Server Mode).
oDefault value: 0.0.0.0
•Port –Adjust the control port of the device the camera sends
commands to (Server mode).
oDefault value: 5678
Upgrade –The Upgrade tab allows you to apply firmware updates to the camera.
•Upgrade File –Browse your computer for the firmware
upgrade file.
•File Version –Displays the firmware version of the selected file.
•Camera Version –Displays the firmware version of the
connected camera.
•Upgrade Status –Displays the status of the firmware upgrade.
UN / PW –The UN / PW tab allows you to adjust the camera’s name & password, as well as adjust the NTP settings.
•Old Password –Type the old password into this field in order to
change the camera password.
oDefault value: “admin”
•New Password –Type the new password into this field in order
to change the camera password.
Note: Passwords must contain only letters and numbers. Special
characters are not applicable.
Max length: 15 characters.
•Confirm –Type the new password into this field again in order
to change the camera password.
•Camera Name –Adjust the camera’s friendly name.
oDefault value: SimplTrack Lite
•Reboot / Reset Buttons –Reboot or Reset the camera.
oReboot Button –Turns camera off and on.
oReset Button –Sets camera to factory default settings.
•Local Time –Displays the camera’s local time.

13
Rev 1.0 9/21
•Display Time Checkbox –Enable / Disable whether time is displayed in video feed.
oDefault value: Off (unchecked).
•Time Format –Adjust the format in which time is displayed.
oOptions include: YYYY-MM-DDDD hh:mm:ss, MM-DD-YYYY hh:mm:ss, DD-MM-YYYY hh:mm:ss, YYYY-MM-DD
week hh:mm:ss, MM-DD-YYYY week hh:mm:ssDD-MM-YYYY week hh:mm:ss
•Enable NTP Checkbox –Enable / Disable the Network Time Protocol.
oDefault value: Off (unchecked).
•TimeZone –Adjust the time zone for your location.
oRange: +14:00 ~ -12:00
•NTP Server –Type in the NTP Server address you wish to utilize, then click “OK”
oDefault value: (blank)
NDI –The NDI tab allows you to adjust the NDI protocol settings.
•NDI Receive Group –The NDI®Receive Group allows you to
limit which users on your LAN can see the NDI®source
oDefault value: Public
For best results, the Receive Group should remain
“Public”. Once the Receive Group is changed, you will
need to join the Receive Group through NDI®Access
Manager.
•NDI Local Device Name –The friendly name the camera will
show up as within NDI®devices.
oDefault value: SimplTrack Lite
For best results, give all ‘like’ cameras the same Local
Device Name. e.g. “Tracking cams” or “Framing Cams”
•NDI Local Device Channel (PTZ) –The channel name the camera
will utilize within NDI®devices.
oDefault value: PTZ
For best results, set a unique Local Device Channel for each camera. e.g. “Wide Shot” or “Tight Shot”
•NDI Local Device Channel (Ref) –This field is unused on this camera as it does not have a reference camera.
•Enable NDI®Discovery Server Checkbox –Enable / Disable connectivity to a NDI®Discovery Server.
oDefault value: Off (unchecked)
•NDI®Discovery Server Textbox –This field allows you to define the IP address of the NDI®Discovery Server.
oDefault value: (blank)
For information on the NDI Discovery Server, check out https://support.newtek.com/hc/en-us/articles/218109477-NDI-
Discovery-and-Registration.
Removing the Camera
To remove a camera, you will need to select it from the Device Management section. From there, click the “Delete” button, then
select “OK”.

14
Rev 1.0 9/21
Main View Interface
1
Cameras connected to Device Management
7
Preset control
2
Camera video feed
8
Enable / Disable tracking & Tracking Status
3
PC performance & time
9
Open Tracking Settings
4
Pan, Tilt, & OSD Menu control
10
Connected camera resolution & frame rate
5
Lens control
11
Snapshot, Enable / Disable recording, & Enable / Disable audio
6
OSD Menu Enter / Return
12
Stop video, full screen, & gallery view
Controlling the Camera
The Main View can connect and control up to 4 cameras simultaneously. Right-click a camera from the Device Management
section and select the RTSP feed you wish to view. From there, you have full control over Pan, Tilt, Zoom, Focus, Iris, Presets, the
On Screen Display Menu & Tracking Settings. To further cater the camera to your environment, click the Settings button.

15
Rev 1.0 9/21
Tracking Settings
The SimplTrack Lite is truly plug and play tracking camera that does not require much set up before use. The camera only
requires the Preset 0 & Preset 1 positions set, and the Face Height positioned properly.
Preset Zones
Preset Zones allow the camera to temporarily halt tracking once the subject enters a defined area. Once they enter that area, the
camera will call a preset to frame the subject in that Preset Zone. This allows the subject to move around the stage and be
framed when they enter the Preset Zone. Once the subject leaves that Preset Zone, the camera resumes tracking the subject
normally.
There are 4 Preset Zones: 84-87 for Zones 1-4. You must set up Preset 0 as the Stage and Preset 1 as the subject. The subject
must be in the view during the setup for the focus to be correct.
Each Preset Zone has a specific preset number associated with it:
•Preset Zone 1 = preset 84
•Preset Zone 2 = preset 85
•Preset Zone 3 = preset 86
•Preset Zone 4 = preset 87
To set up a Preset Zone:
1. Open the tracking software and select the Main View tab.
2. Have the subject move to the desired Preset Zone location.
3. Position the camera view in the location you'd like the corresponding Preset Zone to move to.
4. "Set" the corresponding preset number (84 ~ 87) using the Presets section of the Main View tab.
a. You can double check that the presets are in the desired location by "Calling" the corresponding preset
number.
5. Enable tracking and allow the subject to enter the Preset Zone.

16
Rev 1.0 9/21
Basic 2 –The Basic 2 tab allows you to adjust the tracking & zoom settings of the camera.
Senior 1 & Senior 2 tabs are not usable on the SimplTrack Lite.

17
Rev 1.0 9/21
Remote Playback
Remote Playback is not usable on the SimplTrack Lite.
Video Recording & Screenshot
You can record short videos and take screenshots using a secondary UVC recording software and save those files directly to your
camera. To do so, connect the SimplTrack Lite to your PC, then open the UVC Camera SFX program.
To take a screenshot, click the “Screenshot” button. Once the screenshot is finished being taken, you’ll be greeted with a
“Screenshot Successful” notification.
To record a short video to the camera, click the “Export” button. Once the video is finished being recorded, a new File Explorer
window will open under a new “USB Drive” directory. This USB Drive is the camera’s memory. While accessing the camera’s
memory, you will be unable to use its video capabilities. To return the SimplTrack Lite to a usable state, power it off and back on.

18
Rev 1.0 9/21
In this example, “snap_0.jpg” is the photo file, and “video_0.h264” is the video file. View the video file within VLC Media Player for
best results.

19
Rev 1.0 9/21
IR Remote Controller Guide
To perform a command on the IR remote, press and release
the button. A special note will be given when you can press
and hold the button.
To perform a shortcut, press the buttons in a sequence
when a right-angle bracket is shown (>).
1. Pan & Tilt Control
Tilt Up: Press [ ]
Tilt Down: Press [ ]
Pan Left: Press [ ]
Pan Right: Press [ ]
Press and hold the Up / Down / Left / Right buttons to
continue panning or tilting. The camera stops as soon as
the button is released, or the limit is reached.
2. Zoom Control
Zoom In: Press [+] Fast or Slow
Zoom Out: Press [-] Fast or Slow
Press and hold the “-“ or “+” button to continue zooming in
or out. The zooming stops as soon as the button is released,
or the limit is reached.
3. Focus Control
Auto Focus Mode: Press [AUTO]
Manual Focus Mode: Press [MANU]
Focus Near: Press [NEAR]
Focus Far: Press [FAR]
Press and hold the “Near“ or “Far” button to continue
focusing in or out. The focusing stops as soon as the button
is released, or the limit is reached.
4. AF Trigger, Iris Reset, & Backlight Comp Controls
Trigger AF on Zoom: Press [TRIG FOCUS]
Reset Iris: Press [IRIS RESET]
Backlight Compensation: Press [BACKLIGHT]
5. Presets –Setting, Calling, and Clearing
Set Preset: Press preset number > [SET]
Call Preset: Press preset number > [CALL]
Clear Preset: Press preset number > [CLEAR]
Cancel Preset: Press [C]
Note: No action will be executed when calling a preset that has
not yet been saved.
Other manuals for SimplTrack Lite
1
This manual suits for next models
2
Table of contents
Other HuddleCamHD IP Camera manuals

HuddleCamHD
HuddleCamHD conference camera User manual

HuddleCamHD
HuddleCamHD 3X Manual

HuddleCamHD
HuddleCamHD SimplTrack 2 Operating and maintenance instructions

HuddleCamHD
HuddleCamHD 10XA User manual

HuddleCamHD
HuddleCamHD HD Color Video Camera User manual

HuddleCamHD
HuddleCamHD HuddleCamHD 18x User manual

HuddleCamHD
HuddleCamHD 3X Gen2 User manual

HuddleCamHD
HuddleCamHD HuddleCamHD 10X 720p User manual

HuddleCamHD
HuddleCamHD SimplTrack Lite User manual

HuddleCamHD
HuddleCamHD HuddleCam-HD 12x User manual