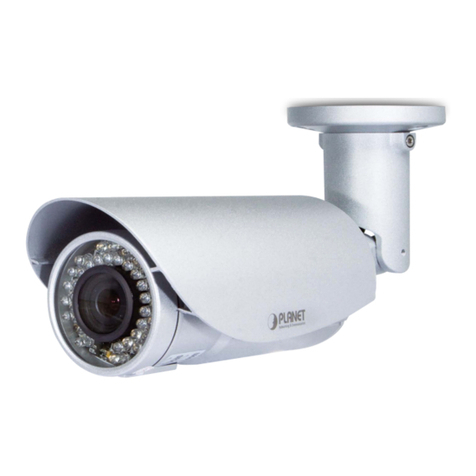
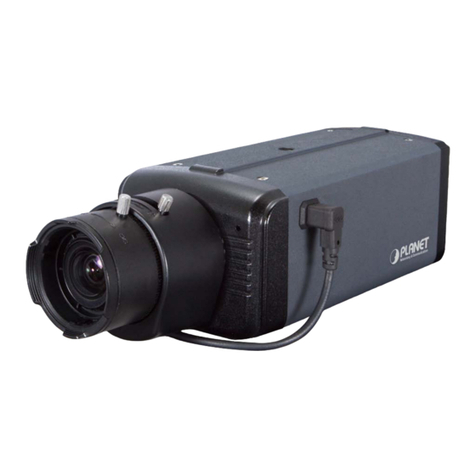
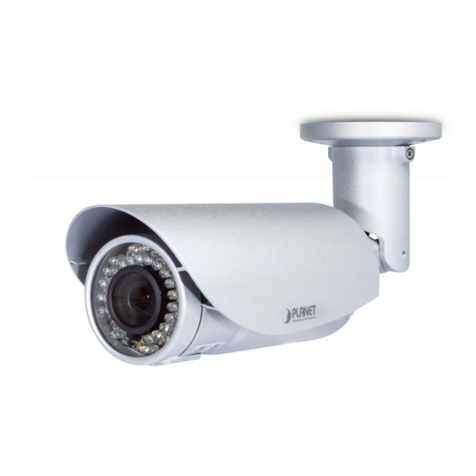
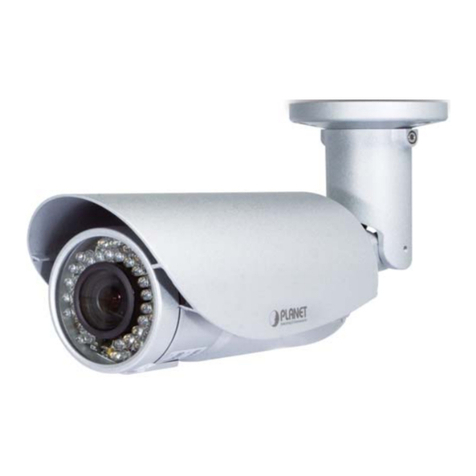
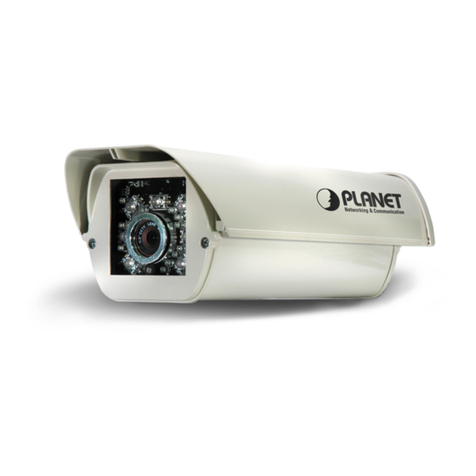
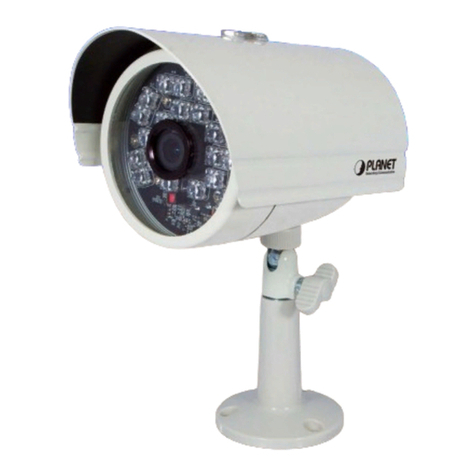
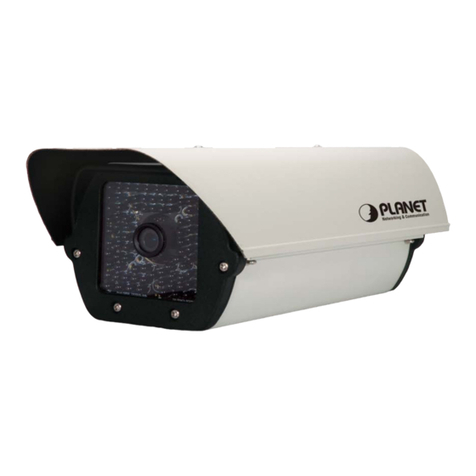
Planet ICA-HM316 User manual

2 Mega-Pixel Outdoor
IR IP Camera
IC
A
-HM316 / IC
A
-HM316W

2Mega‐PixelOutdoorIRIPCamera
ICA‐HM316/ICA‐HM316W
2
Copyright
Copyright ©2013 by PLANET Technology Corp. All rights reserved. No part of this
publication may be reproduced, transmitted, transcribed, stored in a retrieval system, or
translated into any language or computer language, in any form or by any means, electronic,
mechanical, magnetic, optical, chemical, manual or otherwise, without the prior written
permission of PLANET.
PLANET makes no representations or warranties, either expressed or implied, with respect
to the contents hereof and specifically disclaims any warranties, merchantability or fitness for
any particular purpose. Any software described in this manual is sold or licensed "as is".
Should the programs prove defective following their purchase, the buyer (and not PLANET,
its distributor, or its dealer) assumes the entire cost of all necessary servicing, repair, and
any incidental or consequential damages resulting from any defect in the software. Further,
PLANET reserves the right to revise this publication and to make changes from time to time
in the contents hereof without obligation to notify any person of such revision or changes.
All brand and product names mentioned in this manual are trademarks and/or
registered trademarks of their respective holders.
Federal Communication Commission Interference Statement
This equipment has been tested and found to comply with the limits for a Class B digital
device, pursuant to Part 15 of FCC Rules. These limits are designed to provide reasonable
protection against harmful interference in a residential installation. This equipment generates,
uses, and can radiate radio frequency energy and, if not installed and used in accordance
with the instructions, may cause harmful interference to radio communications. However,
there is no guarantee that interference will not occur in a particular installation. If this
equipment does cause harmful interference to radio or television reception, which can be
determined by turning the equipment off and on, the user is encouraged to try to correct the
interference by one or more of the following measures:
1. Reorient or relocate the receiving antenna.
2. Increase the separation between the equipment and receiver.
3. Connect the equipment into an outlet on a circuit different from that to which the receiver
is connected.
4. Consult the dealer or an experienced radio technician for help.
FCC Caution
To assure continued compliance. (example-use only shielded interface cables when
connecting to computer or peripheral devices). Any changes or modifications not expressly
approved by the party responsible for compliance could void the user’s authority to operate
the equipment.
This device complies with Part 15 of the FCC Rules. Operation is subject to the Following
two conditions: ( 1 ) This device may not cause harmful interference, and ( 2 ) this Device
must accept any interference received, including interference that may cause undesired
operation.
Federal Communication Commission (FCC) Radiation Exposure Statement
This equipment complies with FCC radiation exposure set forth for an uncontrolled
environment. In order to avoid the possibility of exceeding the FCC radio frequency
exposure limits, human proximity to the antenna shall not be less than 20 cm (8 inches)
during normal operation.

2Mega‐PixelOutdoorIRIPCamera
ICA‐HM316/ICA‐HM316W
Safety
This equipment is designed with the utmost care for the safety of those who install and use it.
However, special attention must be paid to the dangers of electric shock and static electricity
when working with electrical equipment. All guidelines of this and of the computer
manufacture must therefore be allowed at all times to ensure the safe use of the equipment.
CE Mark Warning
This is a Class B product. In a domestic environment, this product may cause radio
interference, in which case the user may be required to take adequate measures.
WEEE Regulation
3
To avoid the potential effects on the environment and human health as a result of
the presence of hazardous substances in electrical and electronic equipment, end
users of electrical and electronic equipment should understand the meaning of
the crossed-out wheeled bin symbol. Do not dispose of WEEE as unsorted
municipal waste and have to collect such WEEE separately.
Revision
User’s Manual for PLANET 2Mega-Pixel Outdoor IR PoE / Wireless IP Camera
Model: ICA-HM316 / ICA-HM316W
Rev: 2.00 (January. 2013)
Part No. EM-ICAHM316 / ICA-HM316W

2Mega‐PixelOutdoorIRIPCamera
ICA‐HM316/ICA‐HM316W
4
Table of Content
Chapter 1. Product Introduction .................................................................................... 6
1.1 Package Contents ............................................................................................. 6
1.2 Product Description........................................................................................... 6
1.3 Features .............................................................................................................. 7
1.4 Product Specification......................................................................................... 8
Chapter 2. Hardware Interface .................................................................................... 10
2.1 Physical Description........................................................................................ 10
2.1.1 Identification of ICA-HM316 cable..................................................... 10
2.1.2 ICA-HM316 I/O Control Instruction.................................................... 11
2.2 Hardware Installation ...................................................................................... 13
2.2.1 Physical Installation ............................................................................. 13
Chapter 3. Initial Utility Installation.............................................................................. 15
3.1 Search and Configure Network by PLANET IP Installer ........................... 15
3.2 Setup ActiveX to use the Internet Camera .................................................. 20
3.2.1 Internet Explorer 6 for Windows XP .................................................. 20
3.2.2 Internet Explorer 7 for Windows XP .................................................. 21
3.2.3 Internet Explorer 7 for Windows Vista............................................... 22
3.3 Using UPnP of Windows XP or Vista......................................................... 23
3.3.1 Windows XP.......................................................................................... 23
3.3.2 Windows Vista ...................................................................................... 28
Chapter 4. Installation Guide ....................................................................................... 31
4.1 System Requirements..................................................................................... 31
4.2 Before You Begin............................................................................................... 31
4.2.1Connecting to Internet Camera........................................................... 31
Chapter 5. Web Configuration for Live View................................................................ 34
5.1 Live View........................................................................................................... 34
5.2 Configuration .................................................................................................... 37
Chapter 6. Camera configuration.................................................................................. 38
6.1 System............................................................................................................... 38
6.1.1 System Information .............................................................................. 38
6.1.2 User Management................................................................................ 40
6.1.3 System Update ..................................................................................... 41
6.2 Network ............................................................................................................. 42
6.2.1 IP Setting ............................................................................................... 42
6.2.2 PPPoE.................................................................................................... 43
6.2.3 DDNS ..................................................................................................... 43
6.2.4 Mail & FTP & SAMBA.......................................................................... 47
6.2.5 Wireless Setting.................................................................................... 47
6.3 A/V Setting ........................................................................................................ 50
6.3.1 Image Setting........................................................................................ 50
6.3.2 Video Setting......................................................................................... 50
6.3.3 Audio....................................................................................................... 53
6.4 Event List .......................................................................................................... 54
6.4.1 Event Setting......................................................................................... 54
6.4.2 Schedule................................................................................................ 55
6.4.3 I/O Setting.............................................................................................. 56
6.4.4 Log List................................................................................................... 58
Appendix A: Factory Default ......................................................................................... 59

2Mega‐PixelOutdoorIRIPCamera
ICA‐HM316/ICA‐HM316W
5
Appendix B: PING IP Address...................................................................................... 60
Appendix C: 3GPP Access ........................................................................................... 61
Appendix D: Bandwidth and Video Size Estimation ................................................. 62
Appendix E: Planet DDNS Application........................................................................ 63
Appendix F: Configure Port Forwarding Manually .................................................... 64
Appendix G: Troubleshooting & Frequently Asked Questions ................................ 67

2Mega‐PixelOutdoorIRIPCamera
ICA‐HM316/ICA‐HM316W
6
Chapter 1. Product Introduction
1.1 Package Contents
The package should contain the followings:
zIP Camera Unit x 1
zPower Adapter x 1
zScrew package x 1
zStand x 1
z5dbi Antenna x 1 (ICA-HM316W only)
zUser’s Manual CD-ROM x 1
zQuick Installation Guide x 1
NOTE: 1. If any of the above items are missing, please contact your dealer
immediately.
2. Using the power supply that is not the one included in Internet Camera
packet will cause damage and void the warranty for this product.
1.2 Product Description
Superb UXGA Quality with outdoor-ready for Professional Surveillance
The PLANET ICA-HM316 / ICA-HM316W Network Camera with IR Illuminator is a high
resolution camera for round-the-clock surveillance over IP networks. This camera supports
H.264, MPEG-4, and JPEG compression formats and delivers excellent picture quality in 2
Mega-Pixel resolutions at 15 frames per second (fps). The ICA-HM316W provides users High
performance 802.11b/g/n connectivity and secured wireless transmission up to 150Mbps
through the IEEE 802.11b/g/n wireless technology and WEP / WPA encryptions. The IP66-rated
housing protects the camera body against rain and dust and ensures operation under extreme
weather conditions, which makes it an ideal solution for outdoor applications, e.g. surveillance of
buildings, roads, parking areas, garages, railway stations and airports.
Day & Night functionality
To adapt to constantly changing lighting conditions, the ICA-HM316 / ICA-HM316W come with a
removable IR-cut filter and built-in IR illuminators, which enables the camera to provide color
video when there is sufficient light, and black/white video in dark conditions. The camera is able
to maintain clear images 24 hours a day.
Exceptional Image quality with Varifocal
With 3.6~16mm Varifocal lens, the ICA-HM316 / ICA-HM316W meet various demand of
installations, for instance, traffic monitoring on two more lanes or focus on one specified lane.
The result is that an extremely clear and exquisite picture quality.
Advanced event management
The ICA-HM316 / ICA-HM316W also supports a number of advanced features that give the
camera increased flexibility and capabilities, including Auto-iris for improve the image quality to

2Mega‐PixelOutdoorIRIPCamera
ICA‐HM316/ICA‐HM316W
7
avoid over exposure, AV out for perform the two-way audio function and inputs/outputs for
connecting external devices such as door sensors and relays to activate light or close doors.
Flexible installation and Power functionality
The ICA-HM316 / ICA-HM316W incorporate Power over Ethernet supplies power to the camera
via the network, eliminating the need for power cables and reducing installation costs. The
ICA-HM316 is ONVIF-compliant and therefore interoperable with other manufacturer’s products,
it’s also included 64-CH central management software; the ICA-HM316 / ICA-HM316W is
indisputably the top choice for reliable and high performance surveillance.
1.3 Features
¾Camera
■1/3.2” 2MP progressive scan CMOS sensor
■3.6~16 mm Vari-focal, DC Auto-iris Lens
■0 lux Minimum Illumination at F1.2
■Maximum resolution 1600 x 1200
■Removable IR-cut Filter for Day & Night Function
¾Video / Audio
■H.264 / MPEG-4 and M-JPEG video compression simultaneously
■Simultaneous multi-stream support
■Up to 30fps for 1280 x 720 and 15fps for 1600 x 1200 resolutions
■Two-way audio support with enhanced audio quality
¾Network and Configuration
■Compliant with IEEE 802.3af PoE interface for flexible deployment (ICA-HM316 only)
■IEEE 802.11b/g/n wireless LAN with WEP and WPA encryption (ICA-HM316W only)
■Auto MDI/MDI-X supported
■RTSP / UPnP / 3GPP / HTTPS protocols selectable
¾Easy Installation & Management
■Onvif compliant for interoperability
■Built-in 35 IR Illuminators, effective up to 25 Meters
■IP66 outdoor classifications for rigorous environment
■Built-in Samba client for NAS
■3GPP for 3G mobile remote applications
■Digital Input/Outputs for integration with sensors and alarms
■Cam Viewer 3 Central management software supported

2Mega‐PixelOutdoorIRIPCamera
ICA‐HM316/ICA‐HM316W
8
1.4 Product Specification
Model ICA-HM316 ICA-HM316W
Camera
Image Device 1/3.2” 2 Mega-Pixel progressive scan CMOS sensor
Lens Vari-focal 3.6~16 mm, DC Auto-iris
Mechanical IR Cut Filter
Angle of view : horizontal: 20.8 ~ 75.4 Degree / vertical: 15.7 ~ 54.9 Degree
Min Illuminator 0 lux @ F1.2
IR Illumination LED IR LED*35, 850nm
Built-in IR illuminators, Effective up to 25 meter
Effective Pixels 1600 x 1200 pixels
Image
Video Encoder H.264 / MPEG-4 / M-JPEG
Video Profile
H.264: UXGA / 720p / SXGA / VGA / QVGA / QCIF
M-JPEG: UXGA / 720p / SXGA / VGA / QVGA
MPEG-4: QCIF (Only for 3GPP)
Frame Rate Up to 30fps for all resolutions
Image Setting Brightness, sharpness, contrast, AGC, Night Mode
Text, time and date overlay
Streaming Simultaneously multi-profile streaming
M-JPEG streaming over HTTP
Supports 3GPP mobile surveillance
Controllable frame rate and bandwidth
Constant and variable bit rate (MPEG-4 / H.264)
Audio
Audio Streaming Two-way Audio
Audio Encoder RTSP:G.711
3GPP:AMR
Microphone External microphone input
Audio Output Phone Jack
Network and Configuration
Network Standard IEEE 802.3 10Base-T
IEEE 802.3u 100Base-TX
IEEE 802.3 10Base-T
IEEE 802.3u 100Base-TX
IEEE 802.11b/g/n
Antenna connector - 5dBi Dipole Antenna
Frequency - 2.4GHz ~ 2.4835GHz
RF Transmit Power - OFDM: 14 dbm
CCK: 17 dbm
Receiver Sensitivity - 11b
1M: -90 dbm 11M: -85 dbm

2Mega‐PixelOutdoorIRIPCamera
ICA‐HM316/ICA‐HM316W
9
11n (BW20)
MCS0: -85 dbm MCS7: -67 dbm
11n (BW40)
MCS0: -84 dbm MCS7: -64 dbm
Data Rate -
IEEE 802.11b Standard Data Rates: 1,
2, 5.5 and 11Mbps
IEEE 802.11g Standard Data Rates: 6,
9, 12, 18, 24, 36, 48, 54Mbps
IEEE 802.11n Standard Data Rates:
Legacy and High Throughput Modes,
supports 20 / 40MHz Bandwidth
MCS0~7 (150Mbps PHY Rate Rate)
Supported Protocols IPv4, TCP, UDP, HTTP, SMTP, FTP, NTP, DNS, DDNS, DHCP, UPnP, RTSP,
RTP, RTCP, PPPoE, 3GPP, ICMP
Security Password protection, user access log WEP 64/128, WPA, WPA2, TKIP, AES
Users 10 simultaneous unicast users
System Integration
Application Programming
Interface
Open API for software integration
SDK
Alarm Triggers Intelligent video motion detection and external input
3-zone video motion detection
Alarm Events
File upload via FTP, email and SAMBA.
External output activation
Configurable Pre/Post alarm buffering
General
Power Supply 12V DC, 1A
IEEE 802.3af Class 0
12V DC, 1A
Power Consumption PoE Max: Max 10.8 W while IR LED
ON / Max 7.7 W while IR LED OFF
IR on: 6.24W
IR off: 4.44W
Housing Weather-proof IP66-rated housing
Operating Temperature -20 ~ 50 degree C
Operating Humidity 20 ~ 80% (non-condensing)
Weight 958g 905g
Dimension (Φx L) 83mm x 180 mm
Emission CE, FCC
Connectors
10/100 Mbps Ethernet, RJ-45
DC power jack
Terminal block for 1 alarm input , 1
output and factory default reset
External MIC input
Audio out
Composited video out
10/100 Mbps Ethernet, RJ-45
Optional RP-SMA Type
DC power jack
Terminal block for 1 alarm input , 1
output and factory default reset
External MIC input
Audio out
Composited video out
11g
6M: -87 dbm 54M: -70 dbm

2Mega‐PixelOutdoorIRIPCamera
ICA‐HM316/ICA‐HM316W
Chapter 2. Hardware Interface
2.1 Physical Description
2.1.1 Identification of ICA-HM316 cable
1. RJ-45 LAN socket: Connect to PC or Hub/Switch.
For connect to 10Base-T Ethernet or 100Base-TX Fast Ethernet cabling. This Ethernet port built
N-Way protocol can detect or negotiate the transmission speed of the network automatically.
Please use CAT-5 cable to connect the Network Camera to a 100Mbps Fast Ethernet network
switch or hub.
2. Power Jack: The input power is DC 12V.
NOTE: ONLY use package power adapter supplied with the Internet. Otherwise, the
product may be damaged.
3. I/O Control Instruction
I/O terminal connector – used in application, for e.g., motion detection, event triggering, alarm
notifications
4. Video Output
The internet camera also provides composite video output. User can use BNC video cable to
connect the internet camera with a TV monitor or VCR.
5. MIC in (audio in)
Connect a microphone to the network camera.
6. Line out (audio out)
Connect a loud speaker to the network camera. This is for voice alerting and two-way audio.
10

2Mega‐PixelOutdoorIRIPCamera
ICA‐HM316/ICA‐HM316W
2.1.2 ICA-HM316 I/O Control Instruction
1. Digital Input (GND + Alarm)
An alarm input for connecting devices that can toggle between an open and closed circuit, for
example: PIRs, door/window contacts, glass break detectors, etc. When a signal is received the
state changes and the input becomes active.
2. Relay output (COM +N.O.) / (COM+N.C.)
An output to relay switch, for example: LEDs, Sirens, etc
3. Digital Input/Alarm Input
1) GND (Ground): Initial state is LOW
2) Alarm: Max. 50mA, DC 3.3V
4. Relay Output
1) N.C. (Normally Close): Max. 1A, 24VDC or 0.2A, 110~240VAC
2) COM: (Common)
3) N.O. (Normally Open): Max. 1A, 24VDC or 0.2A, 110~240VAC
Relay
1. Digital Input connection
11

2Mega‐PixelOutdoorIRIPCamera
ICA‐HM316/ICA‐HM316W
2. Relay Output Connection
Or
12

2Mega‐PixelOutdoorIRIPCamera
ICA‐HM316/ICA‐HM316W
13
2.2 Hardware Installation
2.2.1 Physical Installation
1. Connect an Ethernet cable
Connect the LAN cable on the camera to the network device (hub or switch).
NOTE: If there has an IEEE802.3af PoE switch in your network, you can connect the
camera LAN cable to this PoE switch to obtain power. The power adapter is
unnecessary when Internet camera is connected to a PoE switch.
2. Attach the power supply
Plug in power adapter and connect to power source. After power on, the camera will start to
operate.
NOTE: 1. Only use the power adapter supplied with Internet camera Otherwise, the
product may be damaged.
2. The power adapter is unnecessary when Internet camera is connected to a
PoE switch. Otherwise, the product may be damaged when Internet camera is
connected to a PoE switch and power adapter simultaneously.
3. Attach BNC connector
Connect the video BNC connector to a monitor set if necessary check camera viewing angle
and focus.
4. Attach Speaker to camera (option)
If user needs not only video stream but also audio stream, then the speaker should be
attached to camera.

2Mega‐PixelOutdoorIRIPCamera
ICA‐HM316/ICA‐HM316W
5. PoE (Power Over Ethernet)
Power over Ethernet (PoE) is a technology that integrates power into a standard LAN
infrastructure. It enables power to be provided to the network device, such as an IP phone or
a network camera, using the same cable as that used for network connection. It eliminates
the need for power outlets at the camera locations and enables easier application of
uninterruptible power supplies (UPS) to ensure 24 hours a day, 7 days a week operation.
14

2Mega‐PixelOutdoorIRIPCamera
ICA‐HM316/ICA‐HM316W
15
Chapter 3. Initial Utility Installation
This chapter shows how to quick set up your H.264 camera. The camera is with the default
settings. However to help you find the networked camera quickly the windows utility PLANET IP
Installer can search the cameras in the network that shall help you to configure some basic setting
before you started advanced management and monitoring.
1. Insert the bundled CD into the CD-ROM drive to launch the auto-run program. Once
completed, a welcome menu screen will appear.
2. Click the “PLANET IPInstaller” hyperlink; you will see the dialog box as below.
NOTE: If the welcome screen does not appear, click “Start” at the taskbar. Then, select
“Run” and type “D:\Utility\PLANETIPinstaller\PLANETIPinstaller.exe”, assume D
drive is your CD-ROM drive.
When you installed the camera on a LAN environment, you may execute PLANET IP Installer to
discover camera’s IP address and set up related parameters in the camera.
3.1 Search and Configure Network by PLANET IP Installer
When you installed the Camera on a LAN environment, you have two easy ways to search your
Cameras by PLANET IP Installer or UPnP discovery. Here is the way to execute PLANET IP
Installer to discover Camera’s IP address and set up related parameter in a Camera.
Search and Configure Network
1. OS: Windows XP SP2 or above. If the following “Windows Security Alert” popup, please click
“Unblock”.

2Mega‐PixelOutdoorIRIPCamera
ICA‐HM316/ICA‐HM316W
2. The GUI of IP Installer is as follows (Default IP: 192.168.0.20).
(1) IP Installer will search all IP Cameras connected on LAN. The user can click “Search
vice” to search again.De
16

2Mega‐PixelOutdoorIRIPCamera
ICA‐HM316/ICA‐HM316W
17
of ,
the
(2) Click one of IP Cameras listed on the left side of IP Installer, then the network configuration
that IP Camera will be listed on the right side. If parameters changed, click on “Submit”. Then
network configuration will be changed. Just click “OK” to reboot
(3) Please make sure the subnet of PC IP address and IP CAM IP address are the same.
IP
PC
IP
PC
CAM IP address: 192.168.0.20
IP address: 192.168.0.100
(4) Different Subnets:
CAM IP address: 192.168.0.20
IP address: 192.168.1.100
(5) To Change PC IP addresses:
Control PanelÆNetwork ConnectionsÆLocal Area Connection PropertiesÆInternet Protocol
(TCP/IP) ÆProperties
Please make sure your IP Camera and PC have the same Subnet. If not, please change IP
Camera IP subnet or PC IP subnet accordingly.

2Mega‐PixelOutdoorIRIPCamera
ICA‐HM316/ICA‐HM316W
18
Ca
fol
(6) A quick way to access remote monitoring is to left-click the mouse twice on a selected IP
mera listed on “Device list” of PLANET IP Installer. An IE browser will be opened.
(7) Then, please key in the default “Username: admin” and “Password: admin” in the
lowing message box.
(8) If the user name and password are input correctly, the following web page will be displayed.

2Mega‐PixelOutdoorIRIPCamera
ICA‐HM316/ICA‐HM316W
19

2Mega‐PixelOutdoorIRIPCamera
ICA‐HM316/ICA‐HM316W
3.2 Setup ActiveX to use the Internet Camera
The Internet camera web pages communicate with the Internet camera using an ActiveX control.
The ActiveX control must be downloaded from the Internet camera and installed on your PC. Your
Internet Explorer security settings must allow for the web page to work correctly. To use the
Internet camera, user must setup his IE browser as follows:
3.2.1 Internet Explorer 6 for Windows XP
From your IE browse ΔTools” ΔInternet Options…” ΔSecurity” ΔCustom Level…”, please
setup your “Settings” as follow.
Set the first 3 items
• Download the signed ActiveX controls
• Download the unsigned ActiveX controls
• Initialize and script the ActiveX controls not masked as safe to Prompt
By now, you have finished your entire PC configuration for Internet camera.
20
This manual suits for next models
1
Table of contents
Other Planet IP Camera manuals

Planet
Planet ICA-108W User manual

Planet
Planet ICA-230 User manual

Planet
Planet ICA-210W User manual

Planet
Planet ICA-350 User manual

Planet
Planet ICA-M230 User manual

Planet
Planet ICA-4500V User manual

Planet
Planet ICA-525 User manual

Planet
Planet ICA-HM131 User manual

Planet
Planet ICA-3350V User manual

Planet
Planet ICA-151 User manual

Planet
Planet ICA-300 User manual

Planet
Planet ICA-501 User manual

Planet
Planet ICA-3110 User manual

Planet
Planet ICA-3550V User manual

Planet
Planet ICA-3150 User manual

Planet
Planet ICA-100C User manual

Planet
Planet ICA-2500 User manual

Planet
Planet ICA-3260 User manual

Planet
Planet ICA-2000 Series User manual

Planet
Planet ICA-3200 User manual