manuals.online logo
Brands
  1. Home
  2. •
  3. Brands
  4. •
  5. Hugo Lahme
  6. •
  7. Floodlight
  8. •
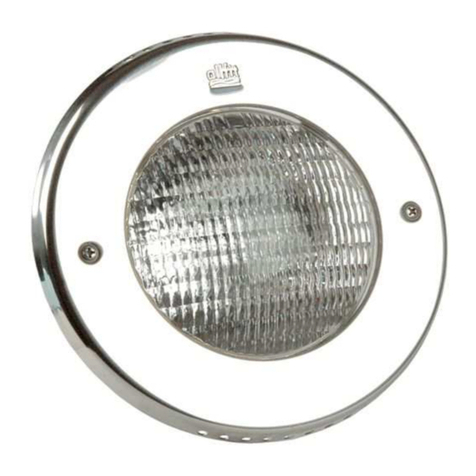
  9. Hugo Lahme VitaLight PAR 56 User manual

Hugo Lahme VitaLight PAR 56 User manual

4130020 4130021
4130990 4130991
Achtung / Attention / Attention
Ausschließlich für den Einbau in privaten Bädern!
To be used exclusively for installation in private sectors!
N’est utilisable qu’en secteur privé!
Konstruktion / Construction / Construction
Unterwasserscheinwerfer aus korrosionsbeständigem Rotguß oder Bronze und Edelstahl oder ABS
mit 2,5 m Silikonkabel 2x6 mm². Schutzklasse III IP 68.
Underwater floodlight made of high quality corrosion resistant gun metal or bronze and stainless steel or ABS
with 2,5 m silicone cable 2x6 mm². Safety class III IP 68.
Le projecteur de piscine est en bronze et inox résistant à la corrosion
avec 2,5 m de câble en silicone de 2x6 mm². Classe de protection III IP 68.
Montage / Installation / Installation
Bei der Installation sind die nationalen Sicherheitsvorschriften zu beachten. Betrieb nur unter Wasser!
Empfohlene Einbautiefe 600 mm unterhalb des Wasserspiegels.
During installation and operation follow the national safety regulations. The underwater floodlight may only be used under
water. Recommended installation depth 600 mm under the water level.
Pour installation de ce projecteur de piscine respecter les normes nationales. Le projecteur de piscine ne doit être mis en
service qu´en situation immergée. La profondeur de montage recommandée est à 600 mm au-dessous de niveau d'eau.
User manual
Einbau- und Bedienungsanleitung
Art Nr./Code /Réf.:
Rotguß / gun metal
/ laiton
Bronze / bronze
/ bronze
Instruction
Unterwasserscheinwerfer PAR 56
Underwater floodlight PAR 56
Projecteur de piscine PAR 56
PAR 56 300W 12V/AC Blende V4A (1.4404) / cover made of INOX 316L / enjoliveur INOX 316L
PAR 56 300W 12V/AC Blende ABS weiß / cover made of ABS white / enjoliveur blanc ABS
Art. Nr.: 522215 Stand: 11/10 Seite 1
Einbauanleitung
1. Unterwasserscheinwerfer auf den Beckenrand legen und das Kabel durch die Kabelverschraubung der Einbaunische bis in
die Verteilerdose ziehen. Die Kabelverschraubung in der Einbaunische fest anziehen. Ungefähr 1 m Anschlusskabel aufgerollt
in der Einbaunische lassen, um einen Austausch des Leuchtmittels oberhalb des Wasserspiegels zu ermöglichen.
Es ist unbedingt darauf zu achten, dass keine scharfen Kanten vorstehen, da sonst das Kabel beschädigt werden kann.
2. Unterwasserscheinwerfer mit beiden Senkschrauben mit der Einbaunische, bzw. mit dem Flansch verschrauben.
3. Blende mit beiden Senkschrauben mit dem Halterahmen verschrauben.
4. Anschlüsse an der Versorgungseinheit laut Anschlussplan ausführen.
Achtung: Sämtliche Metalleinbauteile sind gemäß VDE 0100 Teil 702 an einen Potentialausgleich (Potentialringleitung)
anzuklemmen! Bei der Montage ist zwingend darauf zu achten, dass die Anschlusskabel nicht beschädigt
werden!
Installation instruction
1. Put the underwater floodlight on the pool border. Pull the cable through the cable gland of the built-in niche into the junction
box. Then fix the cable gland in the built-in niche carefully. Leave about 1 m of the connection cable rolled inside the
built-in niche to enable an exchange of the lamps above the water level.
Pay attention that no sharp edges protrude because otherwise the silicone cable can get damaged.
2. Screw up the underwater floodlight inset by using the two flat head screws at the assembly bay or at the flange.
3. Screw the cover with the 2 countersunk screws together with guard ring.
4. The connections to the supply unit have to be conducted as specified in the connection diagram.
Attention: All metal mounting parts have to be crossbonded and earthed (closed potential circuit) in an approved
manner! While assembling it has to be assured that the connection cables will not be dammaged!
Montage dans le bassin
1. Poser le projecteur de piscine sur le bord du bassin. Introduire le câble dans le presse-étoupe du boîtier mural jusqu'à
la boîte de dérivation. Bien serrer le presse-étoupe dans le boîtier mural. Laisser environ 1 m de câble roulé dans le boîtier
pour en cas de panne d´effectuer un changement des lampes au-dessus de la surface du bassin.
Il est important de bien faire ATTENTION de ne pas endommager le câble sur des bords coupants.
2. Fixer le projecteur à l' aide des deux vis sur le boîter mural; ou sur la flasque liner.
3. Fixer l´enjoliveur à l'aide des deux vis sur le corp de projecteur.
4. Branchement à effectuer suivant le schéma.
Attention: Toutes les pièces à insérer en métal sont à relier au circuit équipotentiel. (circuit équipotentiel en boucle)
Au montage il est essentiel de ne pas blesser le câble du projecteur!
Elektrischer Anschluss / Electric connection / Branchement électrique
Der Unterwasserscheinwerfer darf nur mit einer Versorgungseinheit der Firma LAHME, nach EN 60742, betrieben werden.
Bei der Installation ist die DIN VDE 0100-701 und 702 zu beachten. Gemäß VDE 0100-430 sind alle Kabel bauseits gegen
Überlastung zu schützen. Die Betriebsspannung des Leuchtmittels darf nicht überschritten werden.
Die Installation darf nur von einer zugelassenen Elektrofachkraft vorgenommen werden.
The underwater floodlight may only be used in connection with a supply unit from LAHME according to EN 60742.
All construction and cables have to be protected against overloading (provided by customer). Do not exceed the
operating voltage of the lamps.
The installation work has to be conducted by a certified electrician.
Les projecteurs ne doivent être raccordés qu´avec un transfo de la société LAHME aux normes EN 61558.L´installation
doit être réalisée suivant la norme C 1500 VDE 0100-430 disant que tous les câbles sont à protéger contre une surtension.
La tension nominale des sources est impérativement à respecter.
L´installation doit être effectuée uniquement par du personnel qualifié.
Art. Nr.: 522215 Stand: 11/10 Seite 2
Versorgungseinheit / supply unit / alimentation
Der Anschluss darf nur gemäß DIN EN 61558/VDE 0570, DIN EN 61347/VDE 0712,VDE 0100 Teil 410 erfolgen.
Connection is only to be made at a safety supply unit according to DIN EN 61558/VDE 0570, DIN EN 61347
VDE 0712, VDE 0100 part 410.
Les boîtiers d`alimentation à utiliser sont de securité selon les normes DIN EN 61558/VDE 0570, DIN EN 61347/
VDE 0712 / VDE 0100 chapitre 410.
Pflegeanleitung / Maintenance instruction / Guide de soins
Zur Reinigung der sichtbaren Teile nur lösungsmittel- und säurefreie Reinigungsmittel verwenden.
Bitte keinen Hochdruckreiniger verwenden.
For cleaning of the visible parts use only solvent and acid free cleaners. Please do not use high pressure cleaner.
Effectuer le nettoyage des pièces visibles à l´aide de produits ne contenant pas de solvant. Ne pas utiliser des appareils
à haute pression.
Zubehör / Accessories / Accessoires
Art. Nr. / Code / Réf. Artikelbezeichnung / Product type / Type de produit
533000 Transformator 220-240V -12/13V/AC -50/60Hz 300VA IP 65, für 1 Unterwasserscheinwerfer
Transformer 220-240V -12-13V/AC -50/60Hz 300VA IP 65, for 1 underwater floodlight
Transformateur 220-240V -12/13V/AC -50/60Hz 600VA IP 65, pour 1 projecteur de piscine
533001 Transformator 220-240V -12/13V/AC -50/60Hz 600VA IP 65, für 2 Unterwasserscheinwerfer
Transformer 220-240V -12-13V/AC -50/60Hz 600VA IP 65, for 2 underwater floodlight
Transformateur 220-240V -12/13V/AC -50/60Hz 600VA IP 65, pour 2 projecteur de piscine
533002 Transformator 220-240V -12/13V/AC -50/60Hz 900VA IP 65, für 3 Unterwasserscheinwerfer
Transformer 220-240V -12-13V/AC -50/60Hz 900VA IP 65, for 3 underwater floodlight
Transformateur 220-240V -12/13V/AC -50/60Hz 900VA IP 65, pour 3 projecteur de piscine
4100050 Einbaunische für Folien- und Fliesenbecken aus Rotguß / Built-in niche for liner and tile pools
made of gun metal / Boîtier pour bassin beton carrelé et liner en bronze
4060050 Flanschsatz aus Rotguß mit Dichtung und Schrauben / Flange kit made of gun metal
with seal and screws / Flasque en bronze avec joint et vis de fixation
4101050 Einbaunische für Fertigbecken aus Rotguß / Built-in niche for prefabricated pools made of
gun metal / Boîtier de projecteur pour bassin préfabriqué en bronze
4400020 Anschweißnische für Folien- und Fliesenbecken aus Edelstahl, Kabelausgang hinten
Heat sealed niche for liner and tile pools made of stainless steel, cable outlet backwards
Boîtier soudable pour bassin beton carrelé et liner en inox, sortie de câble en arrière
4400120 Anschweißnische für Folien- und Fliesenbecken aus Edelstahl, Kabelausgang oben
Heat sealed niche for liner and tile pools made of stainless steel, cable outlet on top
Boîtier soudable en Inox pour bassin beton carrelé et liner, sortie de câble en haut
4060020 Flanschsatz aus Edelstahl mit Dichtung und Schrauben
Flange kit made of stainless steel with seal and screws
Flasque en inox avec joint et vis de fixation
Art. Nr.: 522215 Stand: 11/10 Seite 3
Leuchtmittelwechsel / Change of lamps / Changement de lampe
Anlage spannungsfrei schalten. Unterwasserscheinwerfer über den Wasserspiegel führen, öffnen und reinigen. Nur lösungsmittel-
und säurefreie Reiniger verwenden. Leuchtmittel auswechseln, O-Ringe austauschen, Verunreinigungen und Aufkrustungen auf dem
Gehäuse beseitigen. Sie können handelsübliche Reinigungsmittel verwenden. ACHTUNG: keinen Hochdruckreiniger verwenden.
Disconnect the electrical installation. Put the underwater floodlight above the water level, open and clean it. Only use solvent and
acid free cleaners. Change the lamp the O-rings. Remove soiling and incrustations on the fitting housing by using commercially
available cleaners. Attention: Do not use a high pressure cleaner.
L´installation doit être hors tension. Placer le projecteur de piscine au-dessus de niveau d'eau, ouvrir le projecteur et effectuer
pas de solvant. Changer la lampe et les joints. Nettoyer la partie extérieure du boîtier et débarasser le boîtier de tout dépôt.
Vous pouvez utiliser des produits de nettoyage usuels. Attention: Ne pas utiliser des appareils à haute pression.
Elektrischer Anschlussplan / Connection parts / Schéma de branchement
A = Verteilerdose / connection box / boîte de dérivation
B = Nulleiter / neutral line / neutre
C = Phase / maine / phase
D = Transformator / transformer / transformateur
E = Schalter / switch / interrupteur
F = Sicherung / fuse / protection
G = Unterwasserscheinwerfer / underwater floodlight / projecteur de piscine
1 + 2 = 11V Ausgang / output / secondaire
1 + 3 = 12V Ausgang / output / secondaire
1 + 4 = 13V Ausgang / output / secondaire
Kabelbelegung / cable configuration / désignation des câbles
12V + braun / brown / brun
- blau / blue / bleu
Art. Nr.: 522215 Stand: 11/10 Seite 4
Ersatzteile / Spares / Pièces de rechange
Pos. Stk.
11
24 Gewindestift / headless set screw / vis sans tête M3x6
2 Senkschraube / countersunk screw / vis à tête fraisée M6x50
2 Senkschraube / countersunk screw / vis à tête fraisée M6x12
41 Dichtung / seal / joint ø180 x ø170 x 2mm
51 Scheinwerferlampe / lamp / lampe 300 Watt, 12V
61 O-Ring / O-ring / joint torique ø95 x 6,3
71 Quetschverschraub. / threaded connection / presse étoupe PG 13,5
81 Kabel 2,5 m / cable 2,5 m / câble 2,5 m 2 x 6mm²
91
10 1 Klemmbügel / clamping strap / étrier de serrage filetage M5
11 1 Klemmbügel / clamping strap / étrier de serrage filetage ø5,5
12 1 Gewindestift / headless set screw / vis sans tête M5x10
13 1 Blende / cover / enjoliveur V4A
14 2 Senkschraube / countersunk screw / vis à tête fraisée M6x10
Pos. Stk.
13 Blende / cover / enjoliveur ABS blanc ABS
Restliche Positionen siehe vorstehende Tabelle!
The other positions are in the preceeding table!
Les autres positions se trouvent au tableau précédent.
Pos. Stk.
11 GBZ
91 GBZ
Restliche Positionen siehe vorstehende Tabelle 4130020!
The other positions are in the preceeding table 4130020!
Les autres positions se trouvent au tableau précédent 4130020!
Pos. Stk.
11 GBZ
91 GBZ
13 1 Blende / cover / enjoliveur ABS
Restliche Positionen siehe vorstehende Tabelle 4130020!
The other positions are in the preceeding table 4130020!
Les autres positions se trouvent au tableau précédent 4130020!
500800
Art. Nr.: / Code / Réf .: 4130990 Art. Nr.: / Code / Réf. Artikelbezeichnung / Product type / Type de produit
510321
Gehäuse / housing / boîtier
Art. Nr.: / Code / Réf .: 4130021 Art. Nr.: / Code / Réf. Artikelbezeichnung / Product type / Type de produit
4130301121
4130301121 Haltering / guard ring / bague de maintien
Gehäuse / housing / boîtier
Haltering / guard ring / bague de maintien
Gehäuse / housing / boîtier4130250101
505399
577438
500104
500802
4134050
534005
536050
3
4130251121
Art. Nr.: / Code / Réf .: 4130991 Art. Nr.: / Code / Réf. Artikelbezeichnung / Product type / Type de produit
4130251121
510321
Art. Nr.: / Code / Réf .: 4130020 Artikelbezeichnung / Product type / Type de produitArt. Nr.: / Code / Réf.
576157
514022
505267
4130300101
505308
505254
Art. Nr.: 522215 Stand: 11/10 Seite 5
Kabellänge / -querschnitt
Am Unterwasserscheinwerfer ist bereits ab Werk ein Kabel von 2,5 m Länge angebracht. Daher steht der Kabelquerschnitt der
ersten 2,5 m fest. Der nachfolgende Kabelquerschnitt für die Kabelverlängerung muss dann in Abhängigkeit der noch fehlenden
Kabellänge von der Verteilerdose bis zur Versorgungseinheit ausgewählt werden. Der Kabelquerschnitt des zu verlängernden
Kabels von der Versorgungseinheit zur Verteilerdose ist abhängig von der erforderlichen Kabellänge. Die nachfolgende Tabelle
zeigt die Kabellängen und den zu wählenden Kabelquerschnitt für die gewünschte Verlängerung. Es darf jeweils immer nur mit
einem Kabelquerschnitt verlängert werden! Diese Kabelverlängerung muss immer im Trockenen erfolgen! Bei einer Spannungs-
versorgung von 12 V ist ein Spannungsabfall von 0,5 V zwischen Versorgungseinheit und Verteilerdosen zulässig.
Cable length / cable cross section
You get the underwater floodlight ex works with a cable length of 2,5 m. That is why the cable cross section is already determined
for the first 2,5 m. The following cable cross section for the cable extension has to be chosen from the junction box to the supply
unit depending on the cable length still missing. The cable cross section for the cable extension from the supply unit to the junction
box depends on the requested cable length. The following table shows the cable lengths as well as the cable cross section
which has to be chosen for the extension requested. You may only carry out extensions with one cable cross section! This cable
extension has always to be made in dry places! A fall of voltage of 0,5 V between the supply unit and the junction box is acceptable
at a power supply of 12 V.
Longueur de câble et section
Le projecteur de piscine est de série équipée de 2,5 m de câble, de ce fait la section de câble est au départ déjà déterminée.
La section du câble de prolongation est à déterminer en fonction de la longueur complémentaire, de la boîte de dérivation au
boîtier d`alimentation. La section du câble prévue pour la prolongation du câble de l'appareil d'alimentation à la boîte
de dérivation est dépendante de la section demandée. Le tableau ci-joint vous détermine les sections à utiliser en fonction
des longueurs et du voltage secondaire du contrôleur. La section de prolongation doit être la même de la boîte de dérivation
à l'appareil d`alimentation. Cette prolongation de câble doit toujours être faite aux endroits secs! Une chute de tension de 0,5 V
est tolérable à une sortie d´alimentation de 12 V, il est bien entendu du boîtier d`alimentation à la boîte de dérivation.
Tabelle zur Auswahl der Kabelquerschnitte - Gesamtkabellänge
Table for choosing the cable cross section - total cable length
Tableau de sections - longueur totale
bis 4 m ab 8,5 m bis 12 m
ab 4 m bis 5,5 m ab 12 m bis 17 m
ab 5,5 m bis 8,5 m ab 17 m bis 25 m
13 V12 V
Trafospannung / tension secondaire / voltage
2 x 6 mm²
2x 10 mm²
2 x 16 mm²
Kabelquerschnitt / cable
cross section / sections
Art. Nr.: 522215 Stand: 11/10 Seite 6
Bitte beachten / Please note / Attention
Der Unterwasserscheinwerfer ist nur für den Betrieb unter Wasser geeignet. Bei Kontakt mit Körperteilen entsteht
Verbrennungsgefahr. Um eine dauerhaft ansprechende Optik zu gewährleisten, sollte das Wasser einen ph-Wert von 7 bis 8
haben und frei von metallangreifenden Bestandteilen sein. Unterwasserscheinwerfer vor Frost schützen. Bei der Verlegung des
Anschlußkabels ist darauf zu achten, dass dieses über den Wasserspiegel geführt wird.
Achtung: Je nach Wasserbeschaffenheit ist das Kabel alle 3-5 Jahre auszutauschen.
The underwater floodlights are only suitable under water. Risk of burns if body parts get into contact. The water should have a
ph-value between 7 and 8 and be free of metal attacking ingredients for maintaining a permanent attractive appearance.
Protect against freezing. While installing the connection cable, make sure that the cable is carried over the water level.
Please note: Depending on the water condition the cable has to be changed every 3-5 years.
Le projecteur doit seulement être utilisé en situation immergée. Risque de brûlure par contact avec partie corporelle.
L´eau doit avoir une valeur pH entre 7 et 8 et ne pas contenir des substances nuisibles au métal pour assurer une bonne
apparance permanente. À protéger contre gelée. Le câble de projecteur de piscine doit être partiellement posé au dessus
du niveau d'eau.
Attention: Suivant la qualité l`eau le câble est à changer entre 3 et 5 ans.
Achtung ! :
Die Installation darf nur von einer zugelassenen Elektrofachkraft vorgenommen werden.
Die Installationsvorschriften der zuständigen EVU und der DIN VDE 0100- 702 sind zu beachten.
Die Zuleitung zur Versorgungseinheit ist mit einem Kabelquerschnitt von 3x1,5 mm² zu verlegen.
Nach VDE 0100,Teil 701, Abschnitt 4.1.3 muss ein Fi-Fehlerstrom-Schutzschalter mit 30mA bauseits gestellt
werden. Der Deckel der Versorgungseinheit darf nur bei spannungslosem Zustand geöffnet werden.
Für alle Arbeiten an der Versorgungseinheit muss die Versorgungsspannung abgeschaltet werden.
Hinweis .
Installation der Versorgungseinheit nur in trockenen Räumen.
Die Umgebungstemperatur darf 40°C nicht überschreit en.
Mindestabstand zwischen den Versorgungseinheiten 50 mm.
Attention!:
The installation may only be operated by admitted experts. The installation regulations of the responsible
Energy Supply Company have to be followed. A cable with a cable cross section of 3x1,5 mm² has to be
connected with the supply ballast unit. A FI stream protection with 30 mA has to be installed.
Do only open the cover of the supply unit in a deenergised status.
For all working at the supply unit, stop the supply voltage.
Assembly tip:
Installation of the supply unit only in dry places.
The surrounding temperature may not cross 40°C
Minimum distance between the supply ballast units 50 mm
Attention!:
L´installation ne doit être éffectuée que par un électricien agrée. L´installation doit être réalisée suivant les
normes locales. Le câble d´alimentation au primaire ne doit pas avoir une section du câble inférieure
à 3x1,5 mm² et être protégée en amont par une protection différentielle par défaut calibré à 30 mA suivant
la norme.
Le capot de fermeture de l´alimentation ne doit être ouvert que hors tension.
Pour toute intervention à l´interieur du boîtier le courant d´alimentation doit être coupé.
Info:
Placer le boîtier d´alimentation de projecteur de piscine dans un endroit sec.
La température ambiante ne doit pas être supérieure à 40°C, l´espace minimum
entre les alimentations ne doit pas être inférieure à 50 mm
Technische Änderungen vorbehalten Technical amendments reserved Modifications techniques sous réserve
Art. Nr.: 522215 Stand: 11/10 Seite 7
Art. Nr.: 522215 Stand: 11/10 Seite 8

Other manuals for VitaLight PAR 56

1

This manual suits for next models

4

Other Hugo Lahme Floodlight manuals

Hugo Lahme VitaLight 2 x 24 x 3 W POWER LED User manual

Hugo Lahme

Hugo Lahme VitaLight 2 x 24 x 3 W POWER LED User manual

Hugo Lahme VitaLight 4240020 User manual

Hugo Lahme

Hugo Lahme VitaLight 4240020 User manual

Hugo Lahme VitaLight 24 x 3 W POWER LED User manual

Hugo Lahme

Hugo Lahme VitaLight 24 x 3 W POWER LED User manual

Hugo Lahme VitaLight User manual

Hugo Lahme

Hugo Lahme VitaLight User manual

Hugo Lahme VitaLight 9 POWER LED 2.0 User manual

Hugo Lahme

Hugo Lahme VitaLight 9 POWER LED 2.0 User manual

Hugo Lahme VitaLight POWER LED 36 x 3 W User manual

Hugo Lahme

Hugo Lahme VitaLight POWER LED 36 x 3 W User manual

Hugo Lahme VitaLight 2 x 30 POWER LED 2.0 User manual

Hugo Lahme

Hugo Lahme VitaLight 2 x 30 POWER LED 2.0 User manual

Hugo Lahme VitaLight 30 Power LED 2.0 User manual

Hugo Lahme

Hugo Lahme VitaLight 30 Power LED 2.0 User manual

Hugo Lahme VitaLight 30 POWER LED 2.0 User manual

Hugo Lahme

Hugo Lahme VitaLight 30 POWER LED 2.0 User manual

Hugo Lahme VitaLight PAR 56 User manual

Hugo Lahme

Hugo Lahme VitaLight PAR 56 User manual

Hugo Lahme VitaLight POWER LED 4 x 3 W User manual

Hugo Lahme

Hugo Lahme VitaLight POWER LED 4 x 3 W User manual

Hugo Lahme VitaLight 2 x 50 W User manual

Hugo Lahme

Hugo Lahme VitaLight 2 x 50 W User manual

Hugo Lahme VitaLight POWER LED 3 x 3 W User manual

Hugo Lahme

Hugo Lahme VitaLight POWER LED 3 x 3 W User manual

Hugo Lahme VitaLight POWER LED 24 x 3 W User manual

Hugo Lahme

Hugo Lahme VitaLight POWER LED 24 x 3 W User manual

Popular Floodlight manuals by other brands

Probrite PWRF50-PC-4K-BZ INSTALLATION, USAGE, & CARE GUIDE

Probrite

Probrite PWRF50-PC-4K-BZ INSTALLATION, USAGE, & CARE GUIDE

EuroLite AC-300 user manual

EuroLite

EuroLite AC-300 user manual

Chauvet COLORPALETTE II DMX512 user manual

Chauvet

Chauvet COLORPALETTE II DMX512 user manual

Patriot Lighting E9502-2 manual

Patriot Lighting

Patriot Lighting E9502-2 manual

Defiant DFI-5408-GR Use and care guide

Defiant

Defiant DFI-5408-GR Use and care guide

Francis Searchlights FX380 User instruction & installation manual

Francis Searchlights

Francis Searchlights FX380 User instruction & installation manual

ESYLUX AFR 250 LED 5K Installation and operating instructions

ESYLUX

ESYLUX AFR 250 LED 5K Installation and operating instructions

Flex FX5131 Operator's manual

Flex

Flex FX5131 Operator's manual

PROLUMIA 4106090 Series Operating	 instruction

PROLUMIA

PROLUMIA 4106090 Series Operating instruction

Malibu Boats CL9S quick start guide

Malibu Boats

Malibu Boats CL9S quick start guide

Philips BVP080 Mounting instruction

Philips

Philips BVP080 Mounting instruction

Kam Lighting DMX LASER 60 instruction manual

Kam Lighting

Kam Lighting DMX LASER 60 instruction manual

Code 3 PriZm II Installation & operation manual

Code 3

Code 3 PriZm II Installation & operation manual

Elation Design LED 108IP User instructions

Elation

Elation Design LED 108IP User instructions

HOLOPHANE Predator Installation and maintenance manual

HOLOPHANE

HOLOPHANE Predator Installation and maintenance manual

Philips 40745-17-16 user manual

Philips

Philips 40745-17-16 user manual

Beghelli BoxLED BL736LED Series installation instructions

Beghelli

Beghelli BoxLED BL736LED Series installation instructions

MAXSA 44150-SL Assembly & operating instructions

MAXSA

MAXSA 44150-SL Assembly & operating instructions

manuals.online logo
manuals.online logoBrands
  • About & Mission
  • Contact us
  • Privacy Policy
  • Terms and Conditions

Copyright 2025 Manuals.Online. All Rights Reserved.