Hukseflux SR30-D1 User manual

SR30-D1 manual v2005 2/83
Warning statements
This manual supports model SR30-D1, the predecessor
of SR30-M2-D1. Need support for the new SR30-M2-D1?
Please refer to its separate user manual.
When SR30-D1 is installed using the recommended
SR30-M2-D1 wiring scheme, SR30-D1 RS-485
communication will NOT function reliably.
When SR30-M2-D1 is installed using the recommended
SR30-D1 wiring scheme, users will NOT benefit from
improved signal integrity.
Putting more than 30 Volt across the sensor wiring
of the main power supply can lead to permanent
damage to the sensor.
For proper instrument grounding: use SR30-D1 with
its original factory-made cable.
Using the same Modbus address for more than one
device will lead to irregular behaviour of the entire
network.
Do not operate with heater [ON] and ventilator [OFF]:
secondary standard specifications may not be met.
Disconnect power while performing service or
maintenance.
Modbus®is a registered trademark of Schneider Electric, licensed to the Modbus Organization, Inc.

SR30-D1 manual v2005 3/83
Contents
Warning statements 2
Contents 3
List of symbols 5
Introduction 6
1Ordering and checking at delivery 12
1.1 Ordering SR30-D1 12
1.2 Included items 13
1.3 Quick instrument check 13
2Instrument principle and theory 14
2.1 Operating modes: heating and ventilation 18
2.2 Overview of remote diagnostics 19
2.3 Use of the tilt sensor 19
3Specifications of SR30-D1 20
3.1 Specifications of SR30-D1 20
3.2 Dimensions of SR30-D1 25
4Standards and recommended practices for use 26
4.1 Classification standards 26
4.2 General use for solar radiation measurement 26
4.3 Specific use for outdoor PV system performance testing 27
4.4 Specific use in meteorology and climatology 27
4.5 General use for sunshine duration measurement 28
5Use of remote diagnostics 29
5.1 Recommendations 29
5.2 Sensor temperature 29
5.3 Tilt angle 30
5.4 Internal relative humidity 30
5.5 Heater current 30
5.6 Ventilator current 31
5.7 Ventilator speed 31
6Installation of SR30-D1 32
6.1 Site selection and installation 32
6.2 Installation of the sun screen 33
6.3 Installation of optional mounts 34
6.4 Installation of optional extension cable of 20 m 37
6.5 Electrical connection of SR30-D1: wiring diagram 38
6.6 Grounding and use of the shield 38
6.7 Connecting to an RS-485 network 39
6.8 Connecting to a PC 41
7Communication with SR30-D1 42
7.1 PC communication: Sensor Manager software 42
7.2 Network communication: function codes, registers, coils 42
7.3 Network communication: getting started 51
7.4 Network communication: example master request to SR30-D1 52
8Making a dependable measurement 55

SR30-D1 manual v2005 4/83
8.1 The concept of dependability 55
8.2 Reliability of the measurement 56
8.3 Speed of repair and maintenance 57
8.4 Uncertainty evaluation 57
9Maintenance and trouble shooting 60
9.1 Recommended maintenance and quality assurance 60
9.2 Trouble shooting 61
9.3 Calibration and checks in the field 63
9.4 Data quality assurance 64
10 Appendices 66
10.1 Appendix on cable extension / replacement 66
10.2 Appendix on tools for SR30-D1 67
10.3 Appendix on spare parts for SR30-D1 68
10.4 Appendix on the ventilator 68
10.5 Appendix on standards for classification and calibration 69
10.6 Appendix on calibration hierarchy 69
10.7 Appendix on meteorological radiation quantities 71
10.8 Appendix on ISO and WMO classification tables 72
10.9 Appendix on definition of pyranometer specifications 73
10.10 Appendix on terminology / glossary 74
10.11 Appendix on floating point format conversion 76
10.12 Appendix on function codes, register and coil overview 77
10.13 EU declaration of conformity 81

SR30-D1 manual v2005 5/83
List of symbols
Quantities Symbol Unit
Sensitivity S V/(W/m2)
Temperature T °C
Solar irradiance E W/m2
Solar radiant exposure H W∙h/m2
Time in hours h h
Tilt angle relative to horizontal θh°
Relative humidity RH %
Pressure p bar
Temperature coefficient a 1/°C²
Temperature coefficient b 1/°C
Temperature coefficient c -
(see also appendix 10.7 on meteorological quantities)
Subscripts
Not applicable

SR30-D1 manual v2005 6/83
Introduction
Welcome to the next level in solar radiation monitoring! The all-digital SR30-D1
pyranometer offers the highest accuracy and highest data availability: using new
Recirculating Ventilation and Heating (RVH
TM) technology, SR30-D1 outperforms all
pyranometers equipped with traditional ventilation systems. SR30-D1 is the ideal
instrument for use in PV system performance monitoring and meteorological networks.
This manual supports model SR30-D1, the predecessor of SR30-M2-D1. Need
support for the new SR30-M2-D1? Please refer to its separate user manual.
SR30-D1 measures the solar radiation received by a plane surface, in W/m2, from a 180 o
field of view angle. SR30-D1 is an ISO 9060 secondary standard pyranometer. It is
employed where the highest measurement accuracy is required. SR30-D1 offers several
advantages over competing pyranometers:
•Heated for best data availability: new RVHTM technology outperforms traditional
pyranometer ventilation
•The first pyranometer compliant in its standard configuration with the requirements for
Class A monitoring systems of the new IEC 61724-1:2017 standard
•Low cost of ownership: remote diagnostics and supported by an efficient worldwide
calibration and service organisation
•The right paperwork: instruments are supplied with the ISO 9060 required test
certificates
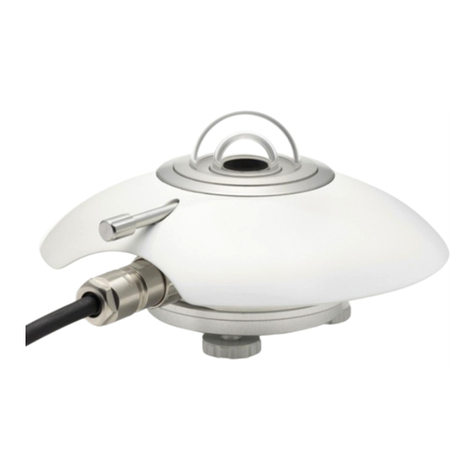
Figure 0.1 SR30-D1 next level digital secondary standard pyranometer

SR30-D1 manual v2005 7/83
Heated for high data availability, featuring new RVH
TM technology
High data availability is attained by heating of the outer dome using ventilation between
the inner and outer dome. RVHTM - Recirculating Ventilation and Heating - technology,
developed by Hukseflux, suppresses dew and frost deposition and is as effective as
traditional ventilation systems, without the maintenance hassle and large footprint.
•low power consumption: SR30-D1 requires only 2 W, compared to 10 W for
traditional ventilation systems
•low maintenance: SR30-D1 does not require filter cleaning
RVHTM uses SR30-D1’s built-in heater and ventilator. The dome of SR30-D1 pyranometer
is heated by ventilating the area between the inner and outer dome. RVH TM is much more
efficient than traditional ventilation, where most of the heat is carried away with the
ventilation air. Recirculating ventilation is as effective in suppressing dew and frost
deposition at 2 W as traditional ventilation is at 10 W. RVHTM technology also leads to a
reduction of zero offsets.
Compliant with IEC 61724-1: 2017, Class A and B
IEC 61724-1: Photovoltaic System Performance Monitoring - Guidelines for
Measurement, Data Exchange and Analysis - requires ventilation and heating for Class A
monitoring. Only SR30 offers both, without the need for additional accessories. Most
competing pyranometers do not even comply with Class B, which requires heating.
Low cost of ownership
SR30-D1 is an affordable secondary standard instrument and is designed for low cost of
ownership, which is mainly determined by costs of installation, on-site inspections,
servicing and calibration:
•low demand on infrastructure, SR30-D1’s RVHTM requires only 2 W power, compared
to 10 W for traditional ventilation systems
•reduction of unnecessary on-site inspection by remote diagnostics
•designed for efficient servicing; easy local diagnostics
•supported by an efficient calibration and maintenance organisation. Hukseflux offers
local support in the main global economies: USA, EU, China, India, Japan and Brazil.
Recalibration is recommended every 2 years, which is good practice in the industry.
Liabilities covered: test certificates
As required by ISO 9060 for secondary standard classification, each SR30-D1 is supplied
with test results for the individual instrument:
•sensitivity
•directional response
•temperature response
•tilt angle measurement
SR30-D1 manual v2005 8/83
Liabilities covered: test certificates
Remote sensor diagnostics
Besides solar radiation, SR30-D1 outputs sensor diagnostics, including:
•tilt angle
•sensor body temperature
•internal humidity
•internal pressure
•ventilator speed (RPM)
•ventilator current
•heater current
Remote diagnostics permits real-time status monitoring, reducing the need for
(un)scheduled field inspections.
Suggested use
Suggested use for SR30-D1:
•PV system performance monitoring
•scientific meteorological observations
SR30-D1 design
SR30-D1 pyranometer employs a state-of-the-art thermopile sensor with black coated
surface, two domes and an anodised aluminium body. SR30-D1 offers a digital output via
Modbus RTU over 2-wire RS-485. The pyranometer dome is heated by ventilating the
area between the inner and outer dome using RVHTM - Recirculating Ventilation and
Heating - technology.
Figure 0.3 Two SR30-D1 secondary stan-
dard pyranometers with digital output for
GHI (global horizontal irradiance) and POA
(plane of array) measurement applications
Figure 0.2Dew deposition and frost (as
in the photo): clear difference between a
non-heated pyranometer (back) and
SR30-D1 with RVHTM technology (front )

SR30-D1 manual v2005 9/83
Diffuse radiation measurement
With its outstanding zero offset specifications, SR30-D1 also is the instrument of choice
for high-accuracy diffuse radiation measurement.
Operating modes: heating and ventilation
The standard operating mode of SR30-D1 is with heater and ventilator both [ON]. The
power consumption then is 2.3 W. Alternatives are operation in medium power mode and
in low power mode. Heating and ventilation may be switched on and off by digital
control. If the heater is switched [OFF], SR30-D1 operates in medium power mode.
Operation at <0.1 W, in the lower power mode, is possible by switching both the
ventilator and heater [OFF]. Although zero offset will then increase slightly, overall
performance will still comply with the secondary standard classification. In case there is
no danger of deposition of dew or frost, the medium power mode offers the most
accurate measurement.
Communication with a PC: Hukseflux Sensor Manager Software
For communication between a PC and SR30-D1, the Hukseflux Sensor Manager software
can be downloaded. It allows the user to plot and export data, and change the SR30-D1
Modbus address and its communication settings. Also, the digital outputs may be viewed
for sensor diagnostics. See our separate Sensor Manager user manual.
Figure 0.4 User interface of the Sensor Manager, showing sensor diagnostics

SR30-D1 manual v2005 10/83
Options for mounting and levelling
There are two mounting options available for SR30-D1: a levelling mount and a tube
levelling mount. They allow for simplified mounting, levelling and instrument exchange
on either a flat surface or a tube.
Figure 0.5 Optional levelling mount (picture on the left); a practical spring-loaded
mount for easy mounting, levelling and instrument exchange on flat surfaces, and the
optional tube mount (picture on the right) including spring-loaded levelling upper clamp,
lower clamp for tube mounting and two sets of bolts.
Spring-loaded levelling
When opting for one of the levelling mounts, SR30-D1 is easily mounted and levelled
using the mount’s spring-loaded centre bolt and SR30-D1’s adjustable levelling feet.
Figure 0.6 Optional levelling mount allows spring-loaded levelling

SR30-D1 manual v2005 11/83
Cabling
The standard cable length is 5 m. Optionally cables of 10 and 20 m are supplied.
Extension to longer cable lengths is achieved by adding extension cables of 20 m with 2
connectors.
Figure 0.7 On the left the SR30-D1 cable with M12-A female connector on sensor end,
pigtails of 0.15 m and conductors with ferrules. Its length is 5 metres standard and
available in 10 and 20 metres too. On the right the optional Hukseflux extension cable
with connector pairs, with male and female M12-A connectors, available in 20 metres
SR30-D1 is designed for use in SCADA (Supervisory Control And Data Acquisition)
systems, supporting Modbus RTU (Remote Terminal Unit) protocol over RS-485. In these
networks the sensor operates as a slave. SCADA systems are often implemented in
photovoltaic solar energy (PV) systems and meteorological networks. Using SR30-D1 in a
network is easy. Once it has the correct Modbus address and communication settings and
is connected to a power supply, the instrument can be used in RS-485 networks. The
user should have sound knowledge of the Modbus communication protocol when
installing sensors in a network.
The instrument should be used in accordance with the recommended practices of ISO,
WMO and ASTM.
The recommended calibration interval of pyranometers is 2 years. The registers
containing the applied sensitivity and the calibration history of SR30-D1 are fully
accessible for users. This allows the user to choose his own local calibration service. The
same feature may be used for remotely controlled re-calibration of pyranometers in the
field. Ask Hukseflux for information on this feature and on ISO and ASTM standardised
procedures for field calibration.

SR30-D1 manual v2005 12/83
1Ordering and checking at delivery
1.1 Ordering SR30-D1
SR30-D1 is succeeded by model SR30-M2-D1 and can no longer be ordered. Please order
SR30-M2-D1 instead. Support and recalibration services for SR30-D1 will continue.
The standard configuration of SR30-D1 is with 5 metres cable.
Common options are:
•longer cable; 10 and 20 metres
•levelling mount. Specify article number LM01
•tube levelling mount with set of bolts. Includes LM01. Specify article number TLM01
•20 metres extension cable with 2 connectors. Specify article number C07E-20
Table 1.1.1 Ordering codes for SR30-D1
VERSIONS OF SR30-D1 (part numbers)
SR30-D1
next level digital secondary standard pyranometer, with
ventilation, heating, tilt sensor and Modbus over RS-485
output
SR30-D1-LM01
next level digital secondary standard pyranometer, with
ventilation, heating, tilt sensor and Modbus over RS-485
output and with levelling mount, for spring-loaded levelling
and mounting SR30 on a surface
SR30-D1-TLM01
next level digital secondary standard pyranometer, with
ventilation, heating, tilt sensor and Modbus over RS-485
output and with tube levelling mount, for spring-loaded
levelling and mounting SR30 on a tube
CABLE FOR SR30-D1,
with female M12-A connector at sensor end, pigtails of 0.15 m and conductors with ferrules
‘-05’ after SR30-D1 part number
standard cable length: 5 m
‘-10’ after SR30-D1 part number
cable length: 10 m
‘-20’ after SR30-D1 part number
cable length: 20 m
CABLE EXTENSION FOR SR30-D1,
with male and female M12-A connectors
C07E-20
cable length: 20 m
An extension cable (with connector pair) can be used in combination with a regular cable
(with one connector at sensor end) to make alternative SR30-D1 cable lengths possible.
This manual supports model SR30-D1, the predecessor of SR30-M2-D1. Need
support for the new SR30-M2-D1? Please refer to its separate user manual.

SR30-D1 manual v2005 13/83
1.2 Included items
Arriving at the customer, the delivery should include:
•pyranometer SR30-D1
•sun screen
•cable of the length as ordered
•product certificate matching the instrument serial number, including:
ocalibration certificate
otemperature response test report
odirectional response test report
otilt sensor test report
•Hukseflux Sensor Manager software on a USB flash drive
•any other options as ordered
For SR30-D1-LM01, also
•spring-loaded levelling mount
For SR30-D1-TLM01, also
•spring-loaded levelling mount
•lower clamp to mount SR30-D1 to a tube or mounting rod
•2 sets of bolts for different tube diameters
Please store the certificates in a safe place.
The latest version of the Hukseflux Sensor Manager can be downloaded via
https://www.hukseflux.com/downloads.
1.3 Quick instrument check
A quick test of the instrument can be done by connecting it to a PC and installing the
Sensor Manager software. See the chapters on installation and PC communication for
directions. Please note that you will need a separate power supply; the sensor cannot be
powered from the USB only.
1. At power–up the signal may have a temporary output level different from zero; an
offset. Let this offset settle down; it is a normal part of the power-up procedure.
2. Check if the sensor reacts to light: expose the sensor to a strong light source, for
instance a 100 W light bulb at 0.1 m distance. The signal should read > 100 W/m2now.
Darken the sensor either by putting something over it or switching off the light. The
instrument irradiance output should go down and within one minute approach 0 W/m2.
3. Inspect the bubble level, compare to the tilt angle output.
4. Verify heater current, ventilator speed, internal humidity.
5. Inspect the instrument for any damage.
6. Check the instrument serial number as indicated by the software against the label on
the instrument and against the certificates provided with the instrument.

SR30-D1 manual v2005 14/83
2Instrument principle and theory
Figure 2.0.1Overview of SR30-D1:
(1) cable (standard length 5 metres, optional longer cable)
(2) connector
(3) sun screen
(4) bubble level
(5) bubble level window
(6) outer dome
(7) inner dome
(8) thermal sensor with black coating
(9) internal ventilation vents
(10) quick release system of sun screen
(11) instrument body
(12) levelling feet
(13) optional spring-loaded levelling mount
(14) optional tube mount
(15) screws included with tube mount
1 2
3
6 7 8 9 105
4
11
12
13
14
15

SR30-D1 manual v2005 15/83
SR30-D1’s scientific name is pyranometer. A pyranometer measures the solar radiation
received by a plane surface from a 180 ° field of view angle. This quantity, expressed in
W/m2, is called “hemispherical” solar radiation. The solar radiation spectrum extends
roughly from 285 to 3000 x 10-9 m. By definition a pyranometer should cover that
spectral range with a spectral selectivity that is as “flat” as possible.
In an irradiance measurement by definition the response to “beam” radiation varies with
the cosine of the angle of incidence; i.e. it should have full response when the solar
radiation hits the sensor perpendicularly (normal to the surface, sun at zenith, 0 ° angle
of incidence), zero response when the sun is at the horizon (90 ° angle of incidence, 90 °
zenith angle), and 50 % of full response at 60 ° angle of incidence. A pyranometer
should have a so-called “directional response” (older documents mention “cosine
response”) that is as close as possible to the ideal cosine characteristic.
In order to attain the proper directional and spectral characteristics, SR30-D1’s main
components are:
•a thermal sensor with black coating. It has a flat spectrum covering the 200 to 50000
x 10-9 m range, and has a near-perfect directional response. The coating absorbs all
solar radiation and, at the moment of absorption, converts it to heat. The heat flows
through the sensor to the sensor body. The thermopile sensor generates a voltage
output signal that is proportional to the solar irradiance.
•in case of SR30-D1, the analogue thermopile voltage is converted by the instrument
electronics to a digital signal. In this process the temperature dependence of the
thermopile is compensated. SR30-D1 uses a high-end 24-bit A/D converter.
•a glass dome. This dome limits the spectral range from 285 to 3000 x 10-9 m (cutting
off the part above 3000 x 10-9 m), while preserving the 180 ° field of view angle.
Another function of the dome is that it shields the thermopile sensor from the
environment (convection, rain).
•a second (inner) glass dome: For a secondary standard pyranometer, two domes are
used, and not one single dome. This construction provides an additional “radiation
shield”, resulting in a better thermal equilibrium between the sensor and inner dome,
compared to using a single dome. The effect of having a second dome is a strong
reduction of instrument offsets.
•a heater and ventilator: in order to reduce dew deposition and frost on the outer dome
surface, SR30-D1 has a built-in heater and ventilator. The heater is coupled to the
sensor body. The ventilation air circulates inside the body and between the domes. The
combination of ventilation and heating keeps the domes in thermal equilibrium with the
sensor and above dew point. When ventilation is [ON], zero offsets are very low.
•a tilt sensor: this sensor measures tilt with a ± 1 ° uncertainty and a short-term
resolution, or detection limit, of better than 0.1 °. This is sufficient to monitor
incidents that change the instrument tilt.

SR30-D1 manual v2005 16/83
Pyranometers can be manufactured to different specifications and with different levels of
verification and characterisation during production. The ISO 9060 - 1990 standard, “Solar
energy - specification and classification of instruments for measuring hemispherical solar
and direct solar radiation”, distinguishes between 3 classes; secondary standard (highest
accuracy), first class (second highest accuracy) and second class (third highest
accuracy).
From second class to first class and from first class to secondary standard, the achievable
accuracy improves by a factor 2.
Figure 2.0.2 Spectral response of the pyranometer compared to the solar spectrum. The
pyranometer only cuts off a negligible part of the total solar spectrum.
0
0.2
0.4
0.6
0.8
1
1.2
100 1000 10000
relative spectral content /
response [arbitrary units]
wavelength [x 10-9 m]
solar radiation
pyranometer
response

SR30-D1 manual v2005 17/83
Figure 2.0.3Directional response of an SR30-D1 pyranometer of 4 azimuth angles,
compared to secondary standard limits.
Figure 2.0.4Recirculating ventilation and heating between the inner- and outer dome is
much more power-efficient than traditional ventilation systems.
-4
-3
-2
-1
0
1
2
3
4
020 40 60 80
deviation from ideal cosine response [%]
zenith angle [°]
South
West
East
North
ISO 9060
specification limit
secondary standard
pyranometer

SR30-D1 manual v2005 18/83
2.1 Operating modes: heating and ventilation
A unique feature of SR30-D1 is its built-in heater and ventilator. In practice, this is as
effective against dew and frost deposition as using traditional ventilation systems.
The heater is coupled to the sensor body. Heat is generated inside the sensor body. The
ventilator circulates air inside the body and between the domes. The combination of
ventilation and heating keeps the domes in thermal equilibrium with the sensor and the
entire instrument above dew point. When ventilation is [ON], zero offsets are very low.
There are 3 operation modes: standard, medium power and low power mode.
In standard operating mode, both heater and ventilator are [ON], in medium power
mode, only the ventilator is [ON], in low power mode both are [OFF]. Table 2.1.1 gives
an overview of these settings and our recommendations for use.
Table 2.1.1 Possible user scenarios for the heater and ventilator
Operating
mode
heater
status
ventilator
status
power use
(nominal)
comment
standard
[ON]
[ON]
2.3 W
factory default
recommended settings
N/A
[ON]
[OFF]
do not use these settings, secondary
standard specifications will not be met
medium
power
[OFF]
[ON]
0.6 W
this mode offers the most accurate
measurement results because the
sensitivity to thermal fluctuations of
the environment is smaller
recommended over the [OFF] [OFF]
setting, because it reduces the thermal
sensor offset
low power
[OFF]
[OFF]
0.1 W
secondary standard performance is
also guaranteed with these settings
Heating when used in combination with ventilation does not affect the classification
specifications and the measurement accuracy.
When using the heater without ventilation secondary standard specifications will not be
met, because of a heating-induced offset.
In case that there is no danger of deposition of dew or frost, the medium power mode
(using the ventilator but not the heater) offers the most accurate measurements over
short time intervals. Averages on the minute time scale produce the same result as in
the standard operating mode. The measurement in medium power mode is less sensitive
to thermal shocks, and is less noisy.
The ventilator power is around 0.5 W. Typical heater power is 1.7 W. With around 0.1 W
power to the electronics, the total power consumption is approximately 2.3 W.

SR30-D1 manual v2005 19/83
2.2 Overview of remote diagnostics
Besides the digital output measuring irradiance in W/m2, SR30-D1 has several sensors
giving outputs which may be used for remote diagnostics. Remote monitoring of the
sensor condition helps improve the accuracy and reliability of the measurement. It also
allows to improve preventive maintenance and effective trouble shooting. Chapter 5
gives recommendations on how to use these diagnostics. Chapter 7 contains details on
the register structure, needed for reading the remote diagnostics output.
A brief overview of the diagnostic signals and their respective registers:
•Tilt angle, “tilt angle average” register
•Sensor body temperature, “sensor body temperature” register
•Internal humidity, “humidity” register
•Internal pressure, “pressure average” register
•Ventilator speed, “fan speed RPM” register
•Ventilator current, “fan current” register
•Heater current, “heater current” register
2.3 Use of the tilt sensor
SR30-D1 is equipped with an internal tilt sensor. The tilt measurement serves to monitor
long-term changes as well as incidents that cause the instrument to move. The absolute
accuracy of the sensor depends on temperature and is not as high as that of the bubble
level. The bubble level remains the reference for horizontal installation. The short-term
resolution, or detection limit, of the tilt sensor is sufficiently high for monitoring possible
incidents. Table 2.3.1 gives recommendations for using the tilt sensor.
Table 2.3.1 Recommendations for use of the tilt sensor
Application
Required
accuracy
Reference
Remarks
Tilted installation
± 1 °
tilt sensor
tilt measurement is sufficiently accurate
Horizontal
installation
± 0.1 °
bubble level
tilt measurement is not sufficiently
accurate
Short-term incident
monitoring
± 0.1 °
tilt sensor output,
immediately after
installation
after levelling with the bubble level, store
“tilt angle average” register. This stored
measurement is the reference for
monitoring incidents.
for short-term incident monitoring, mark
changes or generate a warning if the tilt
sensor measurement exceeds 0.2 °/ min.
Long term
monitoring
± 1 °
tilt sensor output,
immediately after
installation
for long term monitoring, mark changes or
generate a warning if the tilt sensor
measurement exceeds 1 °.

SR30-D1 manual v2005 20/83
3Specifications of SR30-D1
3.1 Specifications of SR30-D1
SR30-D1 measures the solar radiation received by a plane surface from a 180 ofield of
view angle. This quantity, expressed in W/m2, is called “hemispherical” solar radiation.
SR30-D1 offers irradiance in W/m2as a digital output. It must be used in combination
with suitable power supply and a data acquisition system which uses the Modbus
communication protocol over an RS-485 connection. When operated with both heater
and ventilator [ON] or both [OFF], or with only the ventilator [ON] the instrument is
classified as secondary standard according to ISO 9060. It should be used in accordance
with the recommended practices of ISO, IEC, WMO and ASTM.
This manual supports model SR30-D1, the predecessor of SR30-M2-D1. Need
support for the new SR30-M2-D1? Please refer to its separate user manual.
Table 3.1.1 Specifications of SR30-D1 (continued on next pages)
SR30-D1 MEASUREMENT SPECIFICATIONS:
LIST OF CLASSIFICATION CRITERIA OF ISO 9060*
ISO classification (ISO 9060:1990)
secondary standard pyranometer
WMO performance level (WMO-No. 8,
seventh edition 2008)
high quality pyranometer
Response time (95 %)
3 s
Zero offset a (response to 200 W/m2
net thermal radiation)
- in standard operating mode
- in medium power mode
- in low power mode
2 W/m2
2 W/m2
5 W/m2
Zero offset b (response to 5 K/h
change in ambient temperature)
< ± 2 W/m2
Non-stability
< ± 0.5 % change per year
Non-linearity
< ± 0.2 % (100 to 1000 W/m2)
Directional response
< ± 10 W/m2
Directional response test of individual
instrument
report included
Spectral selectivity
< ± 3 % (0.35 to 1.5 x 10⁻⁶ m)
Temperature response
< ± 0.4 % (-30 to +50 °C)
Temperature response test of
individual instrument
report included
Tilt response
< ± 0.2 % (0 to 90 ° at 1000 W/m2)
IEC 61724-1:2017 COMPLIANCE
IEC 61724-1:2017 compliance
meets Class A PV monitoring system requirements
meets Class B PV monitoring system requirements
*For the exact definition of pyranometer ISO 9060 specifications see the appendix.
Table of contents
Other Hukseflux Measuring Instrument manuals

Hukseflux
Hukseflux TPSYS20 User manual

Hukseflux
Hukseflux SR05 series User manual

Hukseflux
Hukseflux TRSYS20 User manual

Hukseflux
Hukseflux SR20-D2 User manual

Hukseflux
Hukseflux NR01 User manual

Hukseflux
Hukseflux IR20 User manual

Hukseflux
Hukseflux SR20 User manual

Hukseflux
Hukseflux FTN02 User manual

Hukseflux
Hukseflux SR25-D2 User manual

Hukseflux
Hukseflux DR01 User manual
Popular Measuring Instrument manuals by other brands

Bin Master
Bin Master CNCR-210 operating instructions

Dilog
Dilog DL6702 operating instructions

Blackmagicdesign
Blackmagicdesign HDLink Series Installation and operation manual

J-TECH
J-TECH DUAL PRO 14W instruction manual

Promax
Promax RANGERNeo+ATSC Quick reference guide

Promax
Promax PROLITE-63B user guide