manuals.online logo
Brands
  1. Home
  2. •
  3. Brands
  4. •
  5. Humminbird
  6. •
  7. Transducer
  8. •
  9. Humminbird XP 9 20 T User manual

Humminbird XP 9 20 T User manual

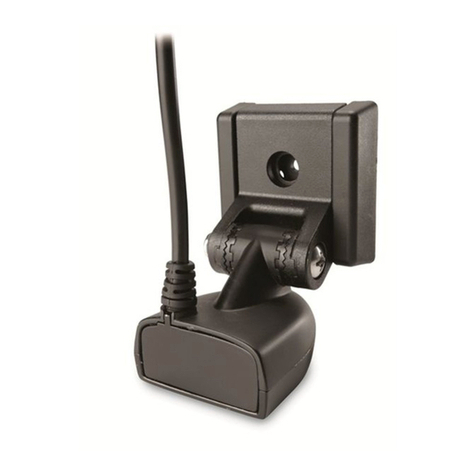
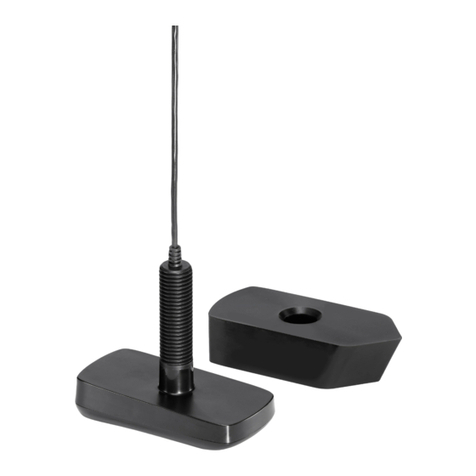
Inside the hull mounting
of the
transducer
generally produces good
results in single thickness
fiberglass hulled boats (Figures 1 and 2). Humminbird
cannot guarantee depth performance when
transmitting and receiving through the hull of the boat,
since some signal loss will occur. The amount of loss
depends on hull construction and thickness, and the
installation.
Note: This type of installation requires the
use of a slow-cure two-part epoxy
(included with your transducer). Do not use
silicone or any other soft adhesive material
to install the transducer, as this material
will reduce the sensitivity of the unit. Do
not use five-minute epoxy, as it has a
tendency to cure before all the air bubbles
can be purged, thus reducing signal
strength.
It is best to perform a test
installation on this type of
transducer first, then run the
boat at high speed to determine the best mounting area.
1. Refer to your Control Head operation manual for
the proper operation of your depthsounder. The
Control Head must be installed and working
before the transducer installation can be tested.
Connect the transducer cable temporarily to
your Control Head. In water similar to your
regular fishing depths, hold the transducer over
the side of your boat, pointed straight down.
WARNING! Do not touch an active
transducer during operation, as this
may cause physical discomfort and
may result in personal injury in the
form of tissue damage. Handle the
transducer only when the power to
the depthsounder is off.
2. Power up your depthsounder and select a sonar
diagnostic mode if available; if not, select
regular sonar display. Adjust the sensitivity or
gain to obtain the best sonar information. Use
this information as a benchmark as you proceed
with the installation process.
3. Observe the outside of the boat hull if possible,
to determine the area which will be most free
from turbulent water (Figures 3 and 4). Ribs,
strakes, and other protrusions should be
avoided, as these create turbulence.
Note: As a general rule, the faster the boat
can travel, the further aft and closer to the
centerline of the hull the transducer will
have to be located to remain in contact
with the water at high speeds.
4. Place the transducer body face down on the
inside of the hull in the area you have selected.
Keep the side tabs (or pointed end of the
transducer) pointing towards the bow of the
boat.
5. Fill the hull with enough water to submerge the
transducer body. It may be helpful to use a
sand-filled bag or other form of weight to hold
the transducer in position on a sloping surface.
Note: The transducer cannot transmit
through air. The water purges any air from
between the transducer and the hull, and fills
any voids in the coarse fiberglass surface.
6. Power up and operate your depthsounder as
described in your operation manual.
7. Run the boat at various speeds and water
depths while observing the screen of the
depthsounder. The transducer can be moved to
different locations in the hull until optimum
performance is achieved. If you are installing an
angled transducer, it may be necessary to
rotate the transducer slightly to obtain the
strongest signal.
1.Mark the location of
the transducer and
remove the water from inside the hull and
thoroughly dry the mounting surface.
2.Mix an ample quantity of two-part slow-cure
epoxy and coat the face of the transducer and
the inside of the hull.
3. Press the transducer into place with a slight
twisting motion to purge any trapped air from
underneath. If you are using a transom-style
transducer, make sure that the pointed end of
the transducer points forward to the bow of the
boat. Position angled-style transducers to
transmit straight down and remain in parallel
alignment with the keel (Figure 5).
Note: Puck or round, circular-bottomed
transducers have no directional bias, and
therefore orientation of these types of
transducers is not as important.
4. Weight the transducer so that it does not move
while the epoxy is curing.
5. When the epoxy has cured, no water will be
necessary inside the hull, and water or spilled
gasoline or oil will not affect the performance of
the transducer.
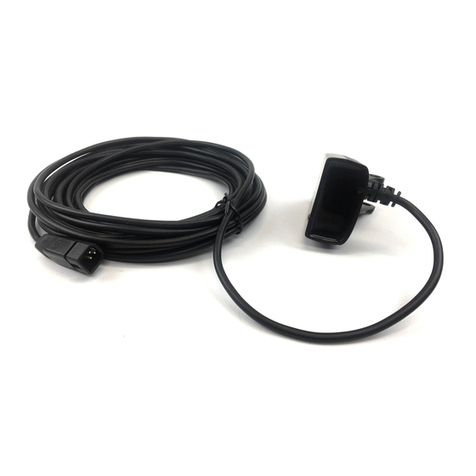
The transducer cable has
a low profile connector
that must be routed to the
point where the depthsounder is mounted. Every boat
is different and there may be several ways to route the
cable.Inside the boat, there is often a channel or
ROUTING THE
CABLE
INSTALLATION
TEST
INSTALLATION
ABOUT INSIDE
THE HULL
MOUNTING
Inside the Hull Mounted Transducer
Thank you for choosing Humminbird, America’s #1 name in depthsounders. Humminbird has built its reputation by manufacturing top-
quality, thoroughly reliable marine equipment. Genuine Humminbird accessories offer the opportunity to upgrade and expand the capabilities
of your Humminbird product.
Inside the Hull Installation
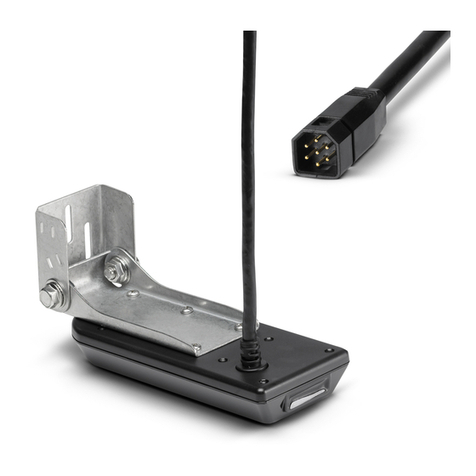
Angled transducer Installation
Preferred Mounting Area
Ribs
THANK YOU
Steps
Correct orientation for
transducer housings.
Forward
Figure 1
Figure 2
Figure 3
Figure 4
Figure 5
530509-3_B
WARNING: Disassembly and repair of this electronic
unit should only be performed by authorized service
personnel. Any modification of the serial number or
attempt to repair the original equipment or accessories
by unauthorized individuals will void the warranty.
Handling and/or opening this unit may result in exposure
to lead, in the form of solder.
WARNING: This product contains lead, a chemical
known to the State of California to cause cancer and
birth defects and other reproductive harm.
Escutcheon Plate
Figure 6
Figure 7
conduit used for other wiring, which can be used to
route the transducer cable forward.
1. Route the transducer cable to the Control Head.
CAUTION! Do not cut or shorten the
transducer cable, and try not to damage the
cable insulation. Route the cable as far as
possible from any VHF radio antenna cables
or tachometer cables to reduce the possibility
of interference. If the cable is too short,
extension cables are available to extend the
transducer cable up to a total of 50' (15 m).
For assistance, contact the Customer Resource
Center at www.humminbird.com or call
334-687-0503 for more information.
1.Insert the transducer
cable into the
appropriate terminal
slot. The cable connectors are labeled, and there
are corresponding labels on the cable holder on
the rear of the Control Head. The slots are keyed
to prevent reversed installation, so be careful not
to force the connector into the holder.
2. Refer to your Control Head Installation Guide for
the correct procedure for installing the cable
connectors to the Control Head.
CONNECTING THE
CABLE
If you have purchased
a puck-style transducer
with temperature probe
pigtail, you must
mount the temperature probe so that it has direct
contact with the water. After installing the transducer,
install the temperature probe on the transom of the
boat according to the following instructions.
The temperature probe incorporates a temperature-
sensitive probe in a high-impact plastic housing with 10
feet of cable. Do not cut this cable. The probe is
intended for installation on the transom, and will work
well on almost any boat. In addition to the parts supplied,
you will need a hand drill with various bits, marine-grade
silicone sealant, and a Phillips head screwdriver.
Areas selected for mounting the temperature probe
should stay in contact with the water at high speeds.
Do not mount the probe directly in front of the
propeller or outdrive, and make sure that there are no
protrusions such as ribs, rows of rivets, or transducers
directly forward of the mounting location, as these
may affect the flow of water over the temperature
probe.
1.
Assemble the probe in the clamp, and align
the probe on the transom so that the lower
edge is flush with the hull of the boat. Mark
the hole location.
2. On fiberglass hulls, it is best to start with a
smaller bit and use progressively larger drill bits
to reduce the chance of chipping or flaking the
outer coating. Drill a ⁵⁄₃₂" (3 mm) mounting hole
approximately ³⁄₄" (19 mm) deep (Figure 7).
1. Once you have tested the location, you may
route the cable from the in-hull mounted
transducer to the transom: either over the top of
the transom, or you may drill a ⁵⁄₈" (16 mm) hole
in the transom directly above the tested
location, above the waterline.
2. Use the cable clamps provided to secure the
cable to the transom of the boat. If a through-
hole is used, an escutcheon plate is included to
dress the hole (Figure 7).
3. After final high-speed adjustments have been
made, seal this upper through-hull hole with
marine-grade silicone sealant.
The cabling from your
transducer should
already be routed from
its location to the Control Head. The cabling from
the temperature probe goes into the transducer
module and its readings are transferred through the
same cable to the depthsounder. Refer to your
Control Head installation guide for more information
about the quick disconnect or connector collector
included with your Control Head. If the connection
is correct, the Control Head will begin displaying
sonar and water temperature immediately. If the
temperature probe fails to read temperature at high
speeds, adjust the height of the probe on the
transom of your boat.
Your depthsounder is now ready for operation.
ROUTING THE
PROBE CABLE
IF YOU HAVE A
TRANSDUCER/TEMP
PROBE COMBO
CUSTOMER RESOURCE CENTER
Your Humminbird accessory is designed for trouble-free operation and is backed by the same warranty as
our depthsounders, VHF Marine-band radios, and GPS Navigation equipment. Refer to your Humminbird
Warranty Card for the specific details of this warranty. If you have any questions, call our Customer
Resource Center:
1-800-633-1468
Throughout the U.S. and Canada, hours are Monday-Friday, 8:00 a.m. to 4:30 p.m. Central time.
Humminbird
678 Humminbird Lane
Eufaula, AL 36027
Transducer Cable
Temperature
probe Cable
In-hull transducer with external
temperature probe

Other Humminbird Transducer manuals

Humminbird XHS-9-20-T User manual

Humminbird

Humminbird XHS-9-20-T User manual

Humminbird 531392-2_B Installation guide

Humminbird

Humminbird 531392-2_B Installation guide

Humminbird XPT 9 HW T User manual

Humminbird

Humminbird XPT 9 HW T User manual

Humminbird XTH 9 20 P User manual

Humminbird

Humminbird XTH 9 20 P User manual

Humminbird Transducer User manual

Humminbird

Humminbird Transducer User manual

Humminbird Portable Transducer User manual

Humminbird

Humminbird Portable Transducer User manual

Humminbird transducer User manual

Humminbird

Humminbird transducer User manual

Humminbird transducer Quick reference guide

Humminbird

Humminbird transducer Quick reference guide

Humminbird 530511-3_A User manual

Humminbird

Humminbird 530511-3_A User manual

Humminbird ICE Flasher Series User manual

Humminbird

Humminbird ICE Flasher Series User manual

Humminbird APEX Series User manual

Humminbird

Humminbird APEX Series User manual

Humminbird ICE HELIX Series User manual

Humminbird

Humminbird ICE HELIX Series User manual

Humminbird Bronze Thru-Hull Transducer User manual

Humminbird

Humminbird Bronze Thru-Hull Transducer User manual

Humminbird MEGA Live User manual

Humminbird

Humminbird MEGA Live User manual

Humminbird 900 Series User manual

Humminbird

Humminbird 900 Series User manual

Humminbird Trolling Motor Transducer User manual

Humminbird

Humminbird Trolling Motor Transducer User manual

Humminbird XNT 9 DB 74 T User manual

Humminbird

Humminbird XNT 9 DB 74 T User manual

Humminbird TROLLING MOTOR TRANSDUCER User manual

Humminbird

Humminbird TROLLING MOTOR TRANSDUCER User manual

Humminbird MEGA 360 IMAGING Series User manual

Humminbird

Humminbird MEGA 360 IMAGING Series User manual

Humminbird 900 Series User manual

Humminbird

Humminbird 900 Series User manual

Humminbird 531392-1 B User manual

Humminbird

Humminbird 531392-1 B User manual

Humminbird transducer User manual

Humminbird

Humminbird transducer User manual

Humminbird 530758-3_C Owner's manual

Humminbird

Humminbird 530758-3_C Owner's manual

Humminbird PIRANHAMAX 4 User manual

Humminbird

Humminbird PIRANHAMAX 4 User manual

Popular Transducer manuals by other brands

Setra Systems Multi-Sense 260 Series installation guide

Setra Systems

Setra Systems Multi-Sense 260 Series installation guide

TILLQUIST LQT400 user manual

TILLQUIST

TILLQUIST LQT400 user manual

NK TECHNOLOGIES AT-TH Series instructions

NK TECHNOLOGIES

NK TECHNOLOGIES AT-TH Series instructions

MKS Baratron 722A manual

MKS

MKS Baratron 722A manual

Milltronics ST-100 SERIES instruction manual

Milltronics

Milltronics ST-100 SERIES instruction manual

TSI Instruments 8455 Operation and service manual

TSI Instruments

TSI Instruments 8455 Operation and service manual

Dwyer Instruments WWDP Series Installation and operating instructions

Dwyer Instruments

Dwyer Instruments WWDP Series Installation and operating instructions

Simrad ES120-25X10 -  REV C datasheet

Simrad

Simrad ES120-25X10 - REV C datasheet

Simrad ES38-12 -  REV C manual

Simrad

Simrad ES38-12 - REV C manual

HP 5501A Operating and service manual

HP

HP 5501A Operating and service manual

Balluff BTL6-U110-M****-PF-S4 series user guide

Balluff

Balluff BTL6-U110-M****-PF-S4 series user guide

Mianyang Weibo Electronic WBI415S91 user manual

Mianyang Weibo Electronic

Mianyang Weibo Electronic WBI415S91 user manual

Siemens ST-H Series Operation manual

Siemens

Siemens ST-H Series Operation manual

Balluff BTL7-A5-M Series user guide

Balluff

Balluff BTL7-A5-M Series user guide

Kurt J. Lesker 979 Series Operation and maintenance manual

Kurt J. Lesker

Kurt J. Lesker 979 Series Operation and maintenance manual

BECKWITH ELECTRIC M-0215 Instruction book

BECKWITH ELECTRIC

BECKWITH ELECTRIC M-0215 Instruction book

MKS MicroPirani 925 Series Short form manual

MKS

MKS MicroPirani 925 Series Short form manual

novotechnik RSM-2800 user manual

novotechnik

novotechnik RSM-2800 user manual

manuals.online logo
manuals.online logoBrands
  • About & Mission
  • Contact us
  • Privacy Policy
  • Terms and Conditions

Copyright 2025 Manuals.Online. All Rights Reserved.