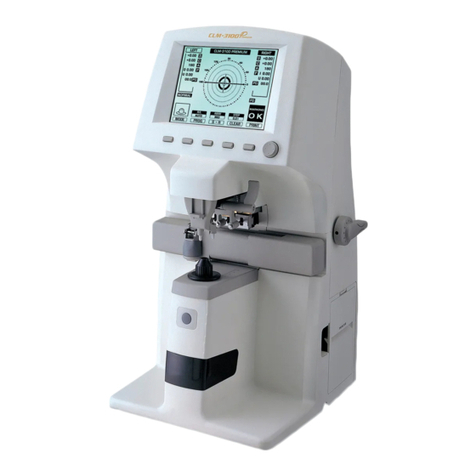
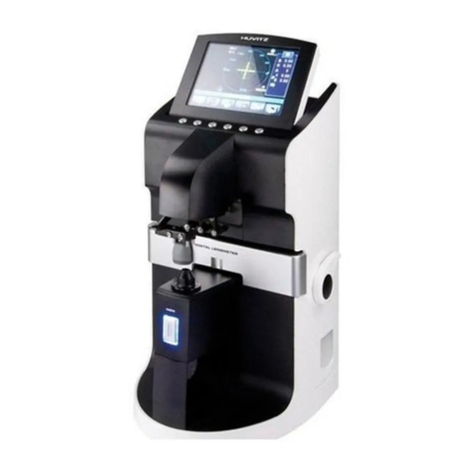
Huvitz HLM-7000 User manual

------------------------------------------------------------------------------- HLM-7000 User Guide 1
Operator Manual
Automatic Lensmeter HLM-7000
ОсОО «МЕДОФФ» www.medoff.net

2HLM-7000 User Guide --------------------------------------------------------------------------
IMPORTANT NOTICE
This product may malfunction due to electromagnetic waves caused by portable
personal telephones, transceivers, radio-controlled toys, etc. Be sure to avoid having
objects such as, which affect this product, brought near the product.
The information in this publication has been carefully checked and is believed to be
entirely accurate at the time of publication. HUVITZ assumes no responsibility,
however, for possible errors or omissions, or for any consequences resulting from
the use of the information contained herein.
HUVITZ reserves the right to make changes in its products or product specifications
at any time and without prior notice, and is not required to update this documentation
to reflect such changes.
9000B200002-B
Ver.1.0 (2008.10)
© 2004 - 2008 HUVITZ Co., Ltd.
38, Burim-ro 170beon-gil, Dongan-gu, Anyang-si, Gyeonggi-do, 14055, Republic of
Korea
All rights are reserved.
Under copyright laws, this manual may not be copied, in whole or in part, without the
prior written consent of HUVITZ Co., Ltd.
ОсОО «МЕДОФФ» www.medoff.net

------------------------------------------------------------------------------ HLM-7000 User Guide 3
CONTENTS
1. INTRODUCTION .................................................................................................... 6
1.1. OUTLINE OF THE INSTRUMENT ................................................................................ 6
1.2. CLASSIFICATION .................................................................................................... 6
2. SAFETY INFORMATION ........................................................................................ 7
2.1. INTRODUCTION ...................................................................................................... 7
2.2. SAFETY SYMBOLS ................................................................................................. 8
2.3. ENVIRONMENT FACTORS ........................................................................................ 9
2.4. SAFETY PRECAUTIONS ........................................................................................ 11
3. FEATURES........................................................................................................... 13
4. NOTES FOR USING THE INSTRUMENT ............................................................. 14
5. CONFIGURATIONS ............................................................................................. 16
5.1. MAIN UNIT .......................................................................................................... 16
5.2. ACCESSORIES ..................................................................................................... 18
6. SETTINGS AND PREPARATION FOR OPERATING ........................................... 19
6.1. RECEIVING INSPECTION ....................................................................................... 19
6.2. TEST AT START-UP .............................................................................................. 19
6.3. DISPLAY PROTECTION FUNCTION .......................................................................... 20
7. BUTTONS FOR OPERATIONS ............................................................................ 21
7.1. SWITCHING SCREEN ACCORDING TO THE BUTTON SELECTION ............................... 21
ОсОО «МЕДОФФ» www.medoff.net

4HLM-7000 User Guide --------------------------------------------------------------------------
7.2. USAGE OF BUTTONS ............................................................................................ 22
8. DESCRIPTION OF SCREEN LAYOUT ................................................................. 25
8.1. MEASUREMENT SCREEN ...................................................................................... 25
8.1.1. Detail explanation ....................................................................................... 26
8.2. ABOUT THE PROGRESSIVE DISPLAY ....................................................................... 28
8.2.1. Detail explanation ....................................................................................... 28
8.3. UV SCREEN ........................................................................................................ 29
8.3.1. Detail explanation ....................................................................................... 29
8.4. CONTACT LENS DISPLAY (SOFT, HARD) ................................................................ 30
8.4.1. Detail explanation ....................................................................................... 31
8.5. D-SUNGLASSES LENS DISPLAY ............................................................................ 31
8.6. SETUP SCREEN ................................................................................................... 32
8.6.1. Detail explanation ....................................................................................... 32
8.7. PRINTOUT FORMAT.............................................................................................. 38
9. MEASUREMENTS ............................................................................................... 39
9.1. NORMAL LENSES ................................................................................................. 39
9.2. FRAMED LENSES ................................................................................................. 42
9.3. PROGRESSIVE MULTI-FOCAL LENSES ................................................................... 45
9.3.1. The structure of progressive powered lens ................................................. 45
9.3.2. Judging progressive lens ............................................................................ 46
9.3.3. Measuring a progressive lens for far vision power ...................................... 48
9.3.4. Measuring a progressive lens for near vision power ................................... 49
9.3.5. Troubleshooting for progressive measurement ........................................... 51
ОсОО «МЕДОФФ» www.medoff.net

------------------------------------------------------------------------------ HLM-7000 User Guide 5
9.4. GENERAL MULTI-FOCAL LENSES........................................................................... 53
9.4.1. Measuring at the Normal Display ................................................................ 53
9.4.2. Measuring at the Progressive Display......................................................... 53
9.5. SOFT CONTACT LENSES ...................................................................................... 54
9.6. HARD CONTACT LENSES ...................................................................................... 55
9.7. TRANSMISSION RATIO OF UV LIGHT ...................................................................... 55
9.8. D-SUNGLASSES LENSES ...................................................................................... 56
9.9. MARKING FOCUS AND CYLINDRICAL AXIS .............................................................. 57
9.9.1. When there is no astigmatism .................................................................... 57
9.9.2. When there is astigmatism ......................................................................... 58
9.10. PRISM ............................................................................................................. 58
10. MAINTENANCE ................................................................................................... 59
10.1. REPLACING PRINTING PAPER ........................................................................... 59
10.2. REPLACING FUSE ............................................................................................ 60
10.3. STORAGE ........................................................................................................ 61
10.4. DISPOSAL ....................................................................................................... 62
11. TROUBLESHOOTING ......................................................................................... 63
11.1. VARIOUS MESSAGES........................................................................................ 63
11.2. HOW TO CLEAN PIN HOLE .................................................................................. 63
12. SPECIFICATIONS ................................................................................................ 65
13. SERVICE INFORMATION .................................................................................... 67
ОсОО «МЕДОФФ» www.medoff.net
6HLM-7000 User Guide --------------------------------------------------------------------------
1. Introduction
1.1. Outline of the instrument
The Automatic Lensmeter HLM-7000 is the equipment for measuring the refractive
power of lenses and gives the spherical, cylindrical and axis of the lenses.
The Automatic Lensmeter HLM-7000 also contains the PD(=pupil distance)
measurement and the UV Protection Ratio Test. The automatic lensmeter HLM-
7000 can measure both the uncutted singular lenses and the framed glasses.
Recently the Bi-Focal lenses or Progressive lenses for the elderly can be check
with this equipment. And also this instrument can measure soft contact lenses
easily and accurately using the specialized mechanical jig and the detailed display.
1.2. Classification
Protection against electric shock: Class I(earthed)
Installation Category: II
Pollution Degree: 2
ОсОО «МЕДОФФ» www.medoff.net
------------------------------------------------------------------------------ HLM-7000 User Guide 7
2. Safety Information
2.1. Introduction
Safety is everyone’s responsibility. The safe use of this equipment is largely
dependent upon the installer, user, operator, and maintainer. It is imperative that
personnel study and become familiar with this entire manual before attempting to
install, use, clean, service or adjust this equipment and any associated accessories.
It is paramount that the instructions contained in this manual are fully understood
and followed to enhance safety to the patient and the user/operator. It is for this
reason that the following safety notices have been placed appropriately within the
text of this manual to highlight safety related information or information requiring
special emphasis. All users, operators, and maintainers must be familiar with and
pay particular attention to all Warnings and Cautions incorporated herein.
“Warning” indicates the presence of a hazard that could result in severe
personal injury, death or substantial property damage if ignored.
NOTE
“Note” describes information for the installation, operation, or maintenance
of which is important but hazard related if ignored.
“Caution” indicates the presence of a hazard that could result in minor injury,
or property damaged if ignored.
!
WARNING
!
CAUTION
ОсОО «МЕДОФФ» www.medoff.net

8HLM-7000 User Guide --------------------------------------------------------------------------
“Information” each page will briefly describe the information being
requested and the browser will open with information relative to your
position.
2.2. Safety Symbols
The International Electrotechnical Commission (IEC) has established a set of
symbols for medical electronic equipment which classify a connection or warn of
any potential hazards. The classifications and symbols are shown below.
Save these instructions
I and O on power switch represent ON and OFF
respectively.
This symbol identifies a safety note. Ensure you
understand the function of this control before using it.
Control function is described in the appropriate User’s
or Service Manual.
Manufactured by xxxx (year).
Identifies the point where the system safety ground is
fastened to the chassis. Protective earth connected to
conductive parts of Class I equipment for safety
purposes.
Extra Symbols
External serial communication port. User can transmit
the memorized data to other equipment such as
Huvitz’s other machines or PC.
COM
!
INFORMATION
ОсОО «МЕДОФФ» www.medoff.net

------------------------------------------------------------------------------ HLM-7000 User Guide 9
2.3. Environment factors
Avoid the following environments for operation or storage
Where the equipment is exposed to water vapor.
Don’t operate an equipment with a wet hand.
Where The temperature changes extremely.
Normal operating temperature range is from 10C to 40C,
Humidity is from 50% to 80%.
Where the humidity is extremely high or there is a
ventilation problem.
Where equipment is exposed to chemical material or
explosive gas.
Where the equipment is exposed to direct sunlight.
Where it is near the heat equipment.
Don’t disassemble the product or open.
We aren’t responsible for it for nothing.
ОсОО «МЕДОФФ» www.medoff.net

10 HLM-7000 User Guide --------------------------------------------------------------------------
Don’t plug the AC power cord into the outlet Before the
connection between devices of the equipment is completed.
This can generate the defect.
Where the equipment is subject to excessive shocks or
vibrations
Be careful not to be inserted dust, especially, metal..
Pull out the power cord with holding the plug, not the cord.
Avoid places where the ambient temperature falls below 10℃ or exceeds 40℃ for
normal operation or below -5℃ or exceeds 50℃ (14℉-104℉) for transportation
and storage. Humidity should be maintained between 50 and 80% for normal
operation, transportation and storage. Avoid environments where the equipment is
exposed to excessive shocks or vibrations.
At operating and non-operating, the warranted environments of temperature and
Humidity are as followings:
At operating : to 80% from +10°C to +31°C, and decreasing linearly to 50% from
+31°C to +40°C
At storage : to 90% from -5°C to 40°C, and to 30% from +40°C to
+50°C decreasing linearly to 50 percent
The warranted altitude is as following:
At operating : to 6,560ft(2,000m)
At storage
: to 14,280ft(6,000m), non-operating
ОсОО «МЕДОФФ» www.medoff.net

------------------------------------------------------------------------------ HLM-7000 User Guide 11
2.4. Safety Precautions
This equipment has been developed and tested according to safety standards as well
as national and international standards. This guarantees a very high degree of safety
for this device. The legislator expects us to inform the user expressively about the
safety aspects in dealing with the device. The correct handling of this equipment is
imperative for its safe operation. Therefore, please read carefully all instructions before
switching on this device. For more detailed information, please contact our Customer
Service Department or one of our authorized representatives.
1. This equipment must not be used (a) in an area that is in danger of explosions
and (b) in the presence of flammable, explosive, or volatile solvent such as
alcohol, benzene or similar chemicals.
2. Do not put or use this device in humid rooms. Humidity should be maintained
between 50 and 80% for normal operation. Do not expose the device to water
splashes, dripping water, or sprayed water. Do not place containers containing
fluids, liquids, or gases on top of any electrical equipment or devices.
3. The equipment must be operated only by, or under direct supervision a
properly trained and qualified person.
4. Modifications of this equipment may only be carried out by Huvitz’s service
technicians or other authorized persons.
5. Customer maintenance of this equipment may only be performed as stated in
the User’s Manual and Service Manual. Any additional maintenance may only
be performed by Huvitz’s service technicians or other authorized persons.
6. The manufacturer is only responsible for effects on safety, reliability, and
performance of this equipment when the following requirements are fulfilled:
(1) The electrical installation in the respective room corresponds to the
specifications stated in this manual and (2) This equipment is used, operated,
and maintained according to this manual and Service Manual.
ОсОО «МЕДОФФ» www.medoff.net

12 HLM-7000 User Guide --------------------------------------------------------------------------
7. The manufacturer is not liable for damage caused by unauthorized tampering
with the device(s). Such tampering will forfeit any rights to claim under
warranty.
8. This equipment may only be used together with accessories supplied by
Huvitz’s. If the customer makes use of other accessories, use them only if their
safe usability under technical safety aspects has been proved and confirmed
by Huvitz or the manufacturer of the accessory.
9. Only persons who have undergone proper training and instructions are
authorized to install, use, operate, and maintain this equipment.
10. Keep the User’s Manual and Service Manual in a place easily accessible at
all times for persons operating and maintaining the equipment.
11. Do not force cable connections. If a cable does not connect easily, be sure
that the connector (plug) is appropriate for the receptacle (socket). If you
cause any damage to a cable connector(s) or receptacle(s), let the
damage(s) be repaired by an authorized service technician.
12. Please do not pull on any cable. Always hold on to the plug when
disconnecting cables.
13. This equipment may be used for the international application related to the
inspection of general lenses according to this manual.
14. Before every operation, visually check the equipment for exterior mechanical
damage(s) and for proper function.
15. Do not cover any ventilation grids or slits.
16. Immediately turn off and unplug any equipment that gives off smoke, sparks,
strange noises, or odors.
ОсОО «МЕДОФФ» www.medoff.net

------------------------------------------------------------------------------ HLM-7000 User Guide 13
3. Features
1. You can measure the center and refraction power of lenses with ease and rapidity.
2. In case of framed lens, single/binocular PD can be measured automatically in
addition to the refraction power of each lens.
3. Transmission ratio of UV (Ultra Violet) light can also be measured with this HLM-
7000.
4. HLM-7000 provides the wide measurement range from –25D to +25D.
5. HLM-7000 supports precise measurements guaranteed by 0.01D measurement
unit.
6. Measuring progressive multi-focal lenses and general multi-focal lenses can be
performed easily and rapidly.
7. HLM-7000 can measure soft contact lenses easily and accurately using the
specialized mechanical jig and the display.
8. HLM-7000 supports gorgeous displays through the proper colored LCD.
9. The measured data can be provided to the customers by using the printing
function.
ОсОО «МЕДОФФ» www.medoff.net
14 HLM-7000 User Guide --------------------------------------------------------------------------
4. Notes for using the instrument
1. Do not hit or drop the instrument. The instrument may be damaged if it
receives a strong impact. The impact can damage the function of this
instrument. So handle with care.
2. Install this instrument on a level, stabilized table with no vibration to keep it
normal state.
3. Exposure to direct sunlight or very bright indoor lights can influence the results
of measurements.
4. If you want to connect this with other equipments, consult the dealer.
5. Sudden heating of the room in cold areas will cause condensation of vapor on
the protective glass in the measurement window and on optical parts inside the
instrument. In this case, wait until condensation disappears before performing
measurements.
6. To get accurate measurements, always keep it clean. Dust may result in
malfunction. After using this instrument, turn off power supply and keep the
dust cover over it.
7. Don't use organic solution such as thinner, benzene, etc. to clean the surface
of this instrument. It may damage the instrument
8. There is a risk of explosion if an incorrect type of battery is used. Dispose used
batteries according to the instructions.
9. Disconnect the power supply and consult the dealer in case of smoke, strange
odors, or noise during operation.
10. Don’t place anything on the lens cap while this instrument is turning on. This
instrument should perform the self-test at start-up.
11. Don’t turn off the Display Protection Mode without an unavoidable reason.
ОсОО «МЕДОФФ» www.medoff.net

------------------------------------------------------------------------------ HLM-7000 User Guide 15
That’s why this instrument should perform the Display Protection function for
the display protection as well as the compensation of temperature.
12. Don’t place anything on the lens cap when you wake up this instrument from
the display protection state. That’s why this instrument should perform the
compensation of temperature at the moment.
ОсОО «МЕДОФФ» www.medoff.net
16 HLM-7000 User Guide --------------------------------------------------------------------------
5. Configurations
5.1. Main Unit
[Figure 1. Component Names (I)]
1. LCD Display
4. Lens Holder
7. UV Cover Table
10. Table Lever
1. LCD Display
2. Key Button
6. Memory Button
8. Marker Lever
11. Printer Cover
10. Table Lever
9. Lens Table
7. UV Cover
4. Lens Holder
5. Lens Supporter
3. PD Sensor
2. Key Button
5. Lens Supporter
8. Marker Lever
11. Printer Cover
3. PD Sensor
6. Memory Button
9. Lens Table
ОсОО «МЕДОФФ» www.medoff.net

------------------------------------------------------------------------------ HLM-7000 User Guide 17
[Figure 2. Component Names (II)]
[Figure 3. Component Names (III)]
1. Power Switch 2. Power Connector 3. Foot Switch Connector
1. Power Switch
2. Power Connector
3. Foot Switch
Connector
ОсОО «МЕДОФФ» www.medoff.net

18 HLM-7000 User Guide --------------------------------------------------------------------------
5.2. Accessories
1) Printing Paper : Rolled paper for printing
2) Fuse(250V 3.15A) : (2ea)
3) Blower : A blower for removing dust on a pinhole
4) Power Cord(Angle Type)
5) Filter Cap : Cap for protection against dust (2ea)
6) Tweezers : A kind of tool to pick up the contact lens
7) Operator’s Manual : Operator manual for users
8) Dust Cover : Polyvinyl cover for protection against dust
9) Lens Cleaner : A cloth for removing dust on a lens
10) Contact Lens Jig : mechanical jig for measuring a contact lens (Optional)
[Figure 4. Accessories]
ОсОО «МЕДОФФ» www.medoff.net

------------------------------------------------------------------------------ HLM-7000 User Guide 19
6. Settings and Preparation for Operating
6.1. Receiving inspection
Step 1. Checking accessories.
Open the box and make sure that all the accessories (printing paper,
protection cover, soft cloth for a lens, user’s manual) are in it
Step 2. Removing the protection tape.
Remove the protection tape from the lens holder, lens support, marking pen
and the UV cover.
6.2. Test at Start-up
Step 1. Connecting the power cable.
Connect the cable into the power receptacle on the bottom of the body.
Step 2. Checking the initial status.
Turn on the power switch and make sure that this instrument is functioning
properly. While starting the equipment, be sure not to place anything on the
lens cap. If you encounter any problem with your equipment during boot-up,
you’ll see the following message on the screen display.
“No Signal” or “Out of range”
If so, clean the 4-pin hole. Refer to Section 11.2 ‘How to clean the 4-pin hole’.
And then turn on again. If the problem persists, please contact your local
distributor or the manufacturer. Refer to the chapter 14. ‘Service Information’ In
summary, the testing procedures at start-up are as followings.
ОсОО «МЕДОФФ» www.medoff.net

20 HLM-7000 User Guide --------------------------------------------------------------------------
a. Turn on the machine. Make sure that there is nothing on the lens cap.
b. If you encounter the message “No Signal” or “Out of range”, please clean the 4-
pin hole. And then turn on again.
c. If the problem persists, please contact your local distributor or the manufacturer.
d. Otherwise, check the values SPH, CYL, AXIS at Measurement Screen about
which is explained in the section 8.1 ‘Measurement screen’.
e. If SPH, CYL, or AXIS aren’t zero, clean the 4-pin hole. And then turn off and on
again. If the problem persists, please contact your local distributor or the
manufacturer.
f. If SPH, CYL, and AXIS are zero, it’s okay with your equipment.
6.3. Display protection function
When the instrument is not used for a few minutes, display protection function works
automatically. In display protection mode, the instrument shows several different
pictures for protecting the display component. If you press any button on this mode, it
will return to the measurement screen. Be sure that don’t turn off this display protection
function in the User Setup Display without an unavoidable reason.
ОсОО «МЕДОФФ» www.medoff.net
Other manuals for HLM-7000
1
Table of contents
Other Huvitz Measuring Instrument manuals

Huvitz
Huvitz HT-5000 User manual

Huvitz
Huvitz HRK-1 User manual

Huvitz
Huvitz CLM-3100P User manual

Huvitz
Huvitz CR-9000 User manual

Huvitz
Huvitz CLM-3100P User manual

Huvitz
Huvitz HLM-1 User manual

Huvitz
Huvitz HNT-1 User manual

Huvitz
Huvitz HLM-1 User manual

Huvitz
Huvitz HRK-9000A User manual

Huvitz
Huvitz CLM-9000 User manual

Huvitz
Huvitz HRK-8000A User manual

Huvitz
Huvitz HBM-1 User manual

Huvitz
Huvitz CLM-7000 User manual

Huvitz
Huvitz HNT-1 User manual

Huvitz
Huvitz HLM-9000 User manual

Huvitz
Huvitz HRK-9000A User manual

Huvitz
Huvitz HLM-7000P User manual

Huvitz
Huvitz HLM-9000 User manual

Huvitz
Huvitz CRK-1 User manual

Huvitz
Huvitz CLM-4000 User manual